Profitec Pro 400: Fill Solenoid Inspection and ServiceUpdated 5 months ago
Tools Needed:
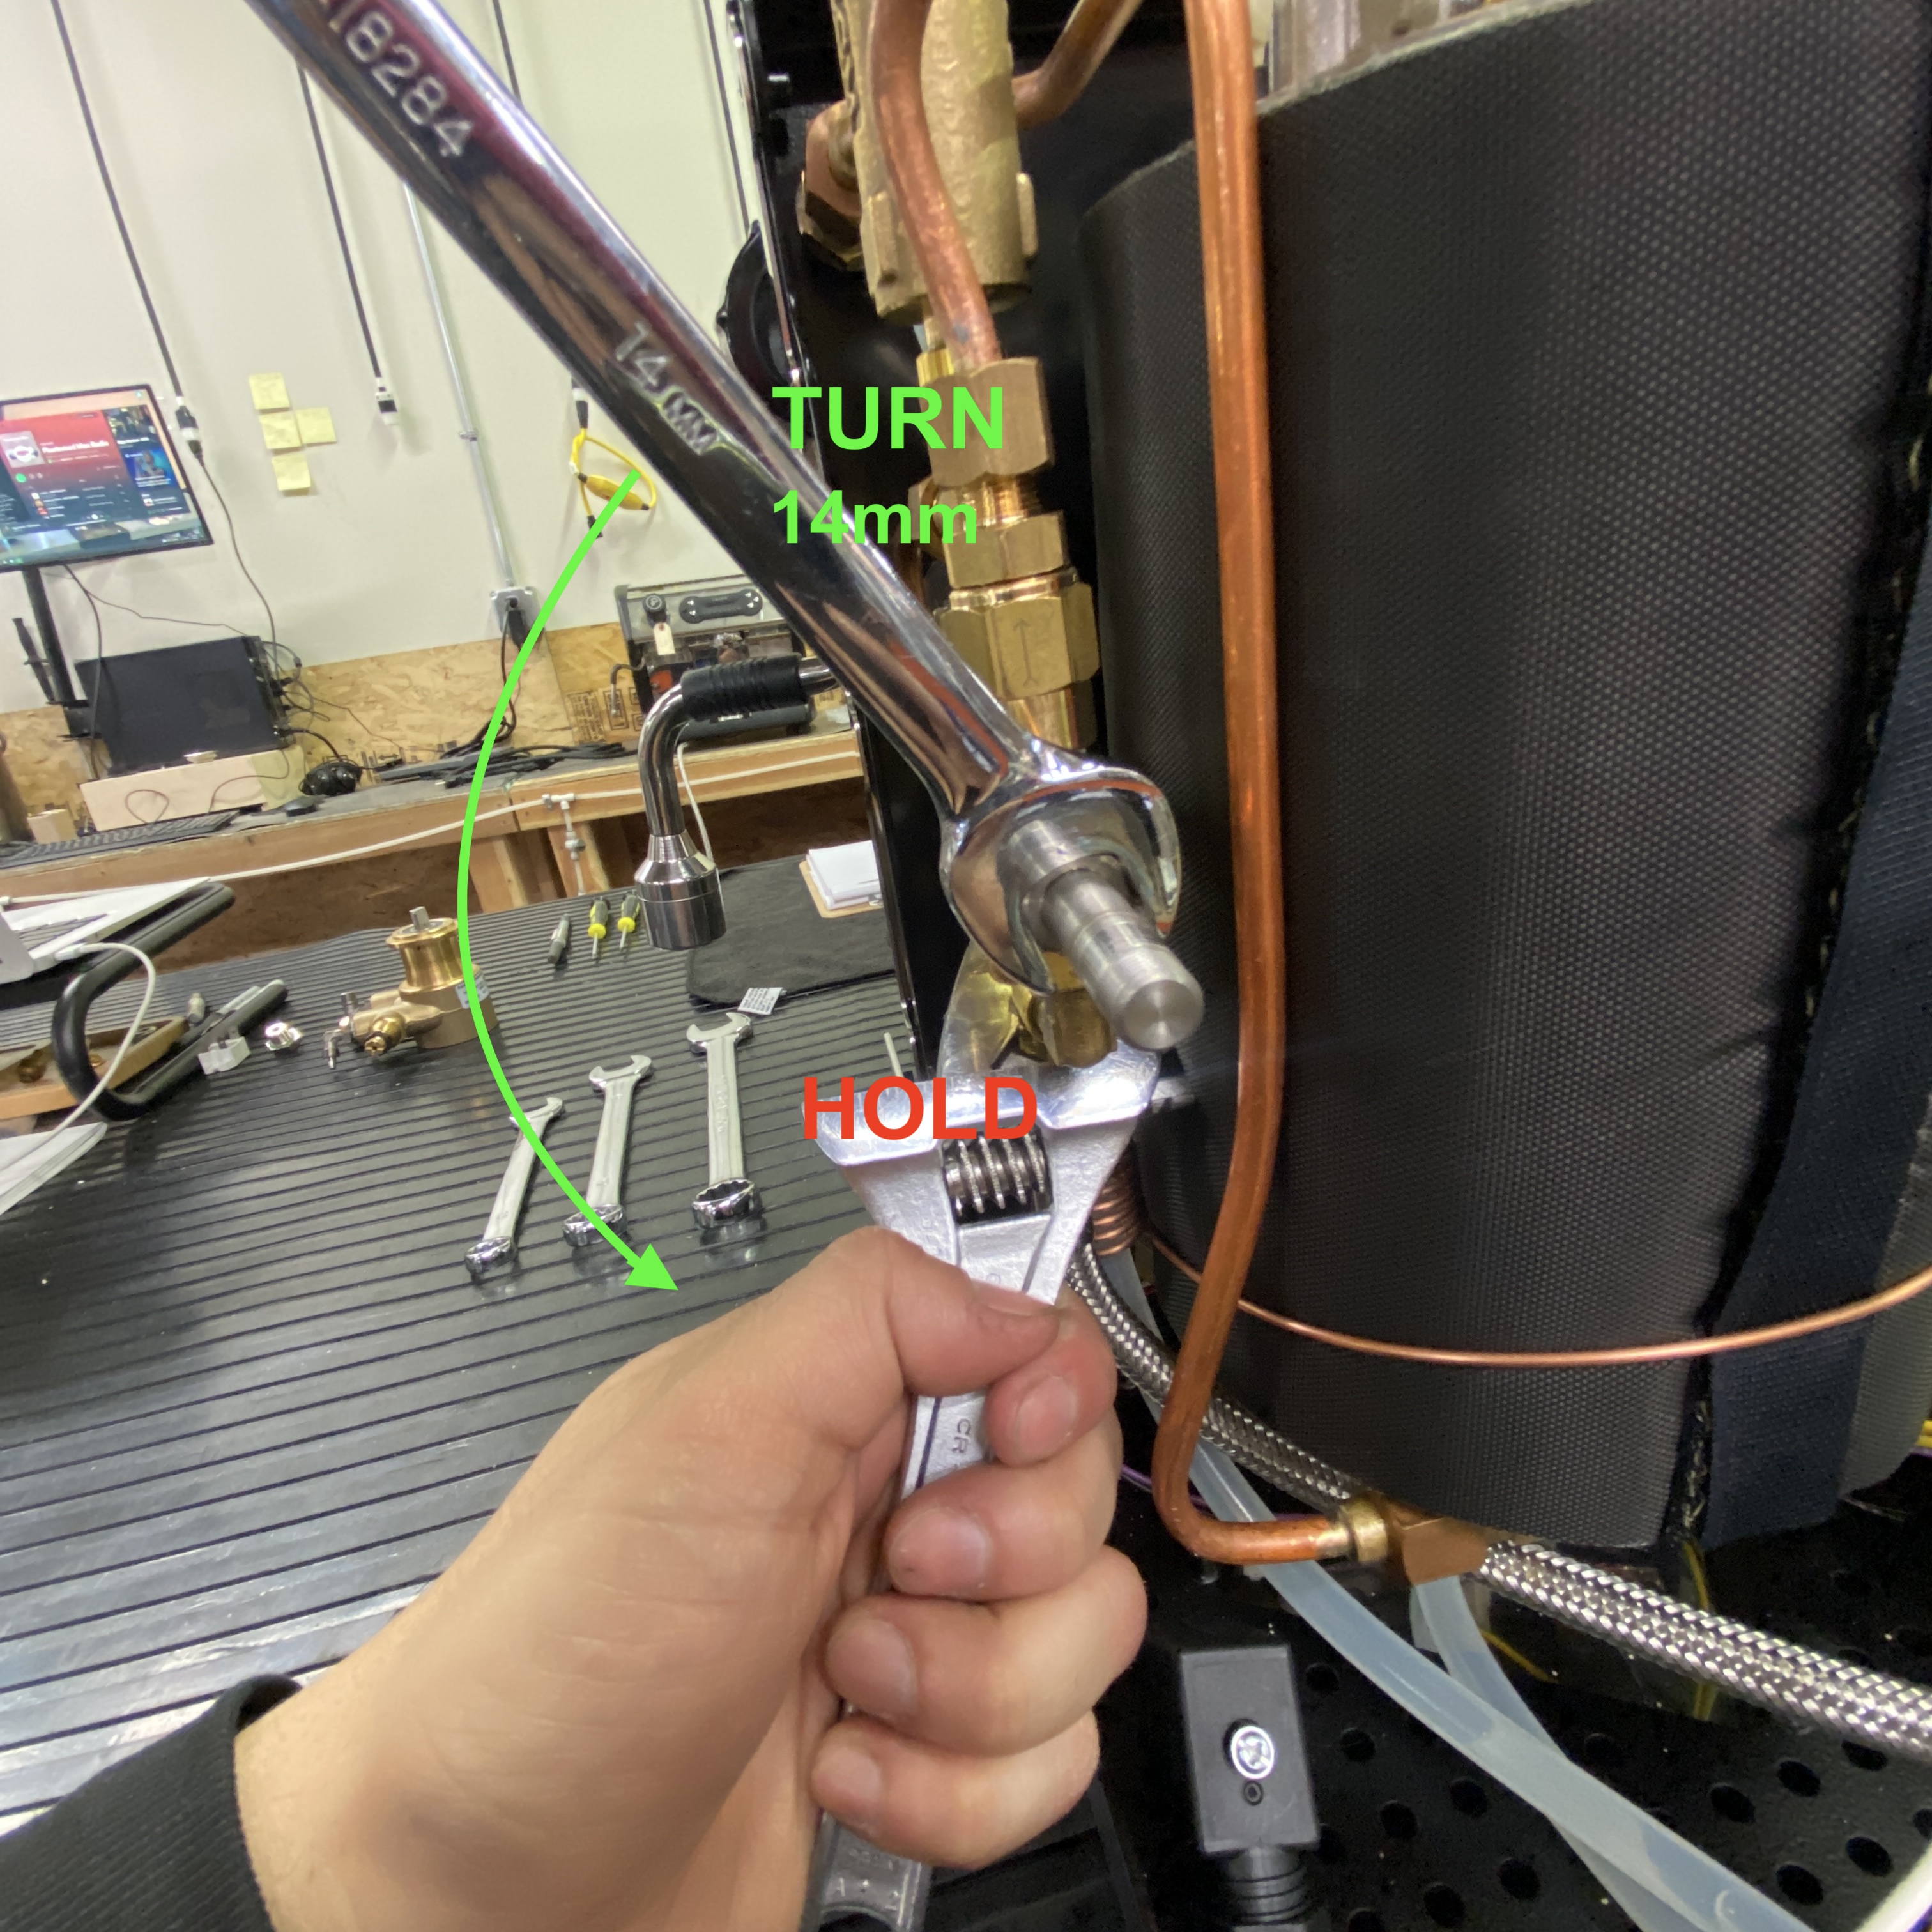
- 14mm crescent wrench
- Adjustable wrench
- #2 Philips screw driver
- Wire brush or scouring pad
1. Start by draining the boiler, then unplug the machine and allow it to cool.
2. Remove the panels from the machine.
3. Create room to work by removing the reservoir tray and setting it aside.
4. Identify the fill solenoid.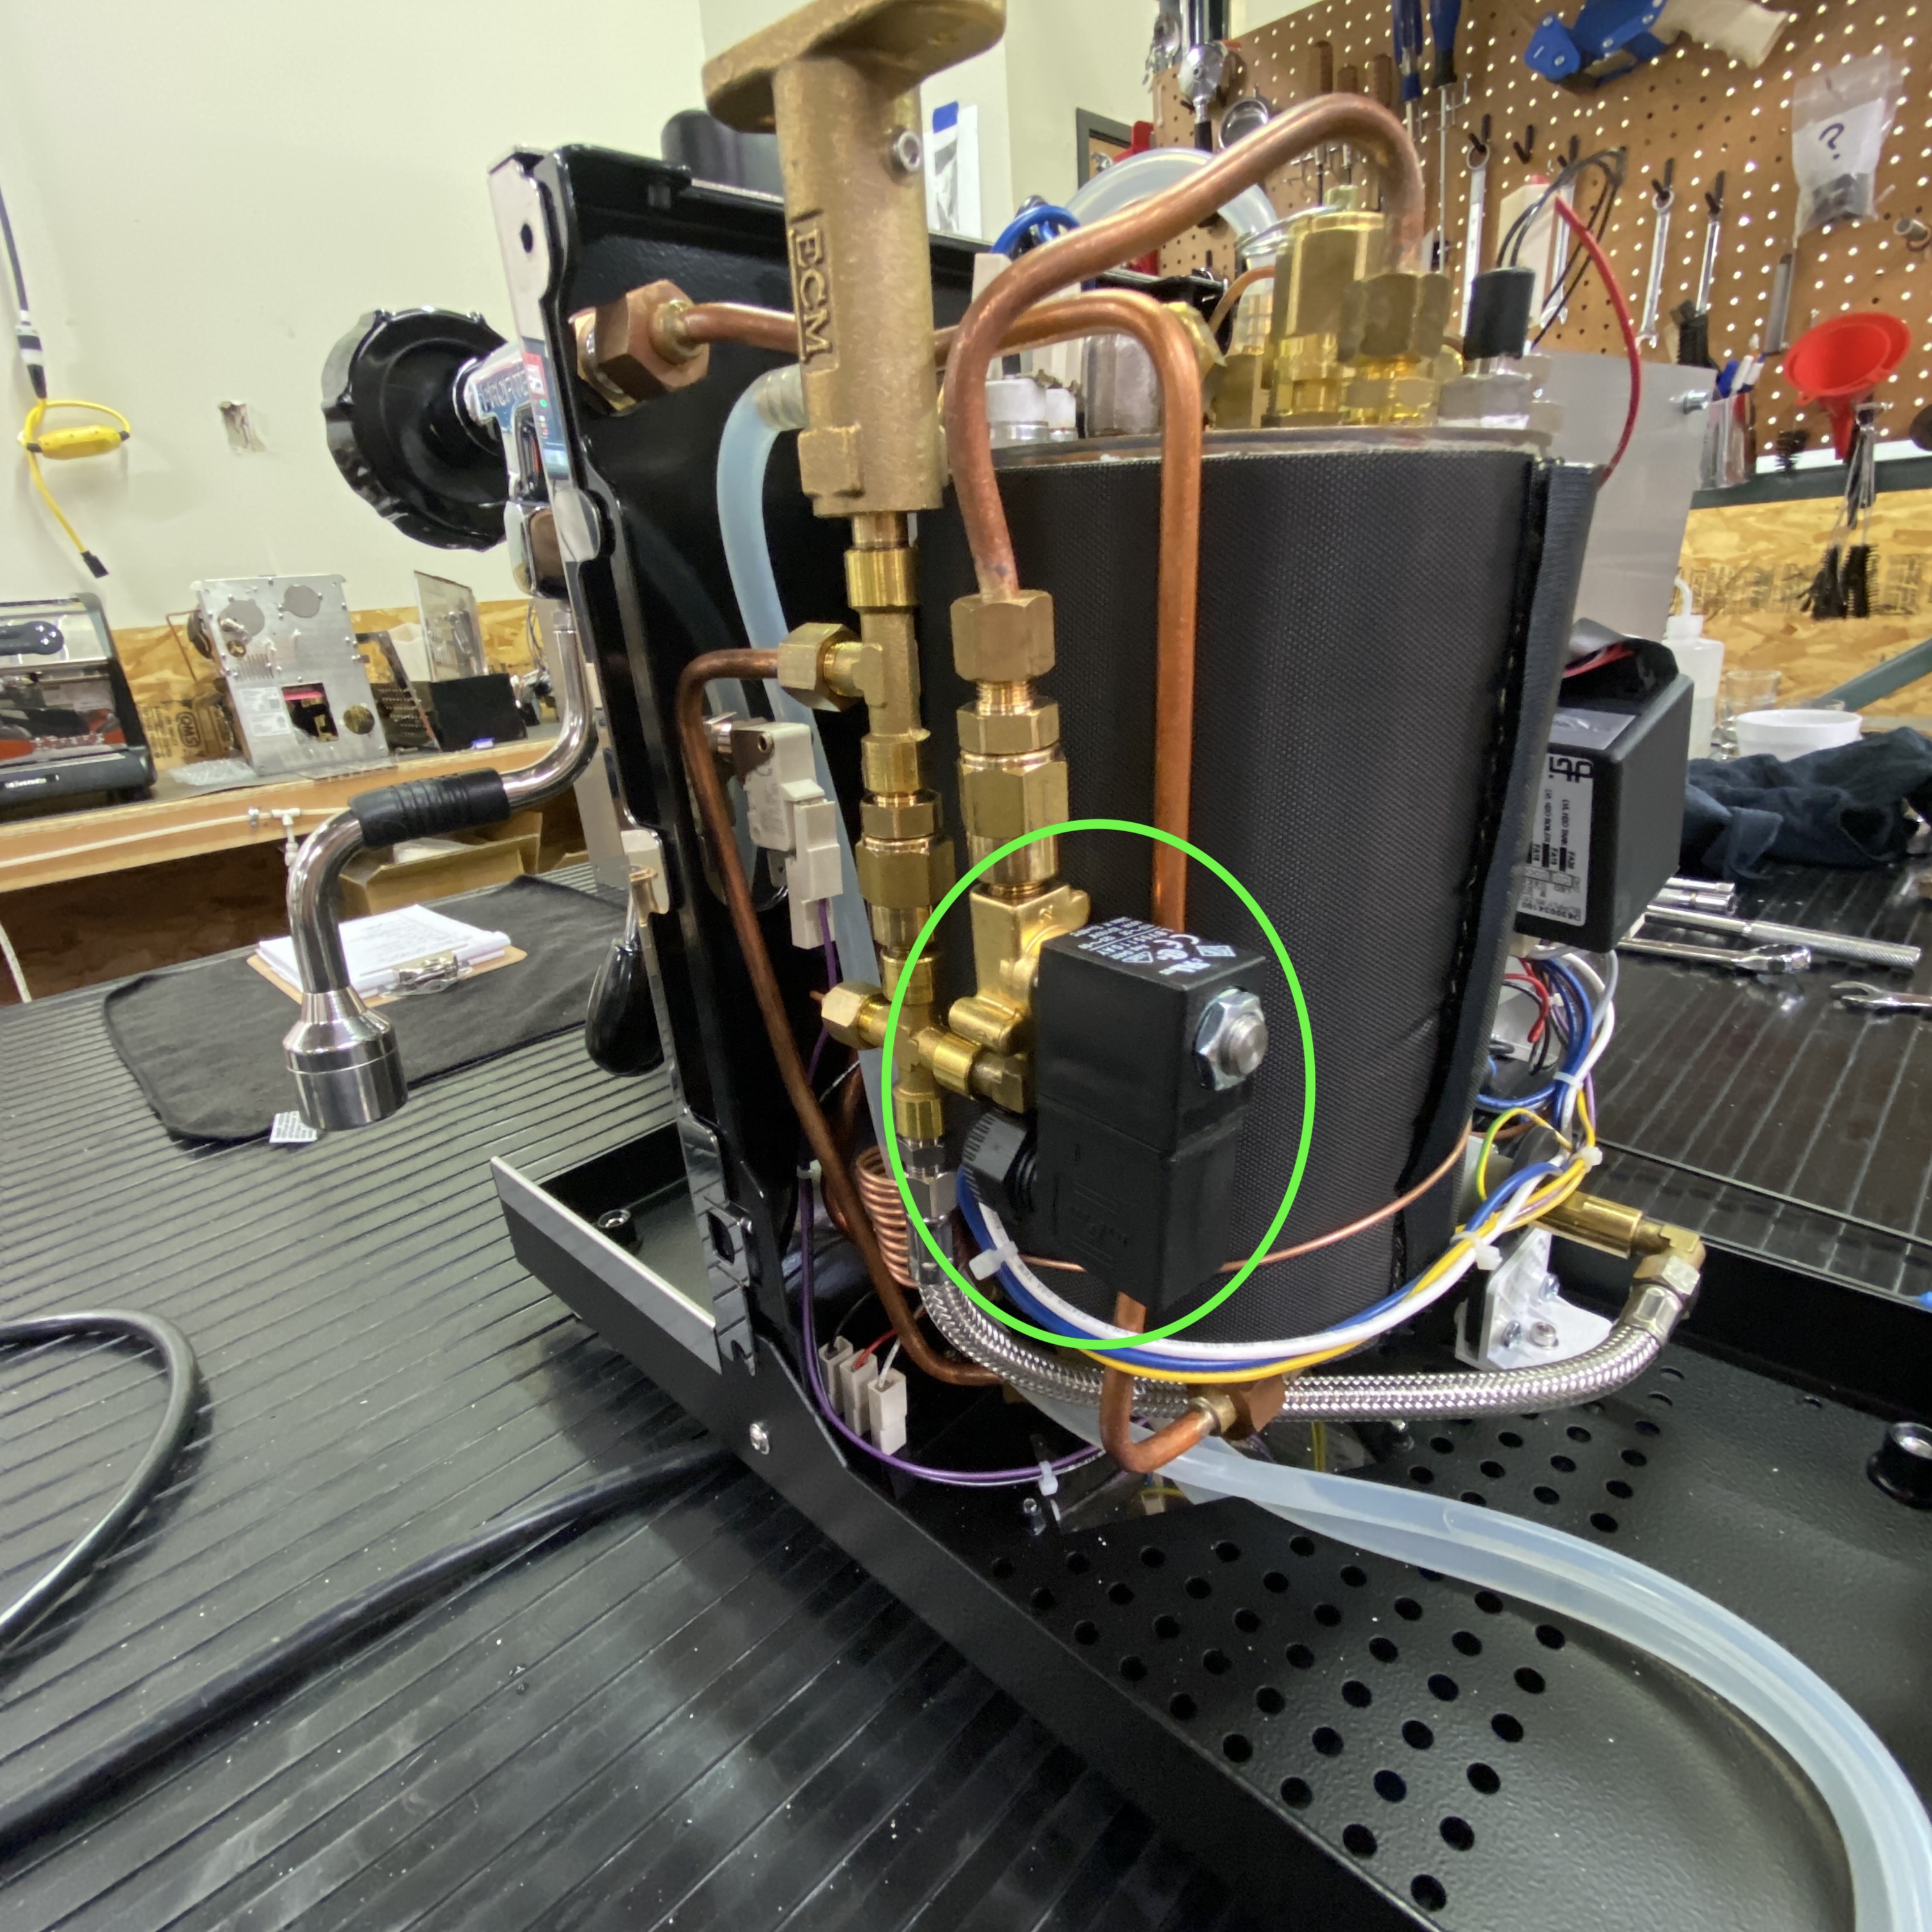
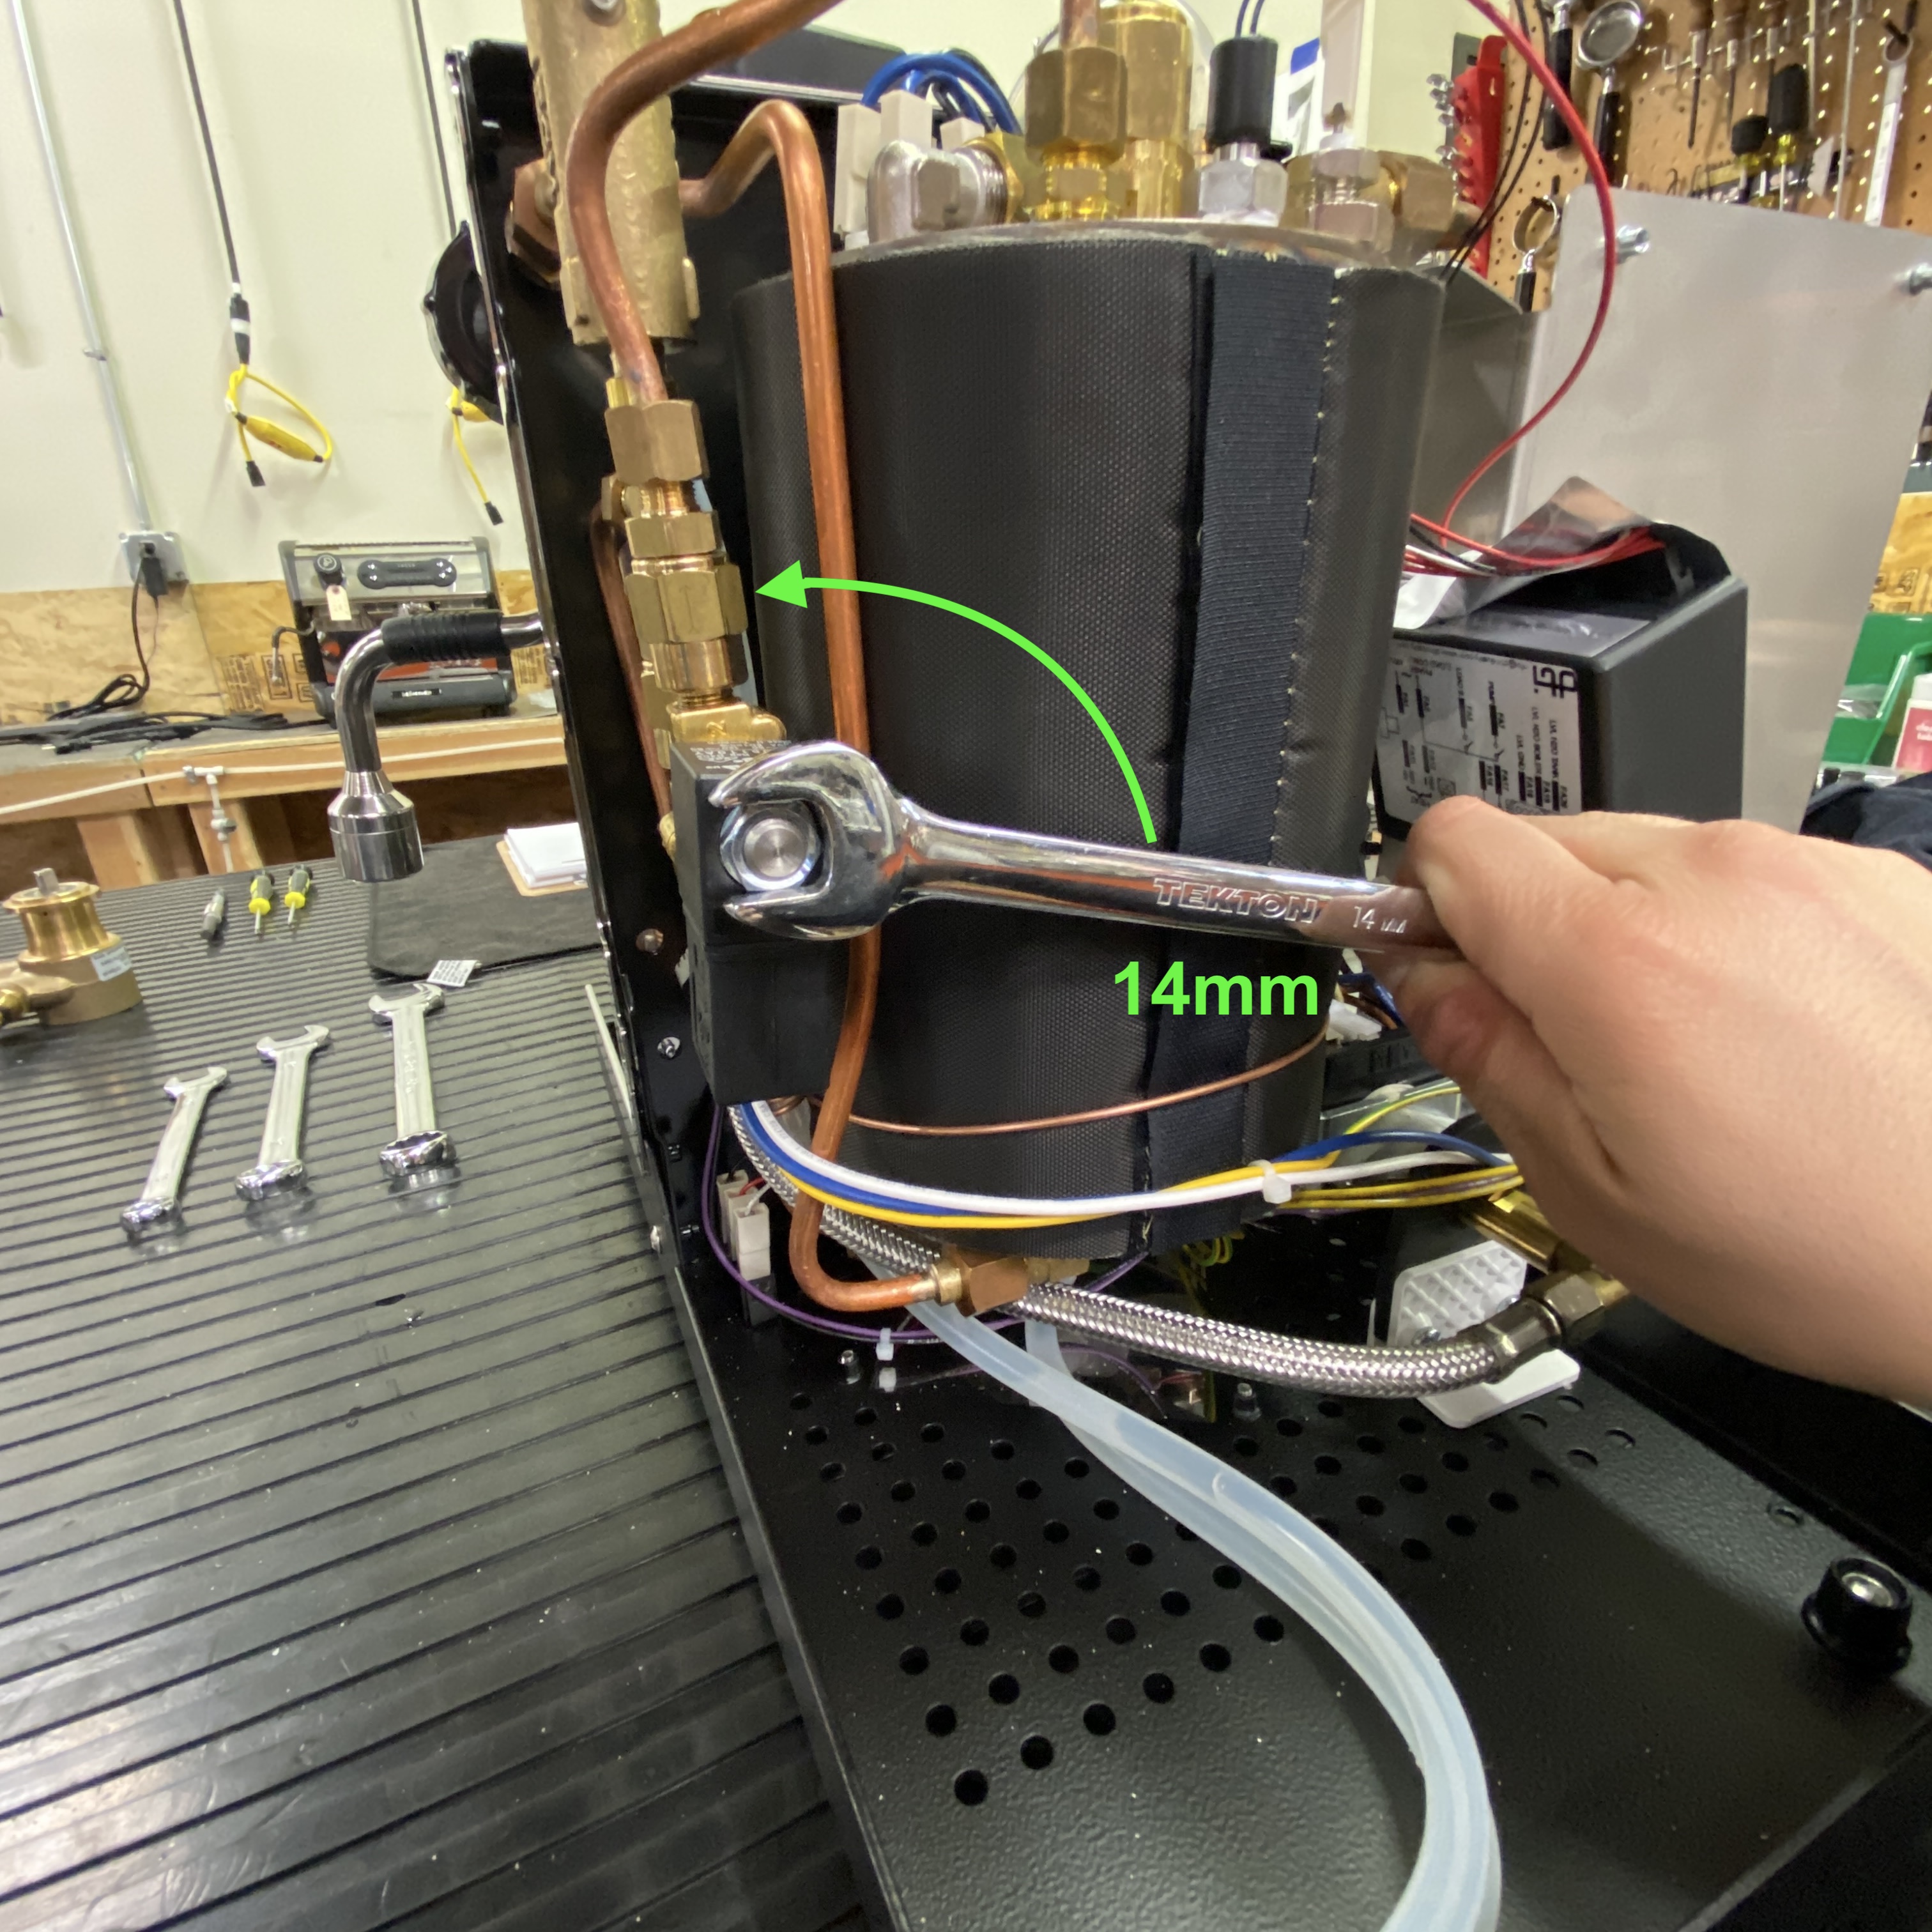
5. Use the 14mm wrench to unscrew the solenoid retaining nut from the solenoid box.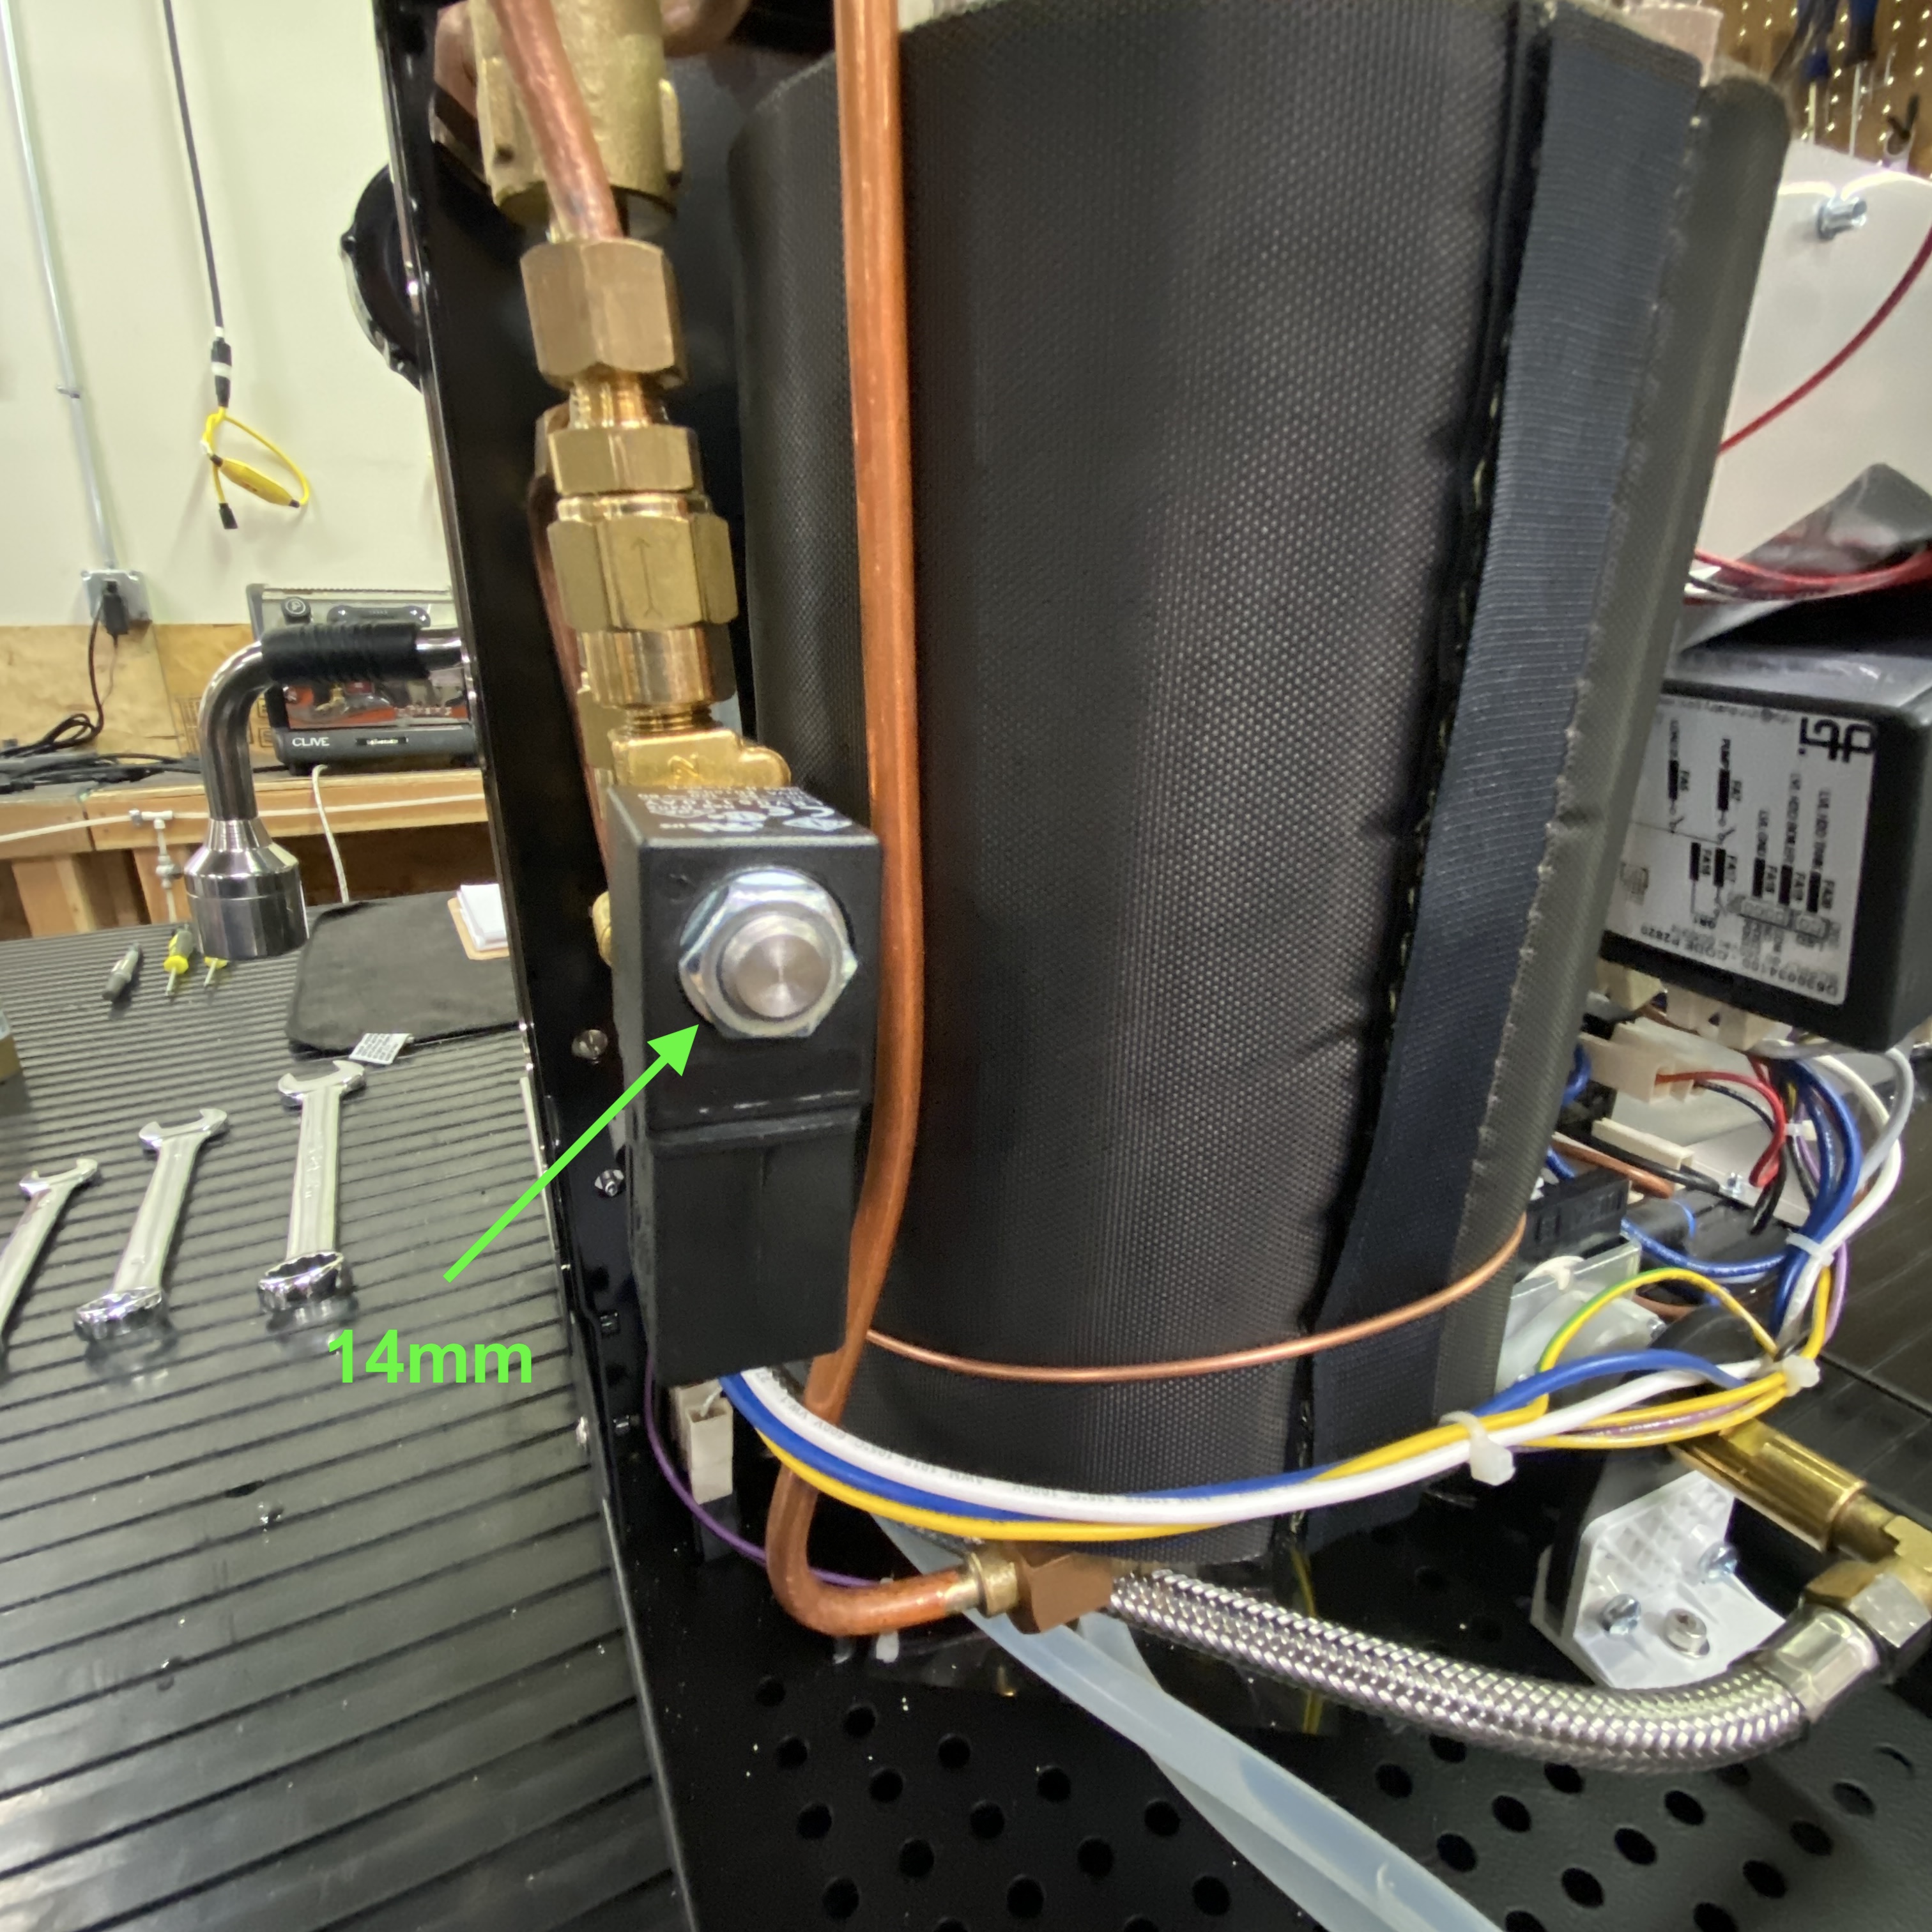
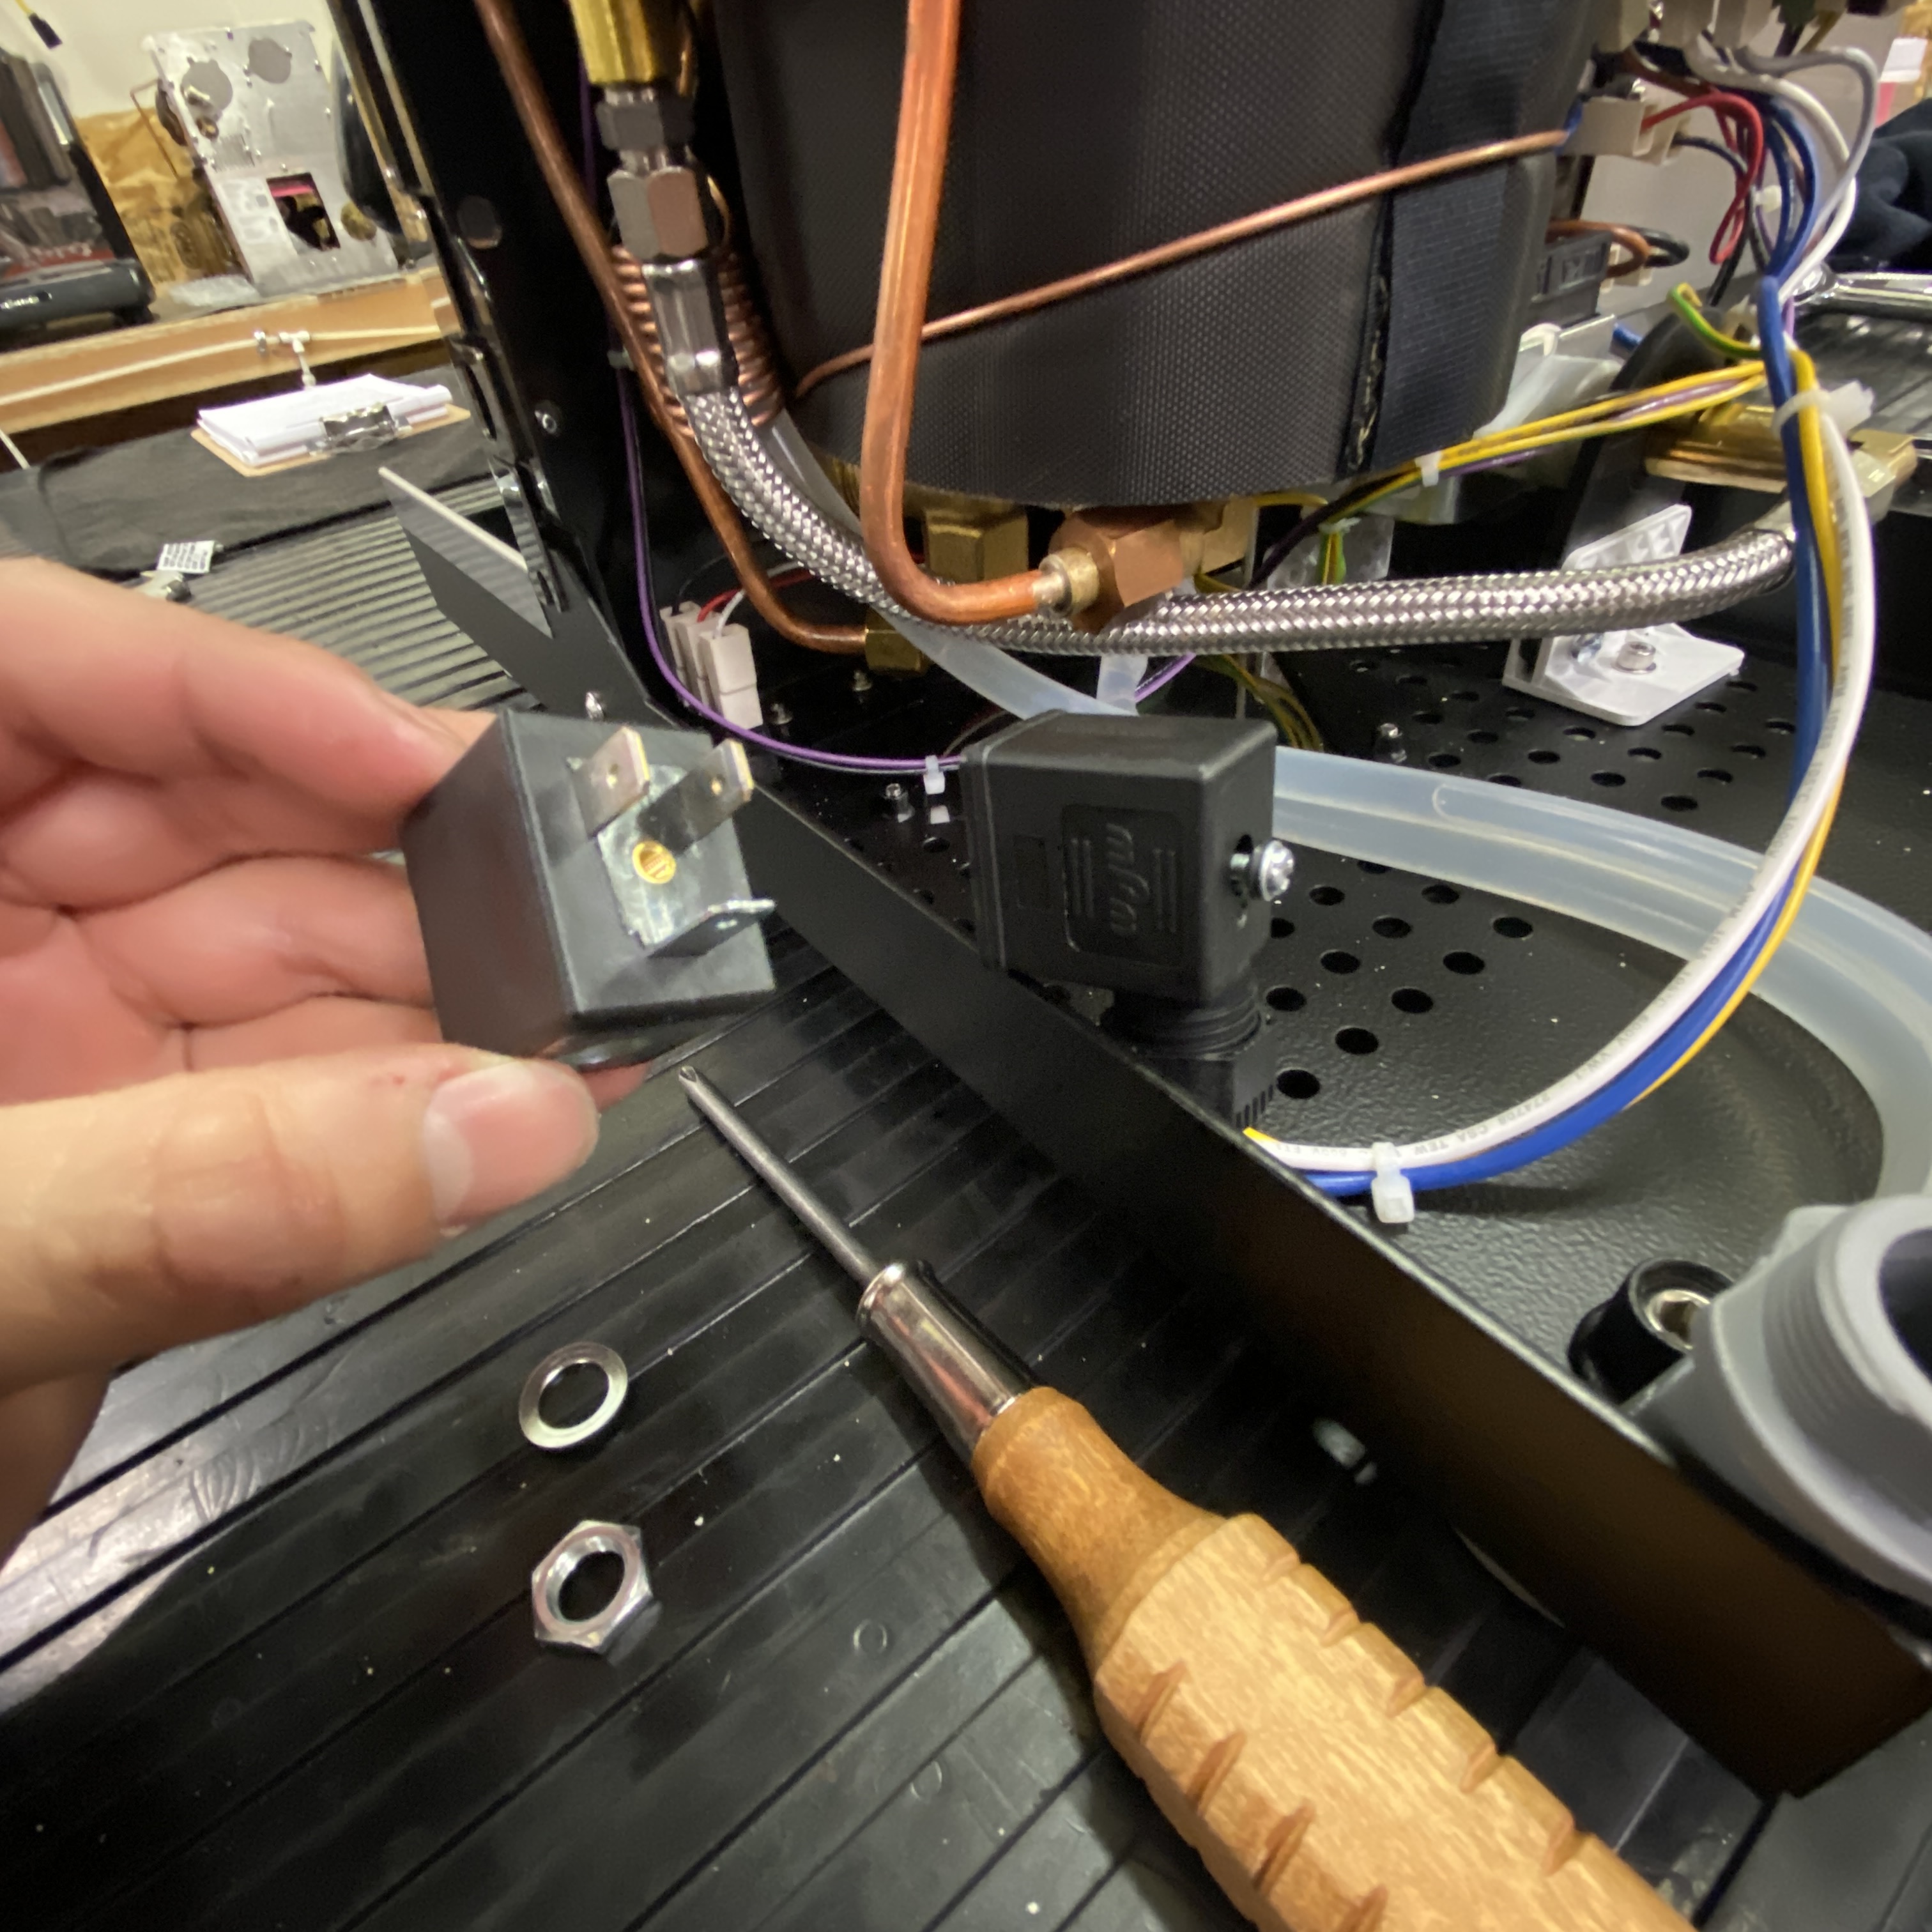
6. Slide the solenoid box off of the armature.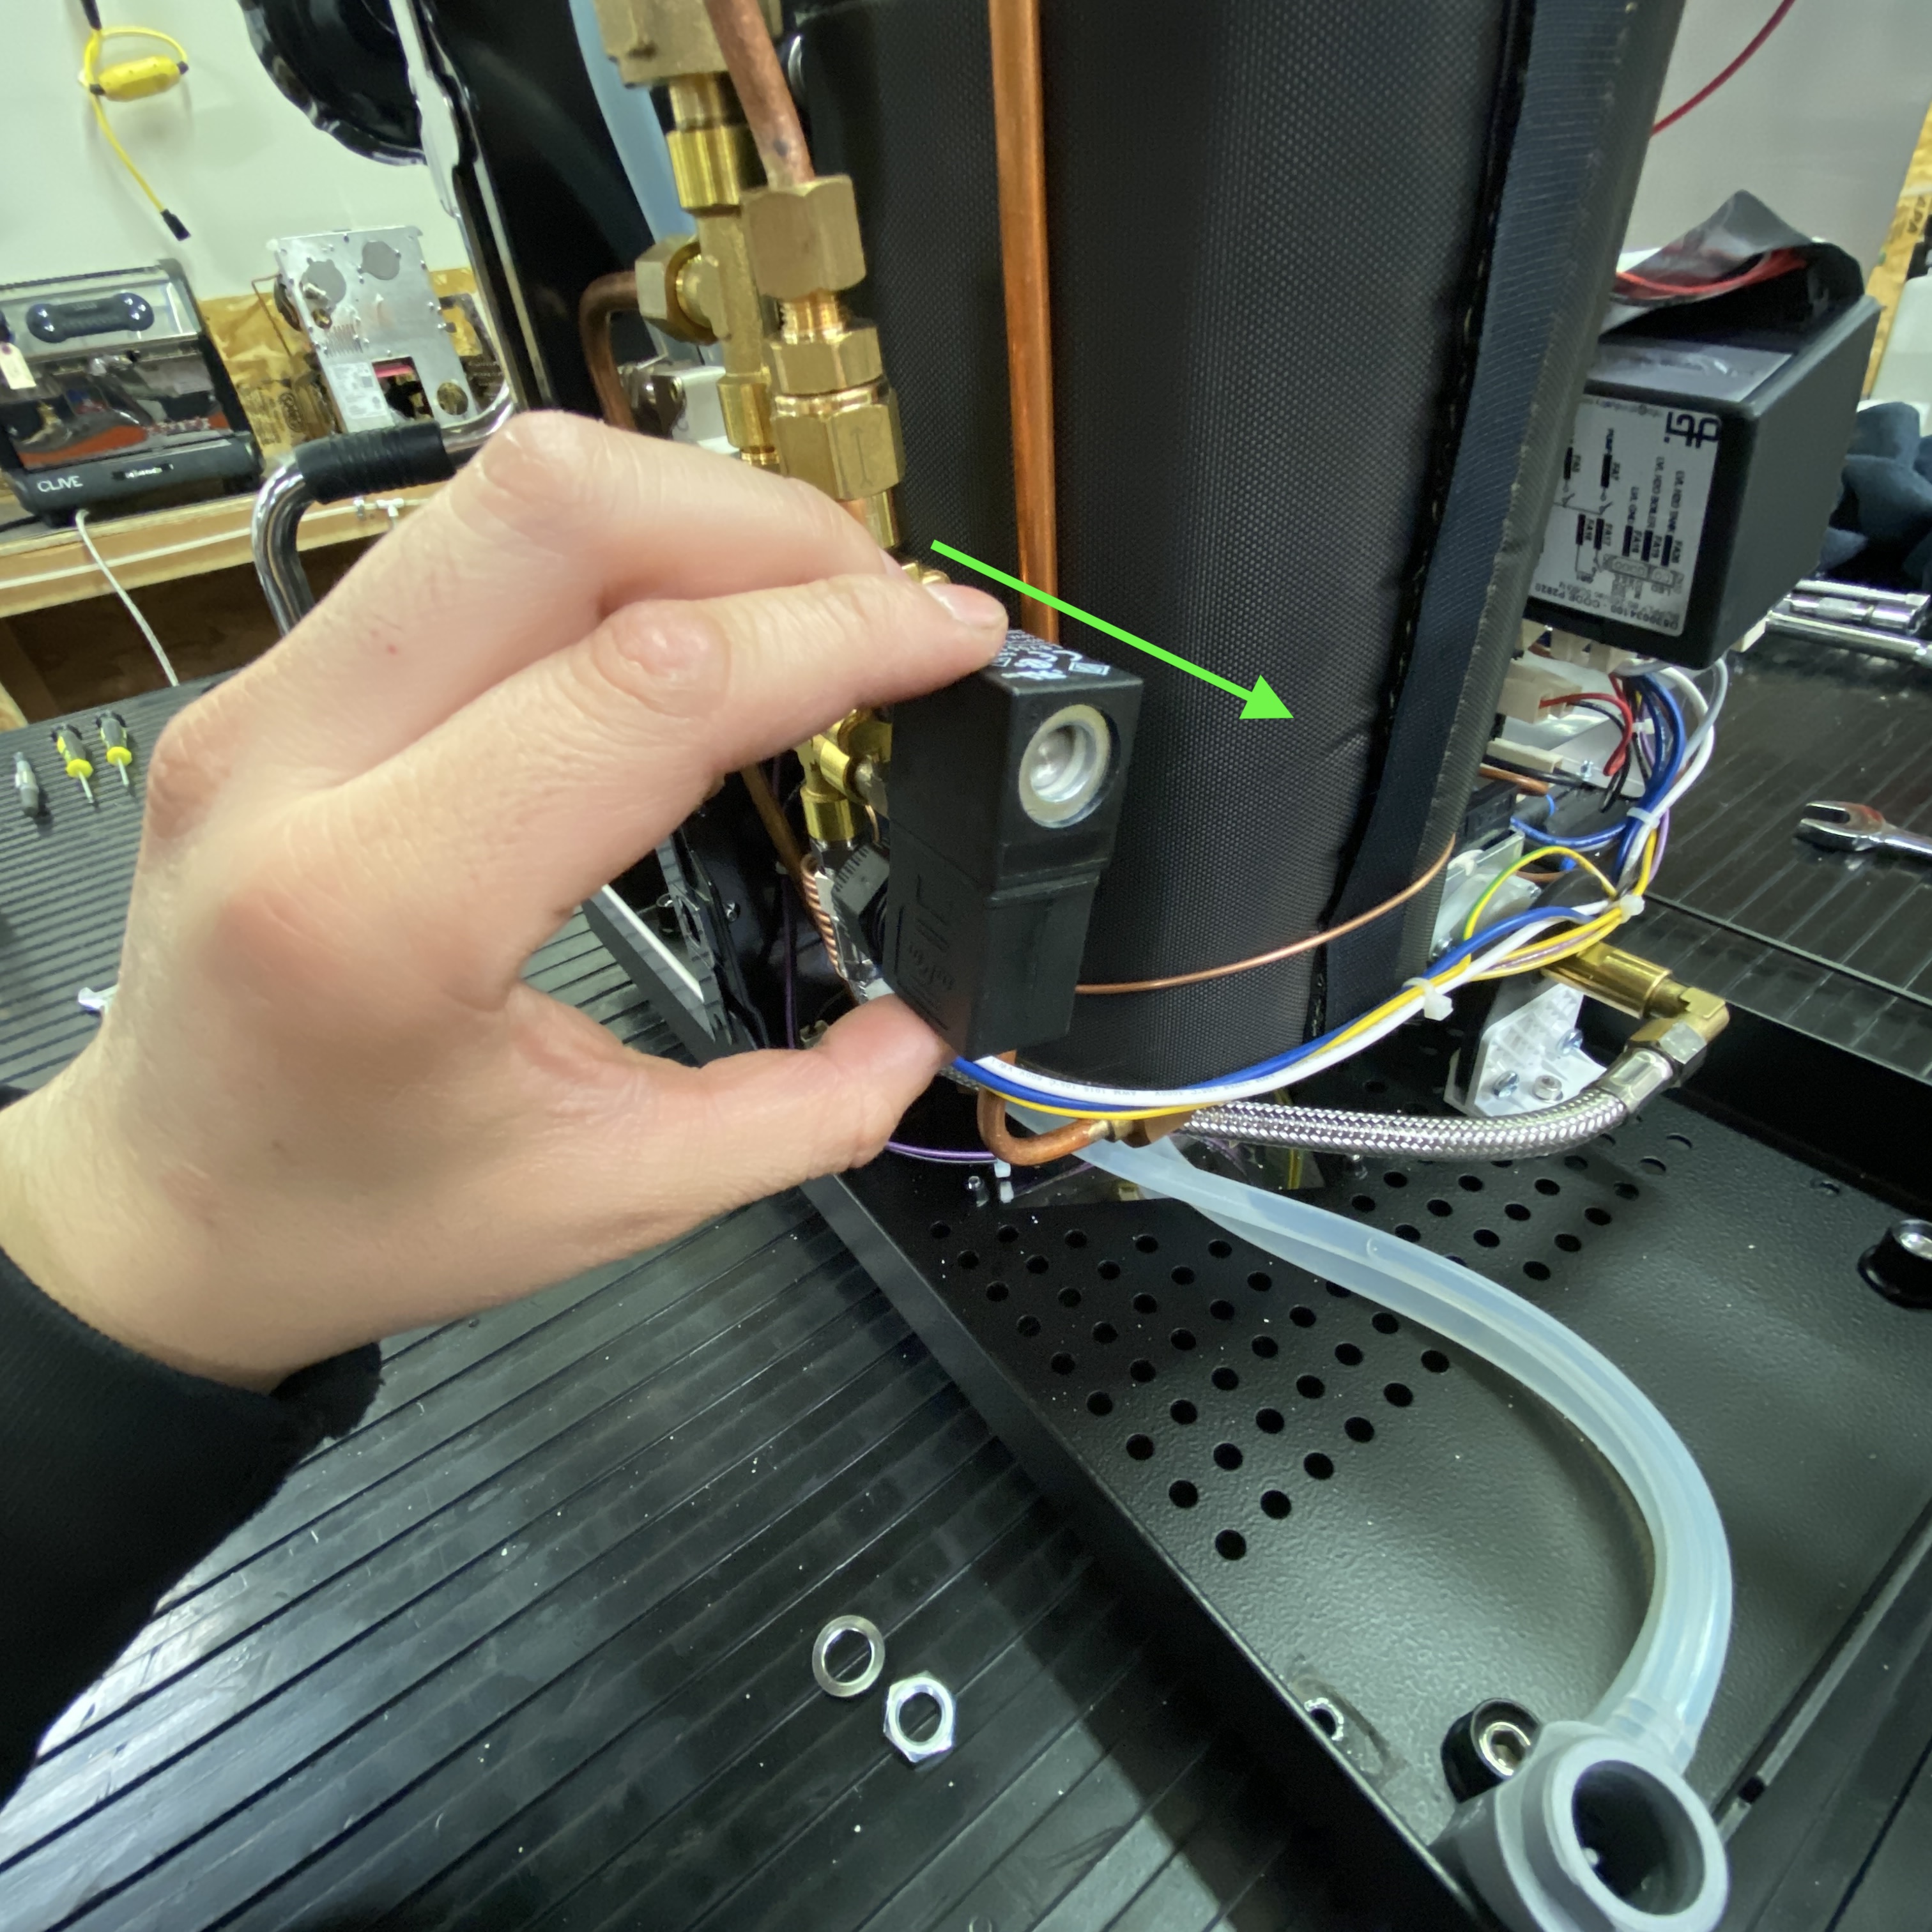
7. If you will be replacing the fill solenoid, remove the retaining screw that holds the electrical plug to the solenoid box, then unplug the solenoid box. (If you're not replacing the fill solenoid, you can skip this step.)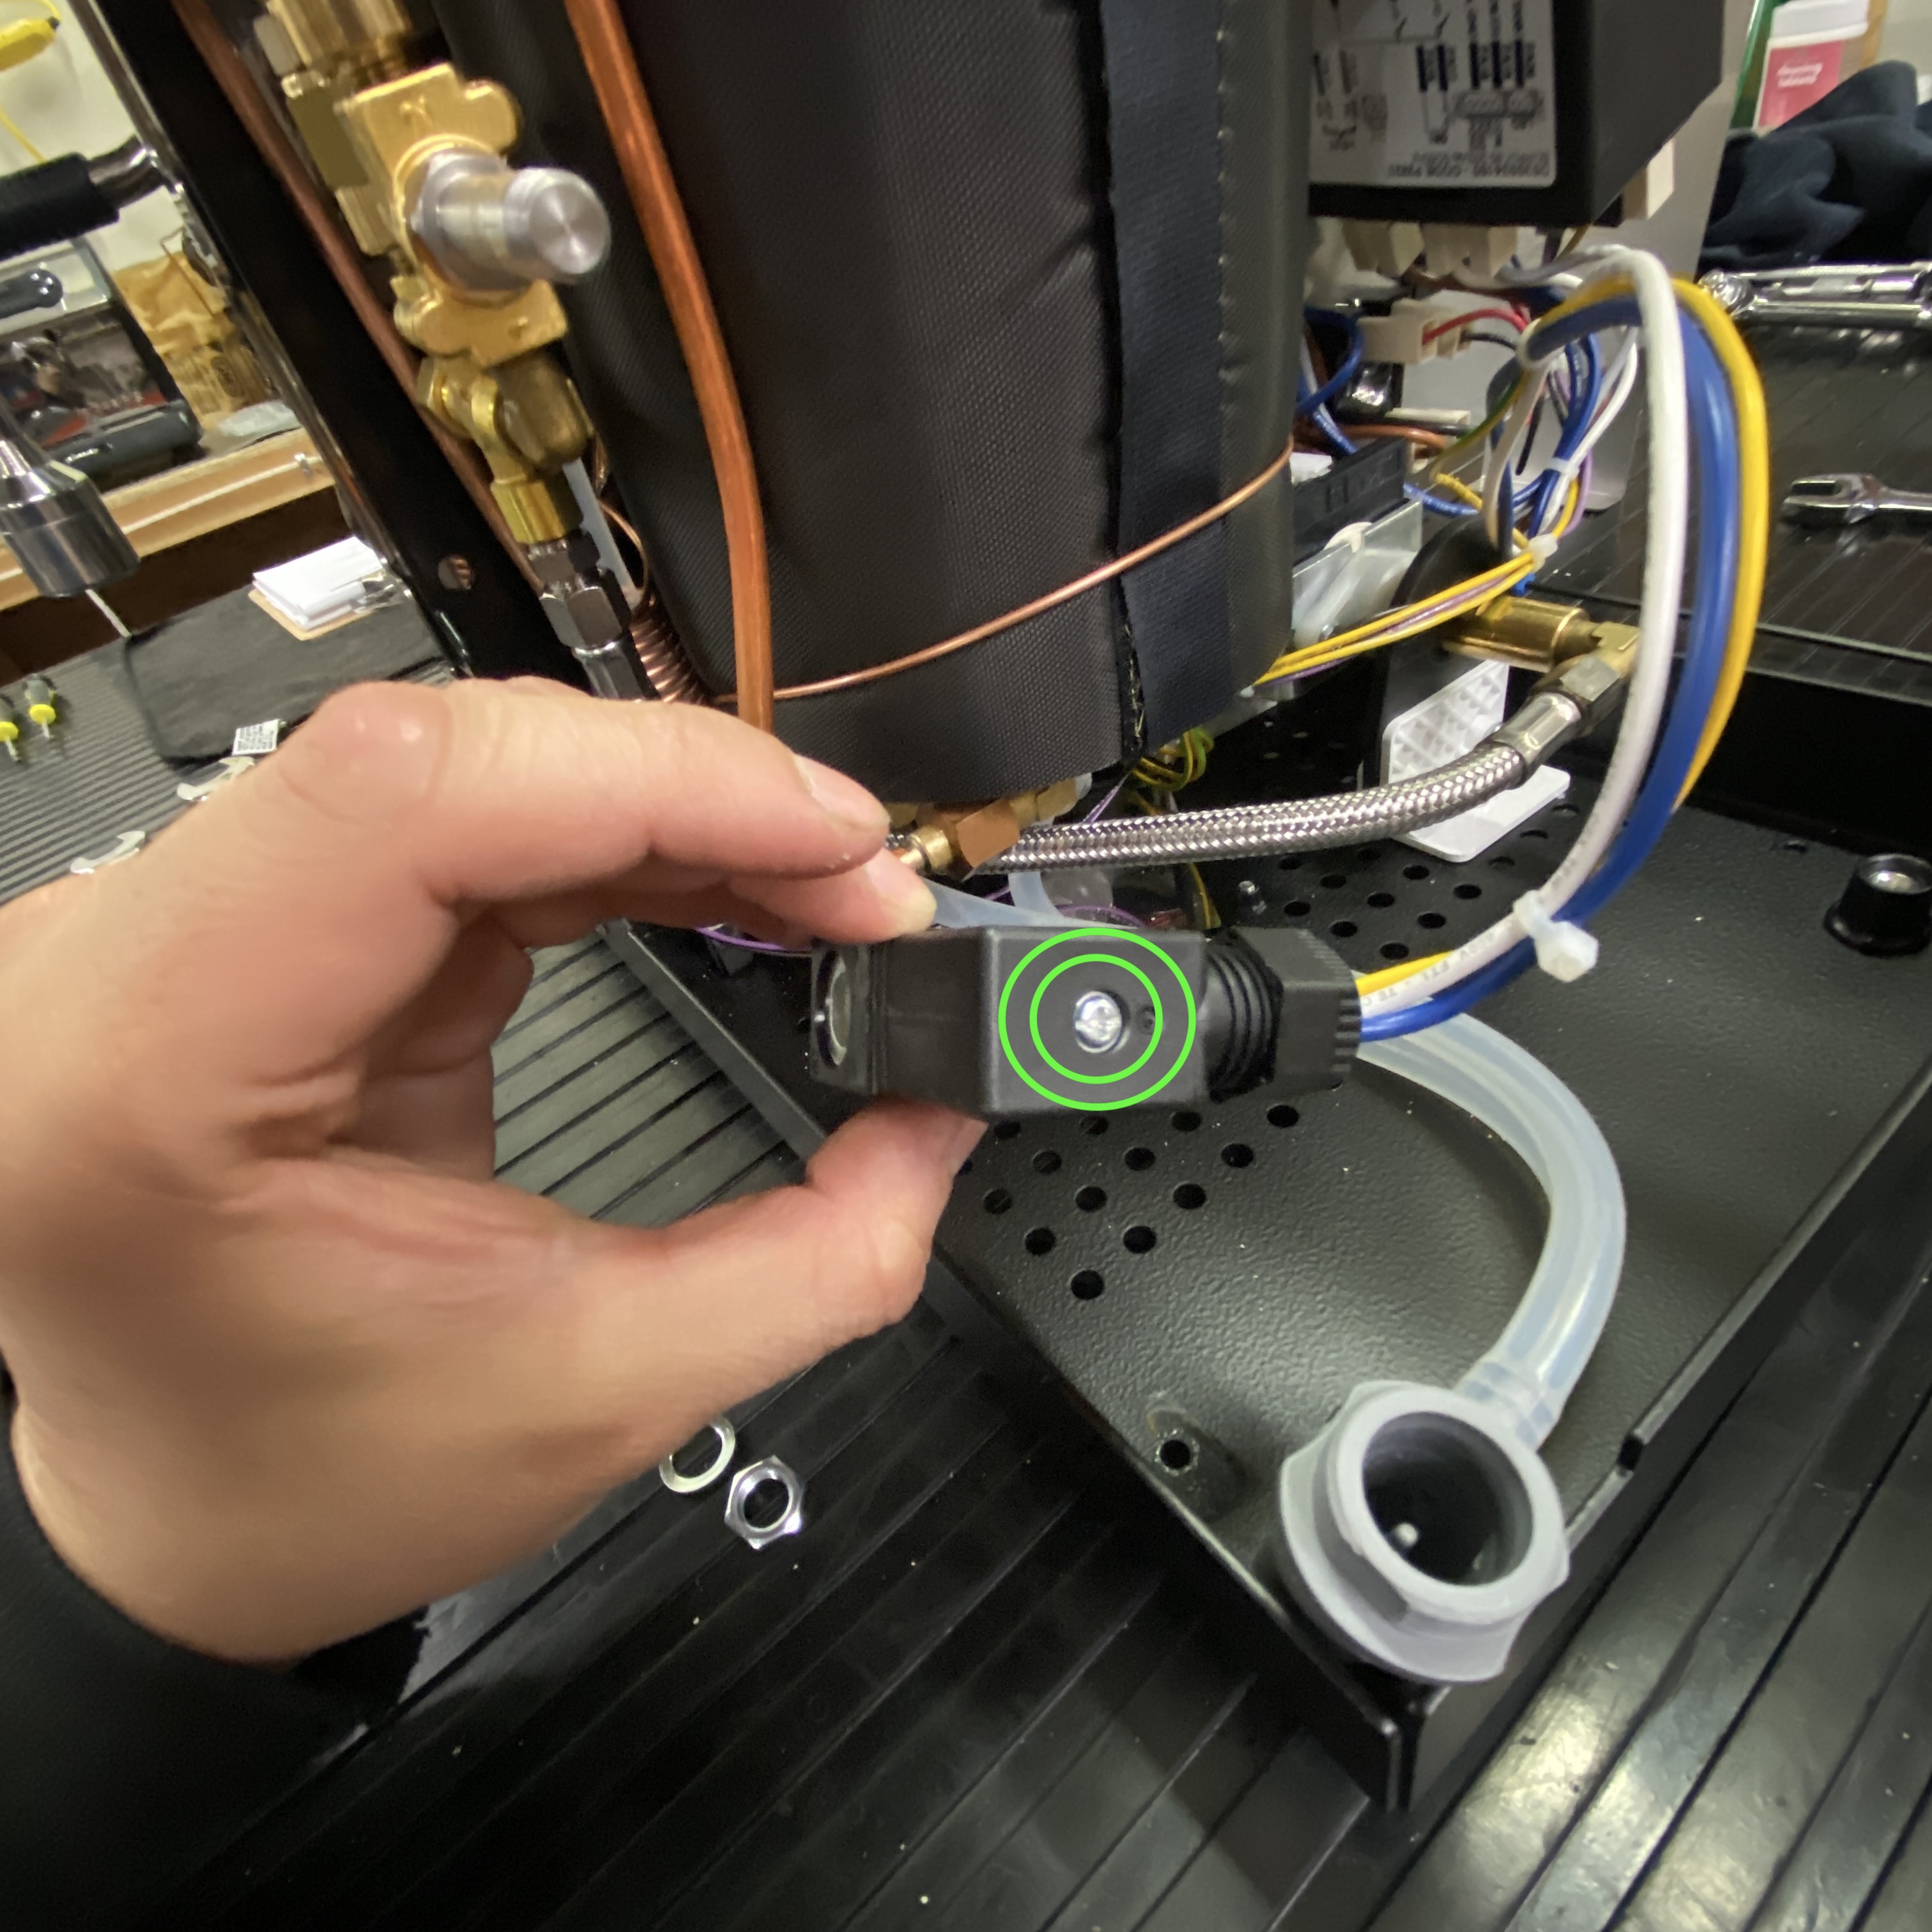
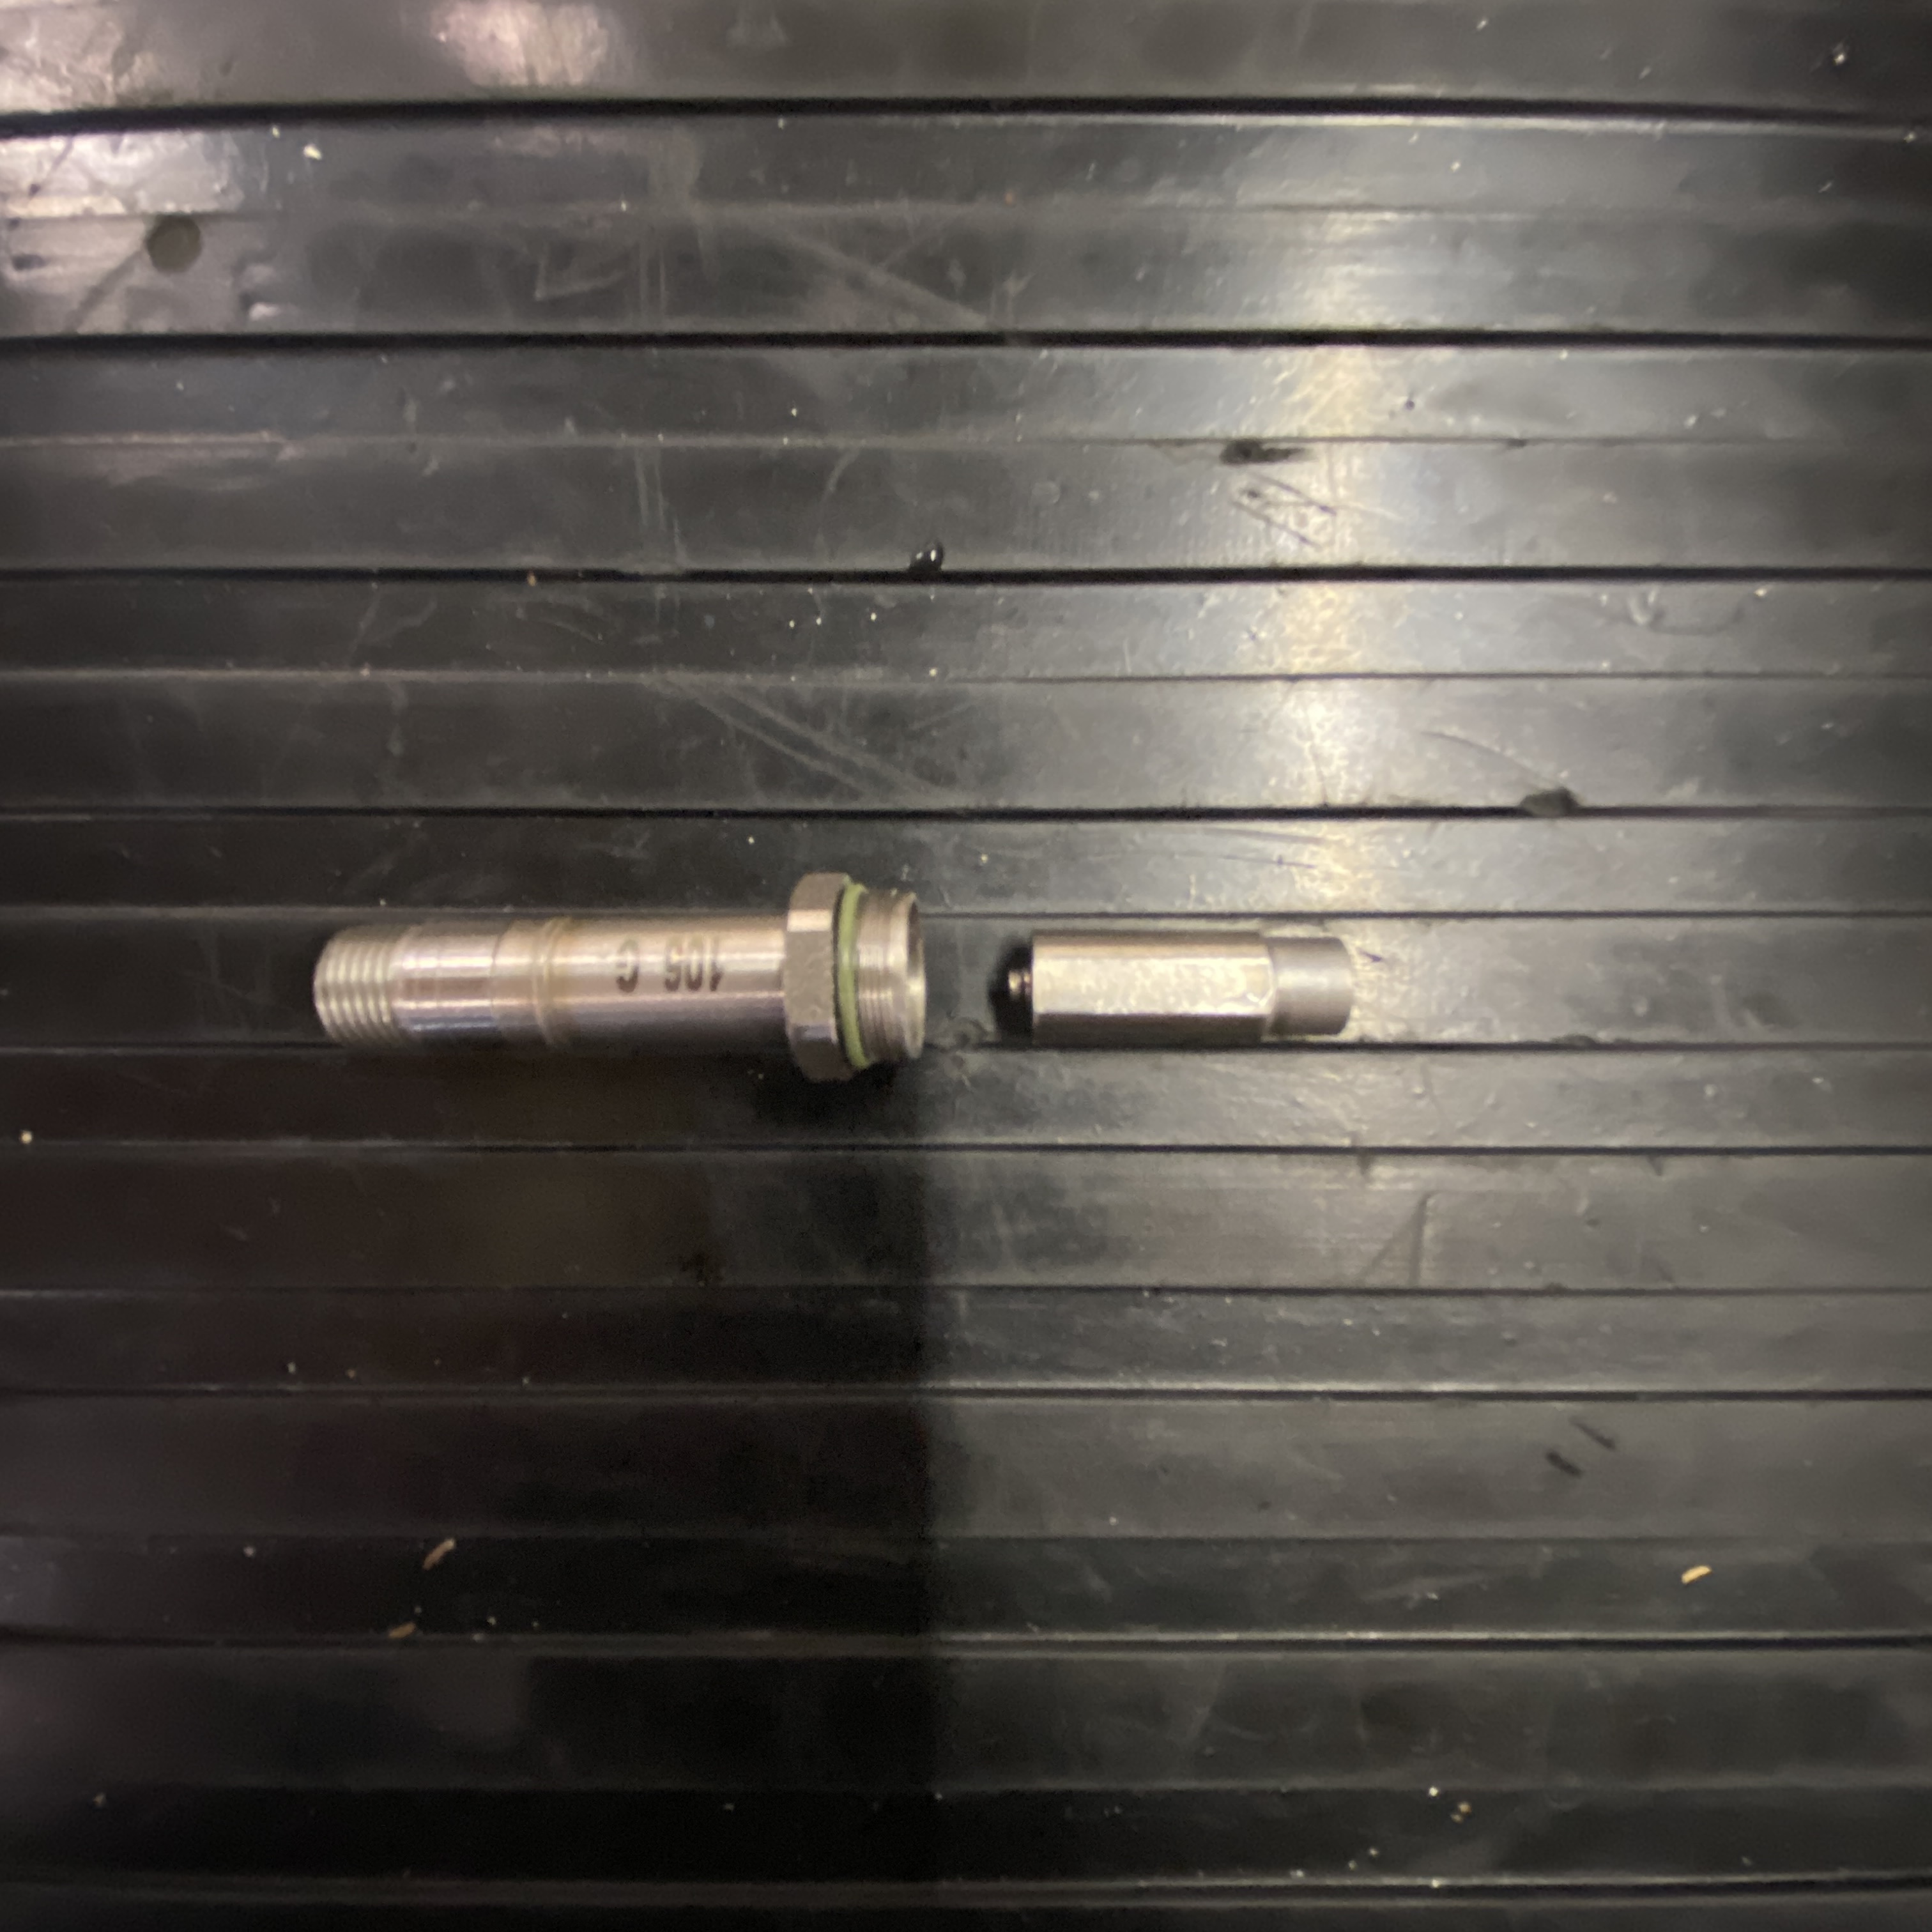
8. Unscrew the armature from the brass valve body. Be sure to use a second wrench to hold the valve body steady while you turn the armature.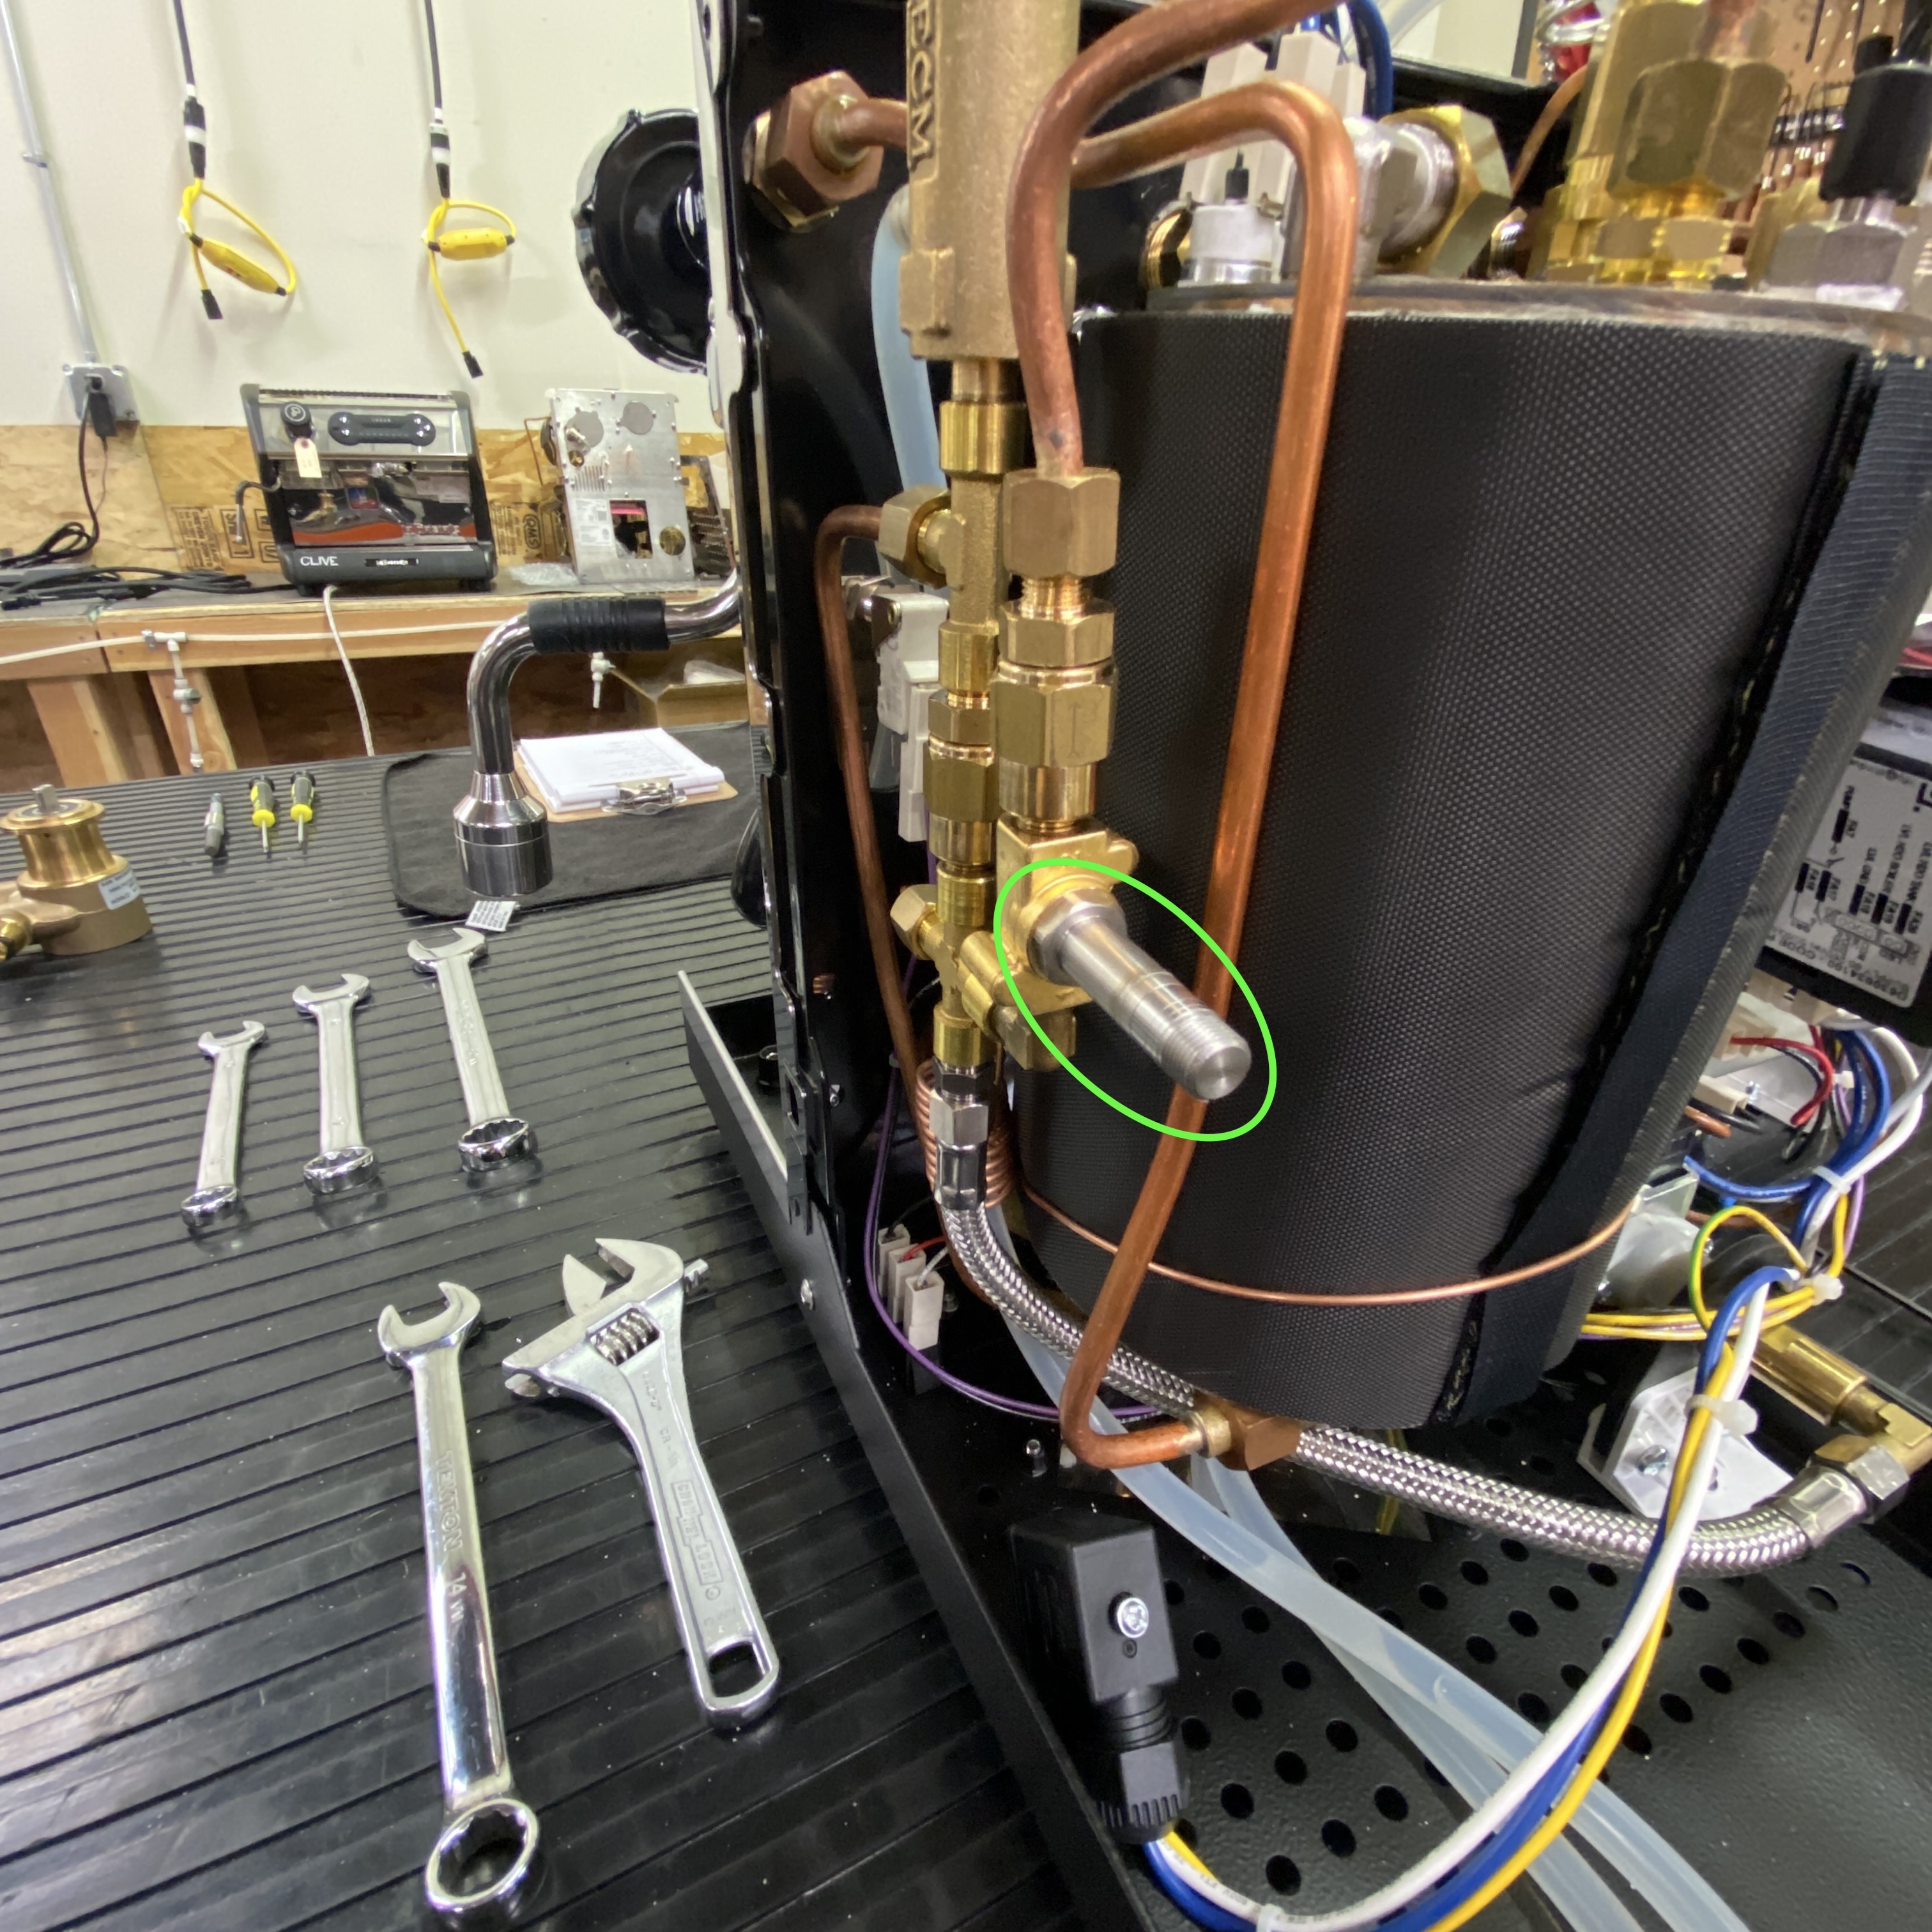
9. Inspect and clean the inside of the armature and make sure all of the springs move freely.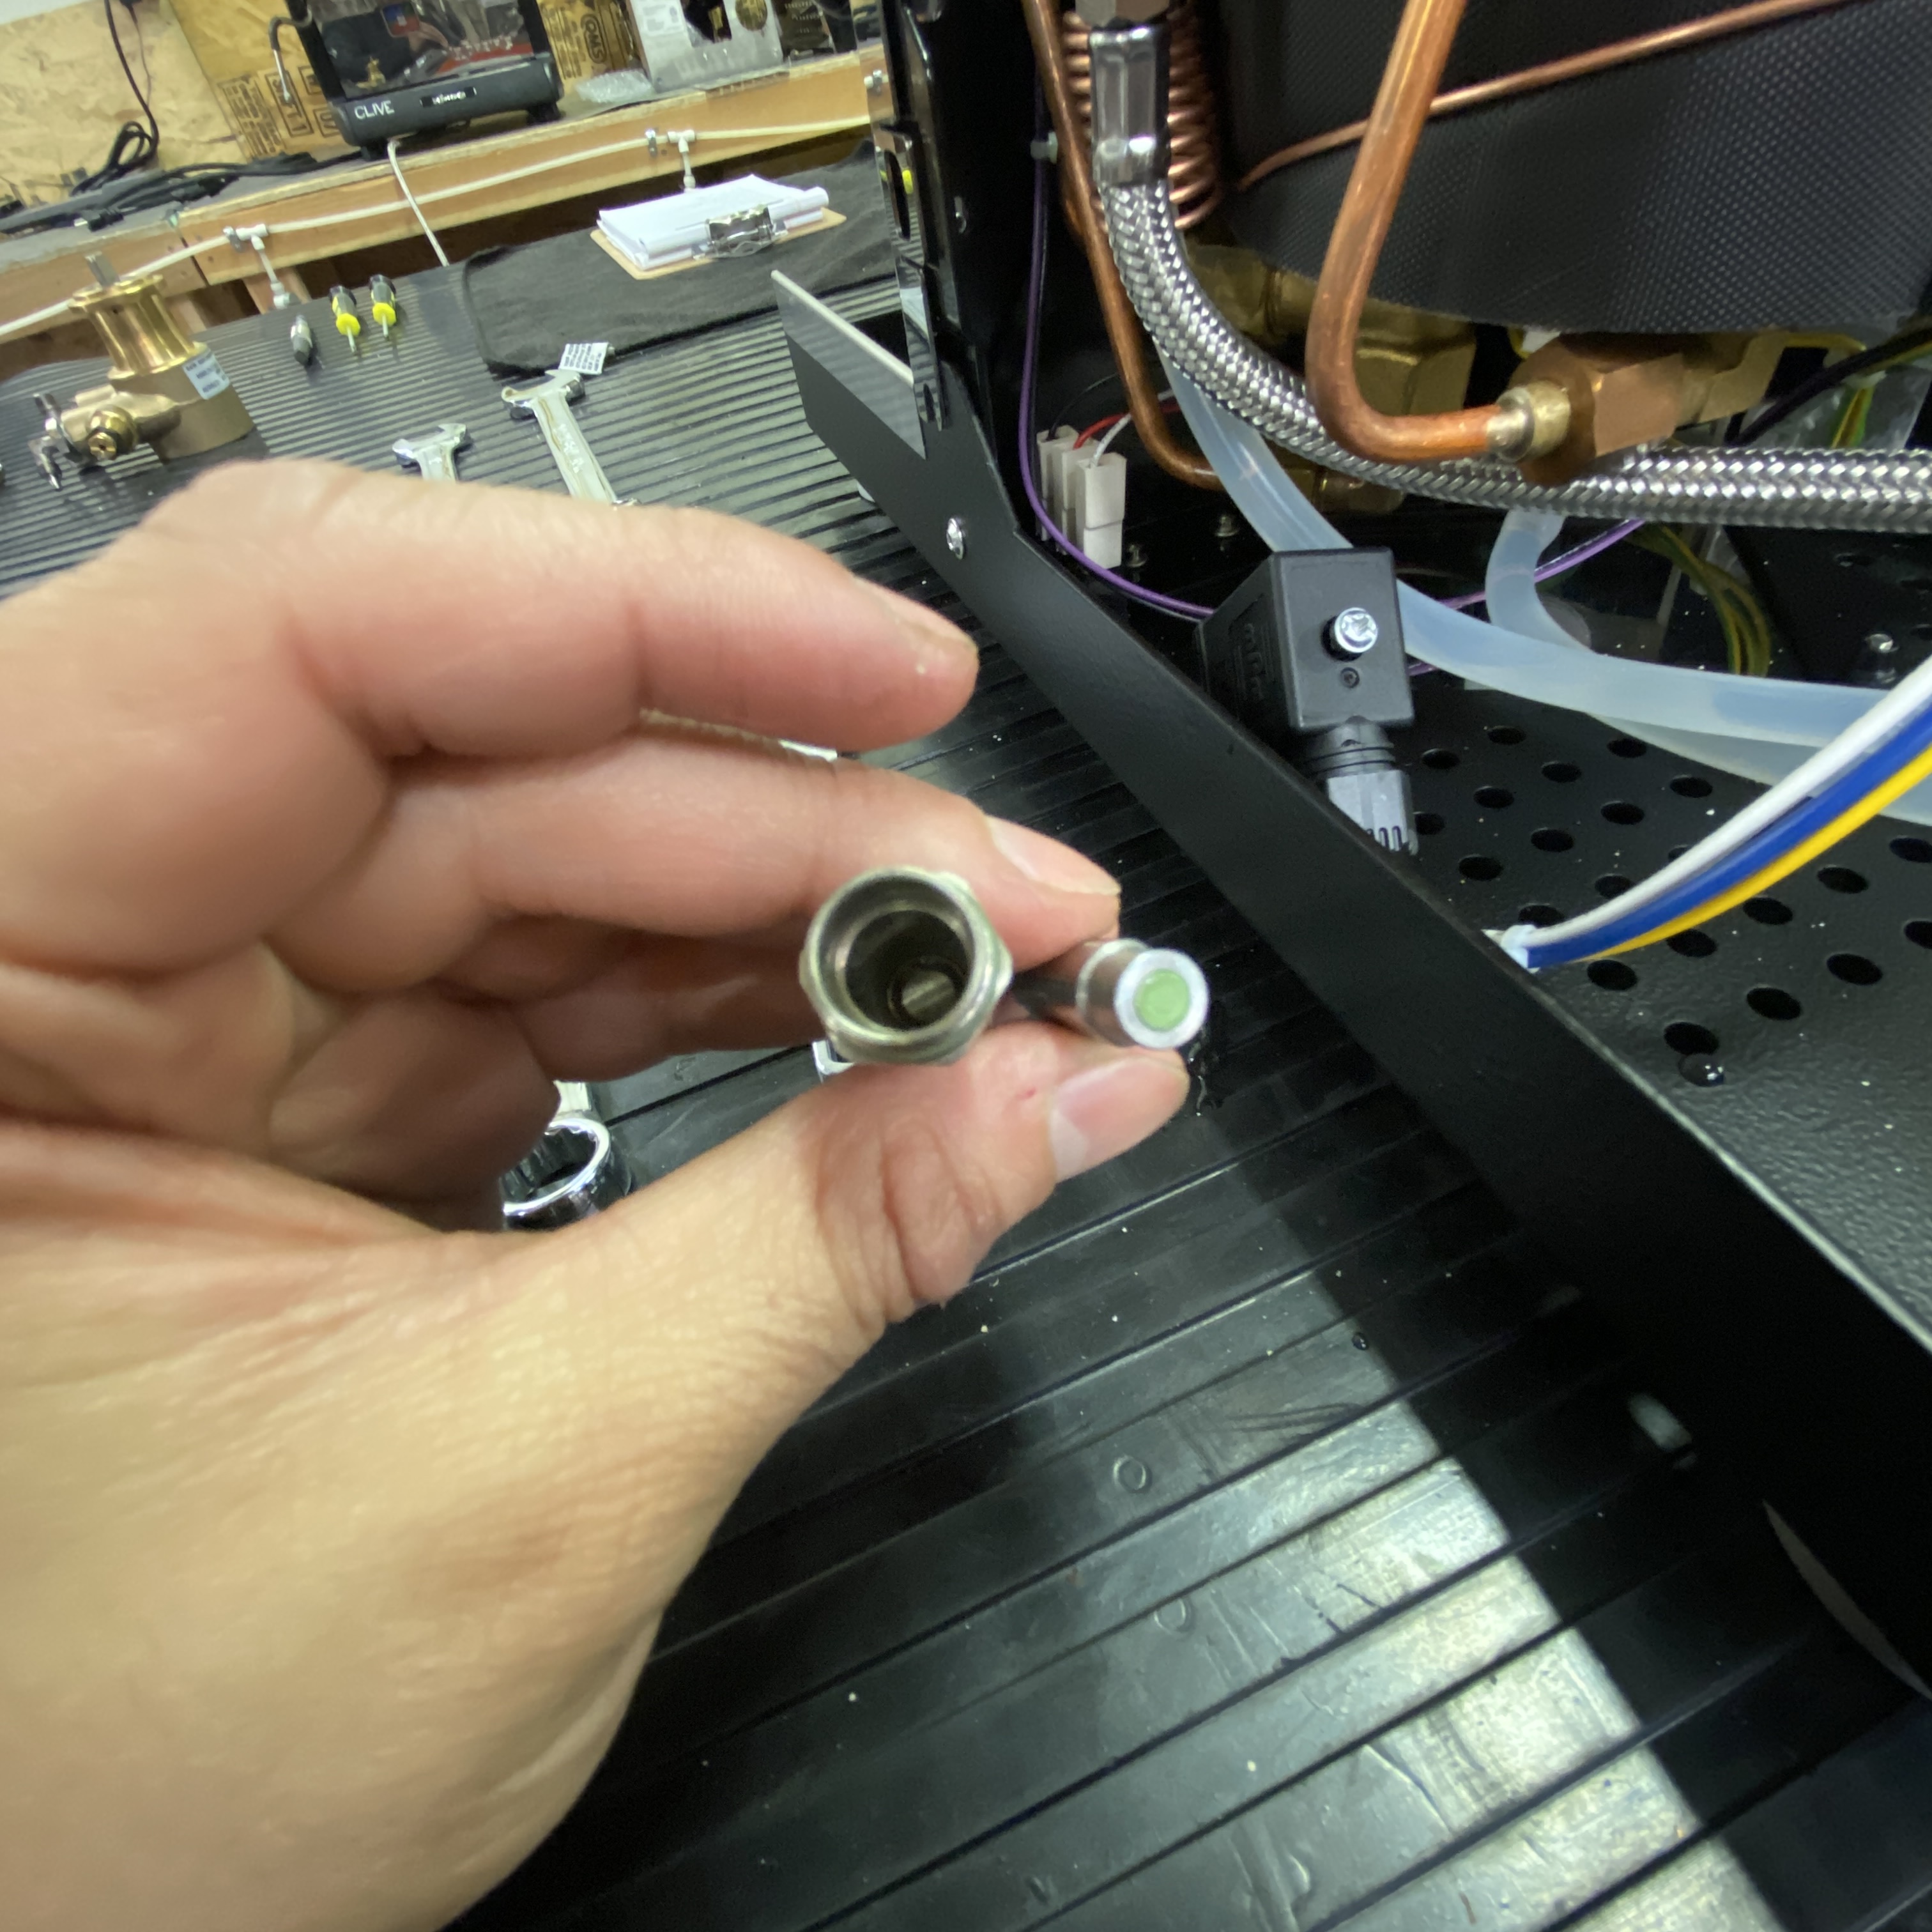
10. Don't forget to clean the inside of the valve body.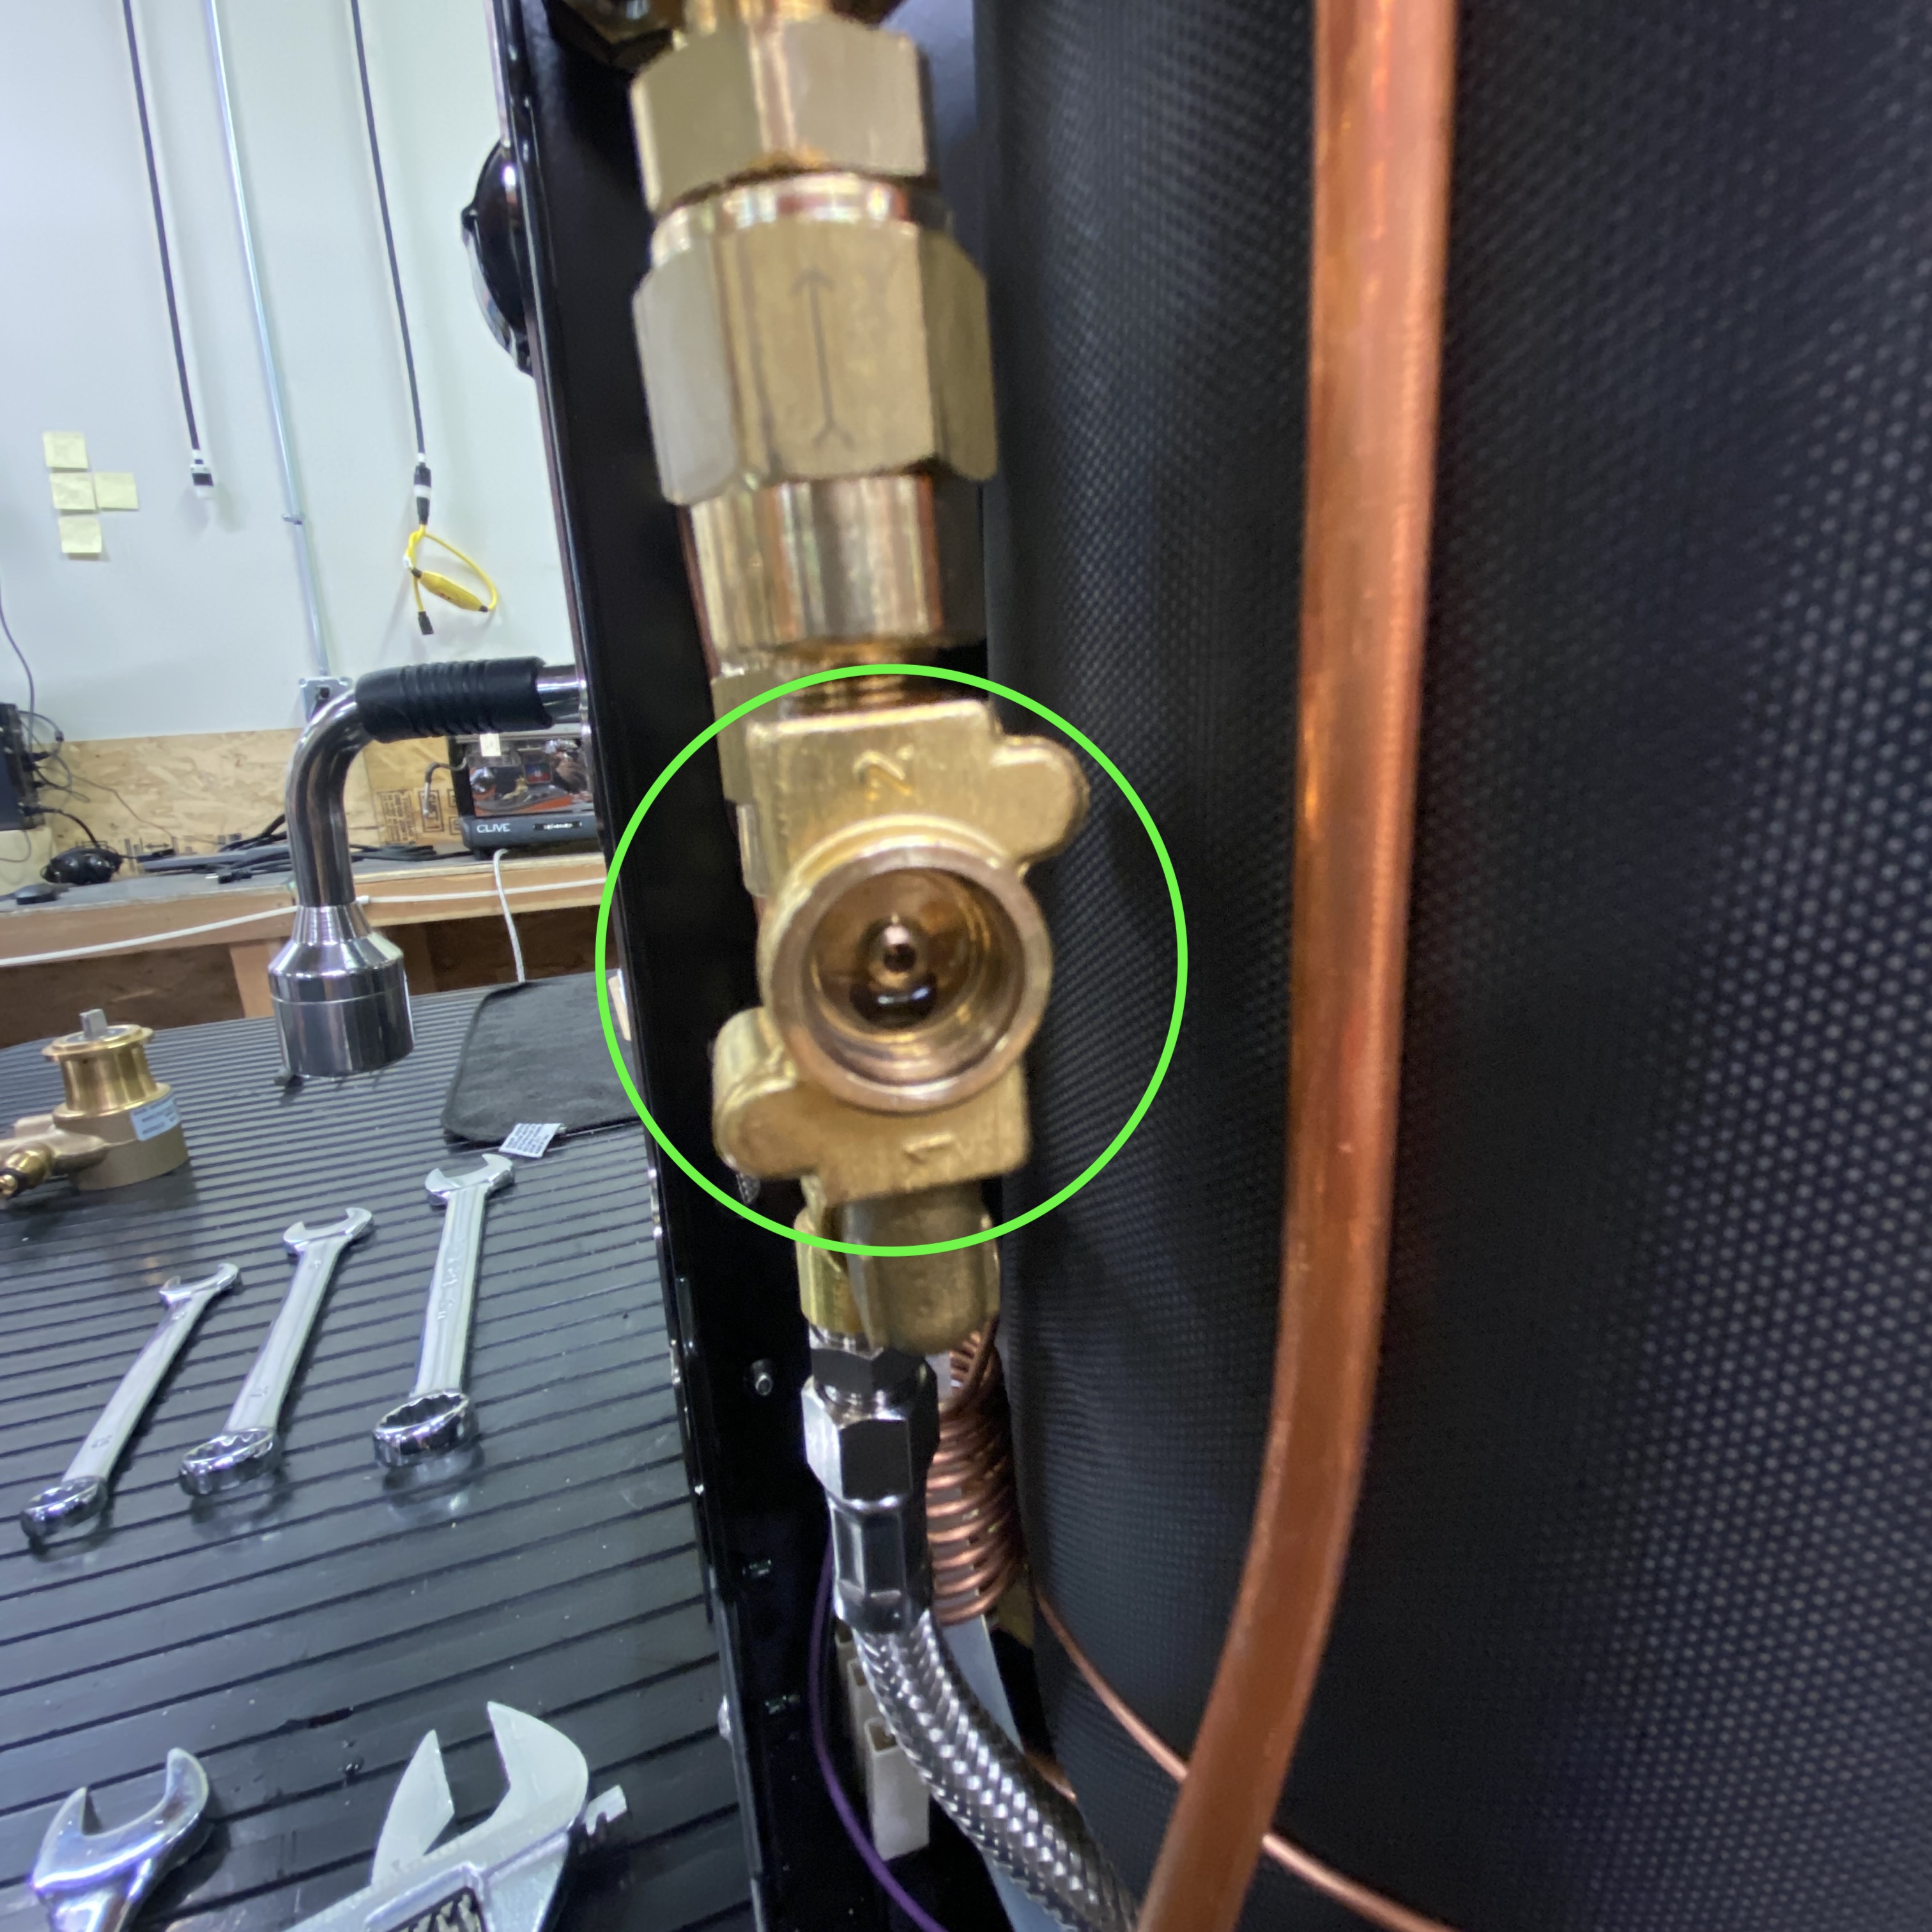
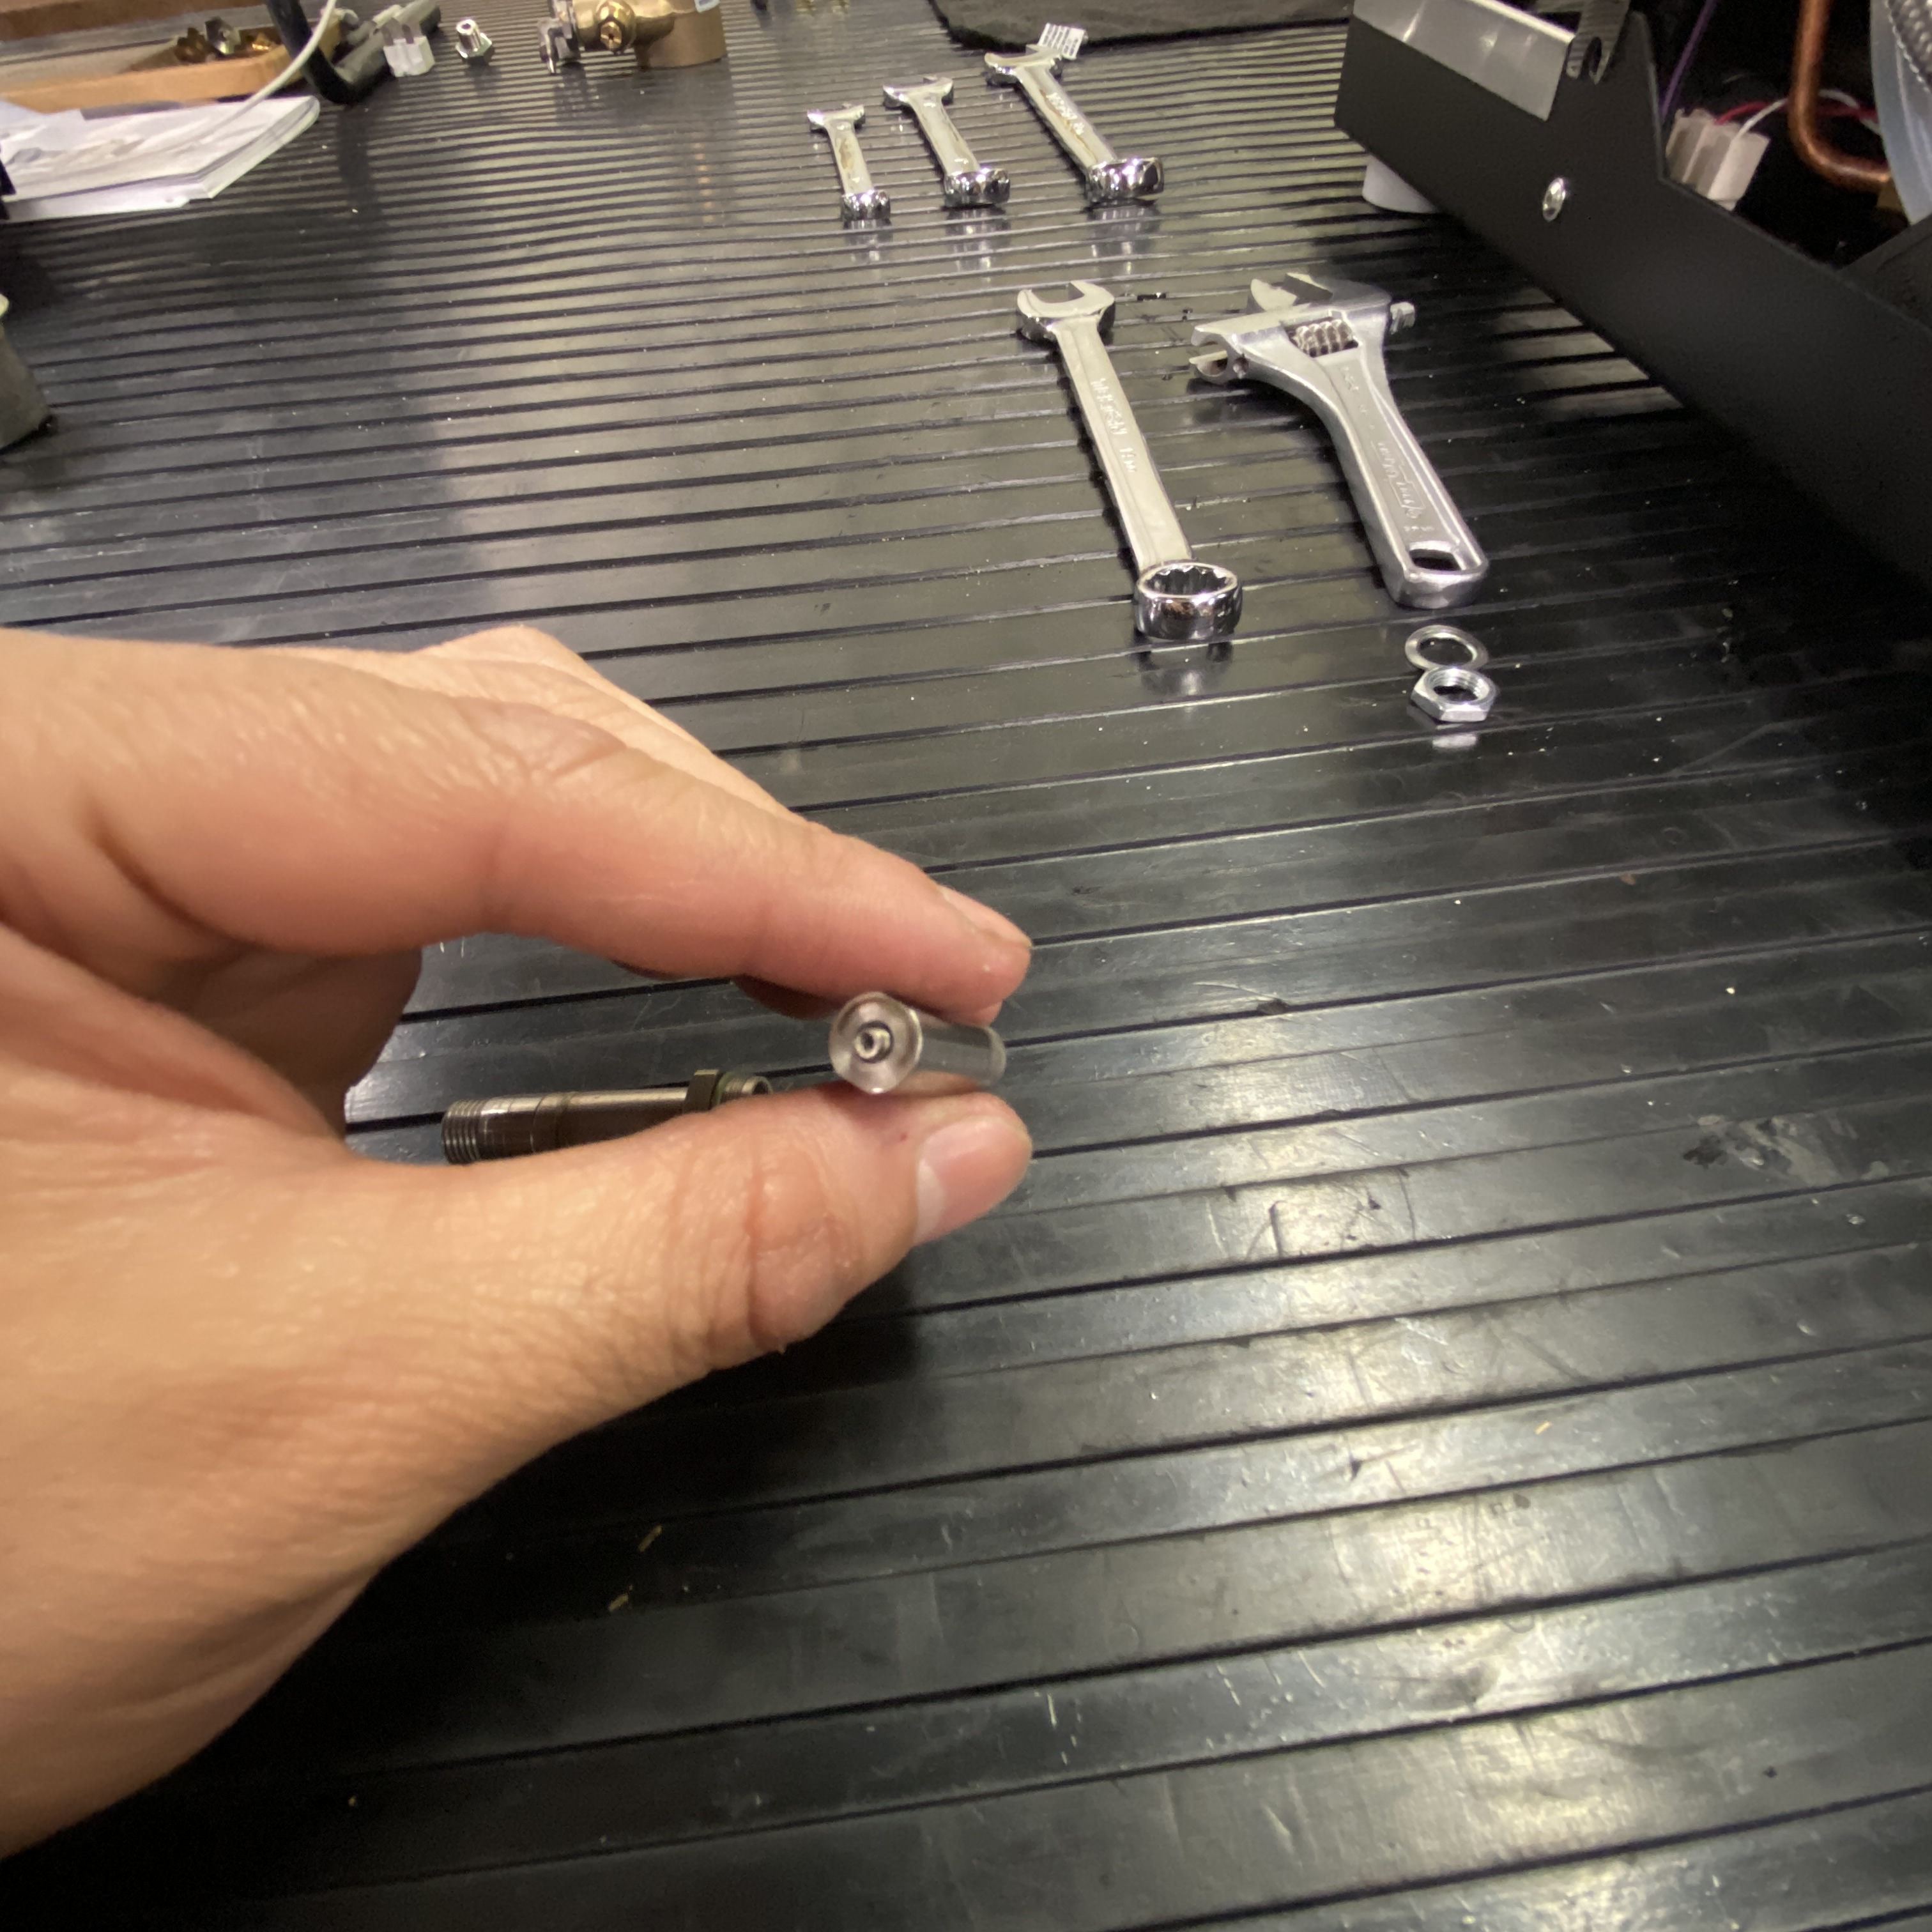
11. Reassemble the fill solenoid by following these steps in reverse, replace any parts that need replacing.