LUCCA X58 Cleaning/Replacing the Expansion Valve Seat GasketUpdated 5 months ago
Tools Needed:
- Philips head screw driver
- Flat-head screwdriver
- Long tweezers or pliers
-Molykote
-Portafilter with blank basket
Parts Needed:
Replacement expansion valve seat gasket
Remove the panels from the machine.
1. The expansion valve is located on the interior right side of the machine. Using a Philips head screwdriver, remove the screw on the side of the valve. 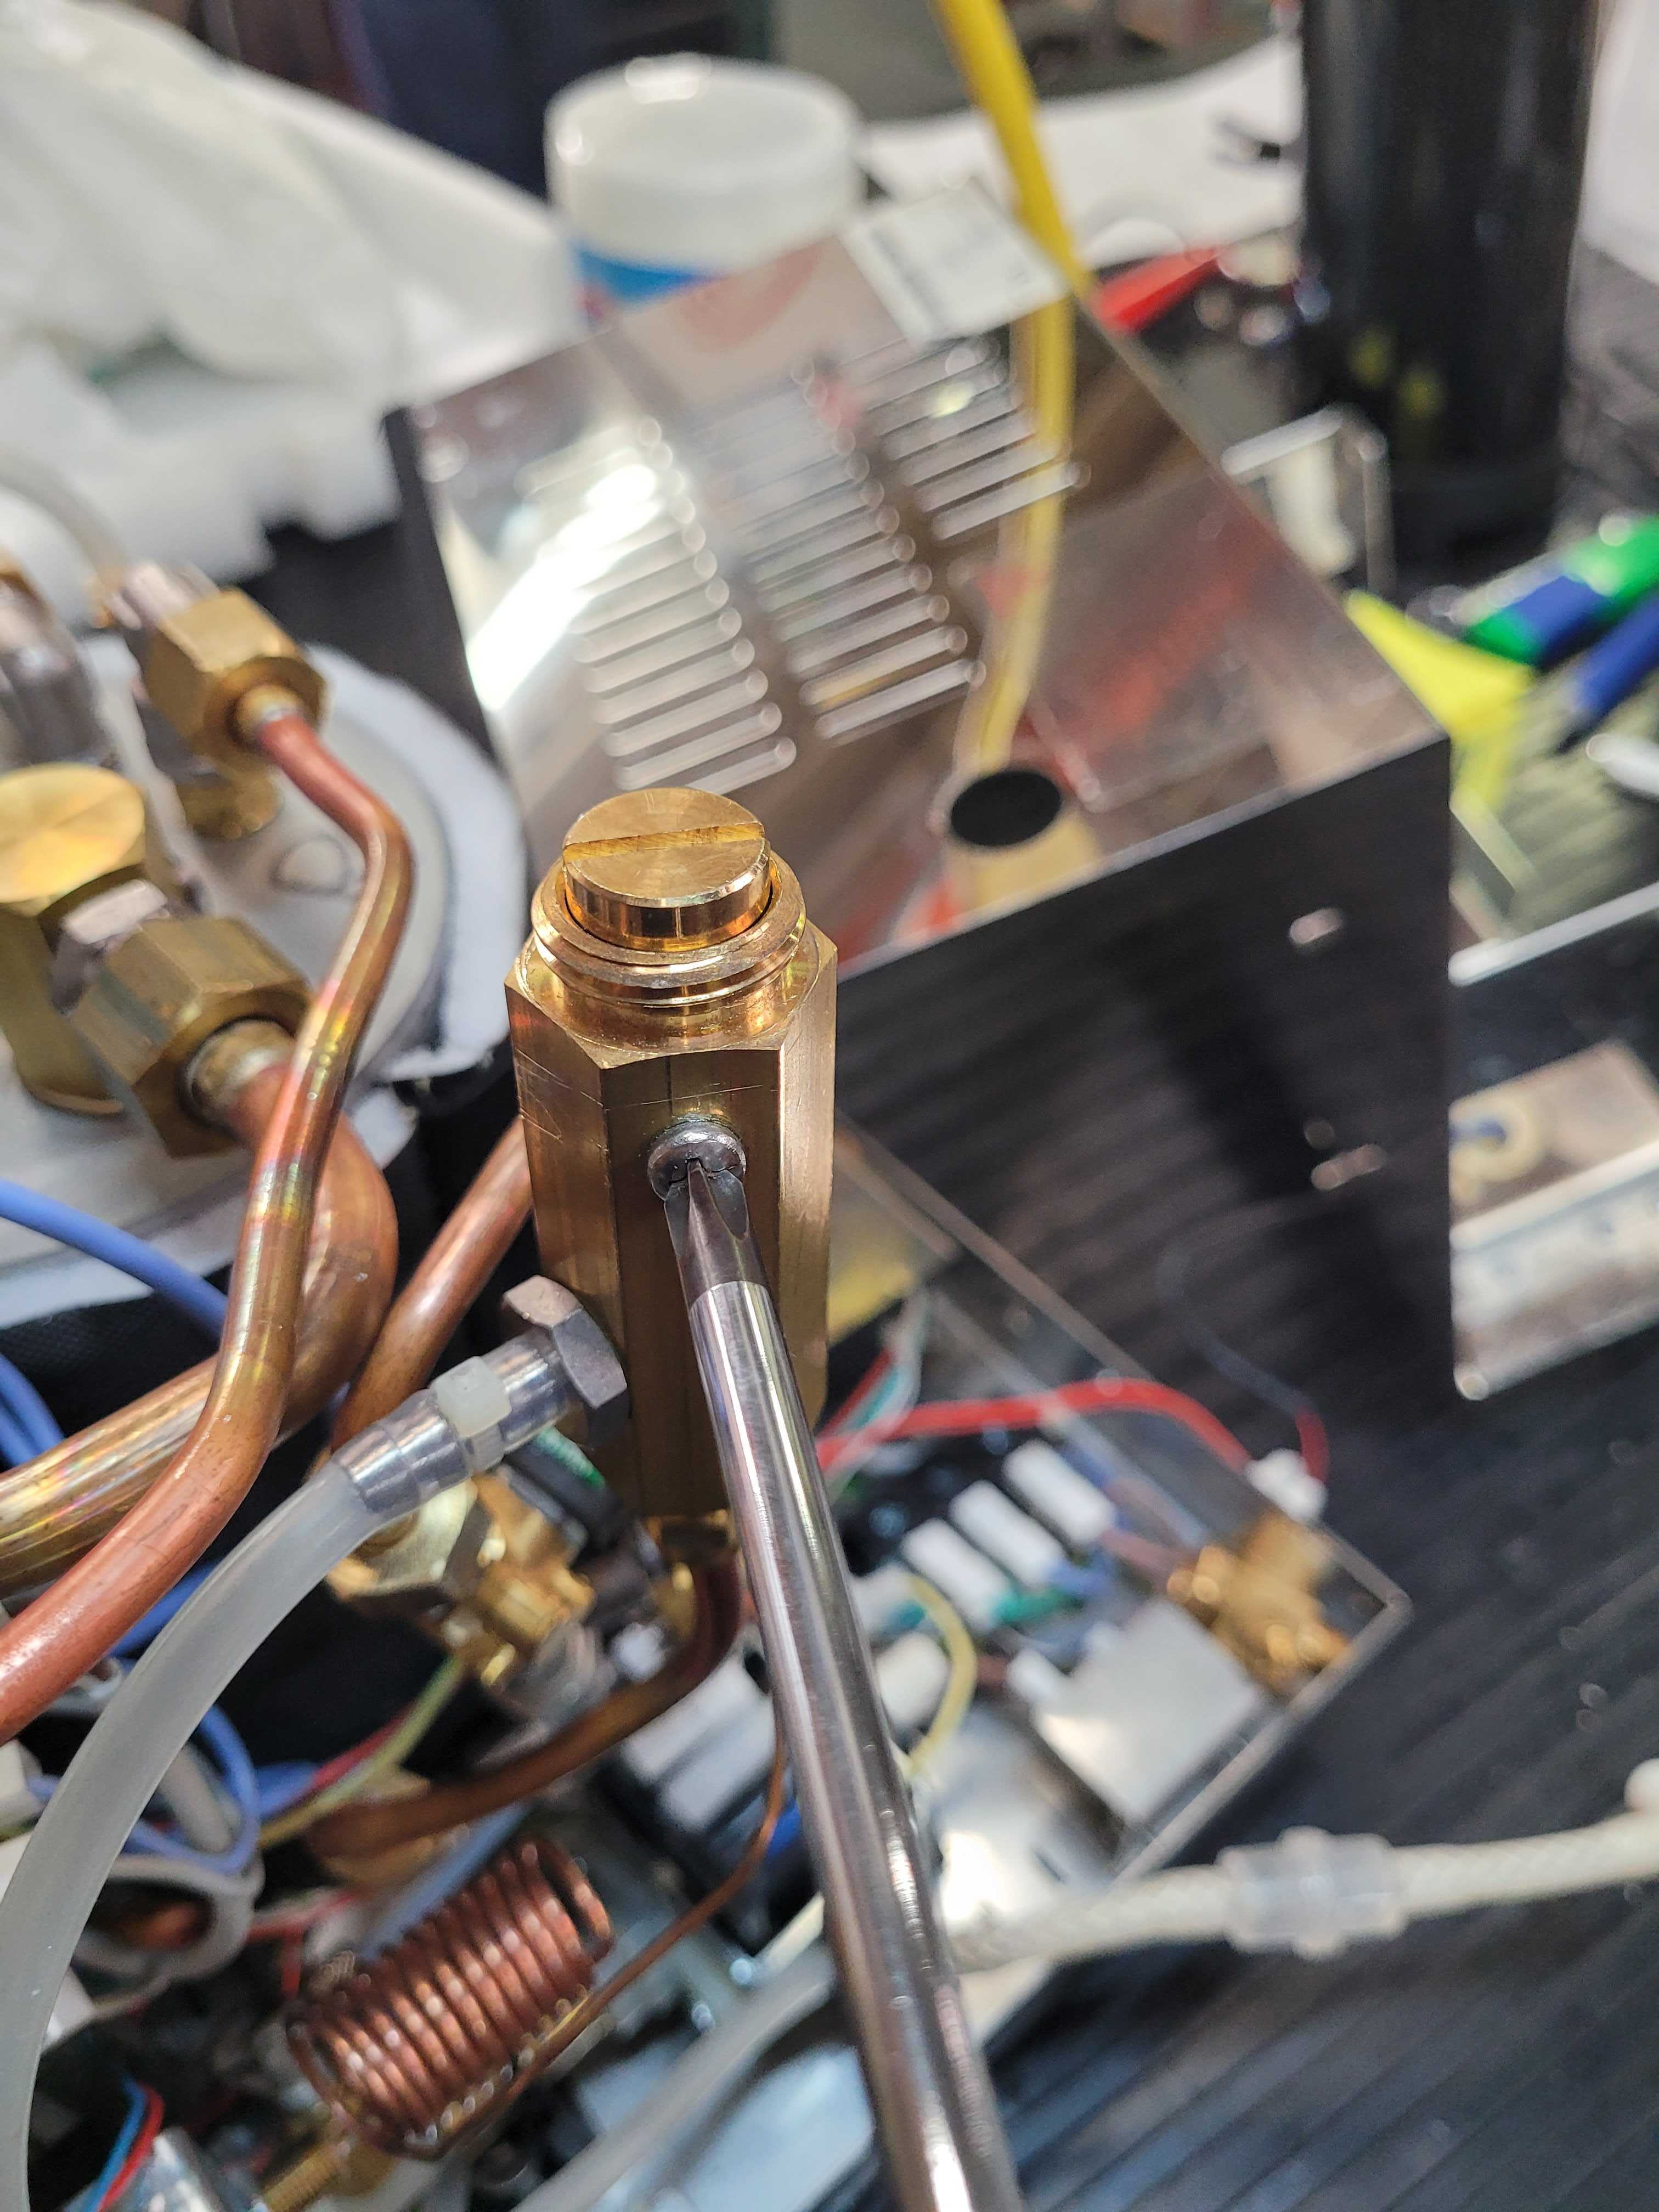
2. Using a flat head screwdriver, remove the top cap of the expansion valve by twisting to the left. 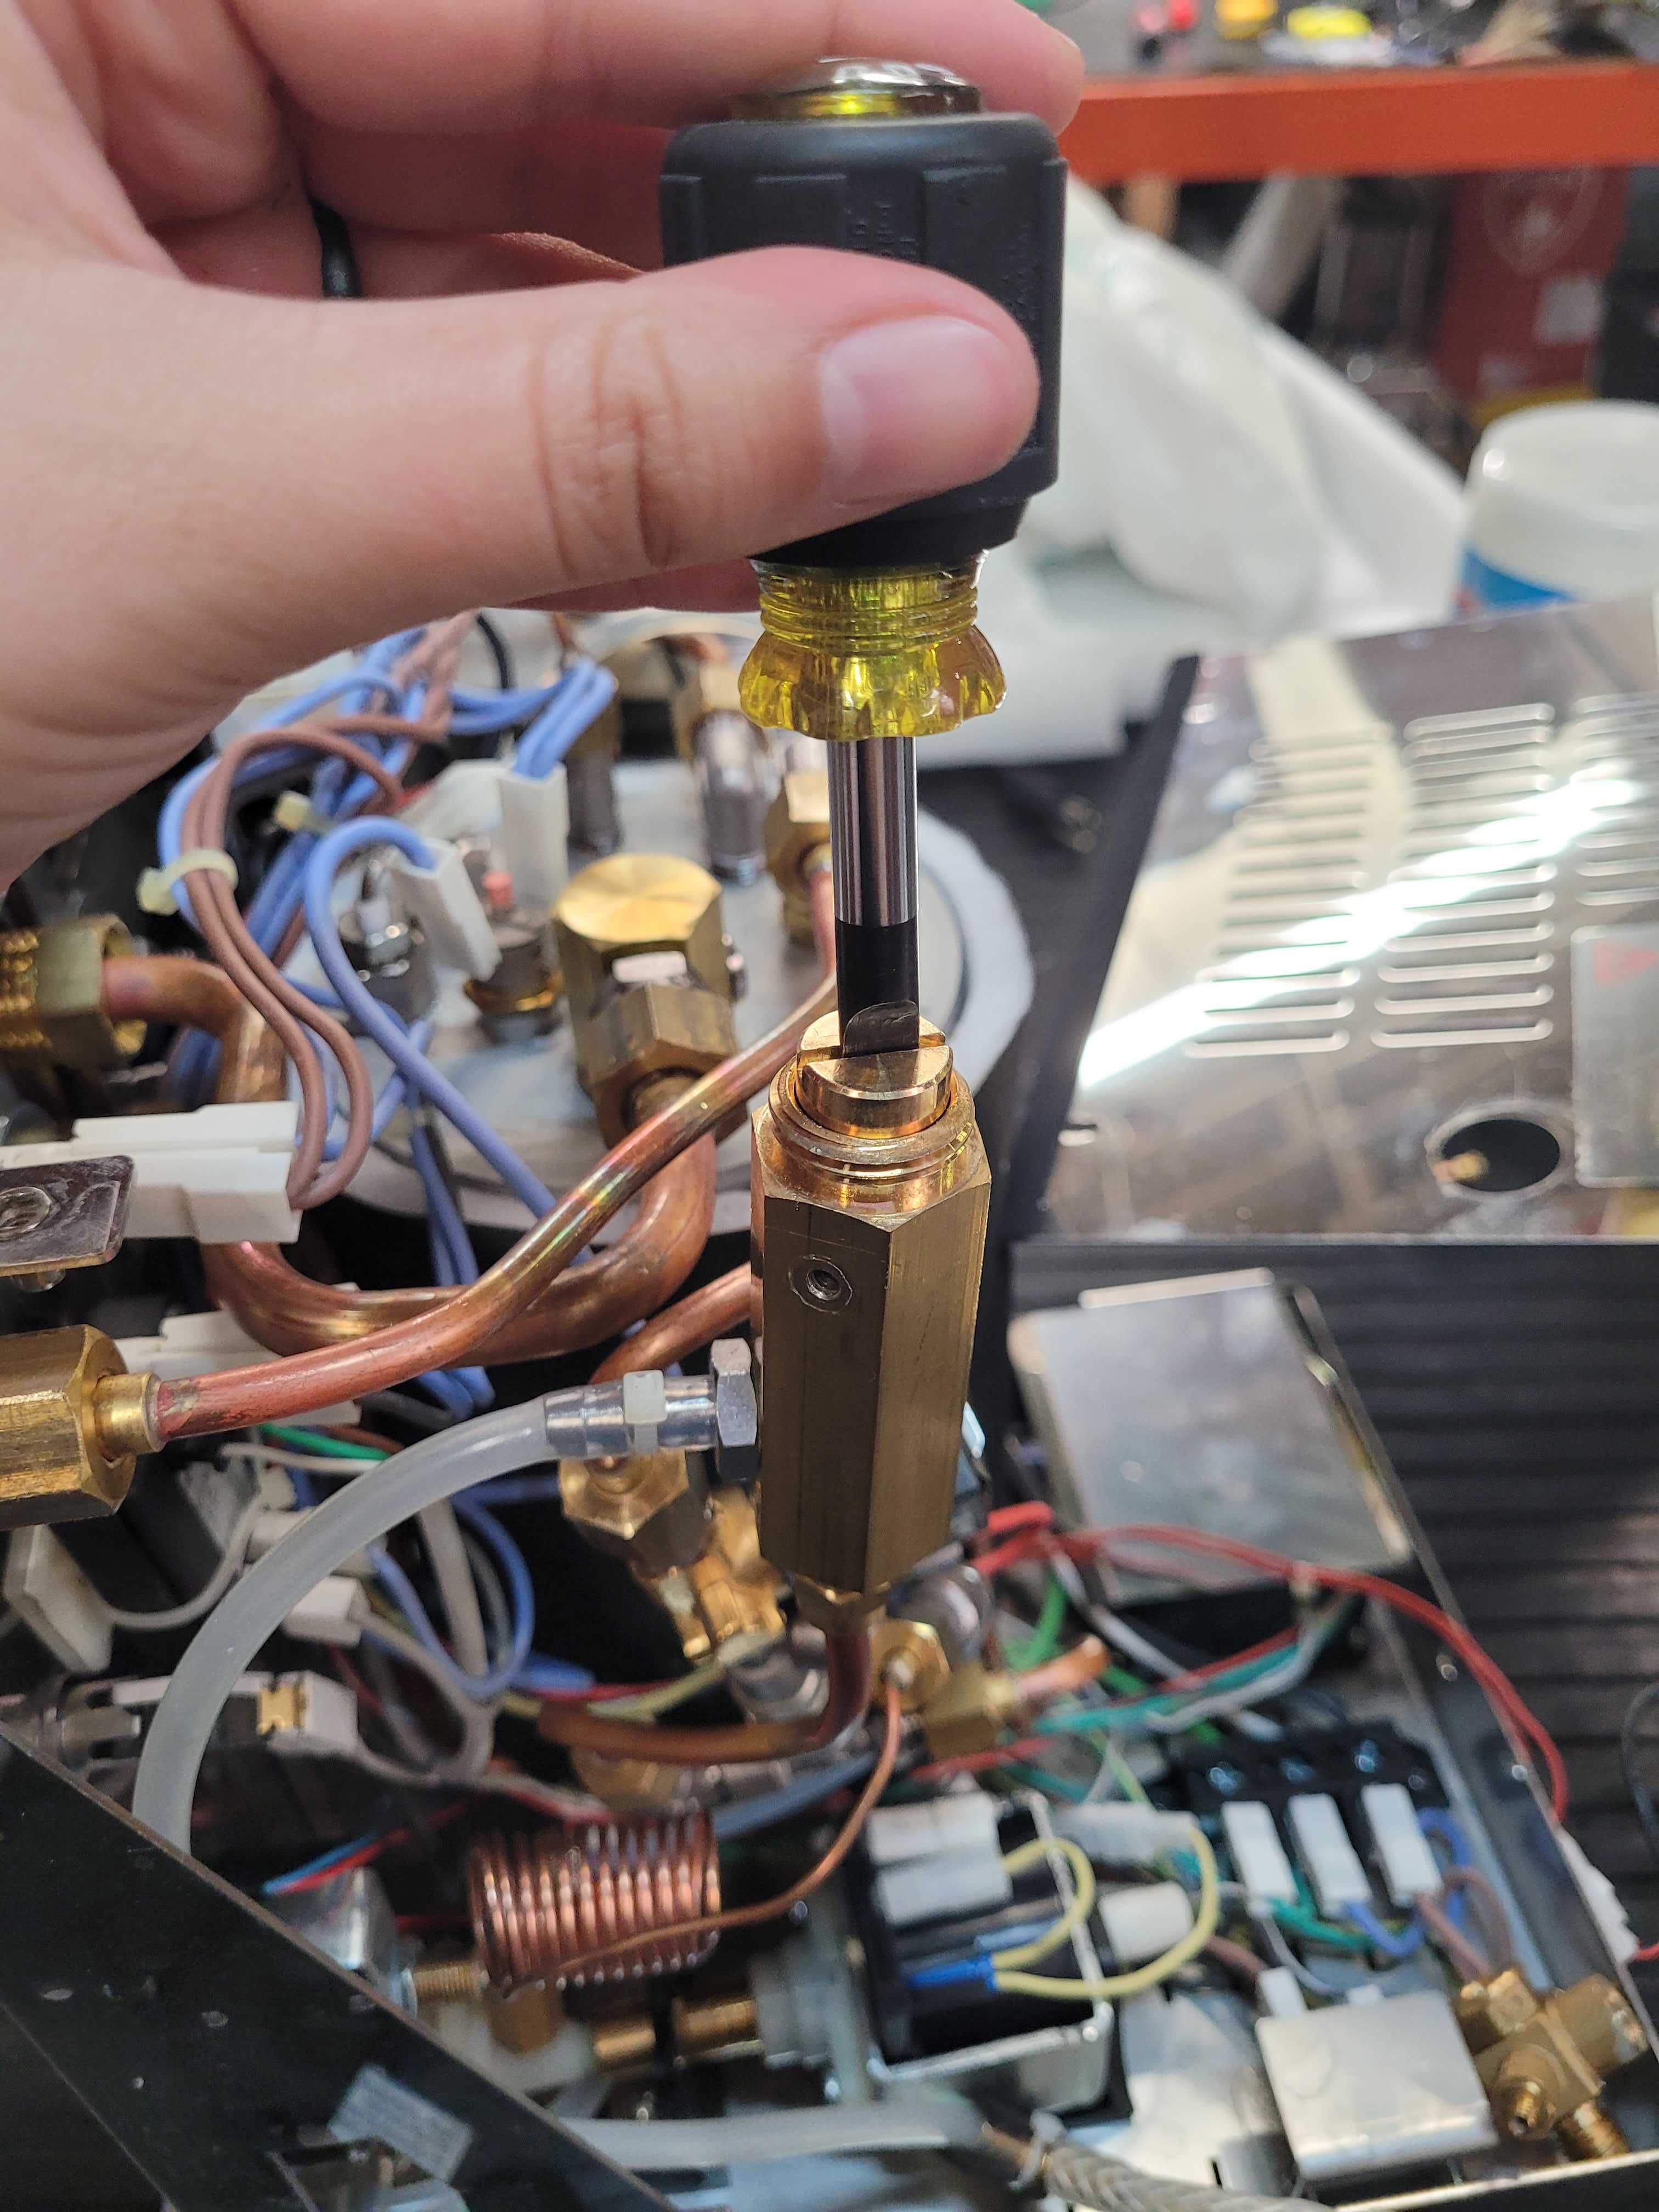
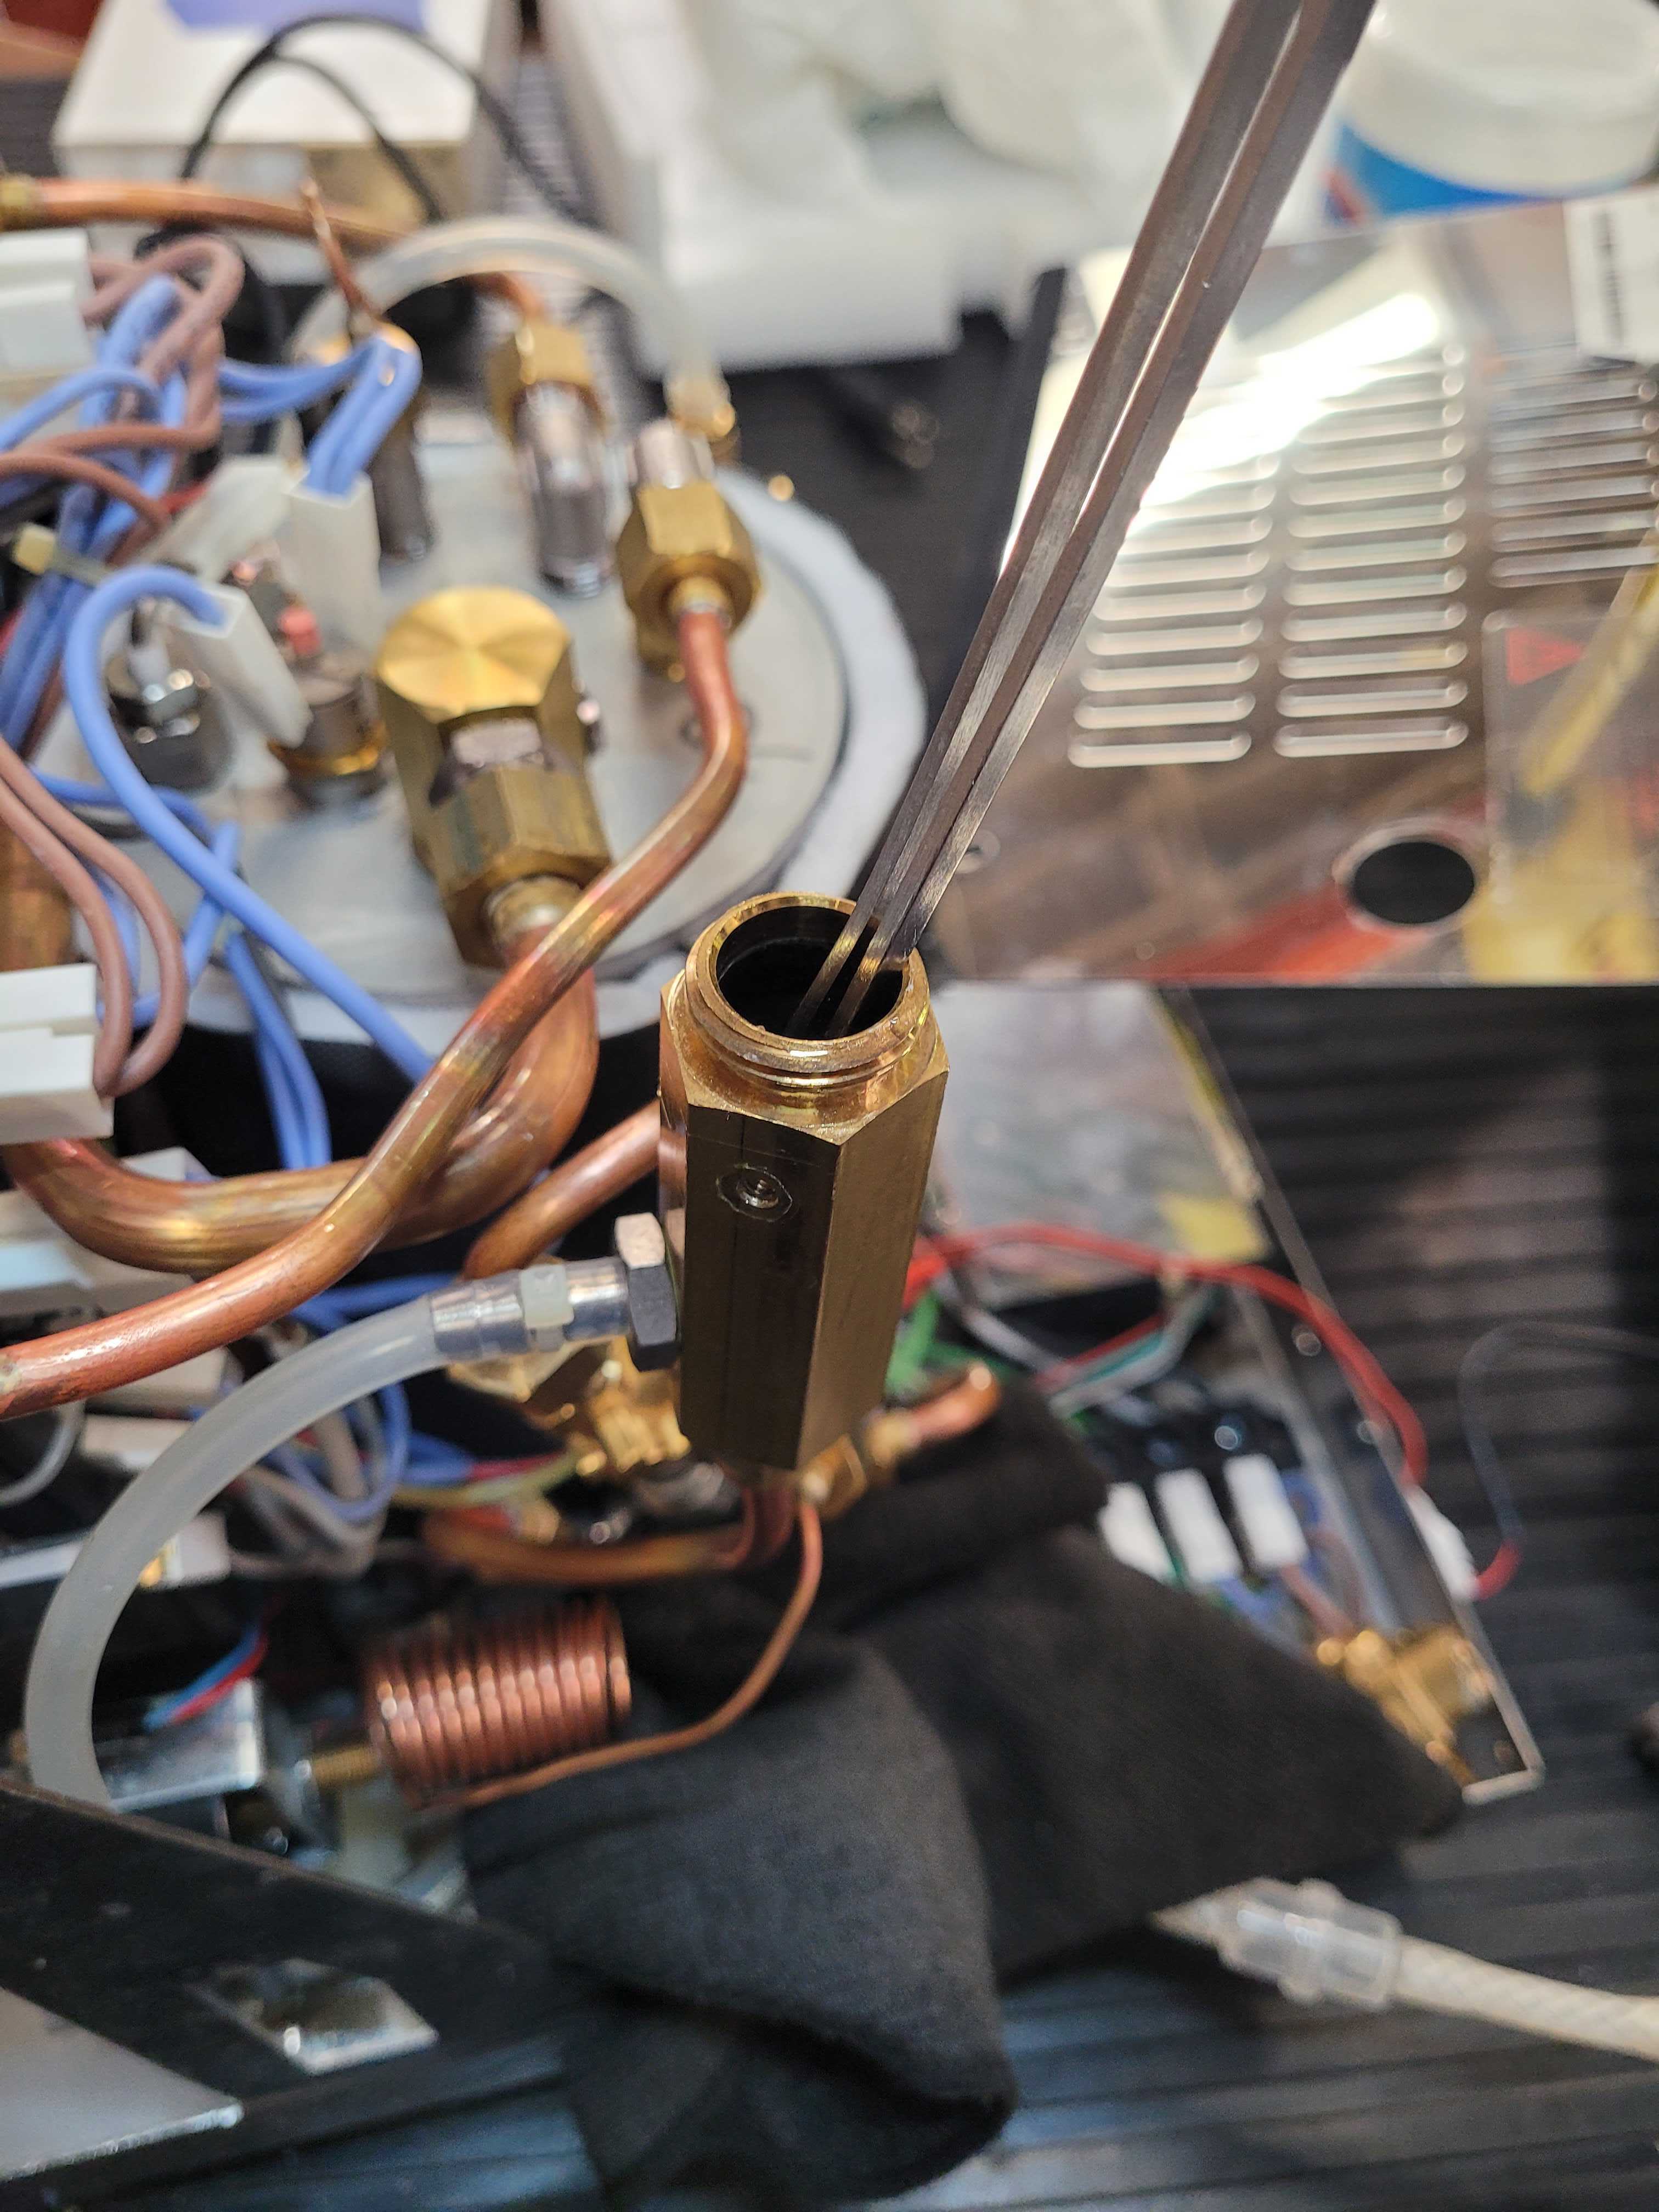
3. Remove the spring and expansion valve seat gasket using a pair of long tweezers or pliers.
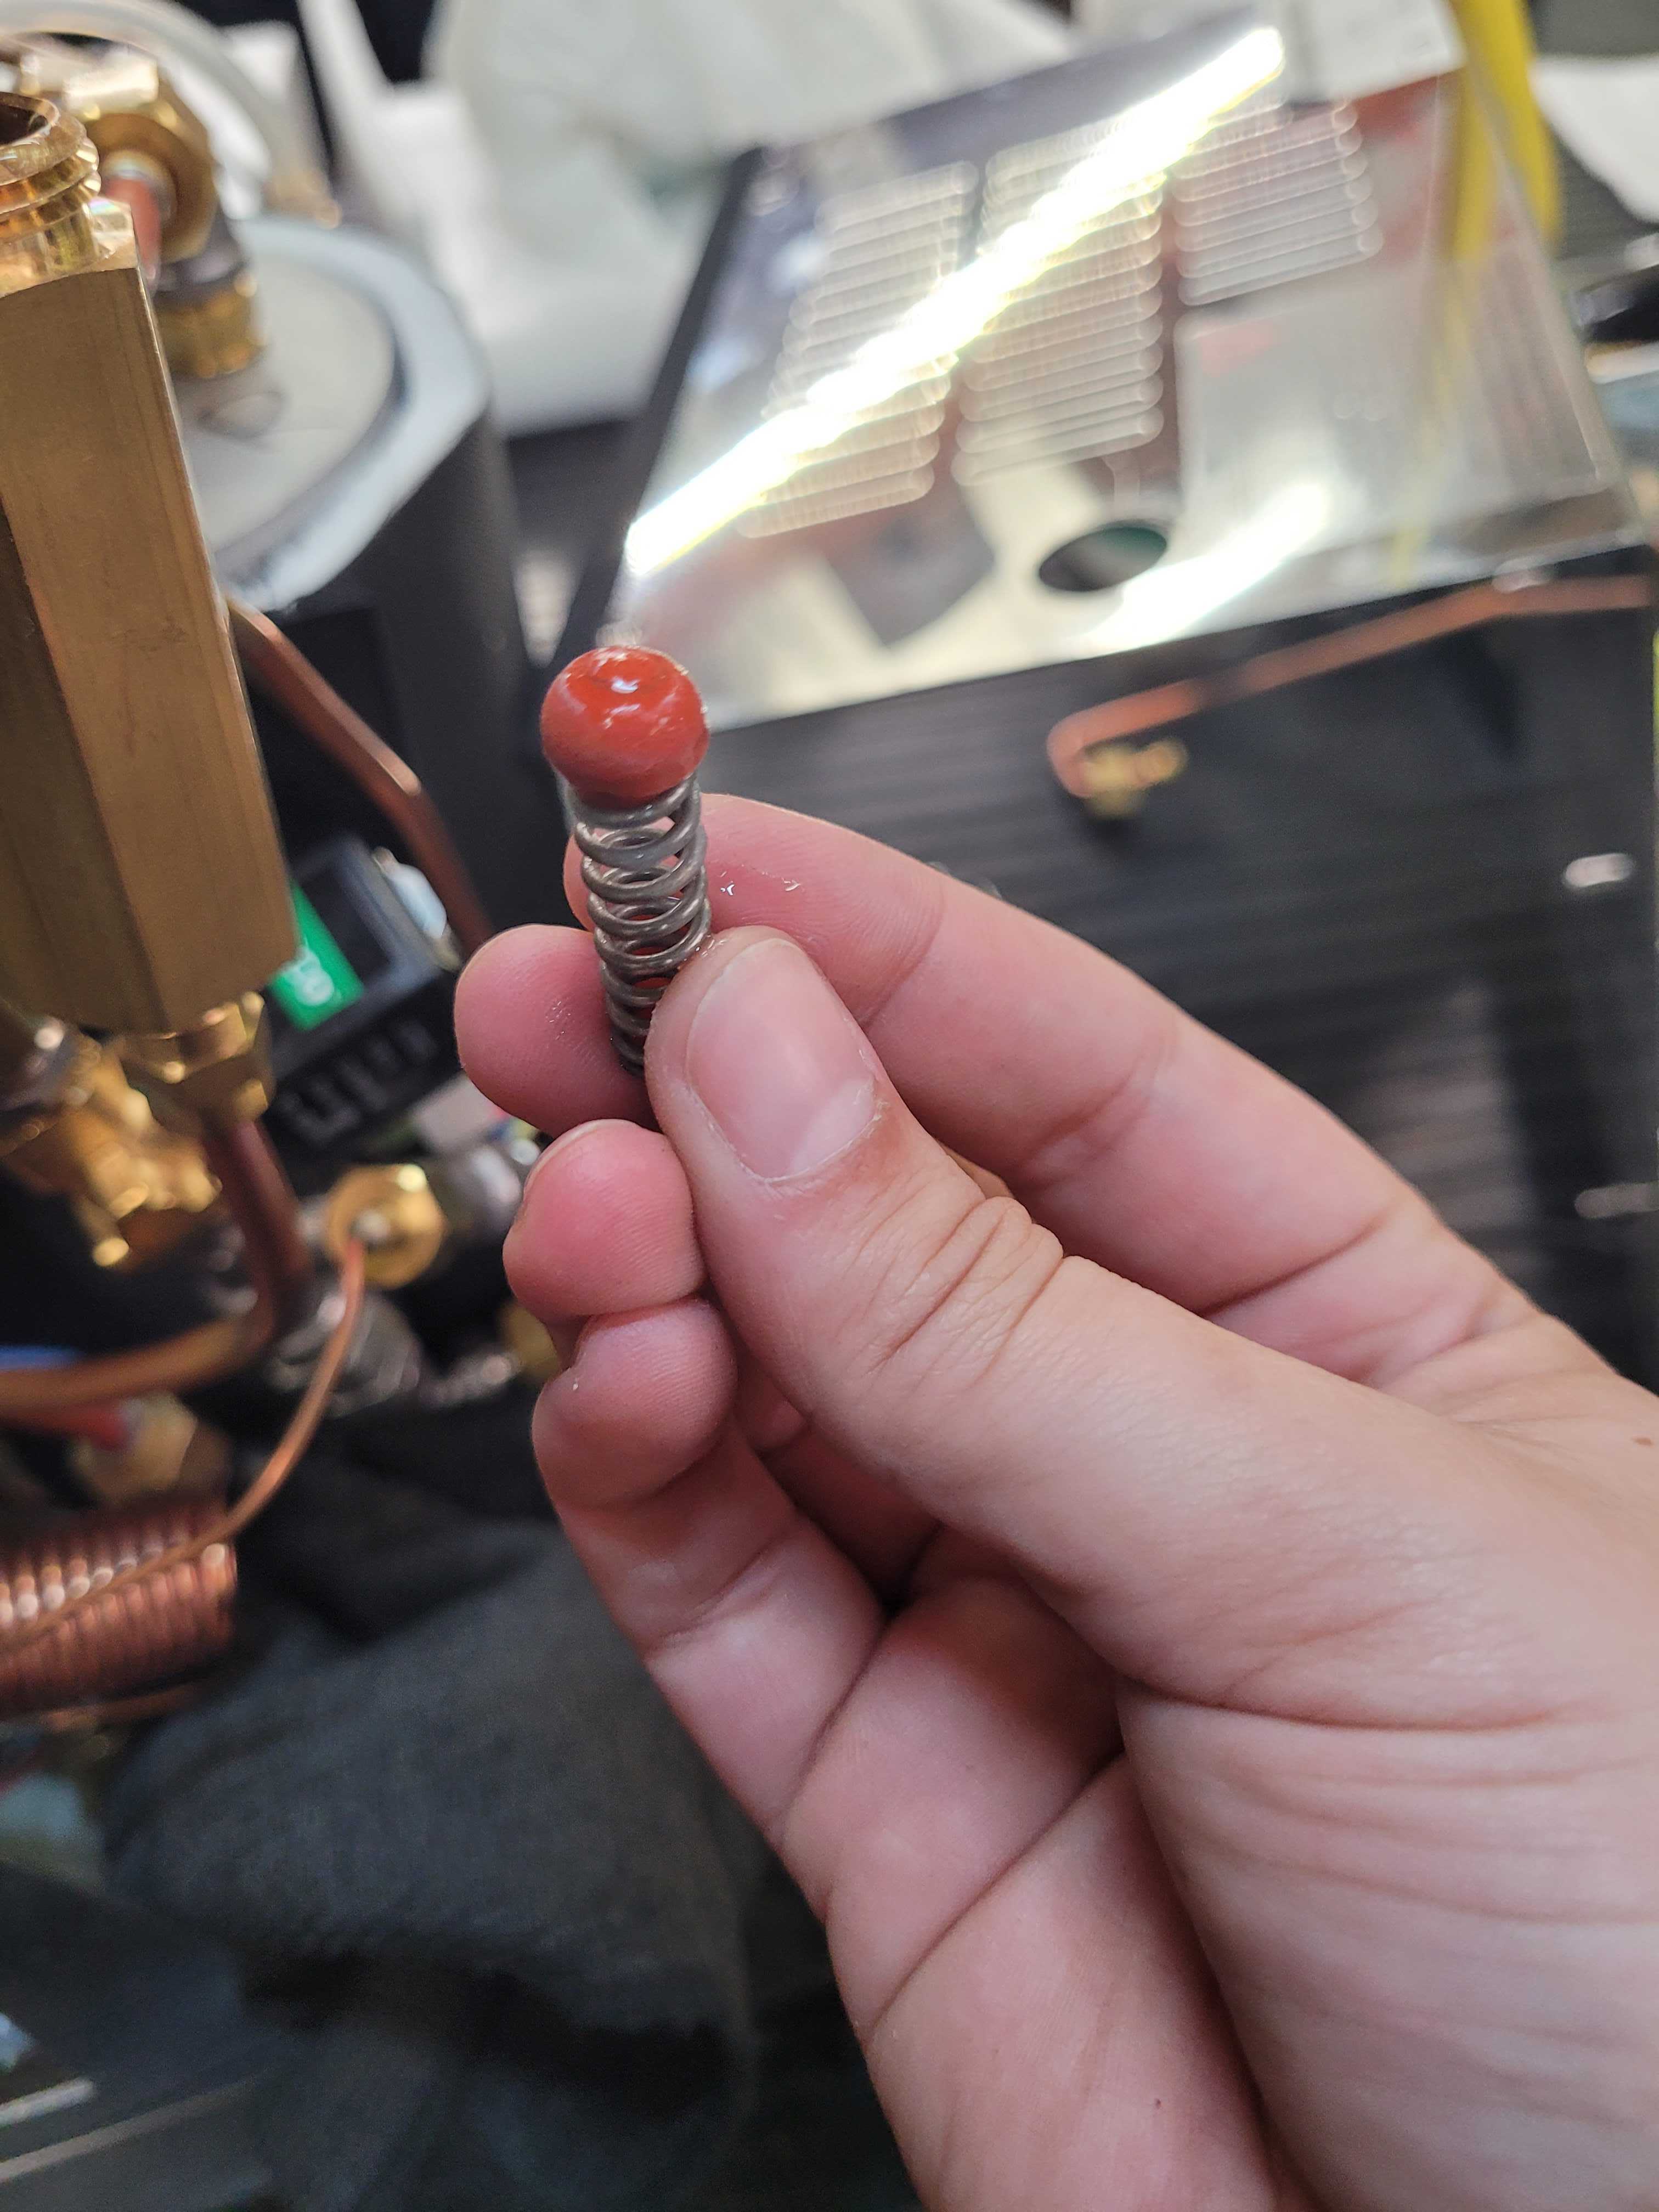
4. Inspect the seat gasket for damage and replace if applicable. In the picture above, the red seat gasket is still viable, it only needs to be wiped clean and lubricated with Molykote before reinstalling.
5. Re-install the valve seat gasket, spring, and adjustment cap into the expansion valve body. Use the flat head screw driver to turn the adjustment cap clockwise until it reaches its maximum adjustment, then back out two full turns. It should match the original photo. Don't forget to re-install the set screw!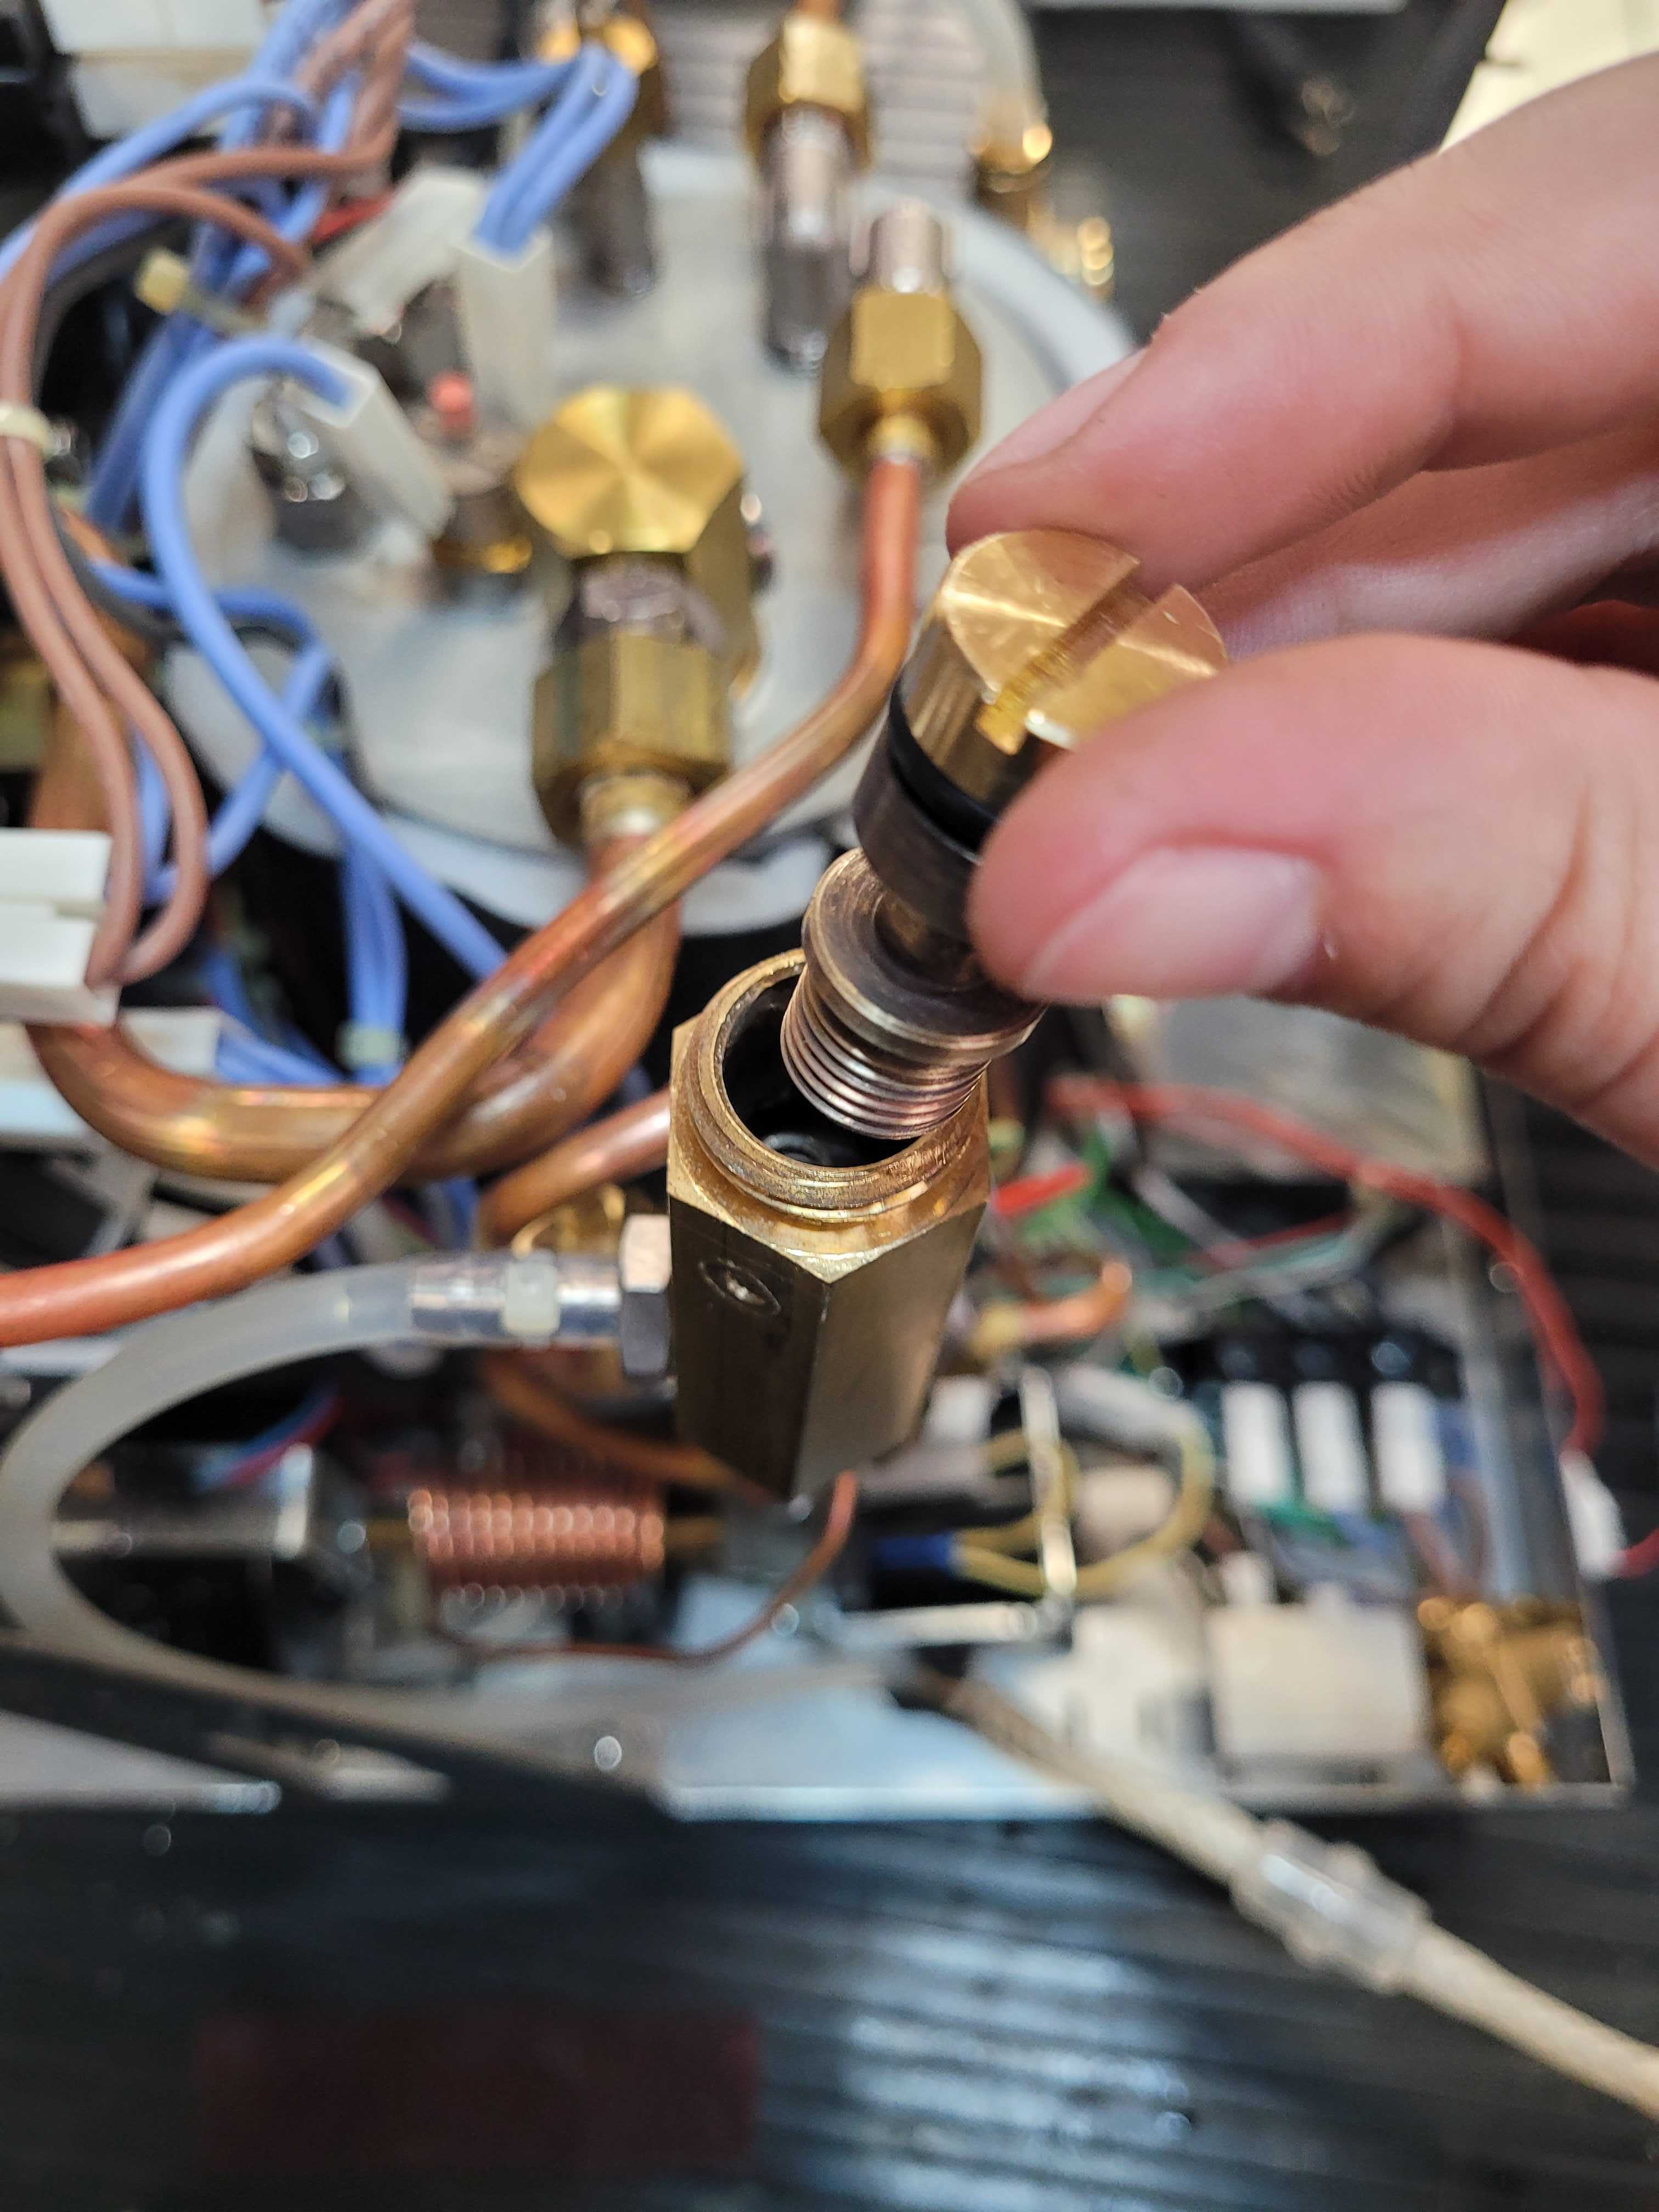
6. Backflush your machine to test the brew pressure using a blank basket. Turn the expansion valve counterclockwise for less pressure, and clockwise for more pressure. Here is video example on how to adjust pressure on the Pro 500 (Skip to 3:30).