LUCCA Solo: Replacing the SSRUpdated 5 months ago
Tools needed:
- Phillips Screwdriver
- Adjustable Wrench
- Remove the panels from your Lucca Solo.
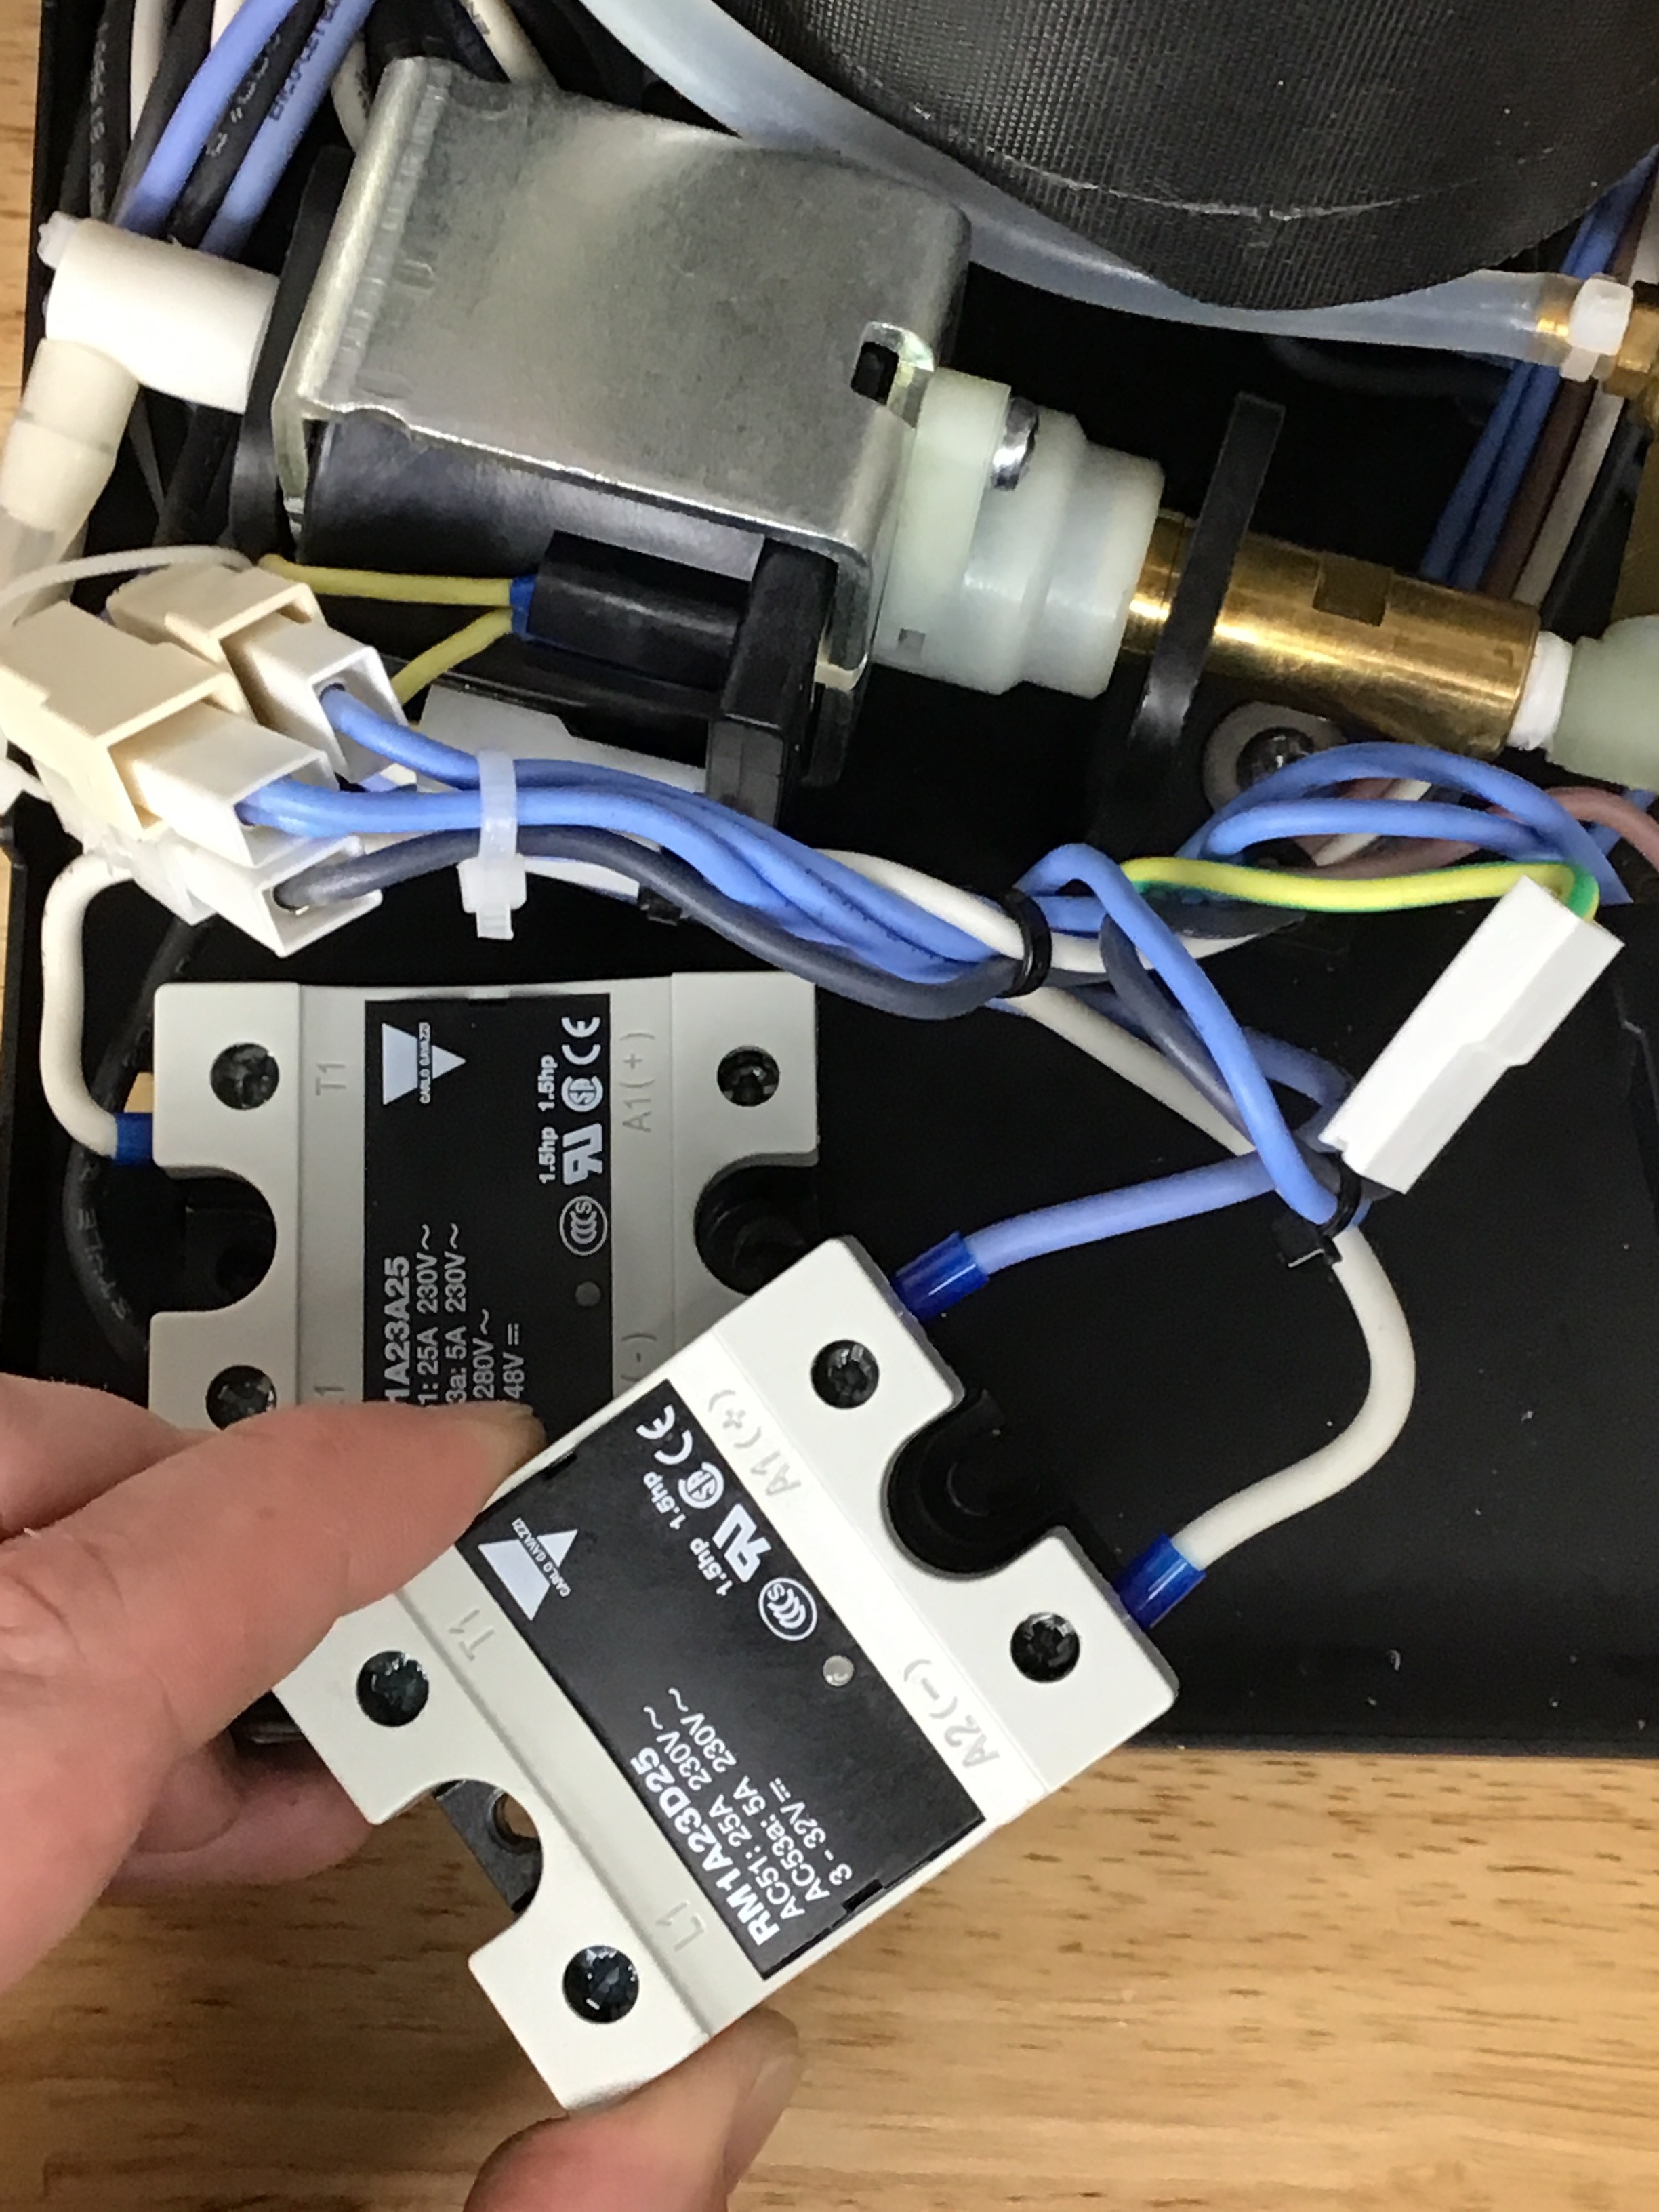
- Locate the SSR at the back of the machine. Notice that each terminal on the SSR is labeled (L1, T1, A1(+), and A2(-)). For the new SSR to function the wires must be connected to the same corresponding terminals on the new SSR.
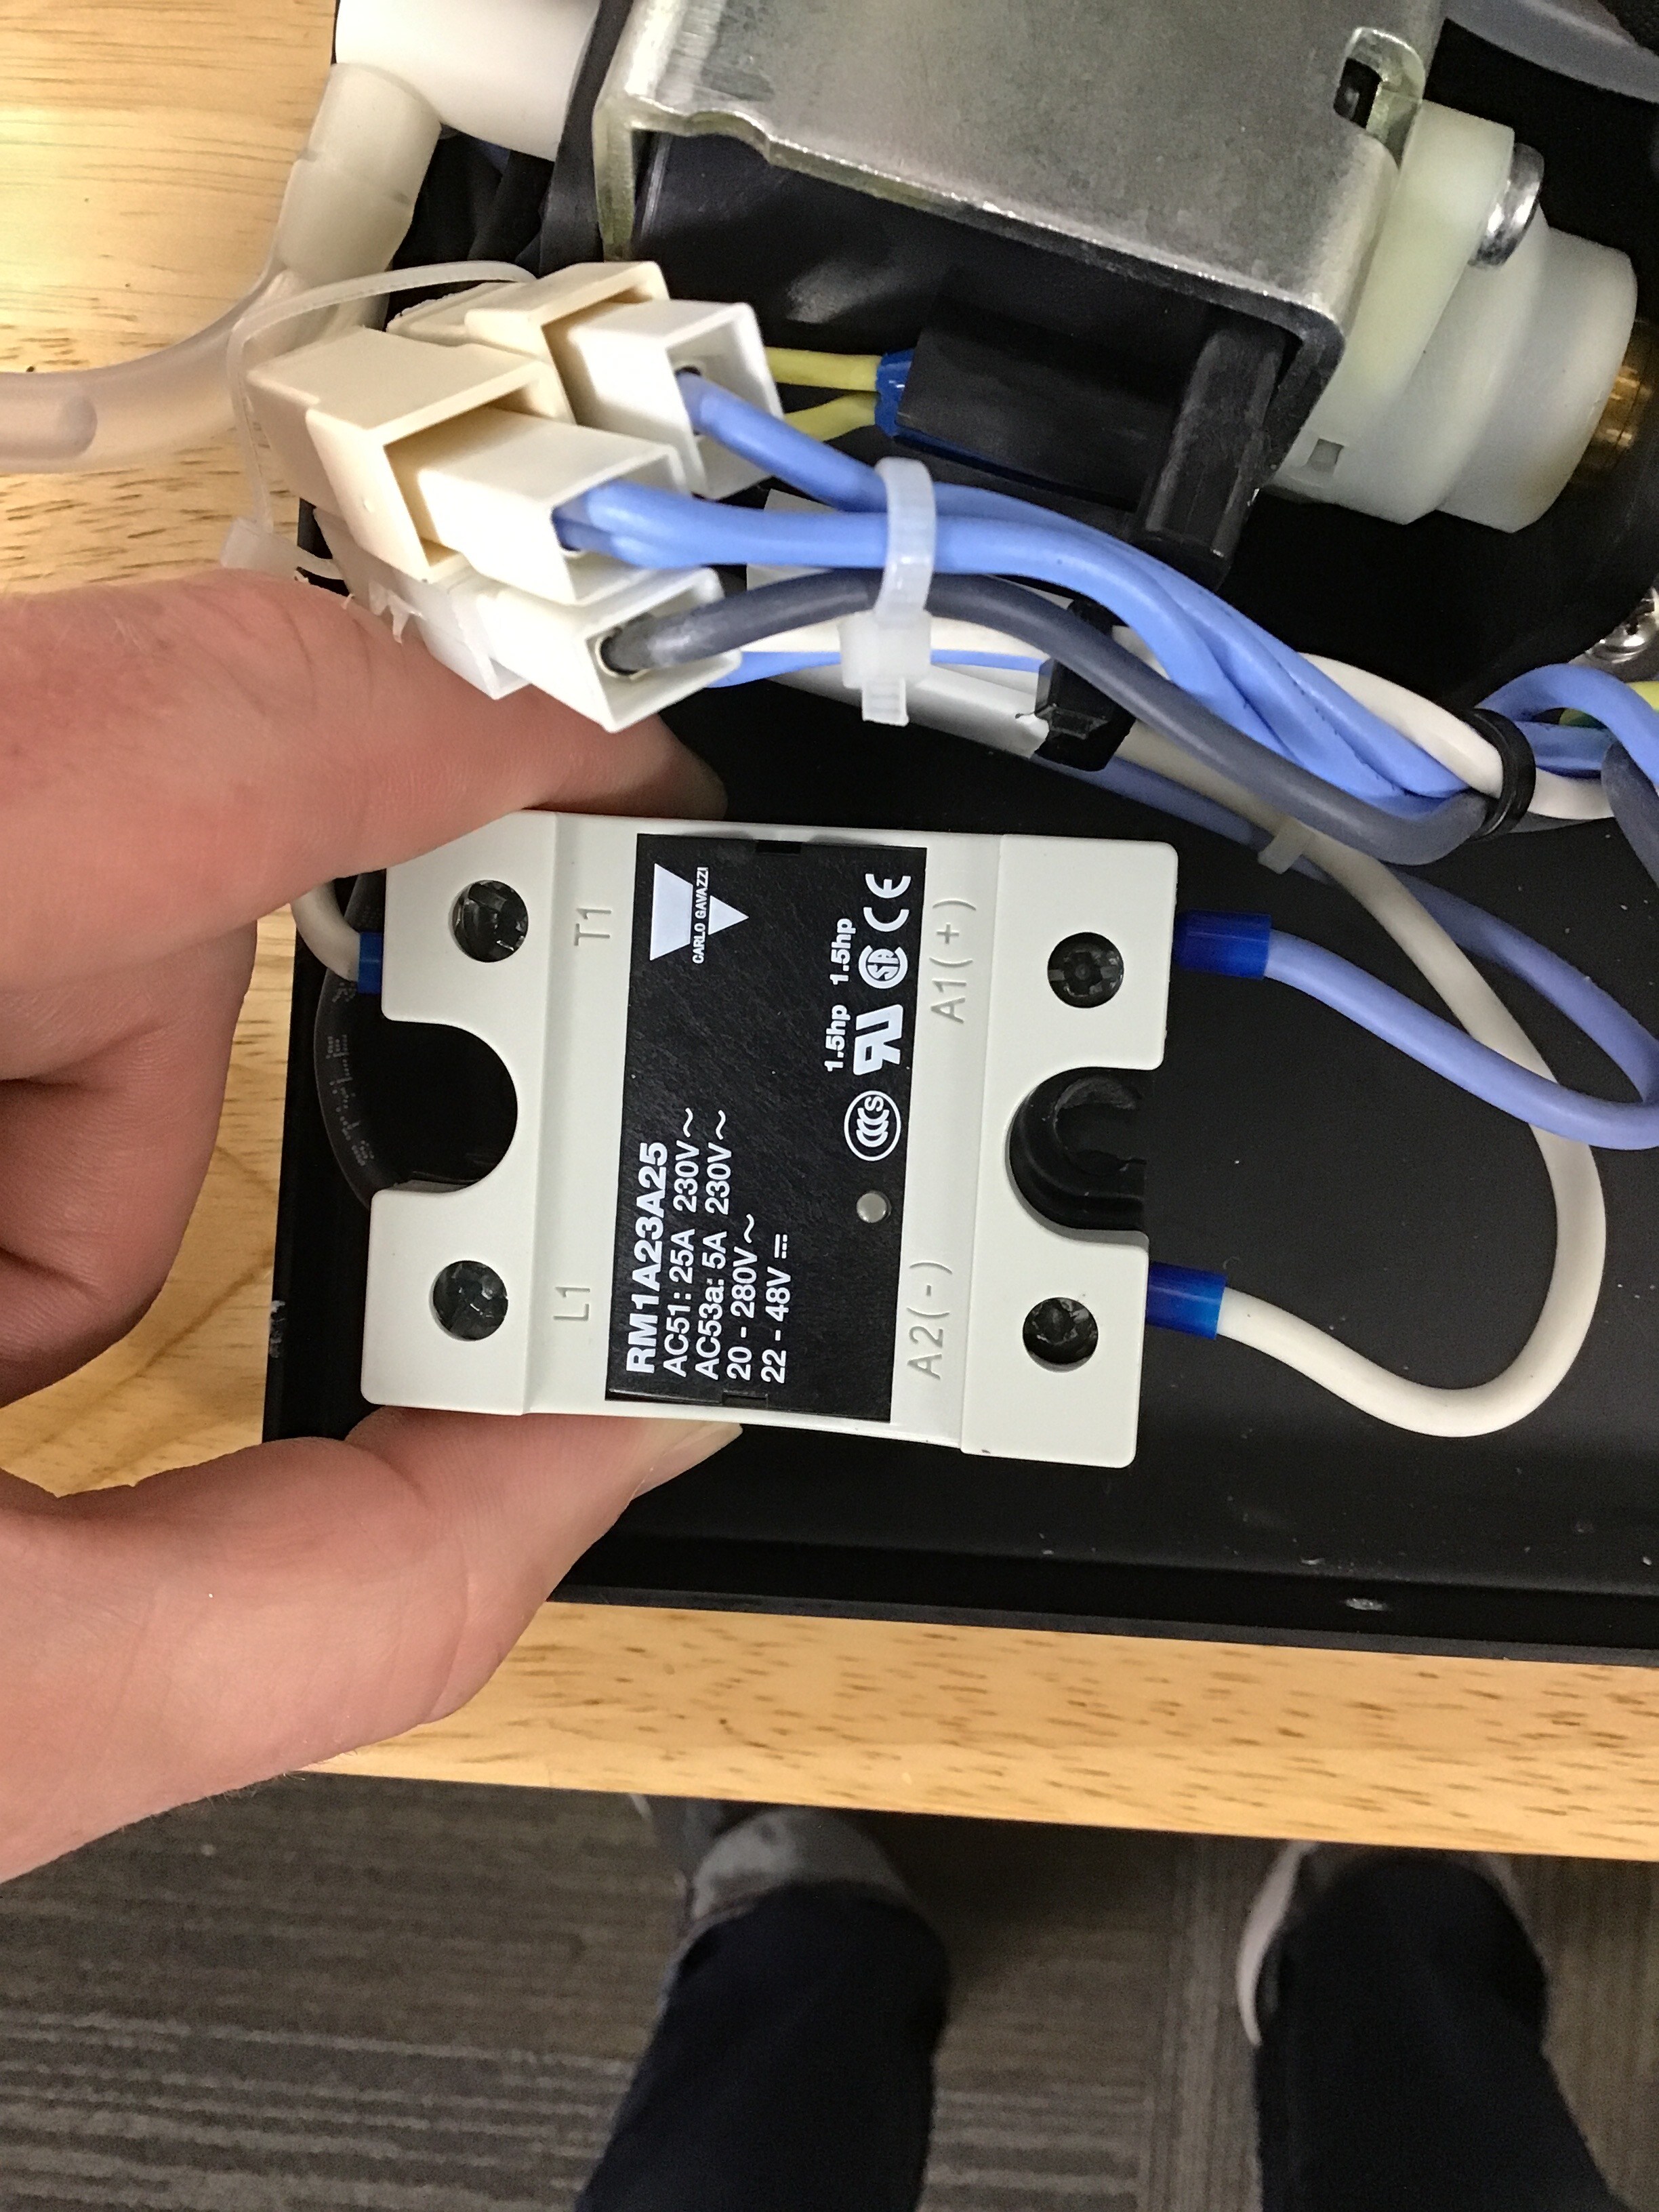
- Remove the 2 Phillips head SSR mounting screws.
.jpg)
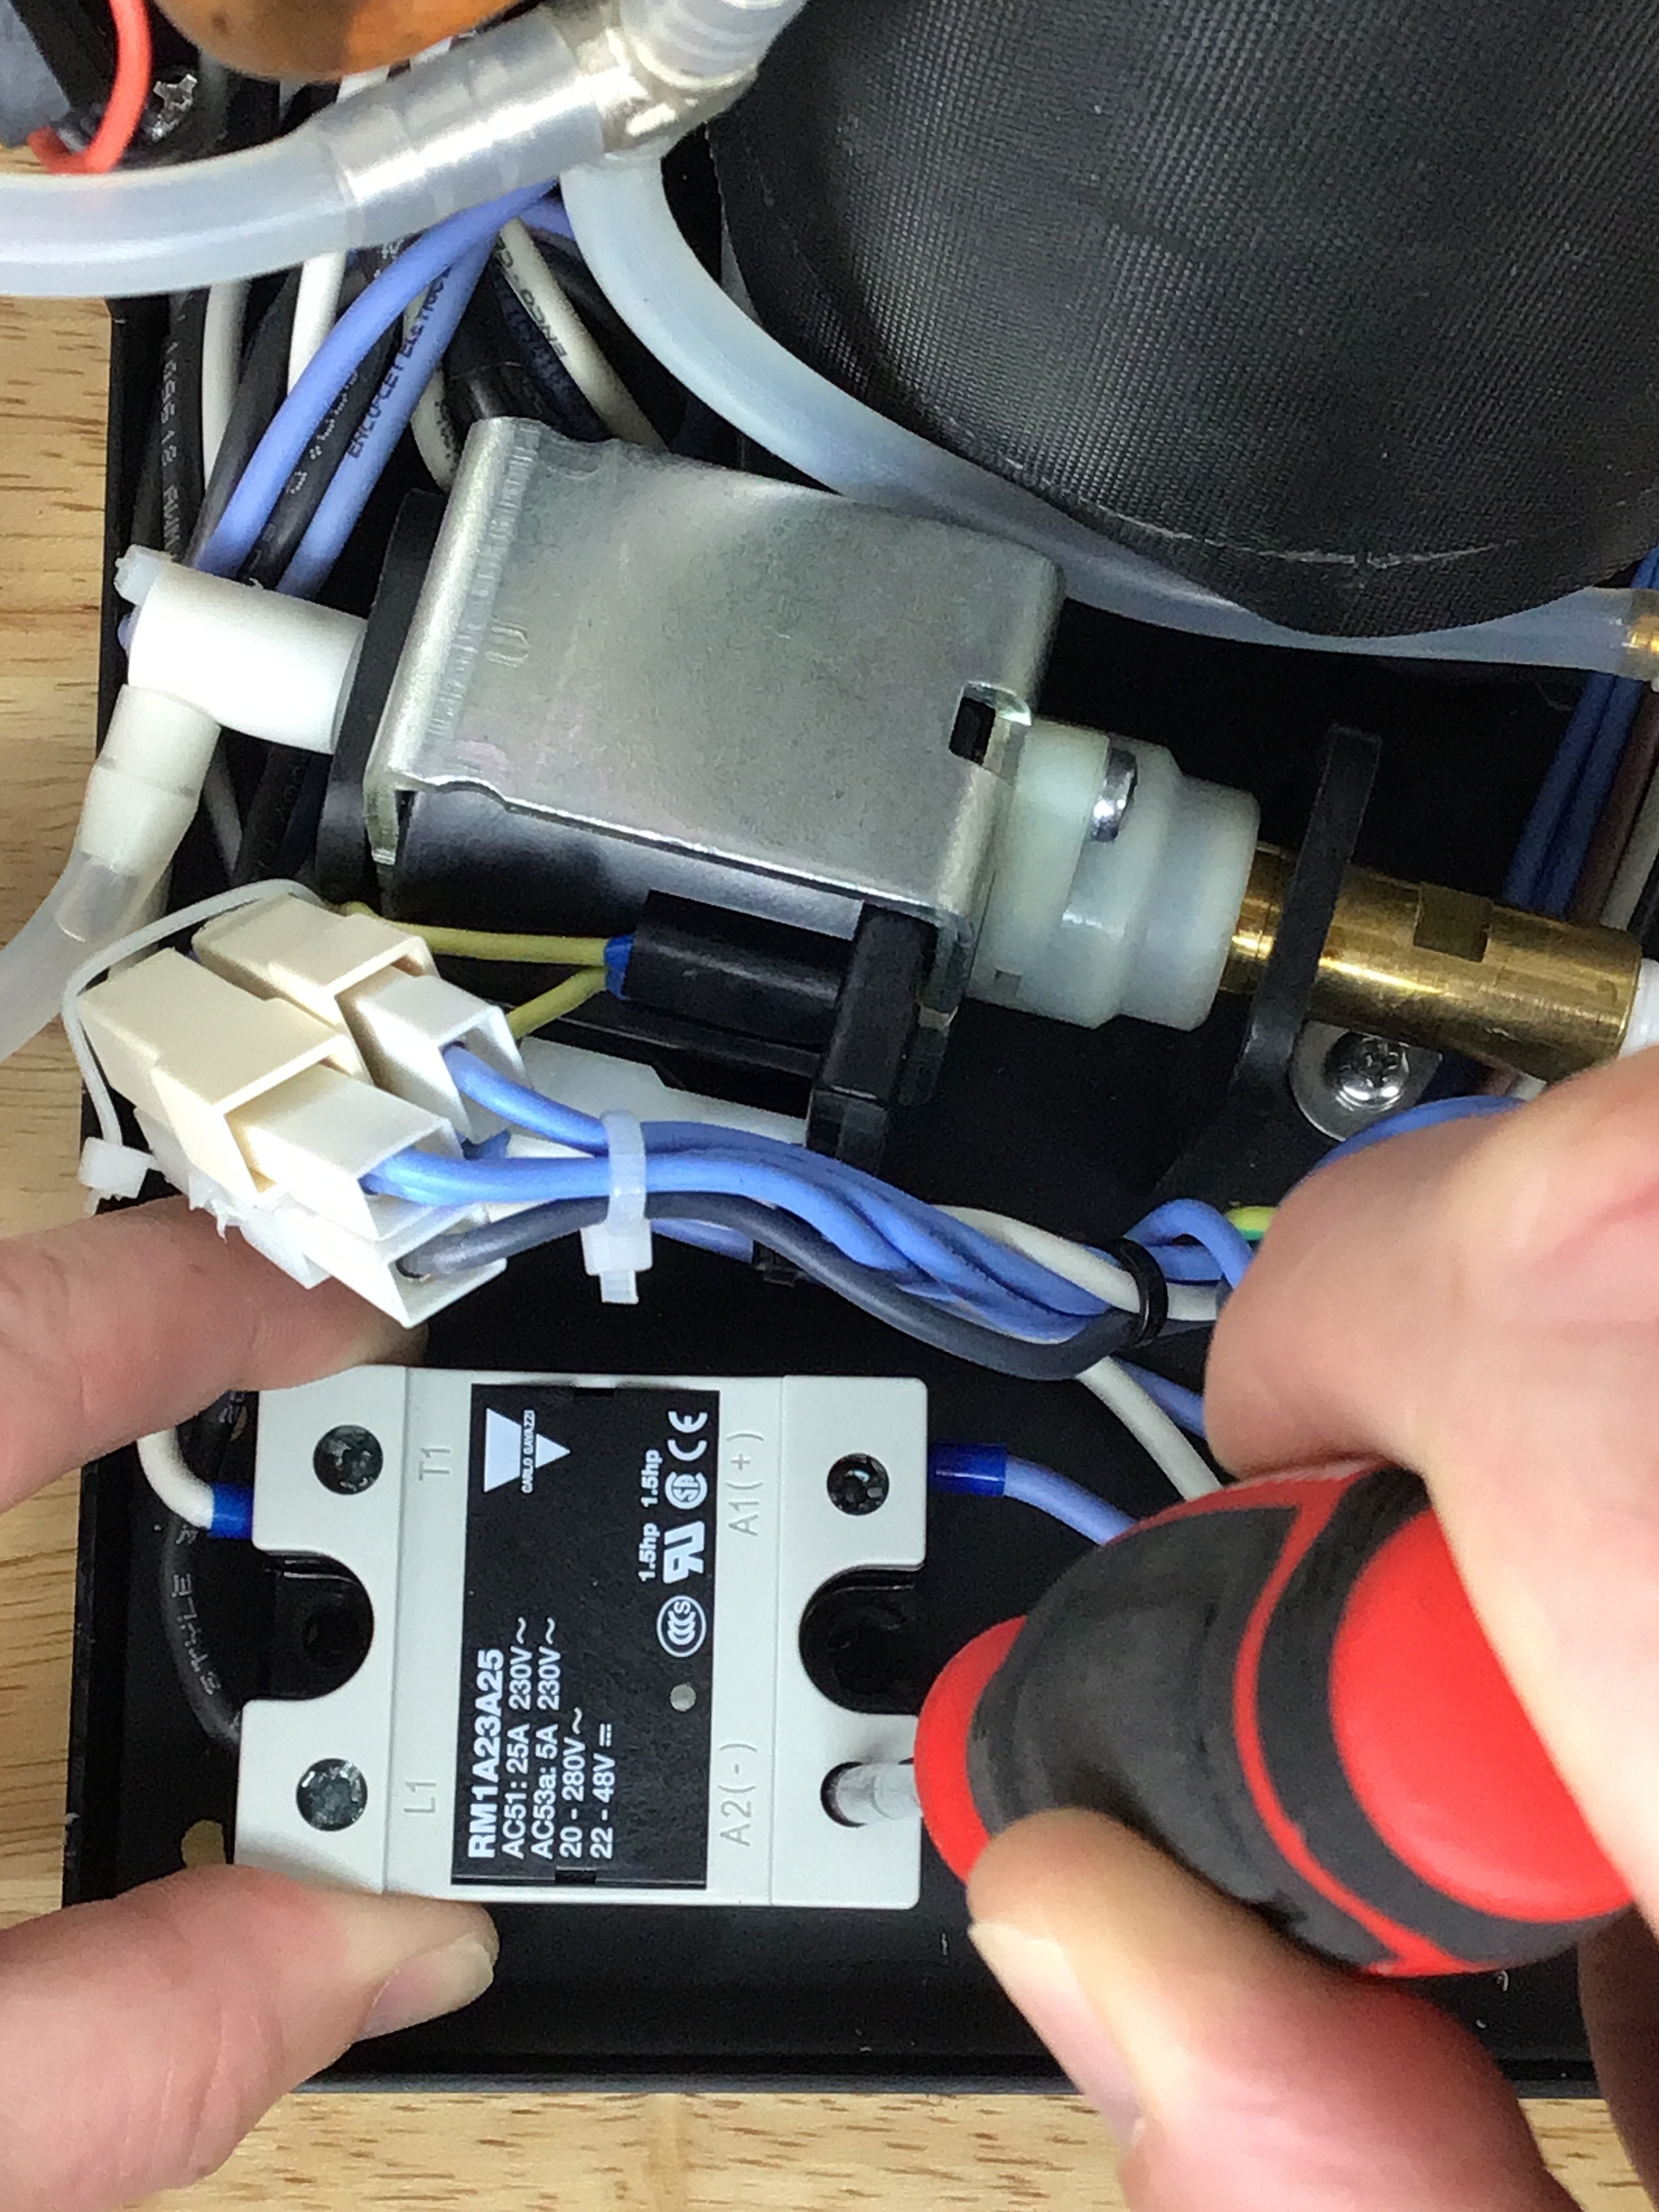
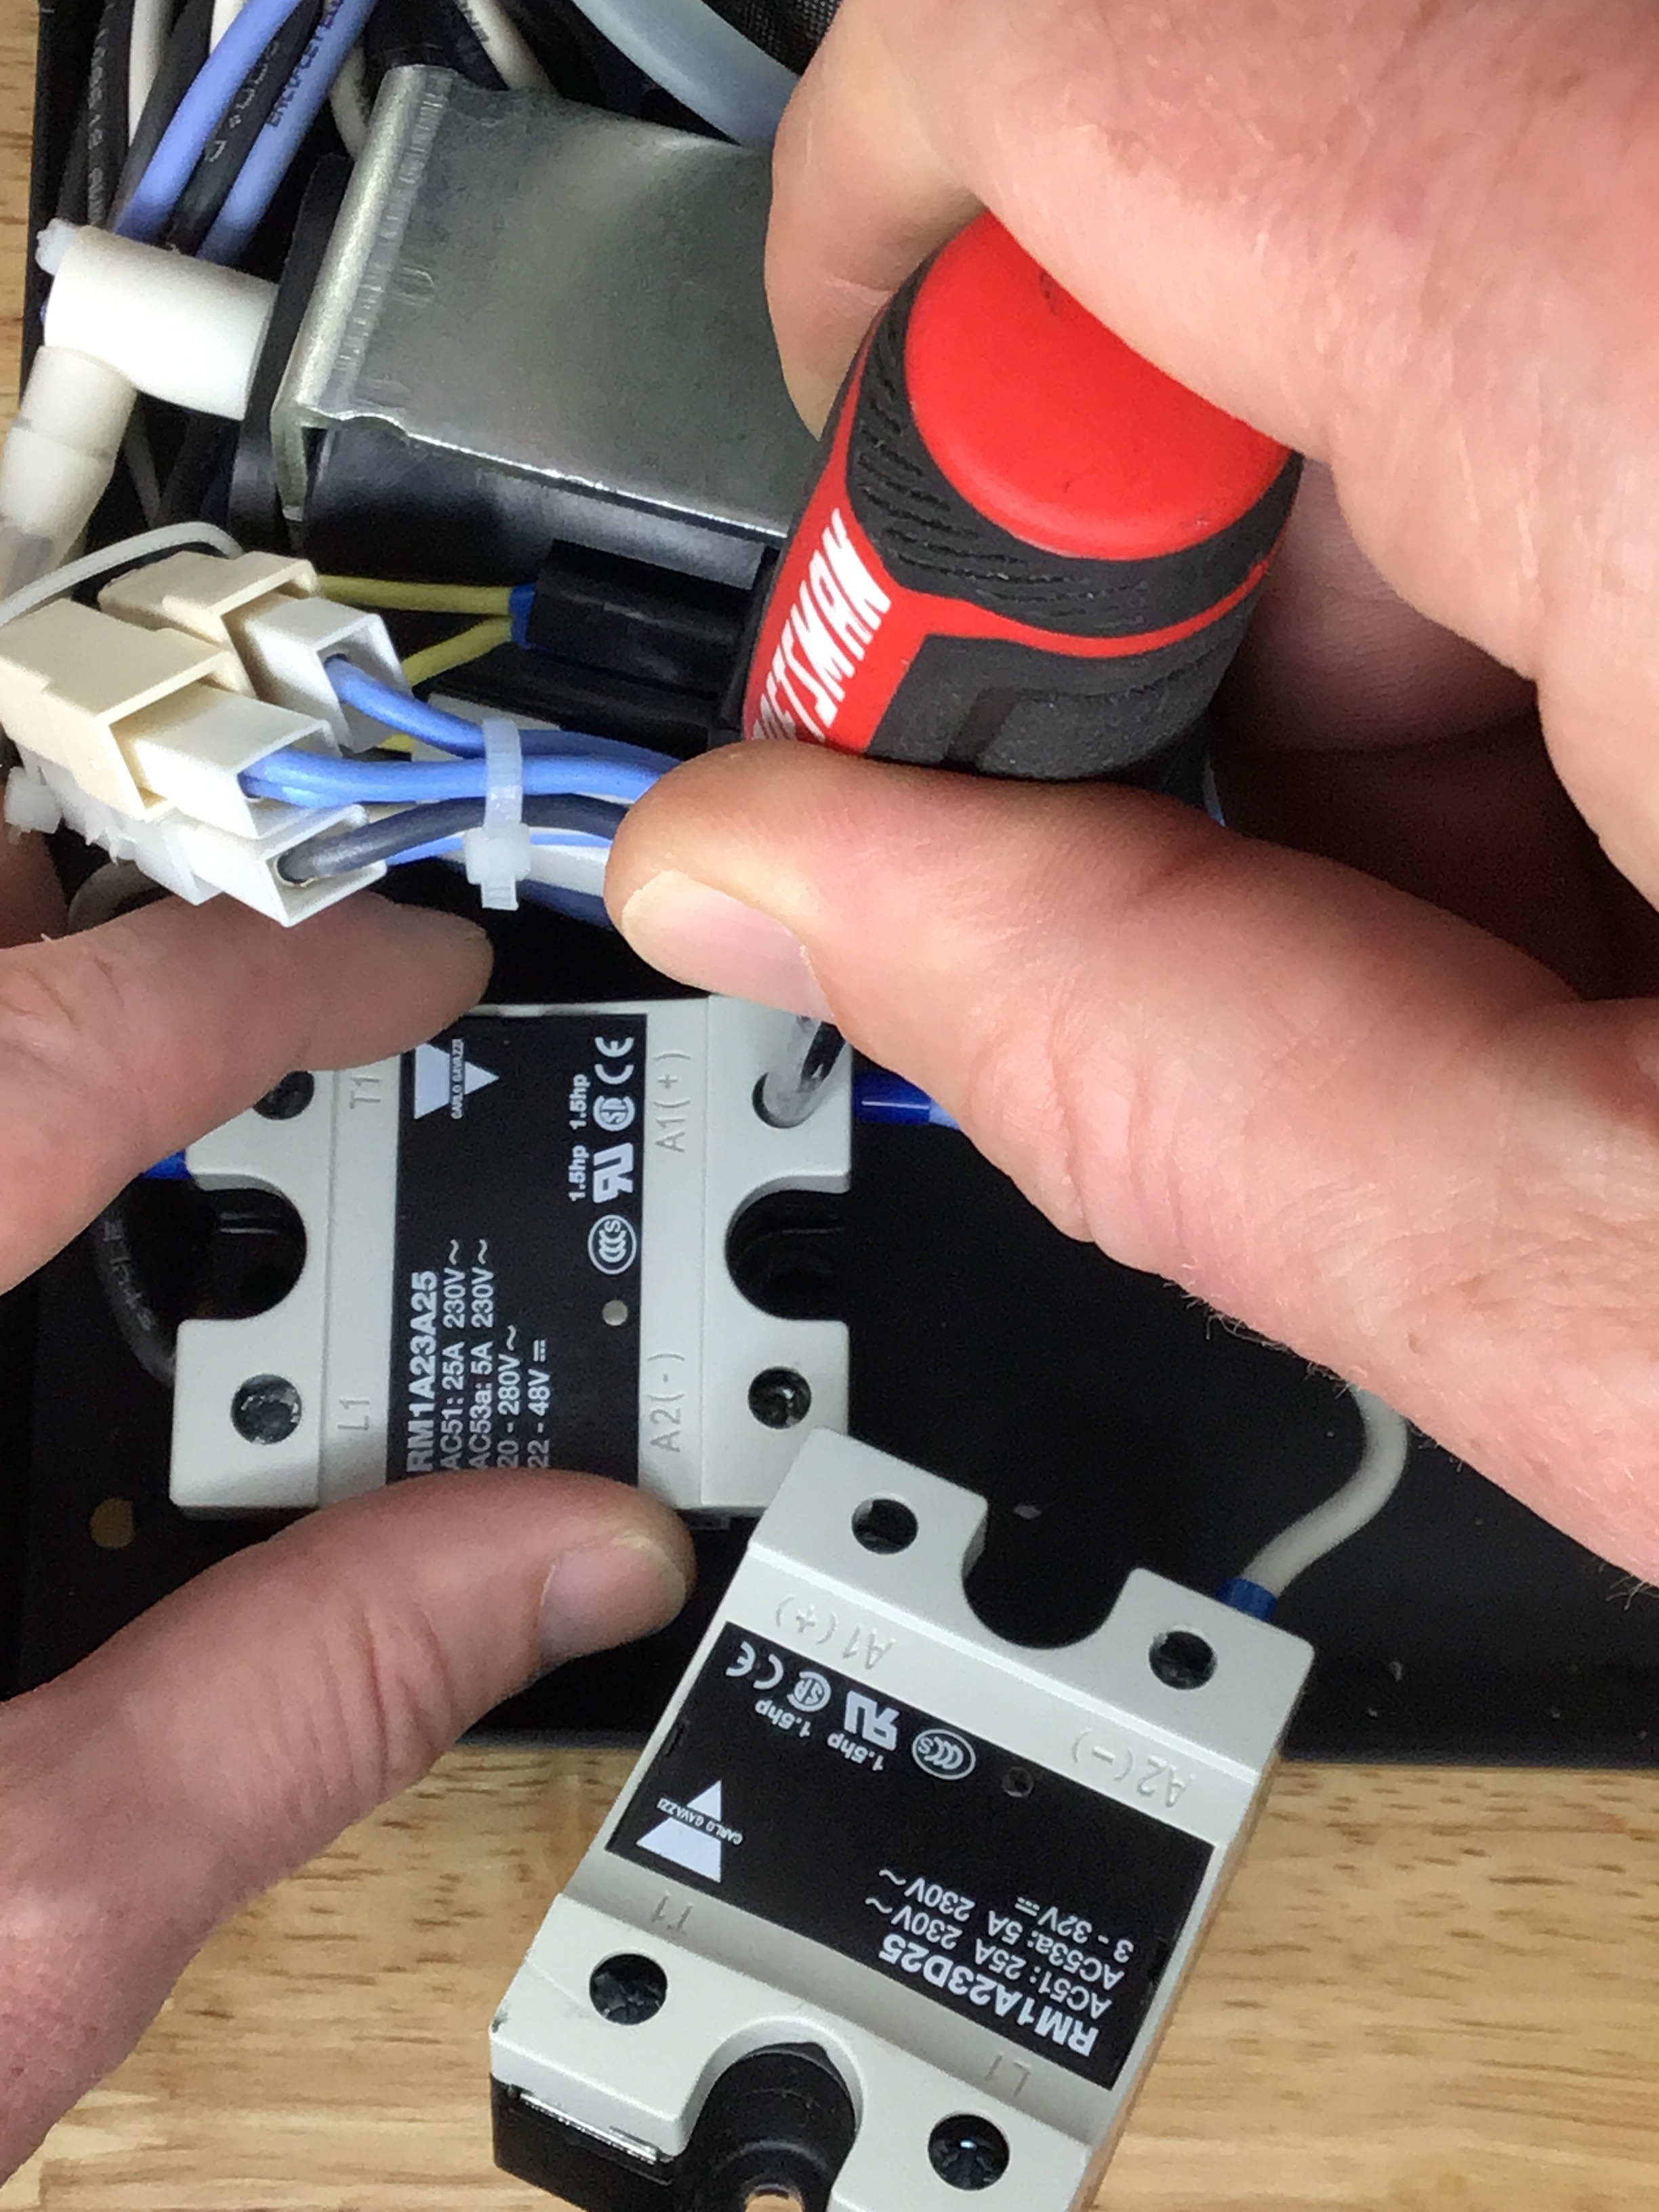
- Use a Phillips screwdriver to disconnect one wire at a time from the old SSR and connect it to the corresponding terminal on the new SSR. Working one wire at a time will ensure the wires are connected to the correct terminals on the new SSR.
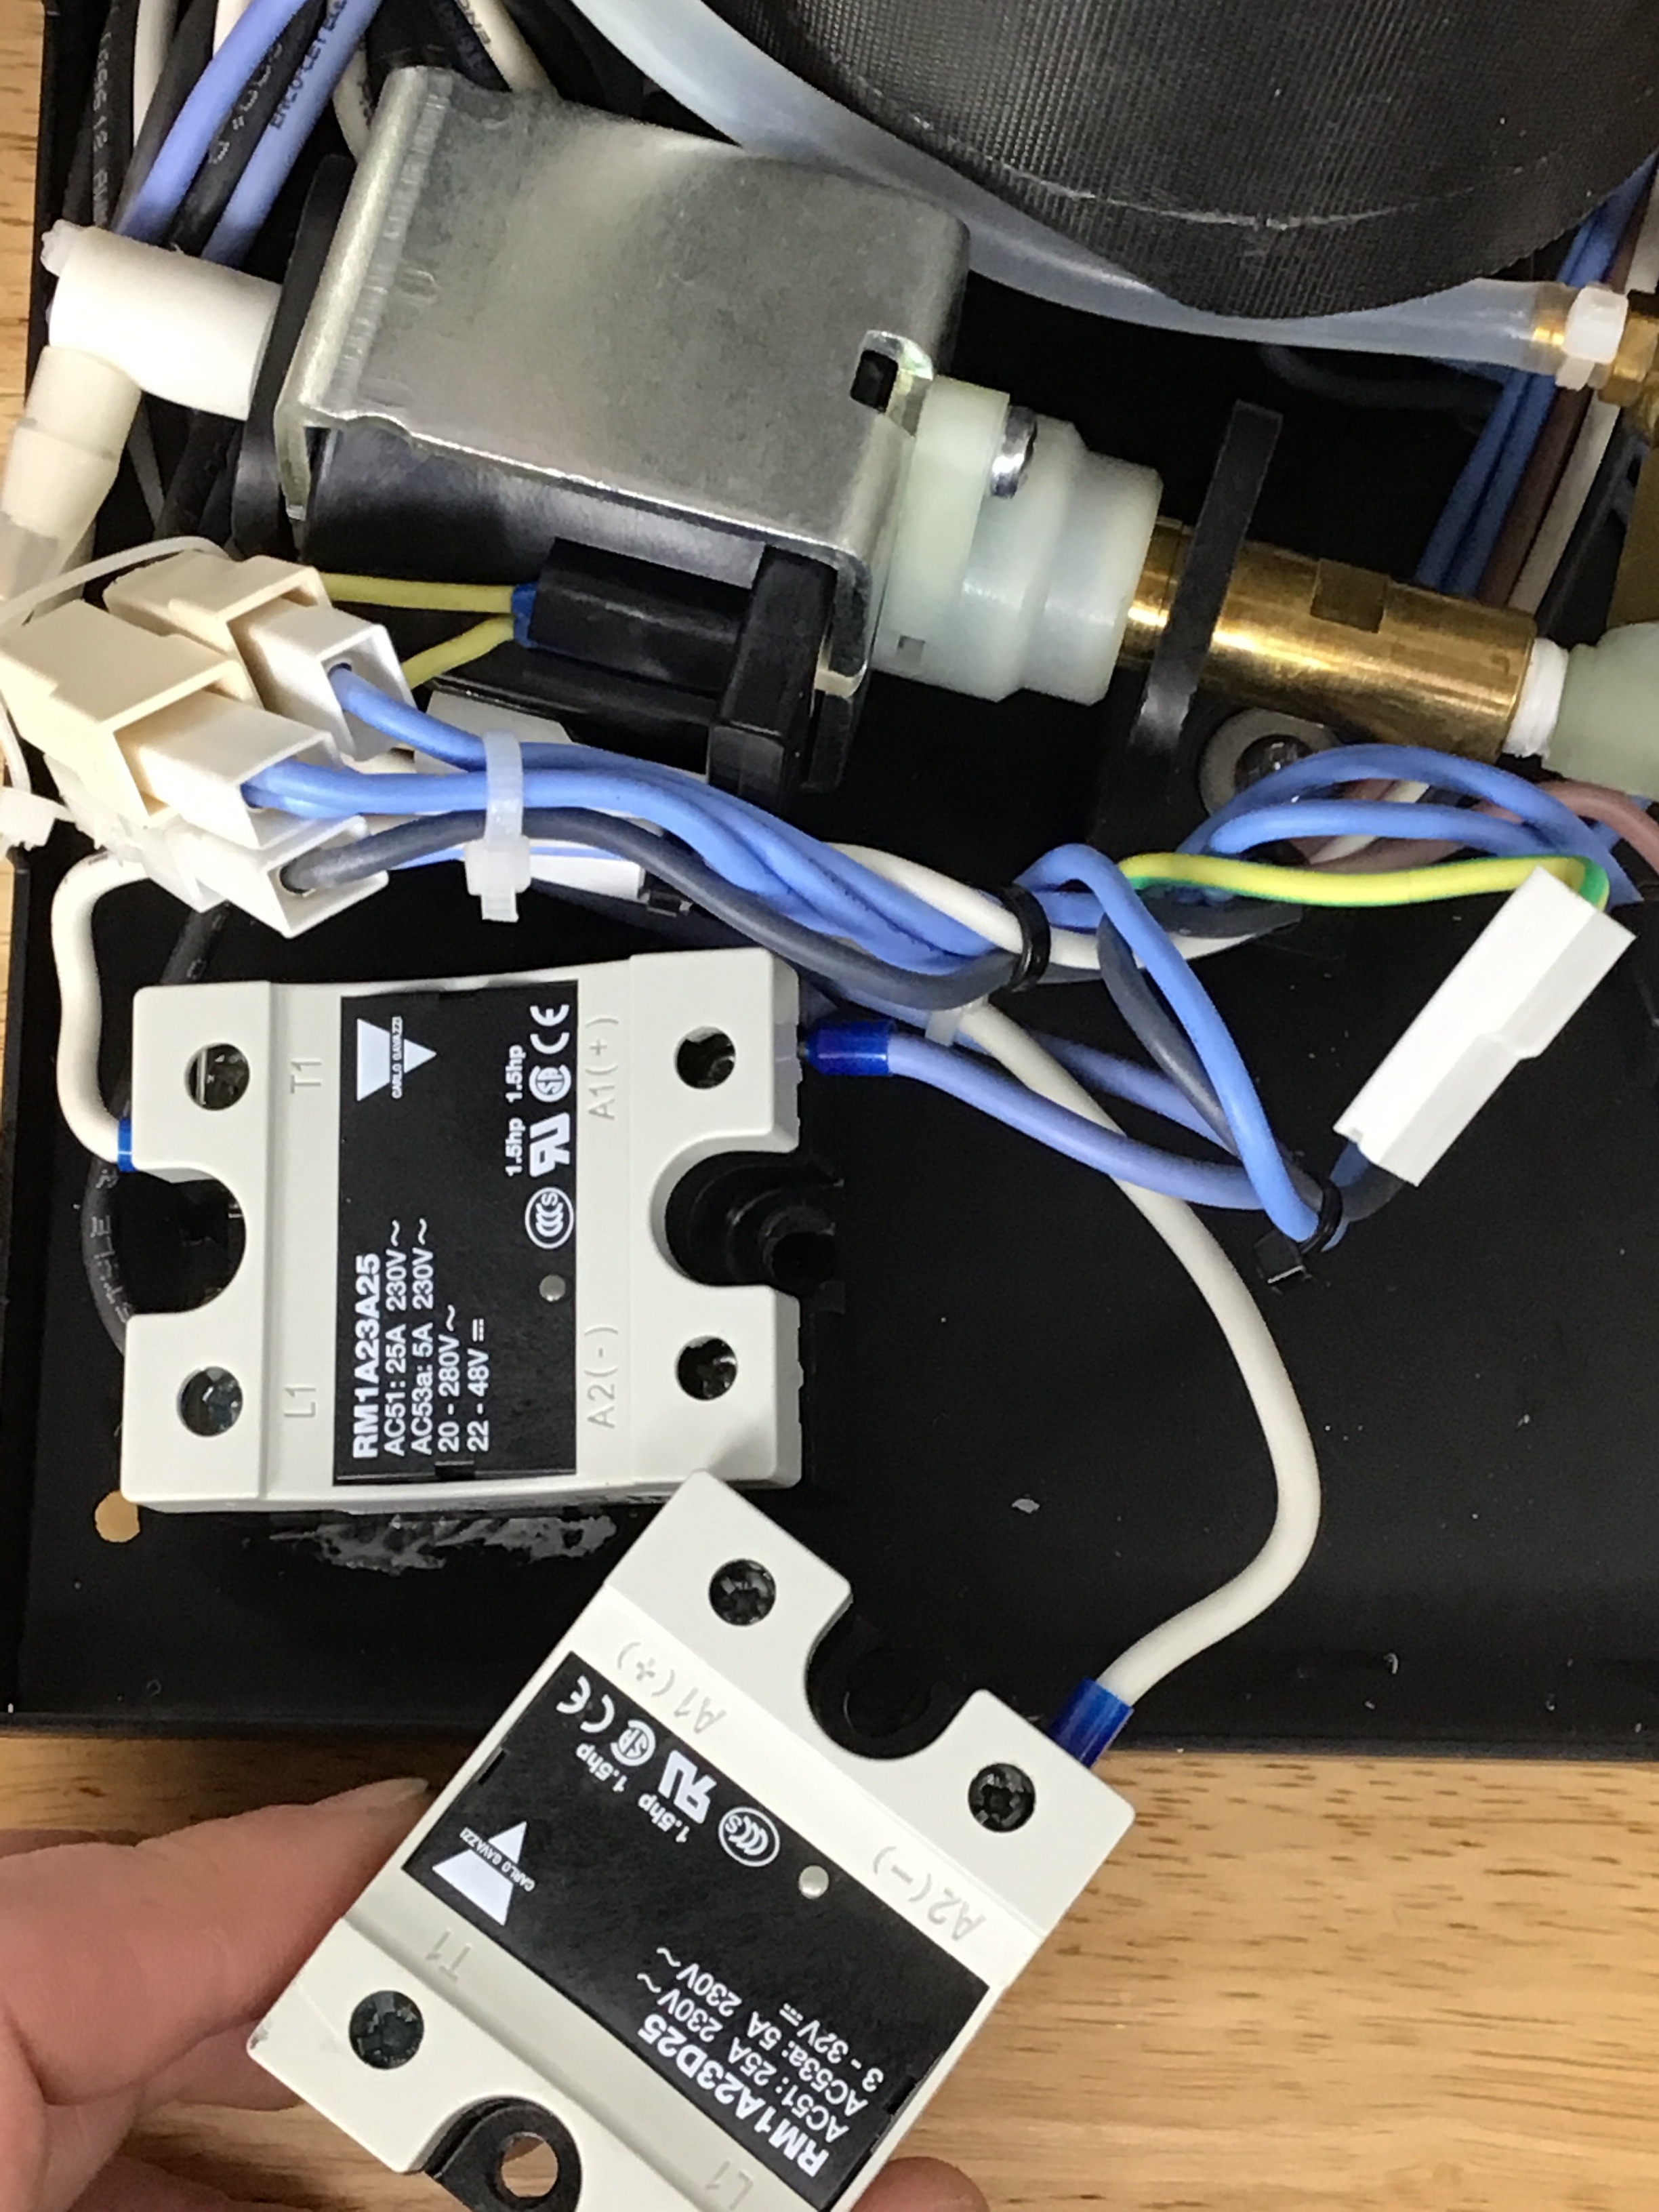
- Once all 4 wires are connected to the new SSR, remove the old SSR and secure the new SSR to the frame using the 2 Phillips head mounting crews to finish installing the new SSR.
Congrats, you have just replaced the SSR! Now, you can plug the machine in and turn it on to test.