LUCCA A53 Mini: Steam Valve Assembly ReplacementUpdated 5 months ago
You'll need:
- 14mm wrench
- 17mm wrench
- 19mm wrench
- Adjustable wrench
- Standard Philips Screwdriver
- Flat blade (flathead screwdriver)
- Pick
You'll need to remove the top and front face panel. Removing all panels is not necessary, but could be helpful for more space.
1. Remove the top panel by removing the one screw in the front center of the panel and lift it off of them machine. 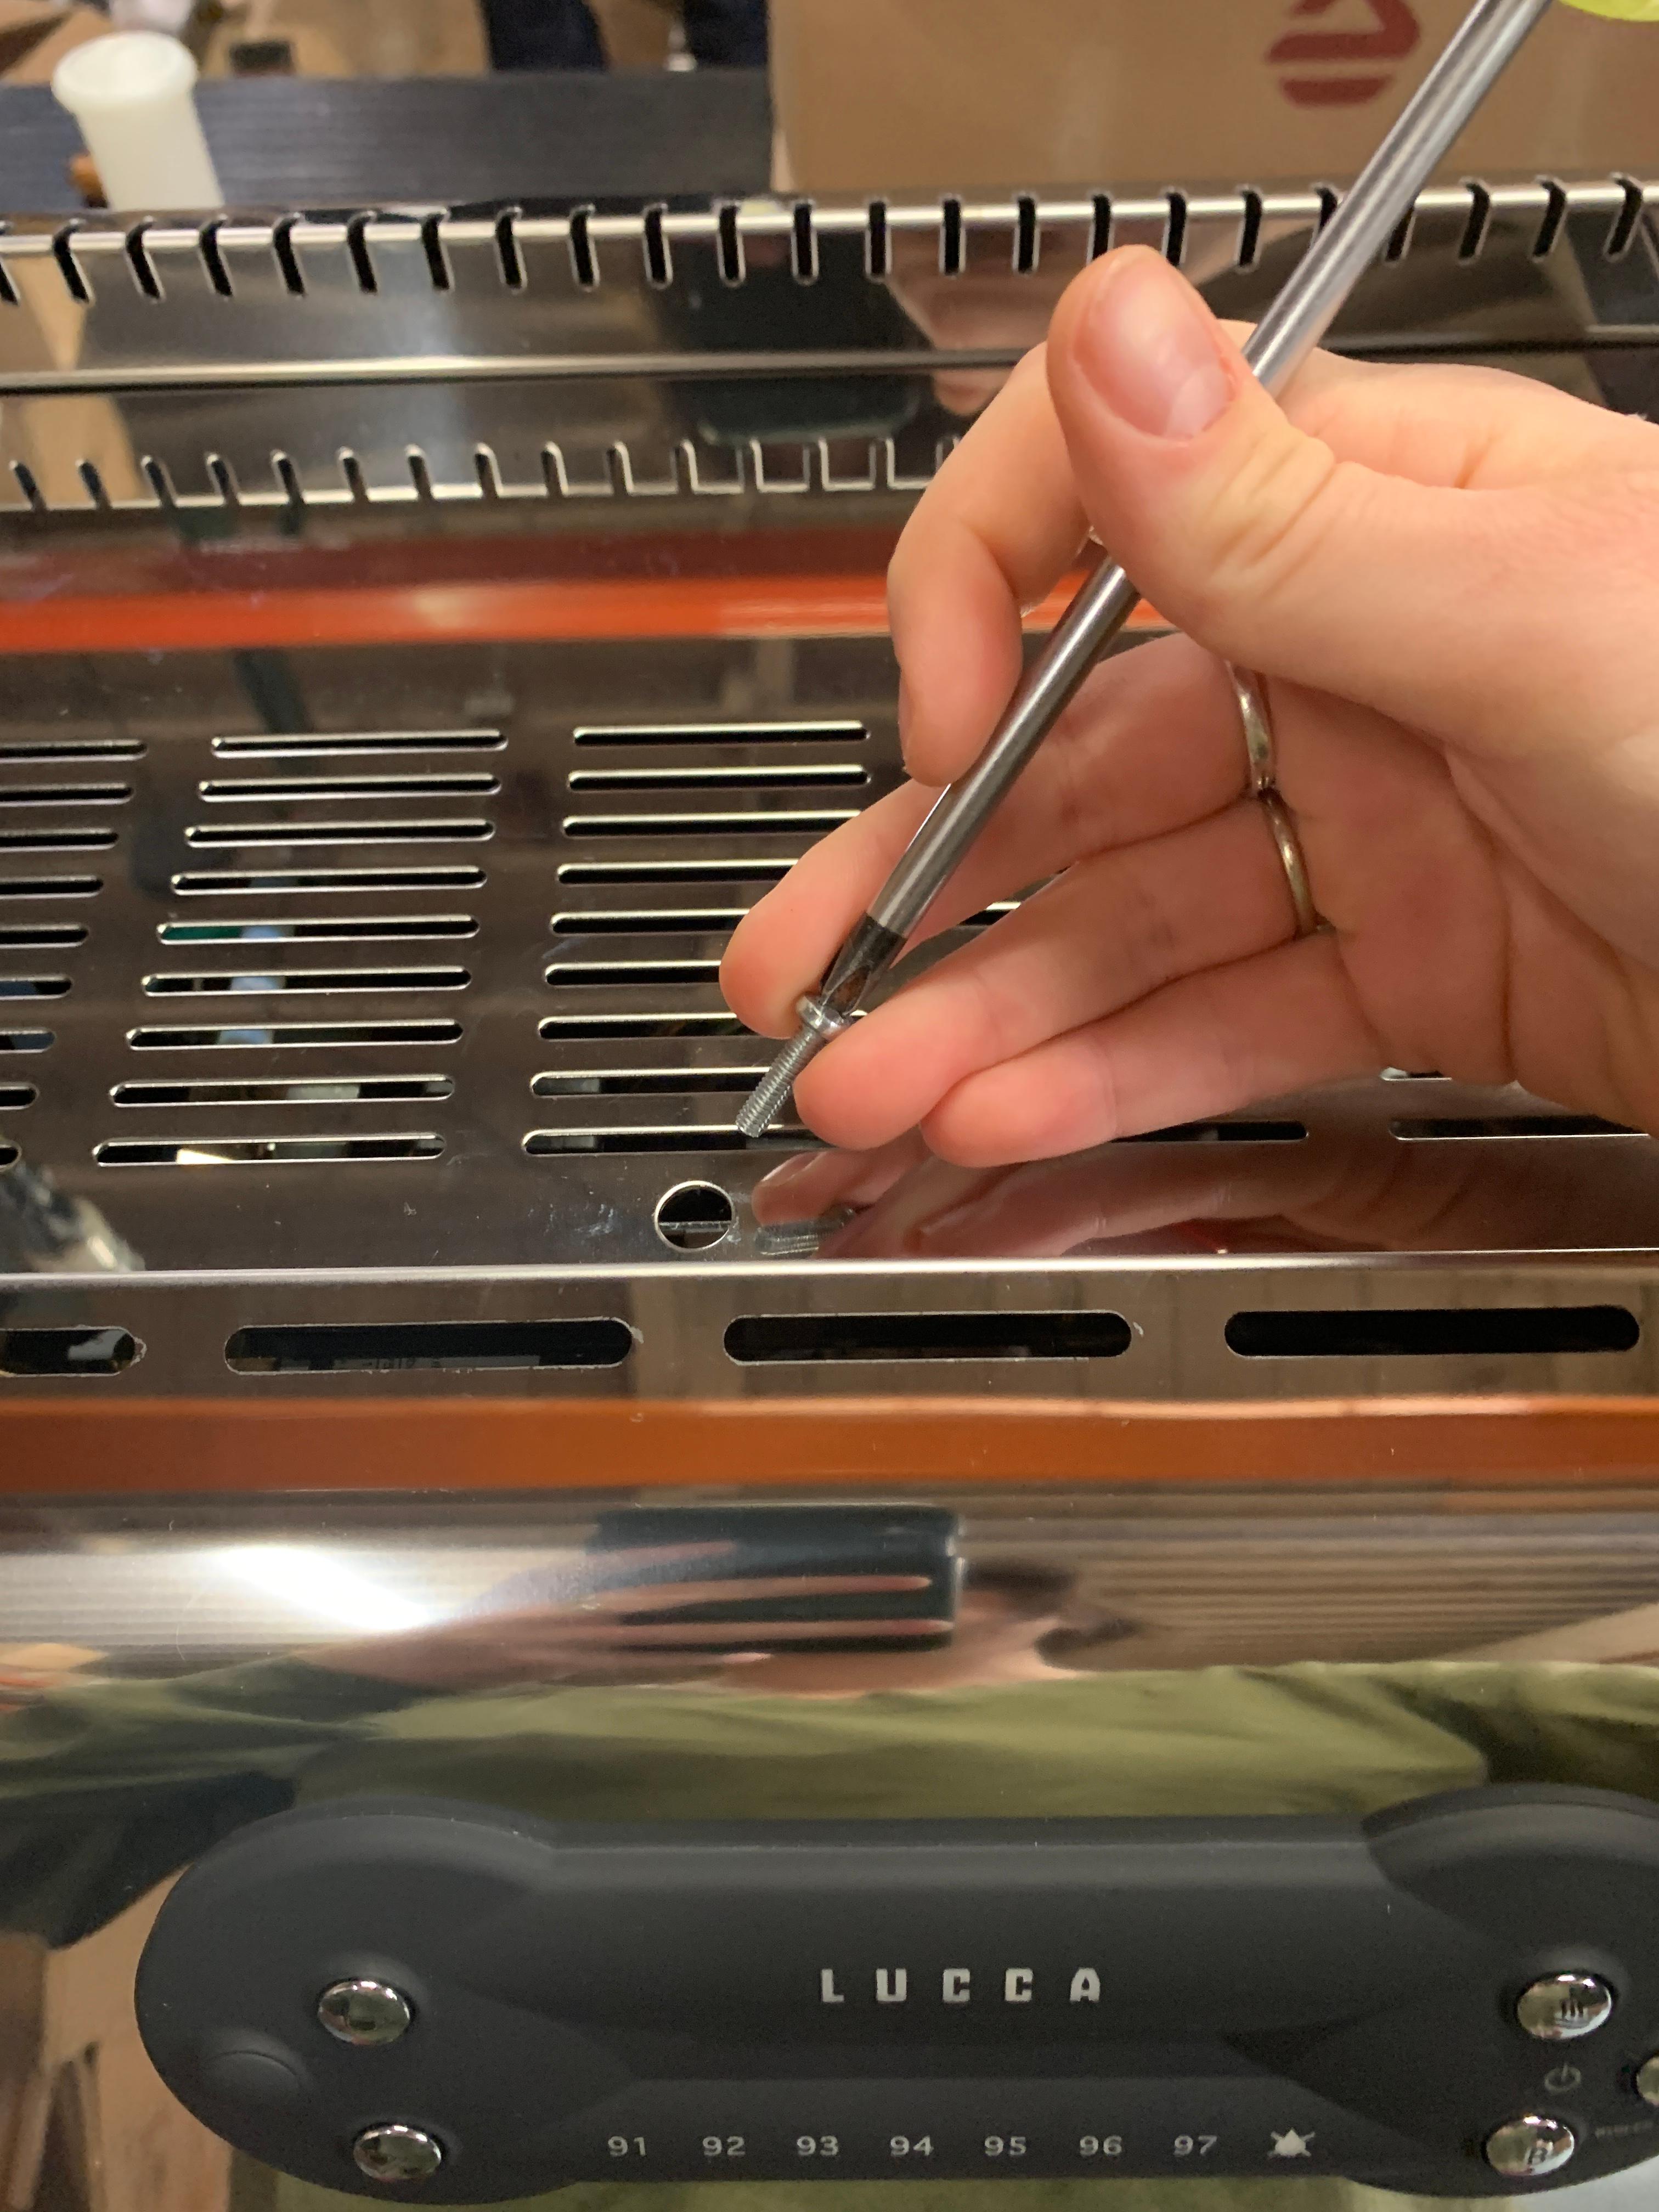 2. To get the front face off, you'll need to unscrew the steam knob
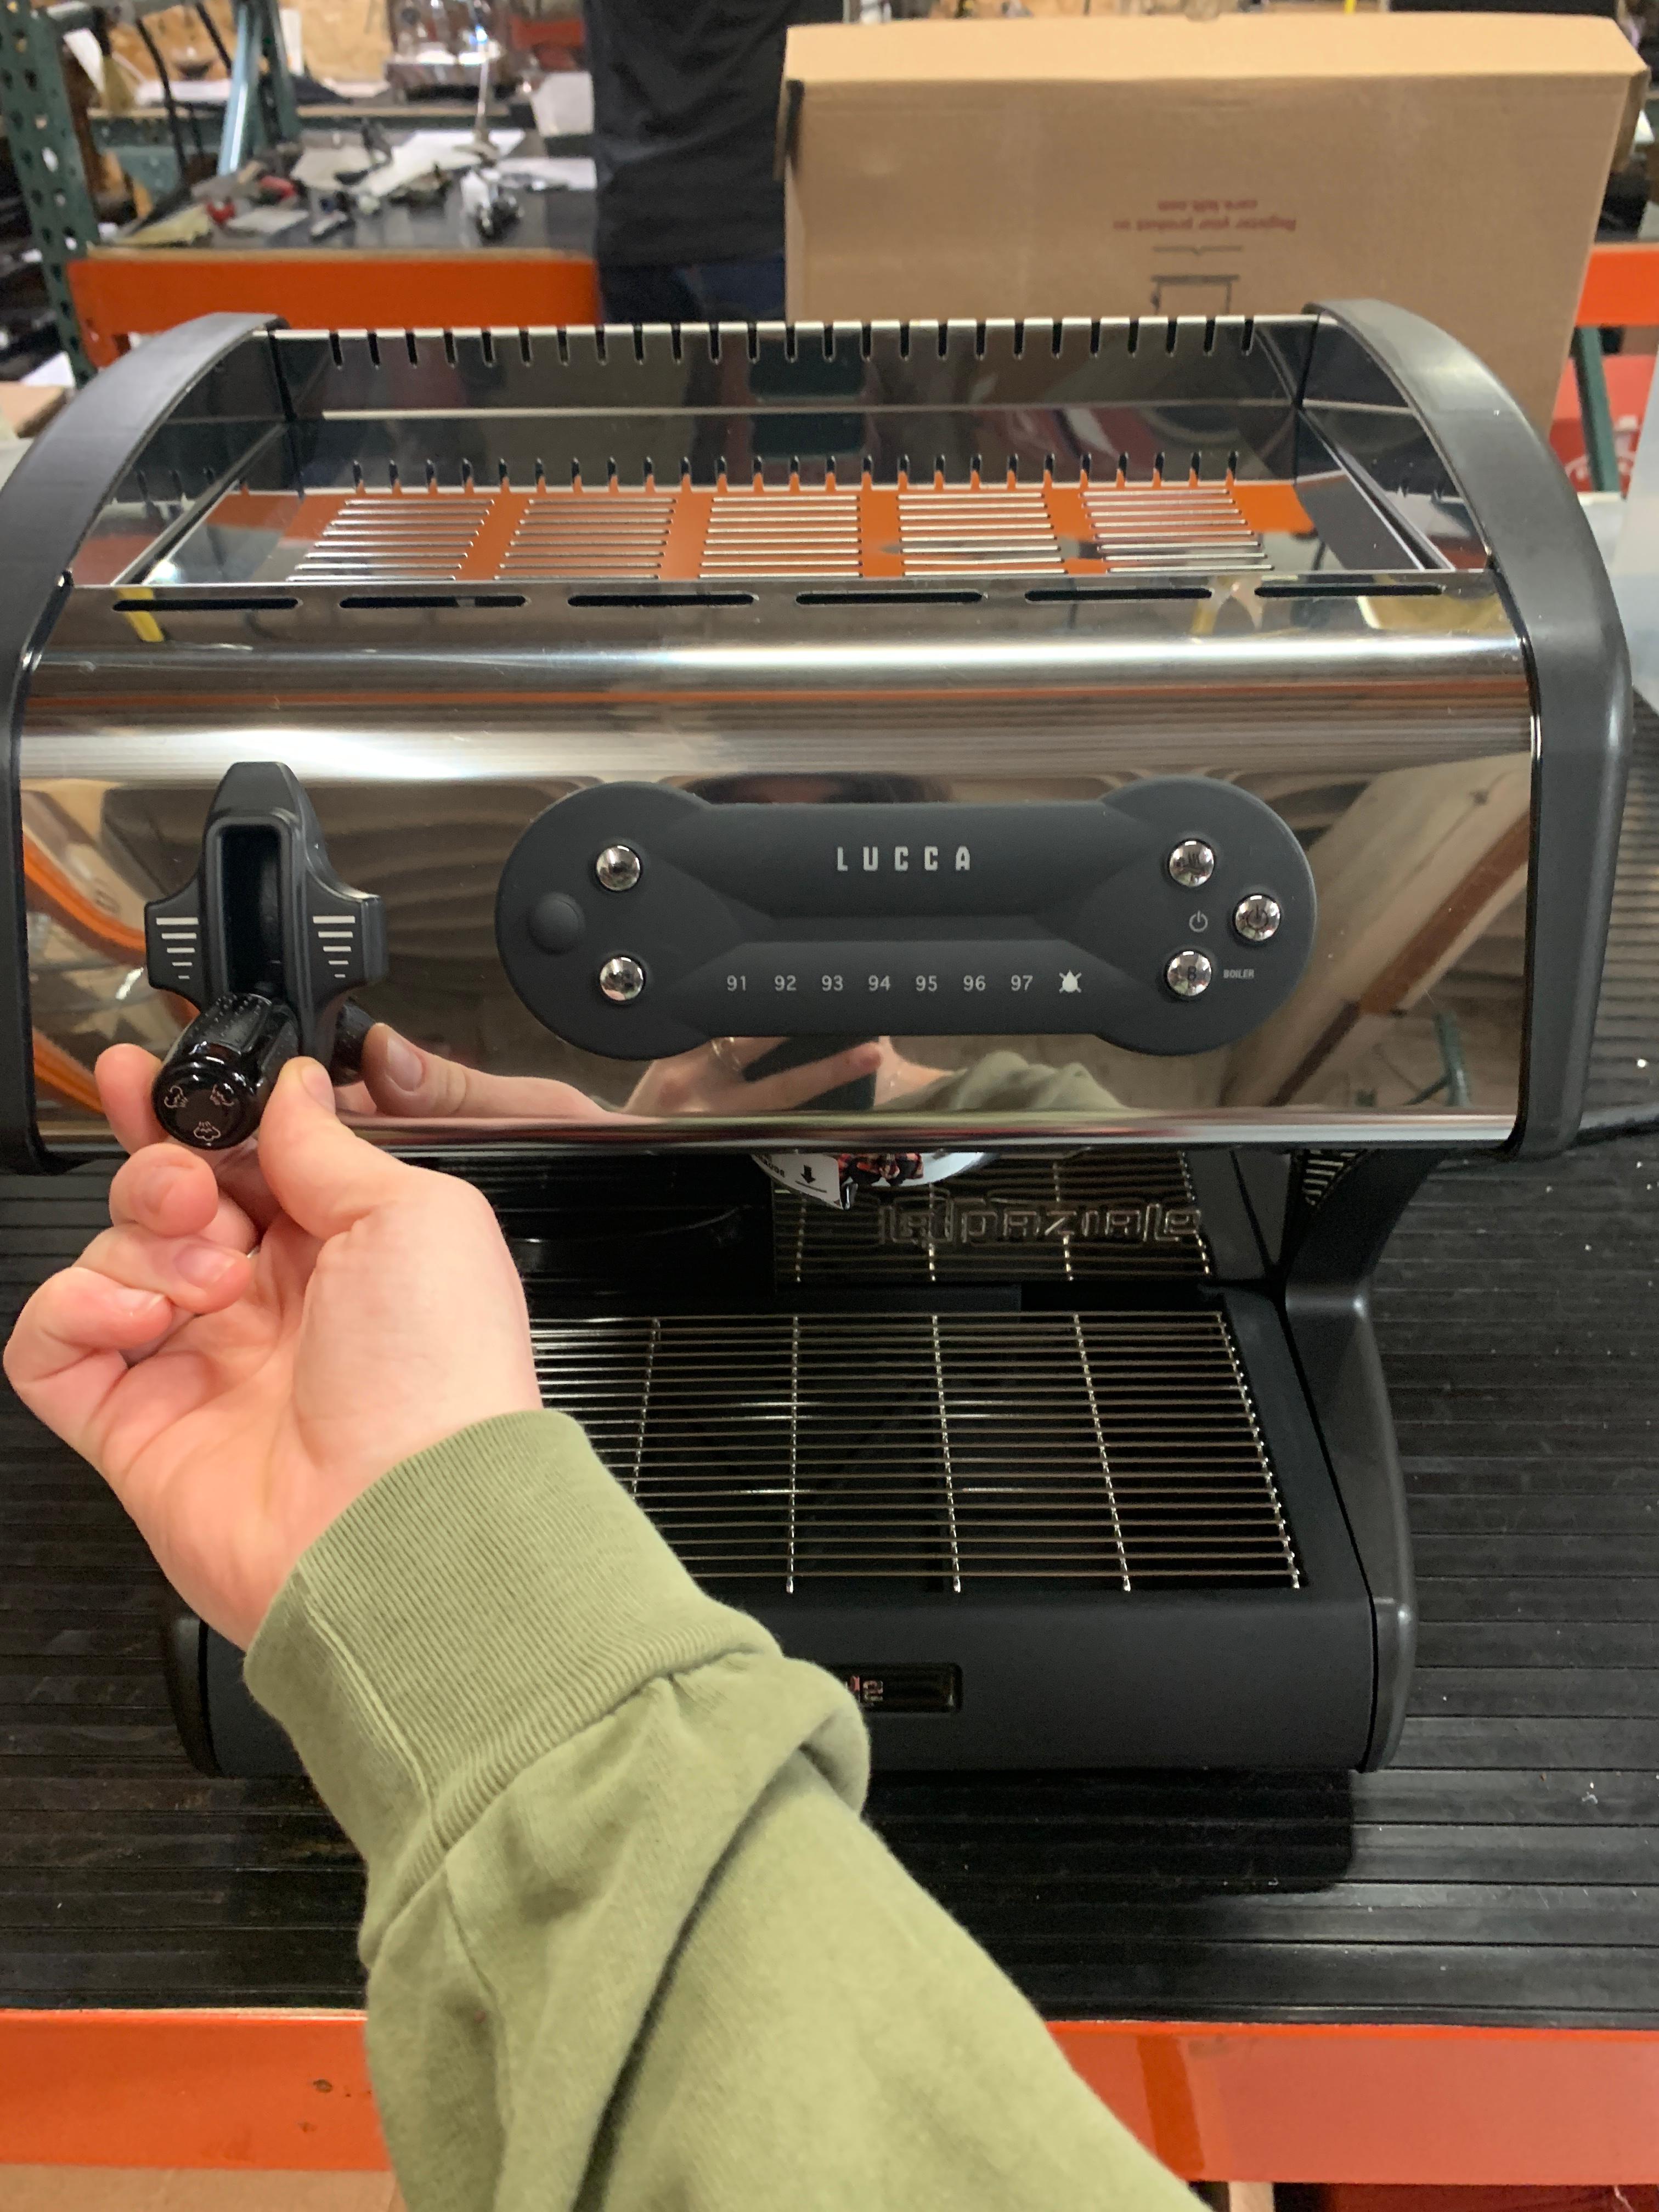
3. Then remove these two screws, pulling the two sides away and sliding the front panel out from between them.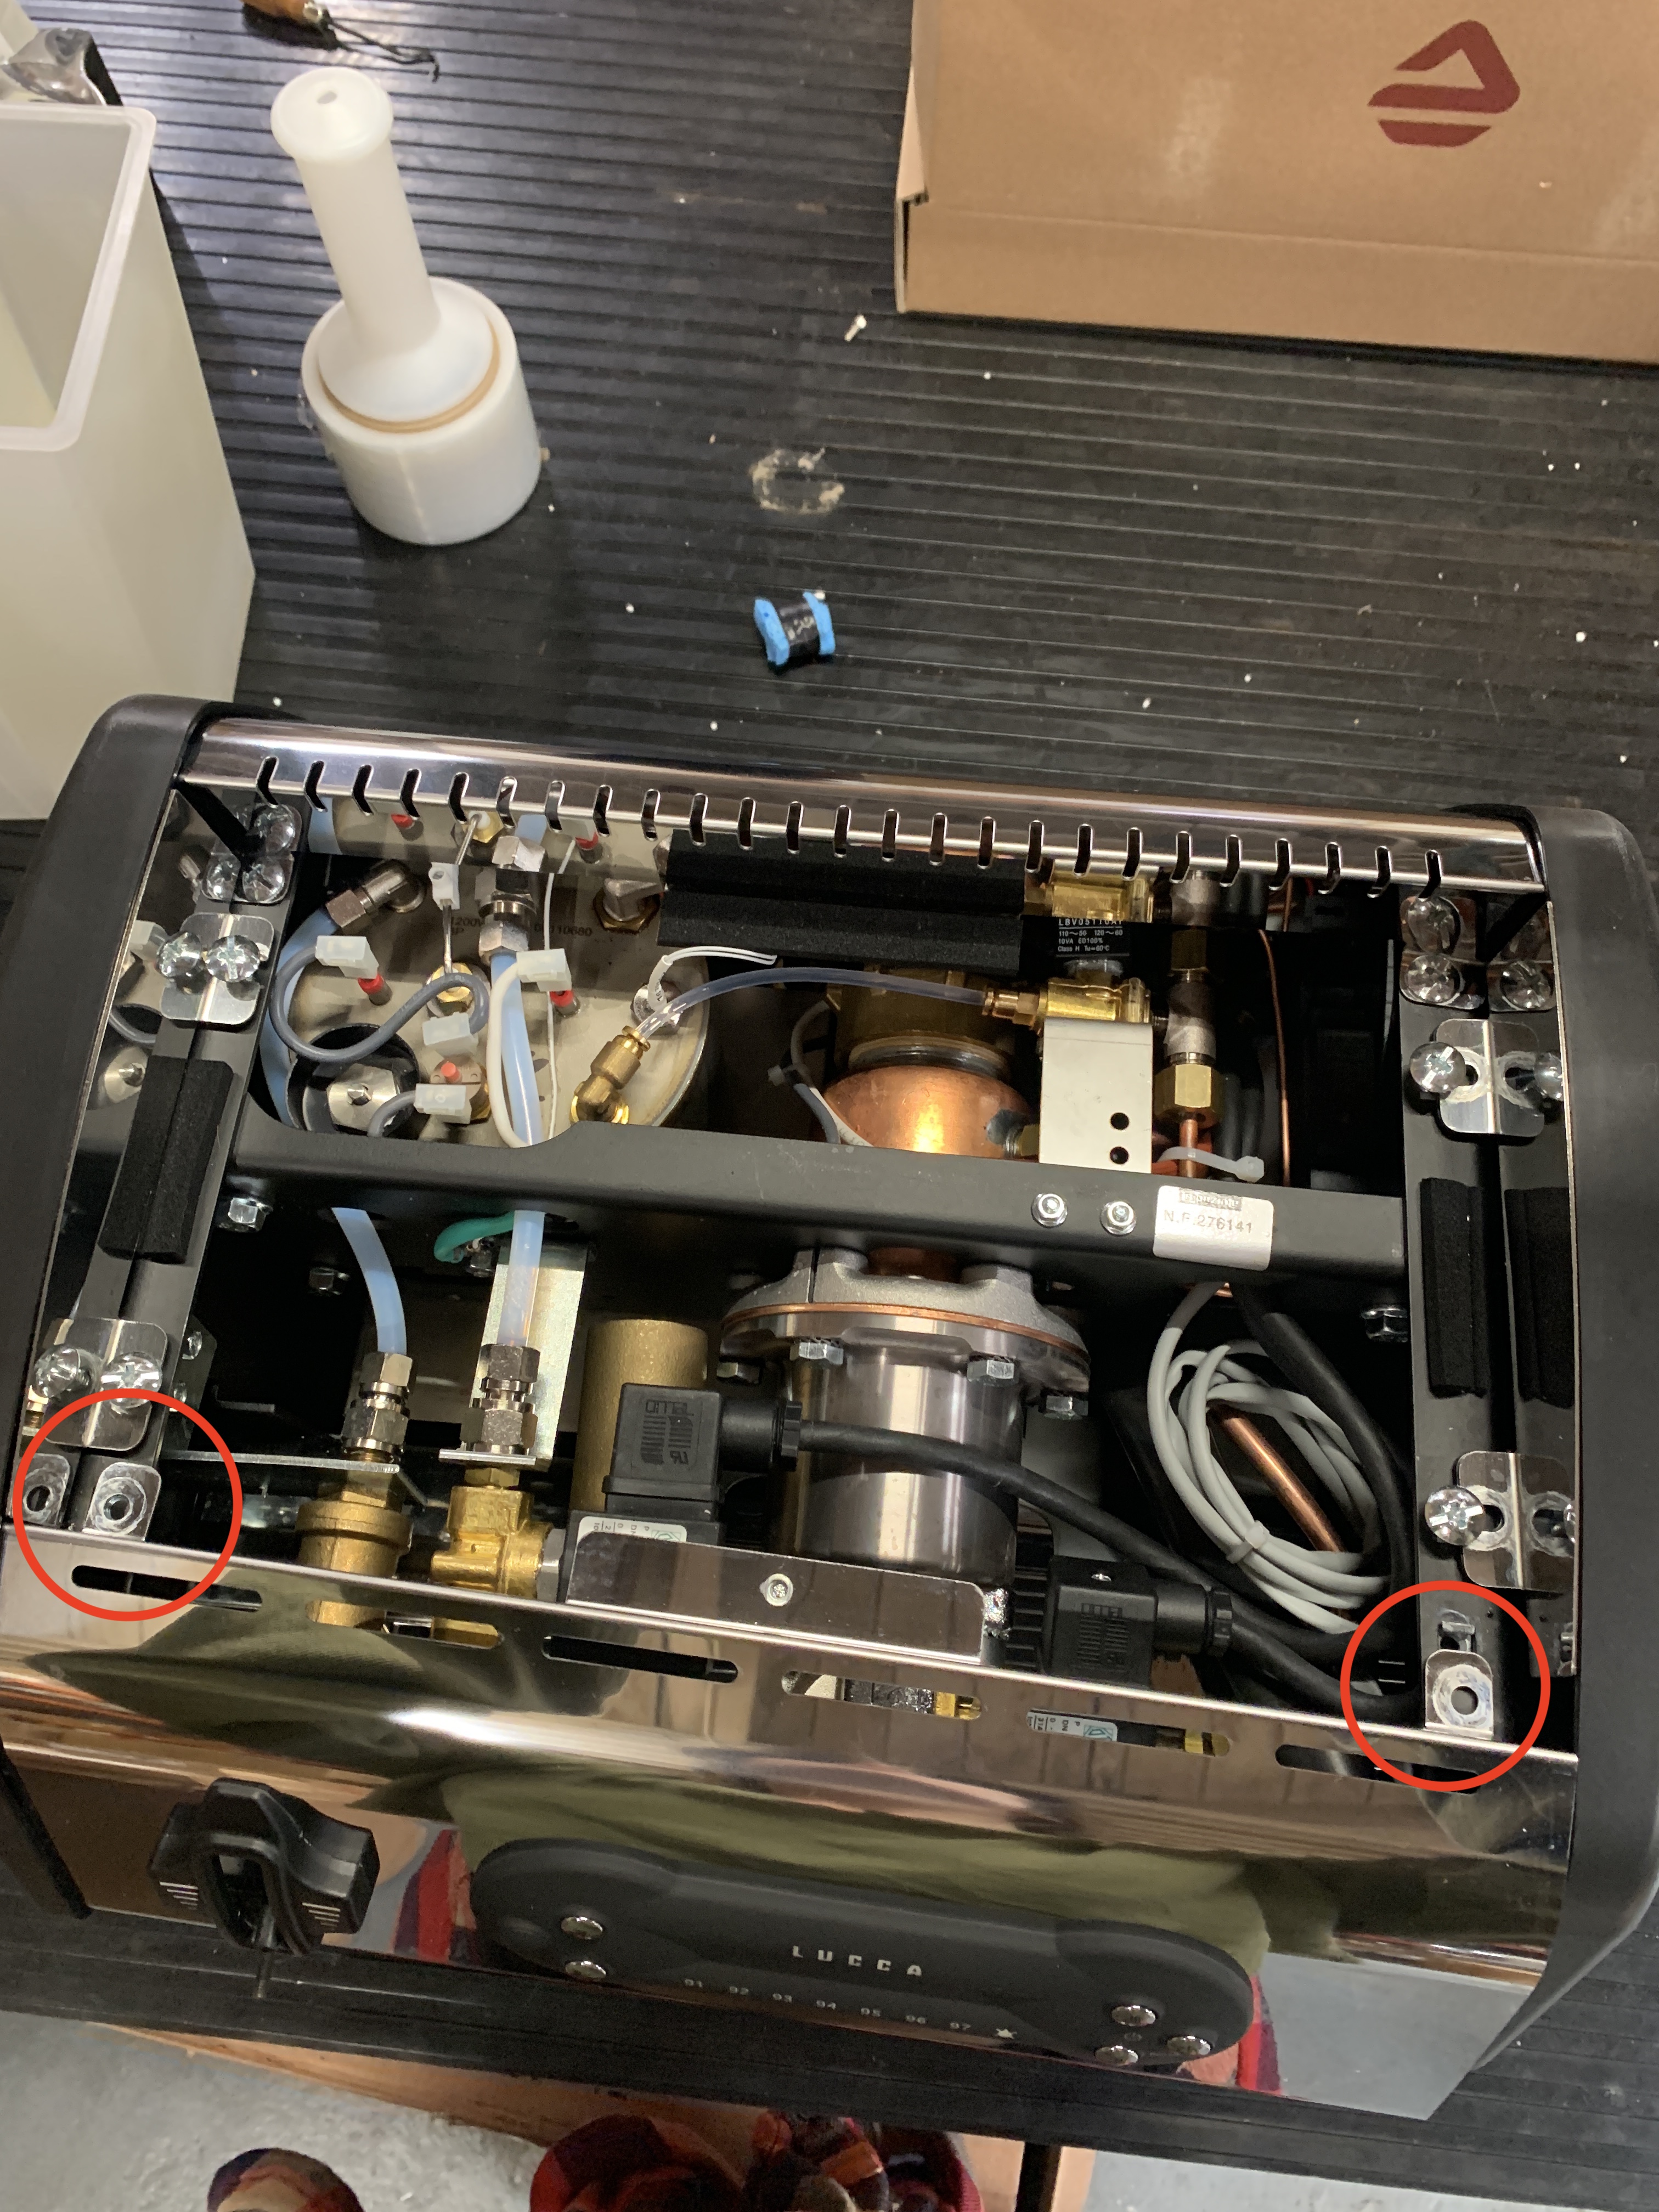 4. Locate the valve assembly in the front left corner of the machine
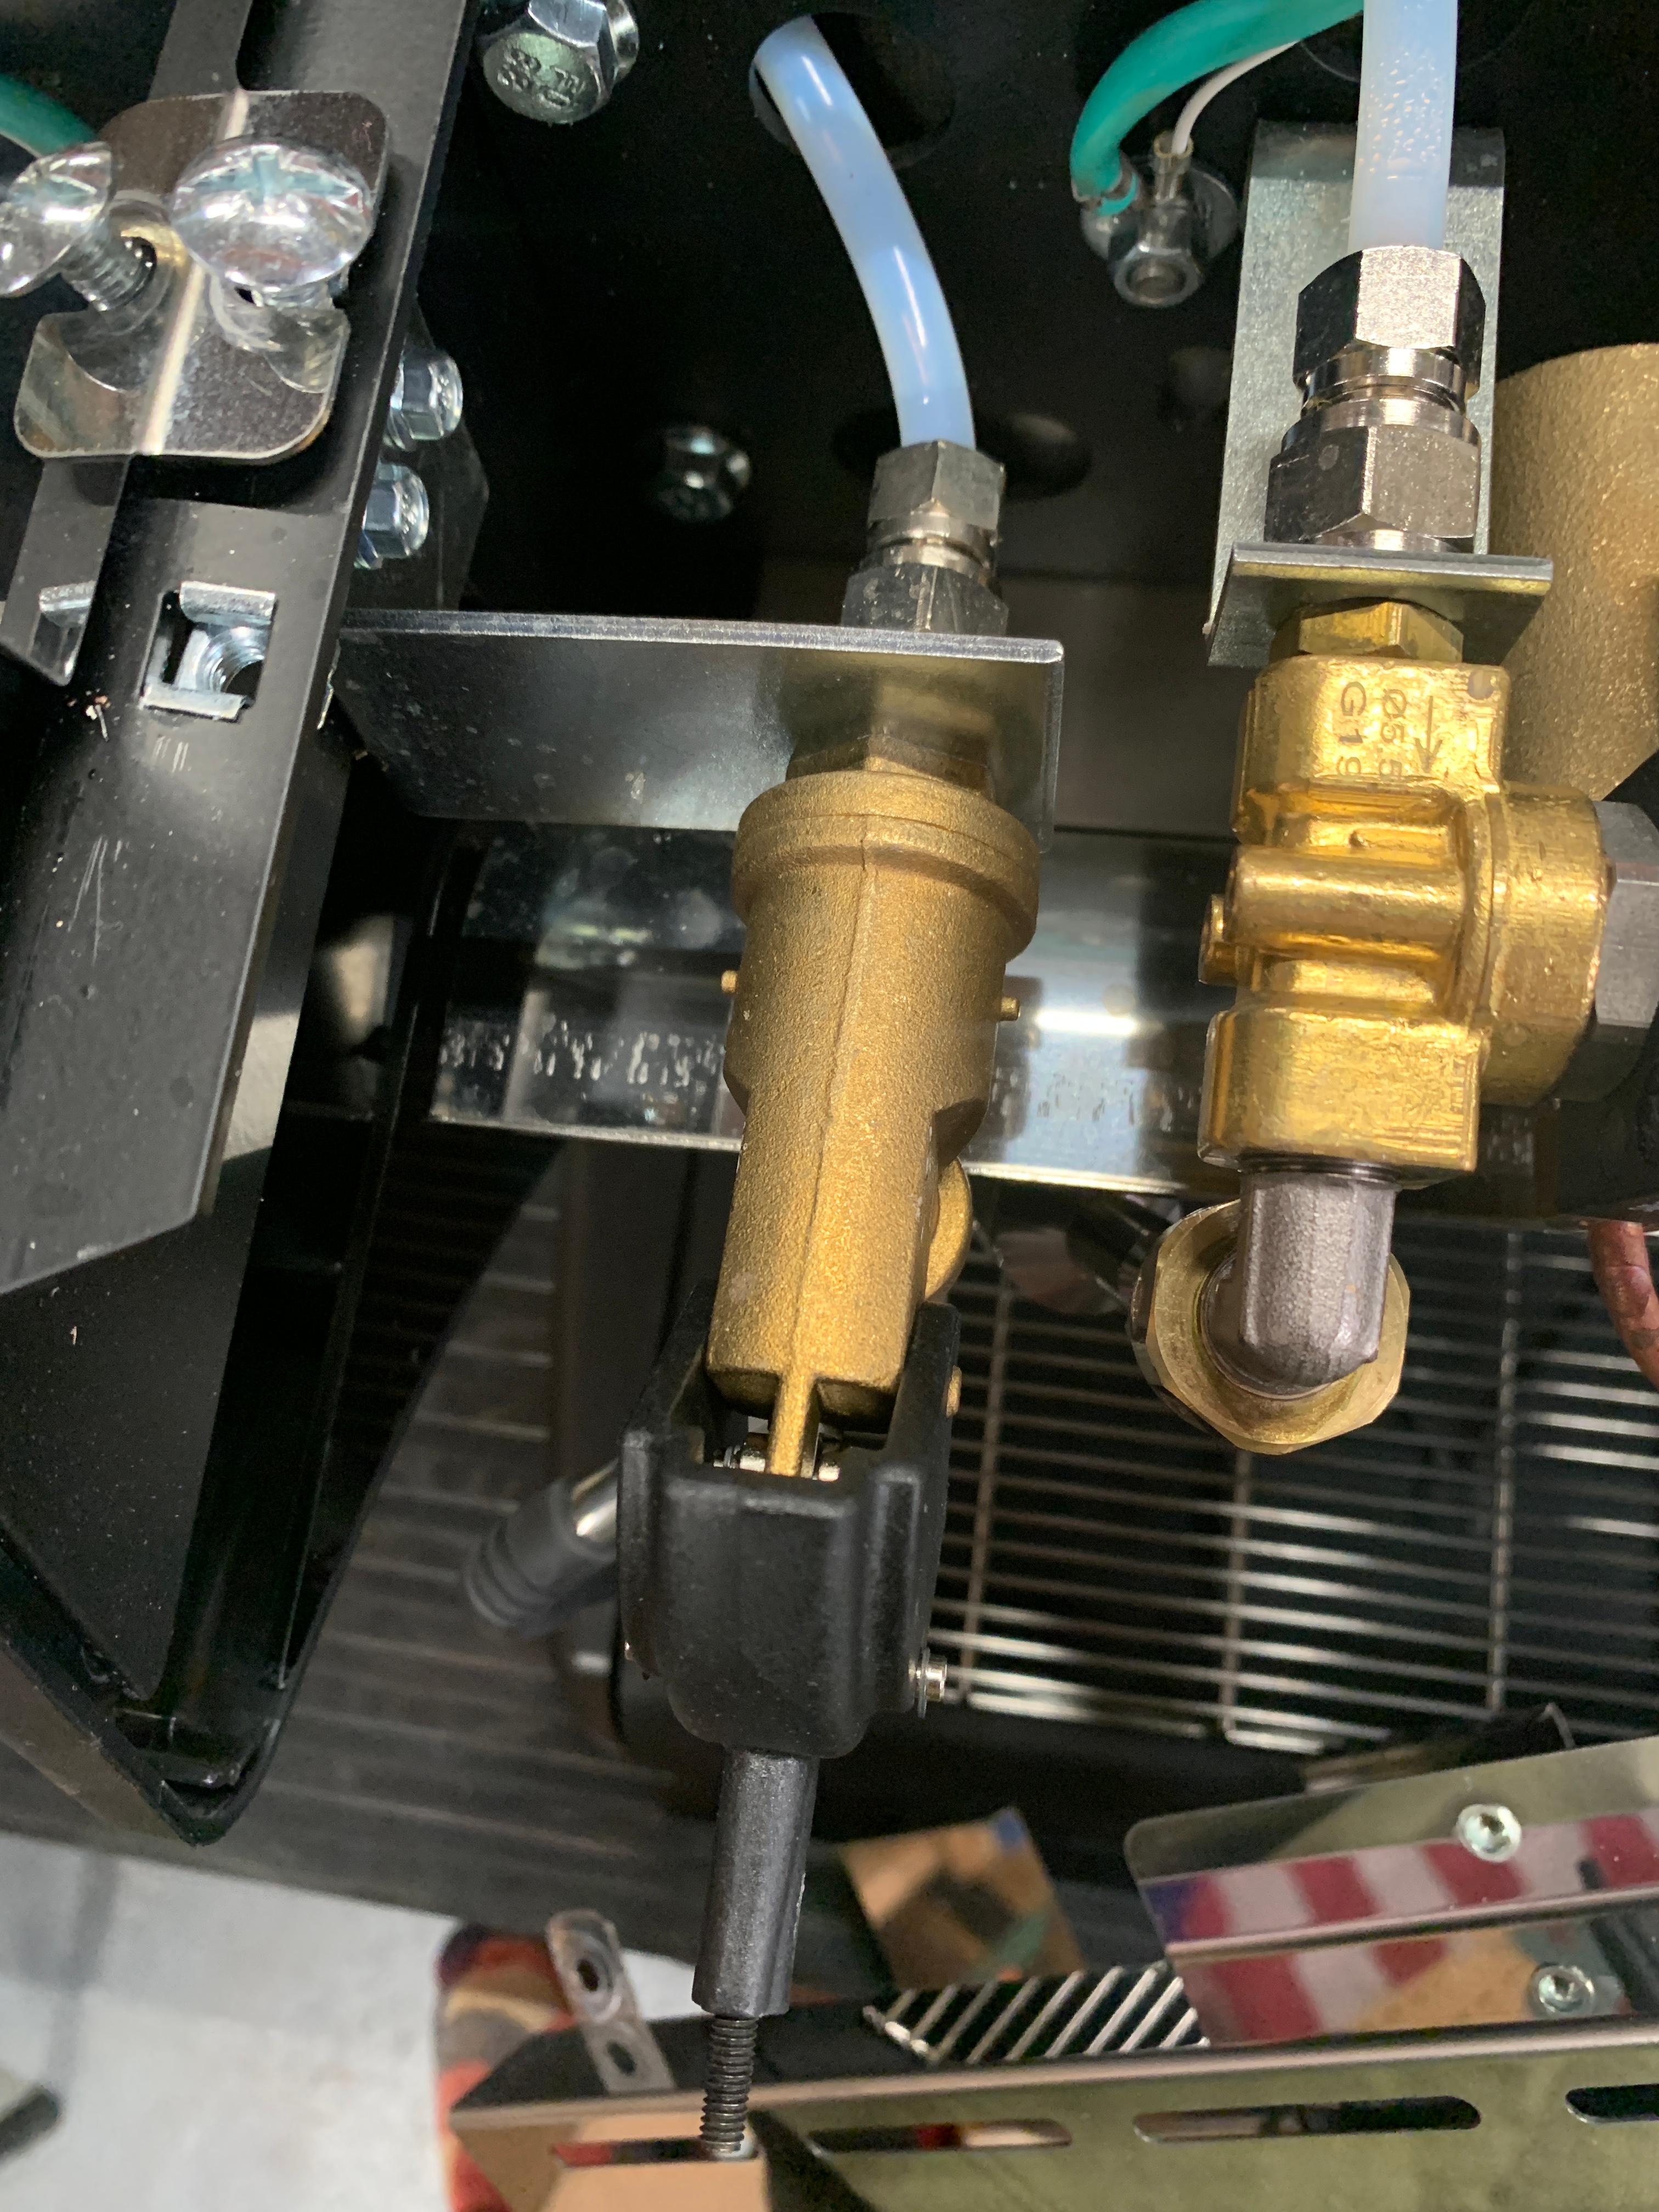
5. Remove the black plastic lever assembly by removing one C-Clip from the side using a pick or other small pointed tool. This will fly, so keep a hand on it to avoid losing it!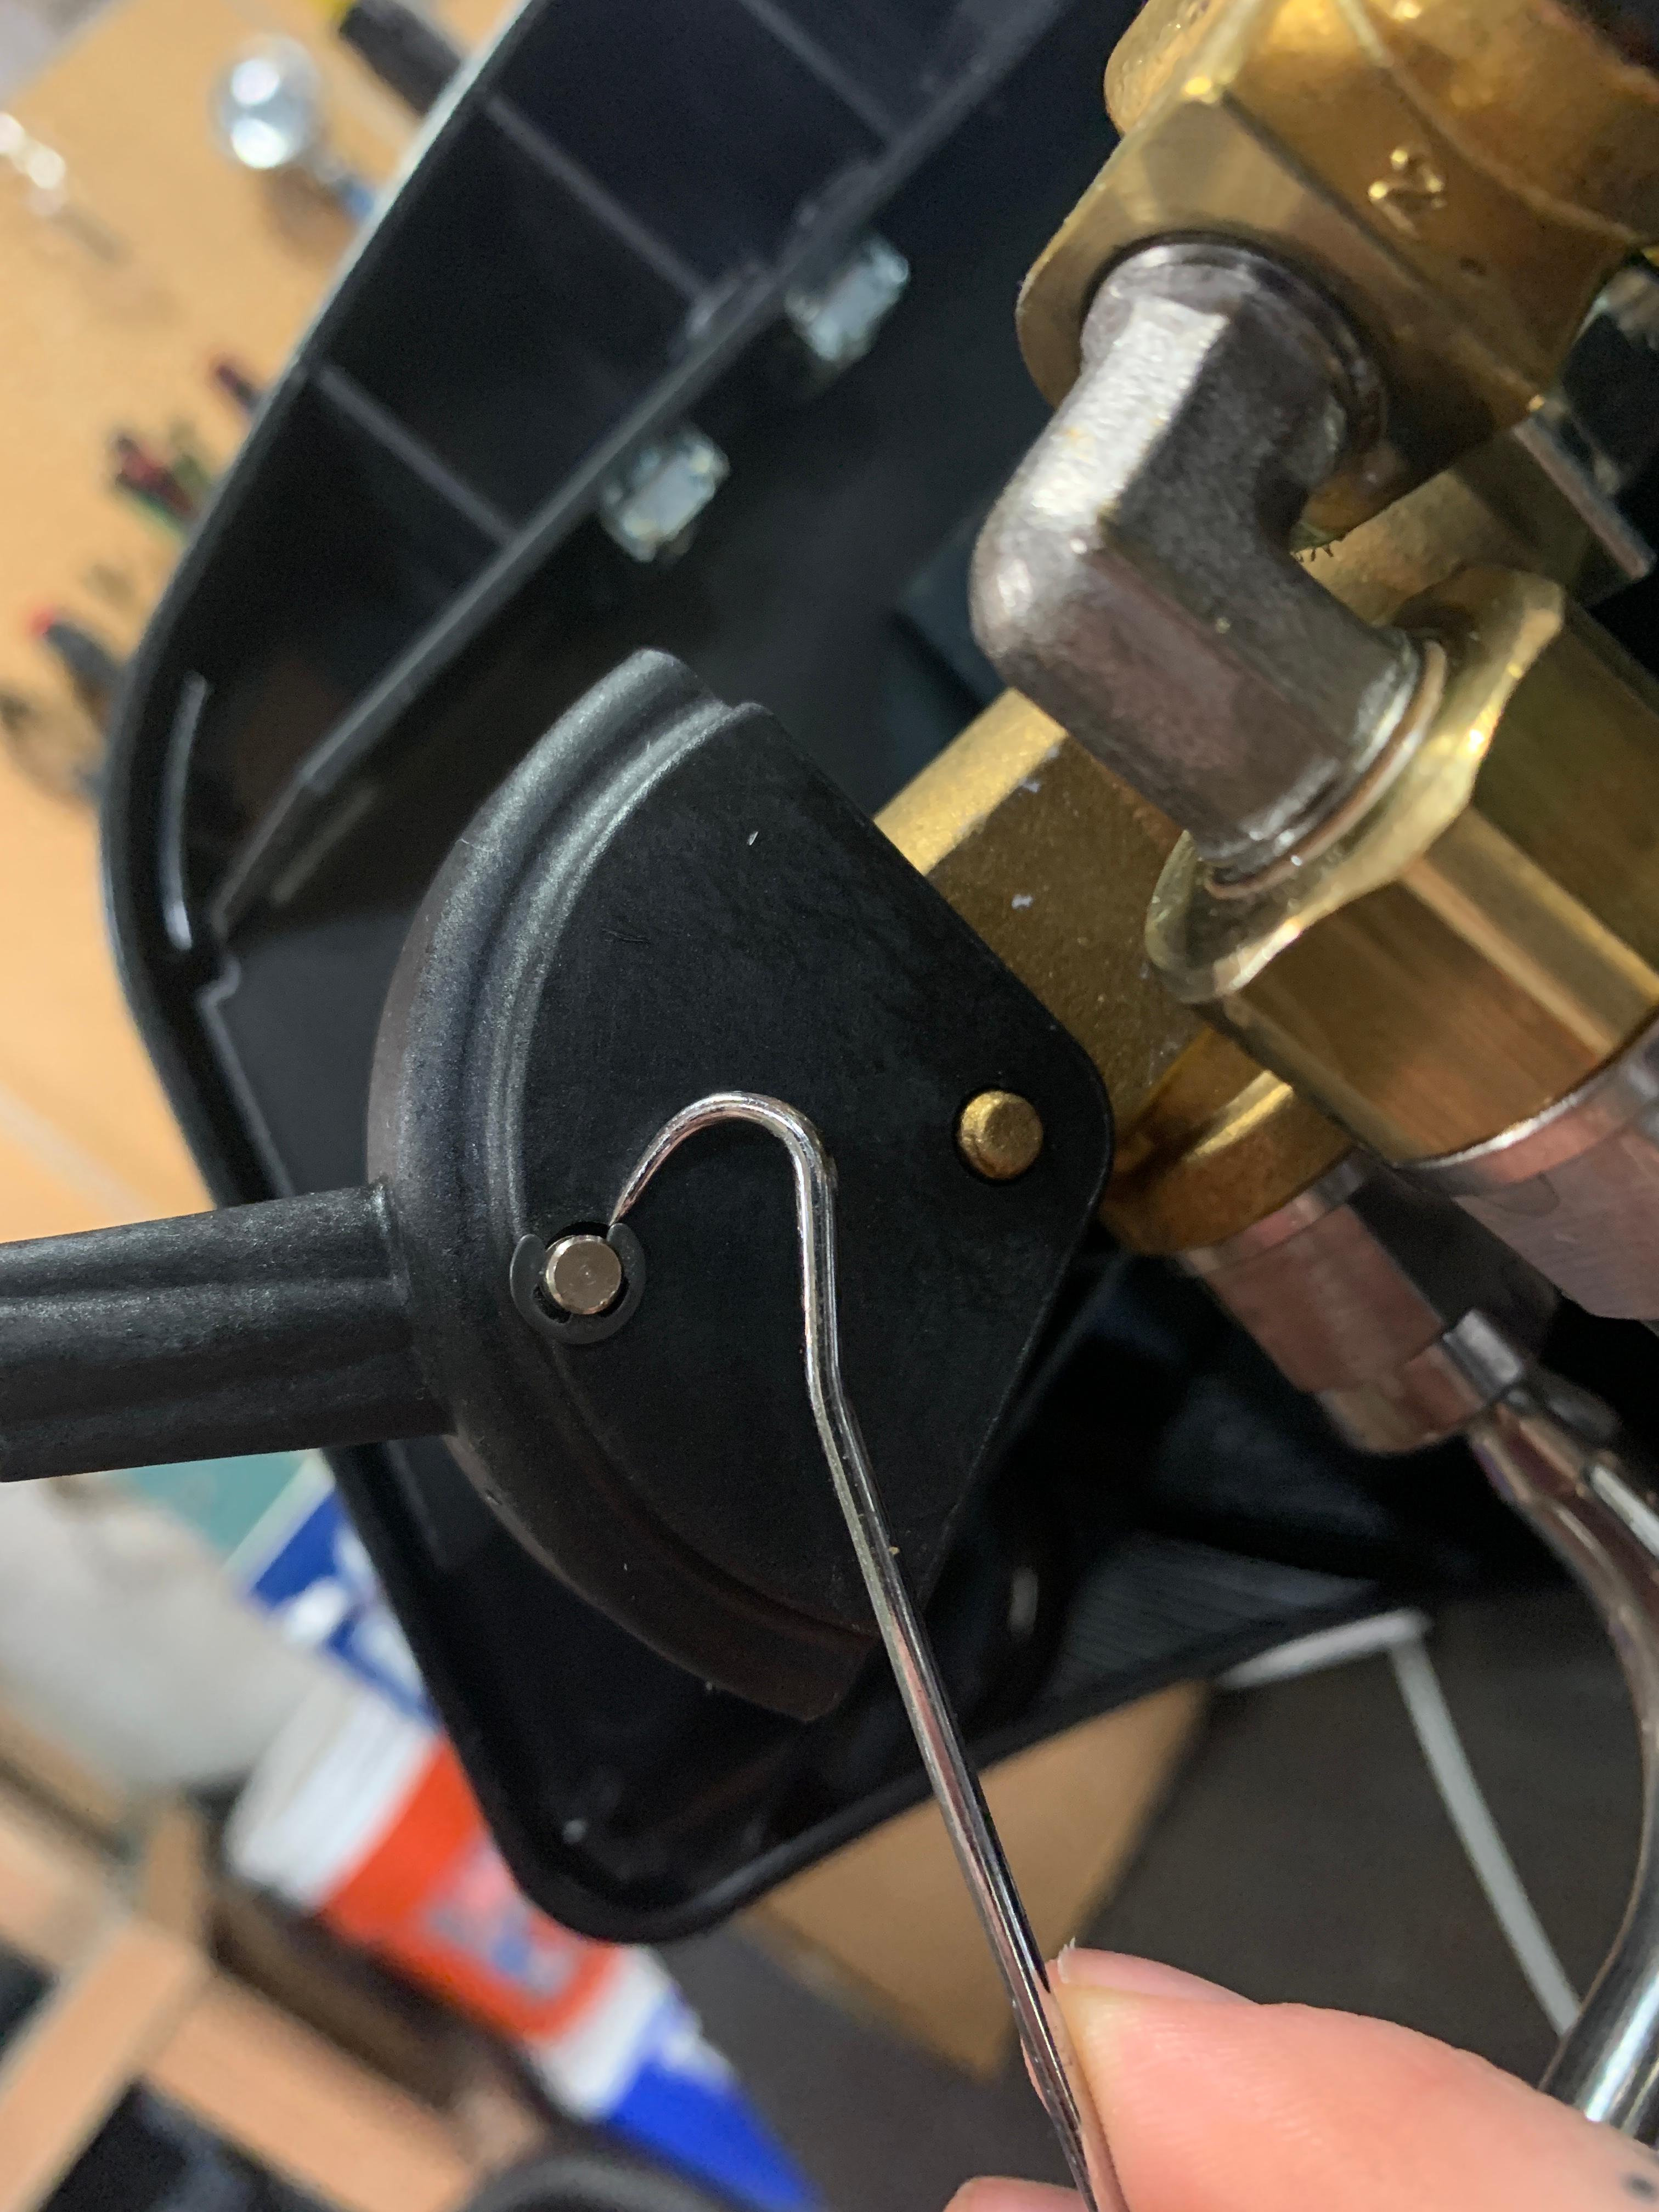 Push the pin through the lever assembly, removing it entirely.
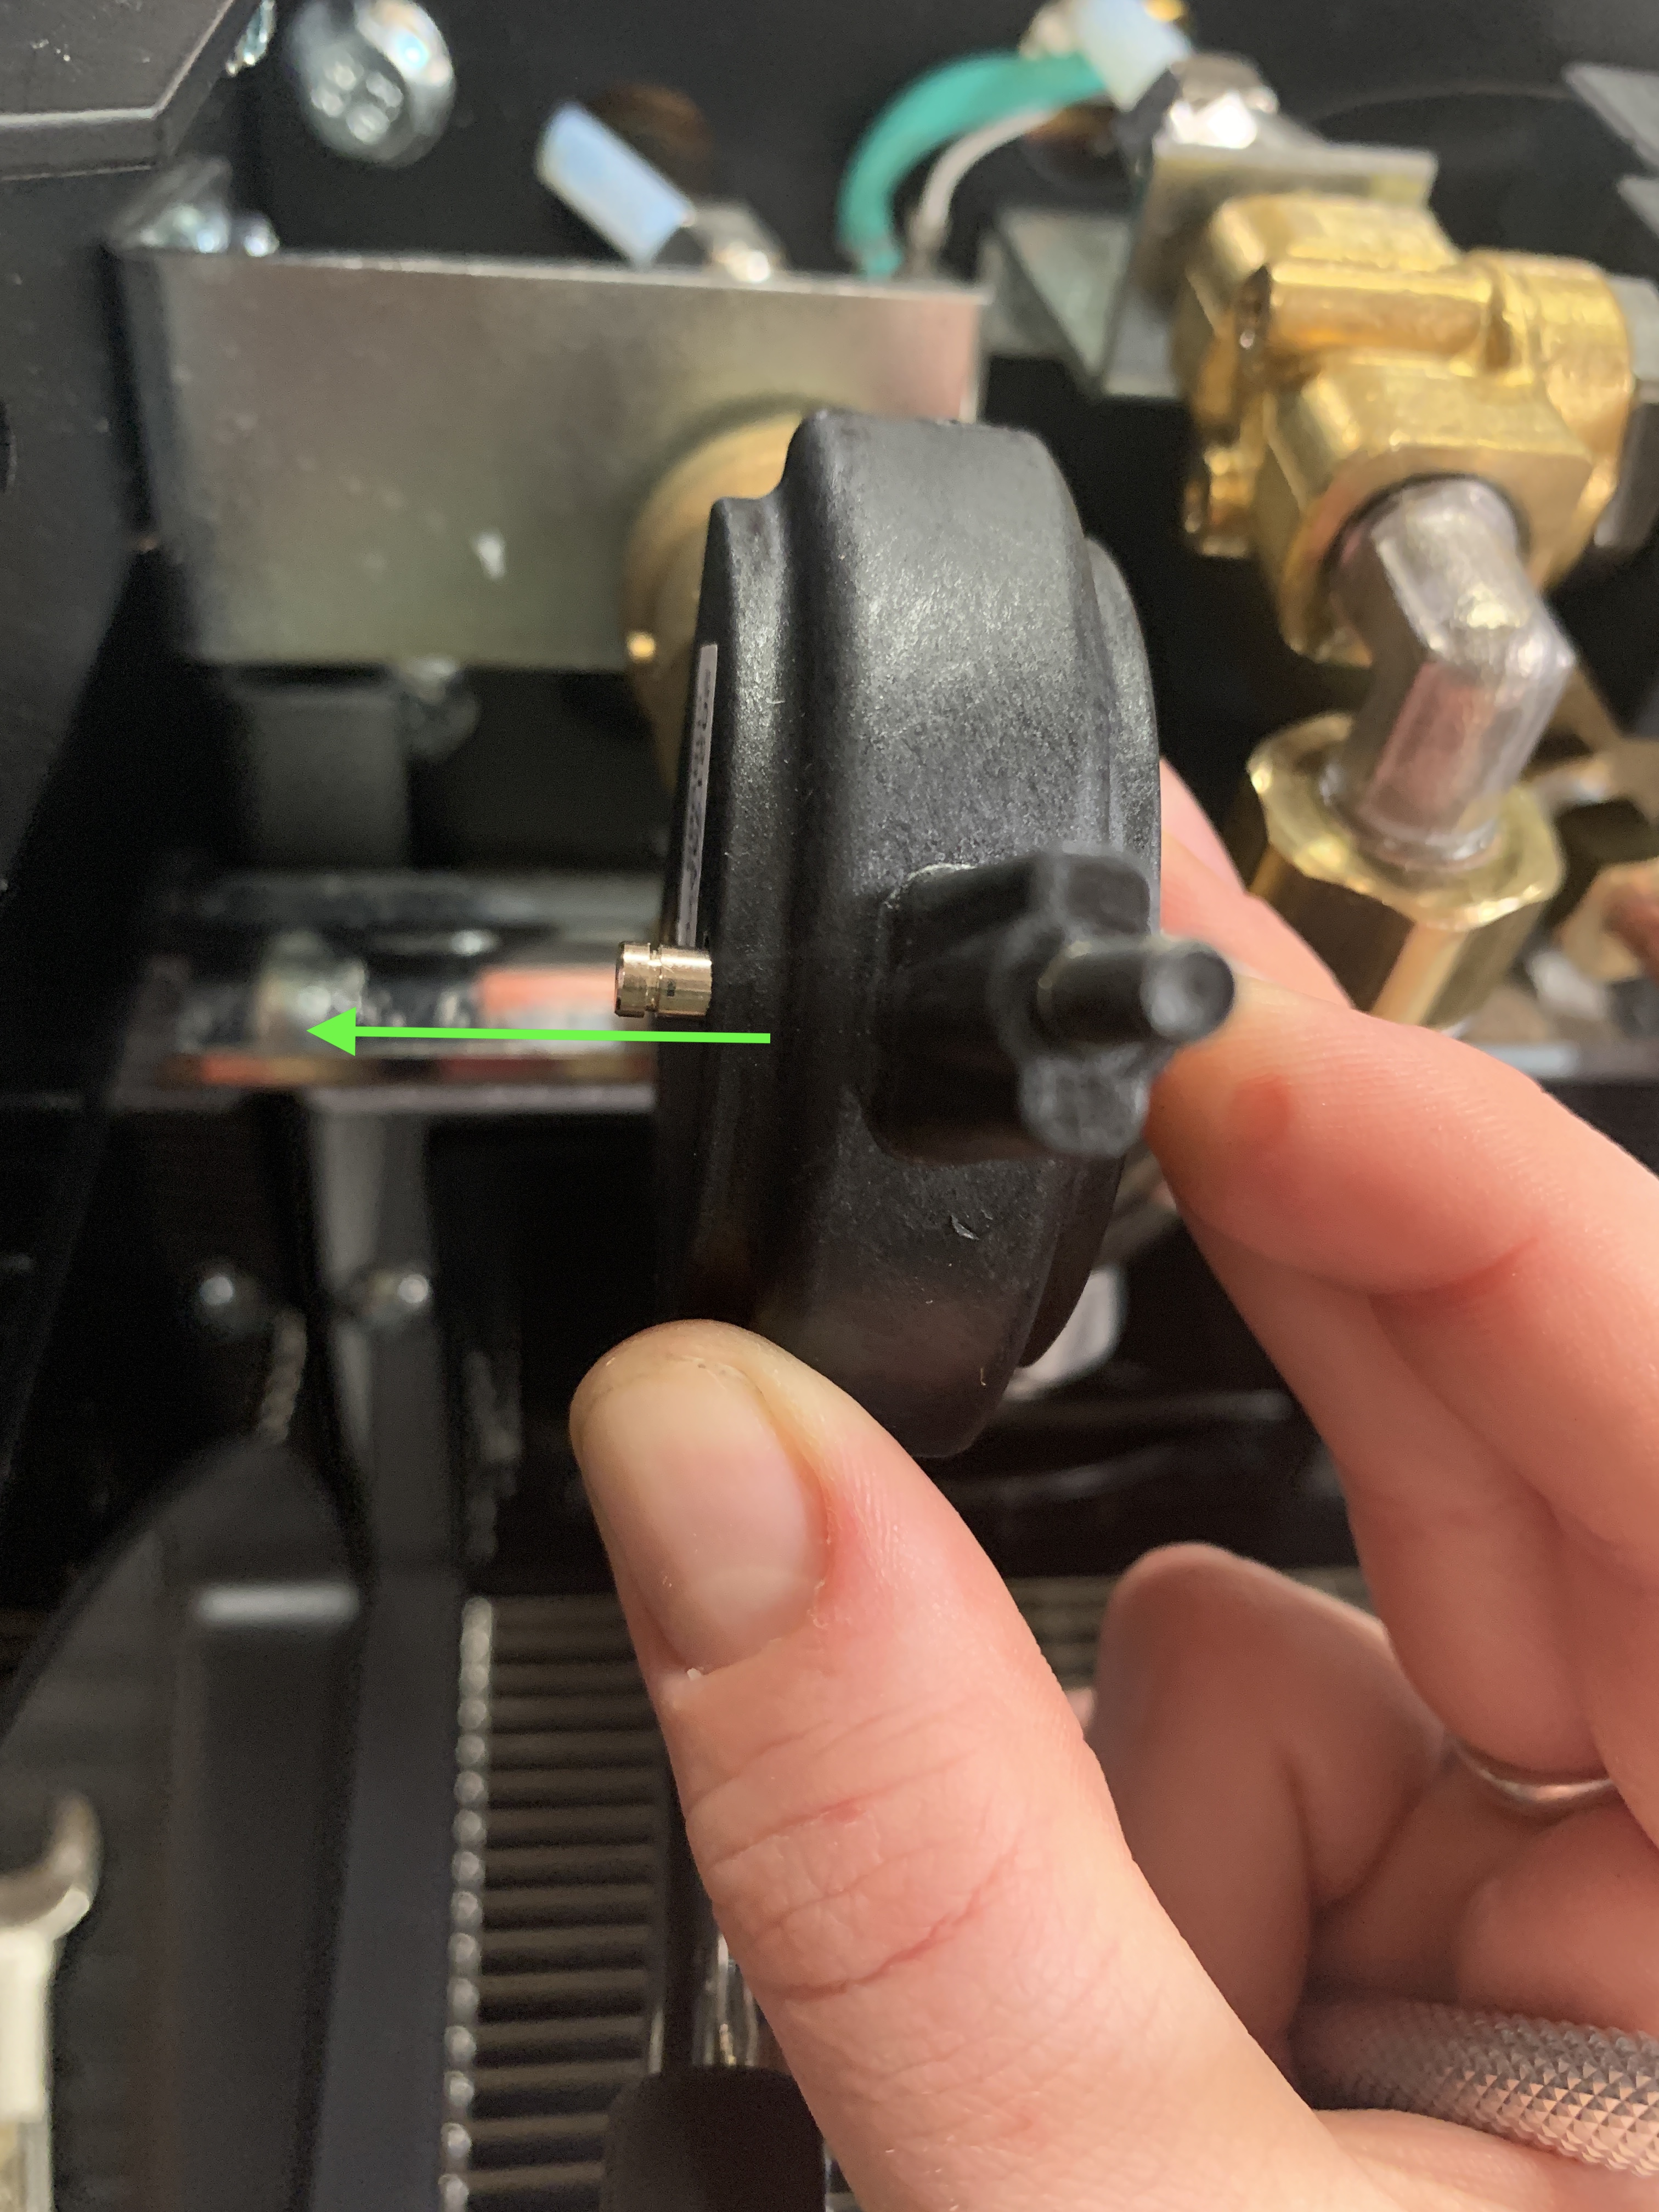
6. Using a small flat blade, pry the plastic cap off of the valve, pushing off the bump and forward on both sides of the valve. 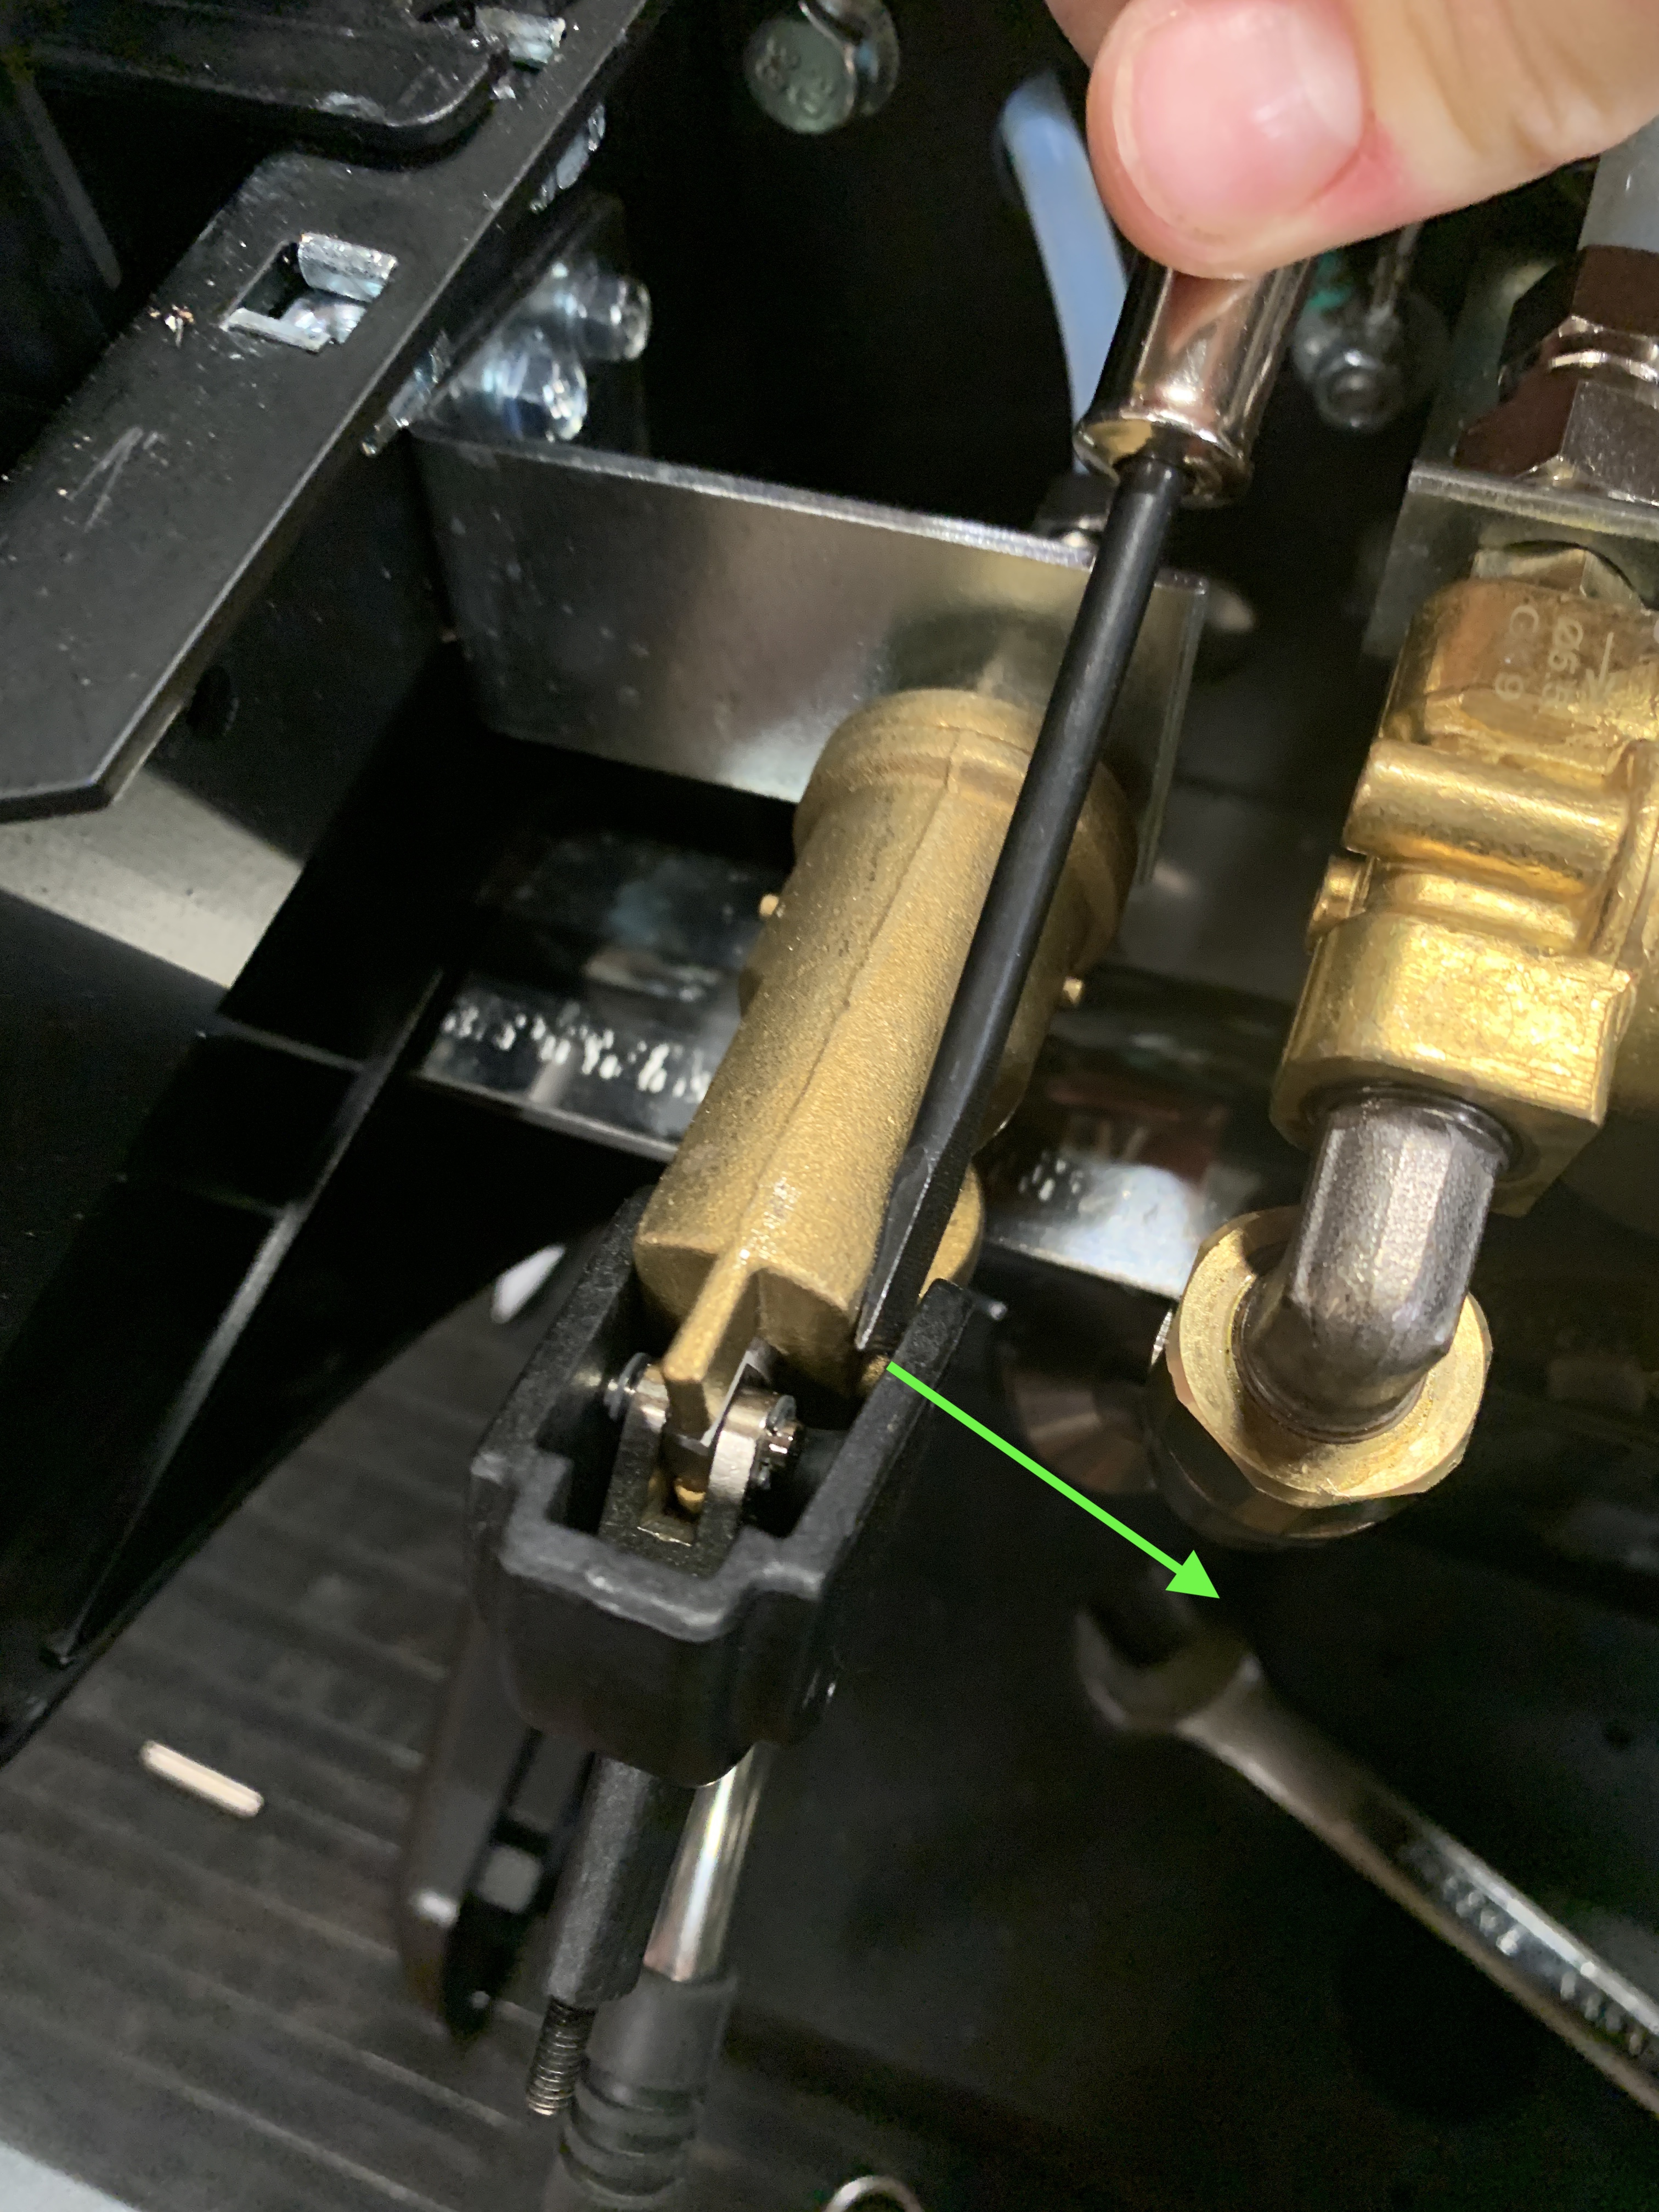
Pull the plastic lever free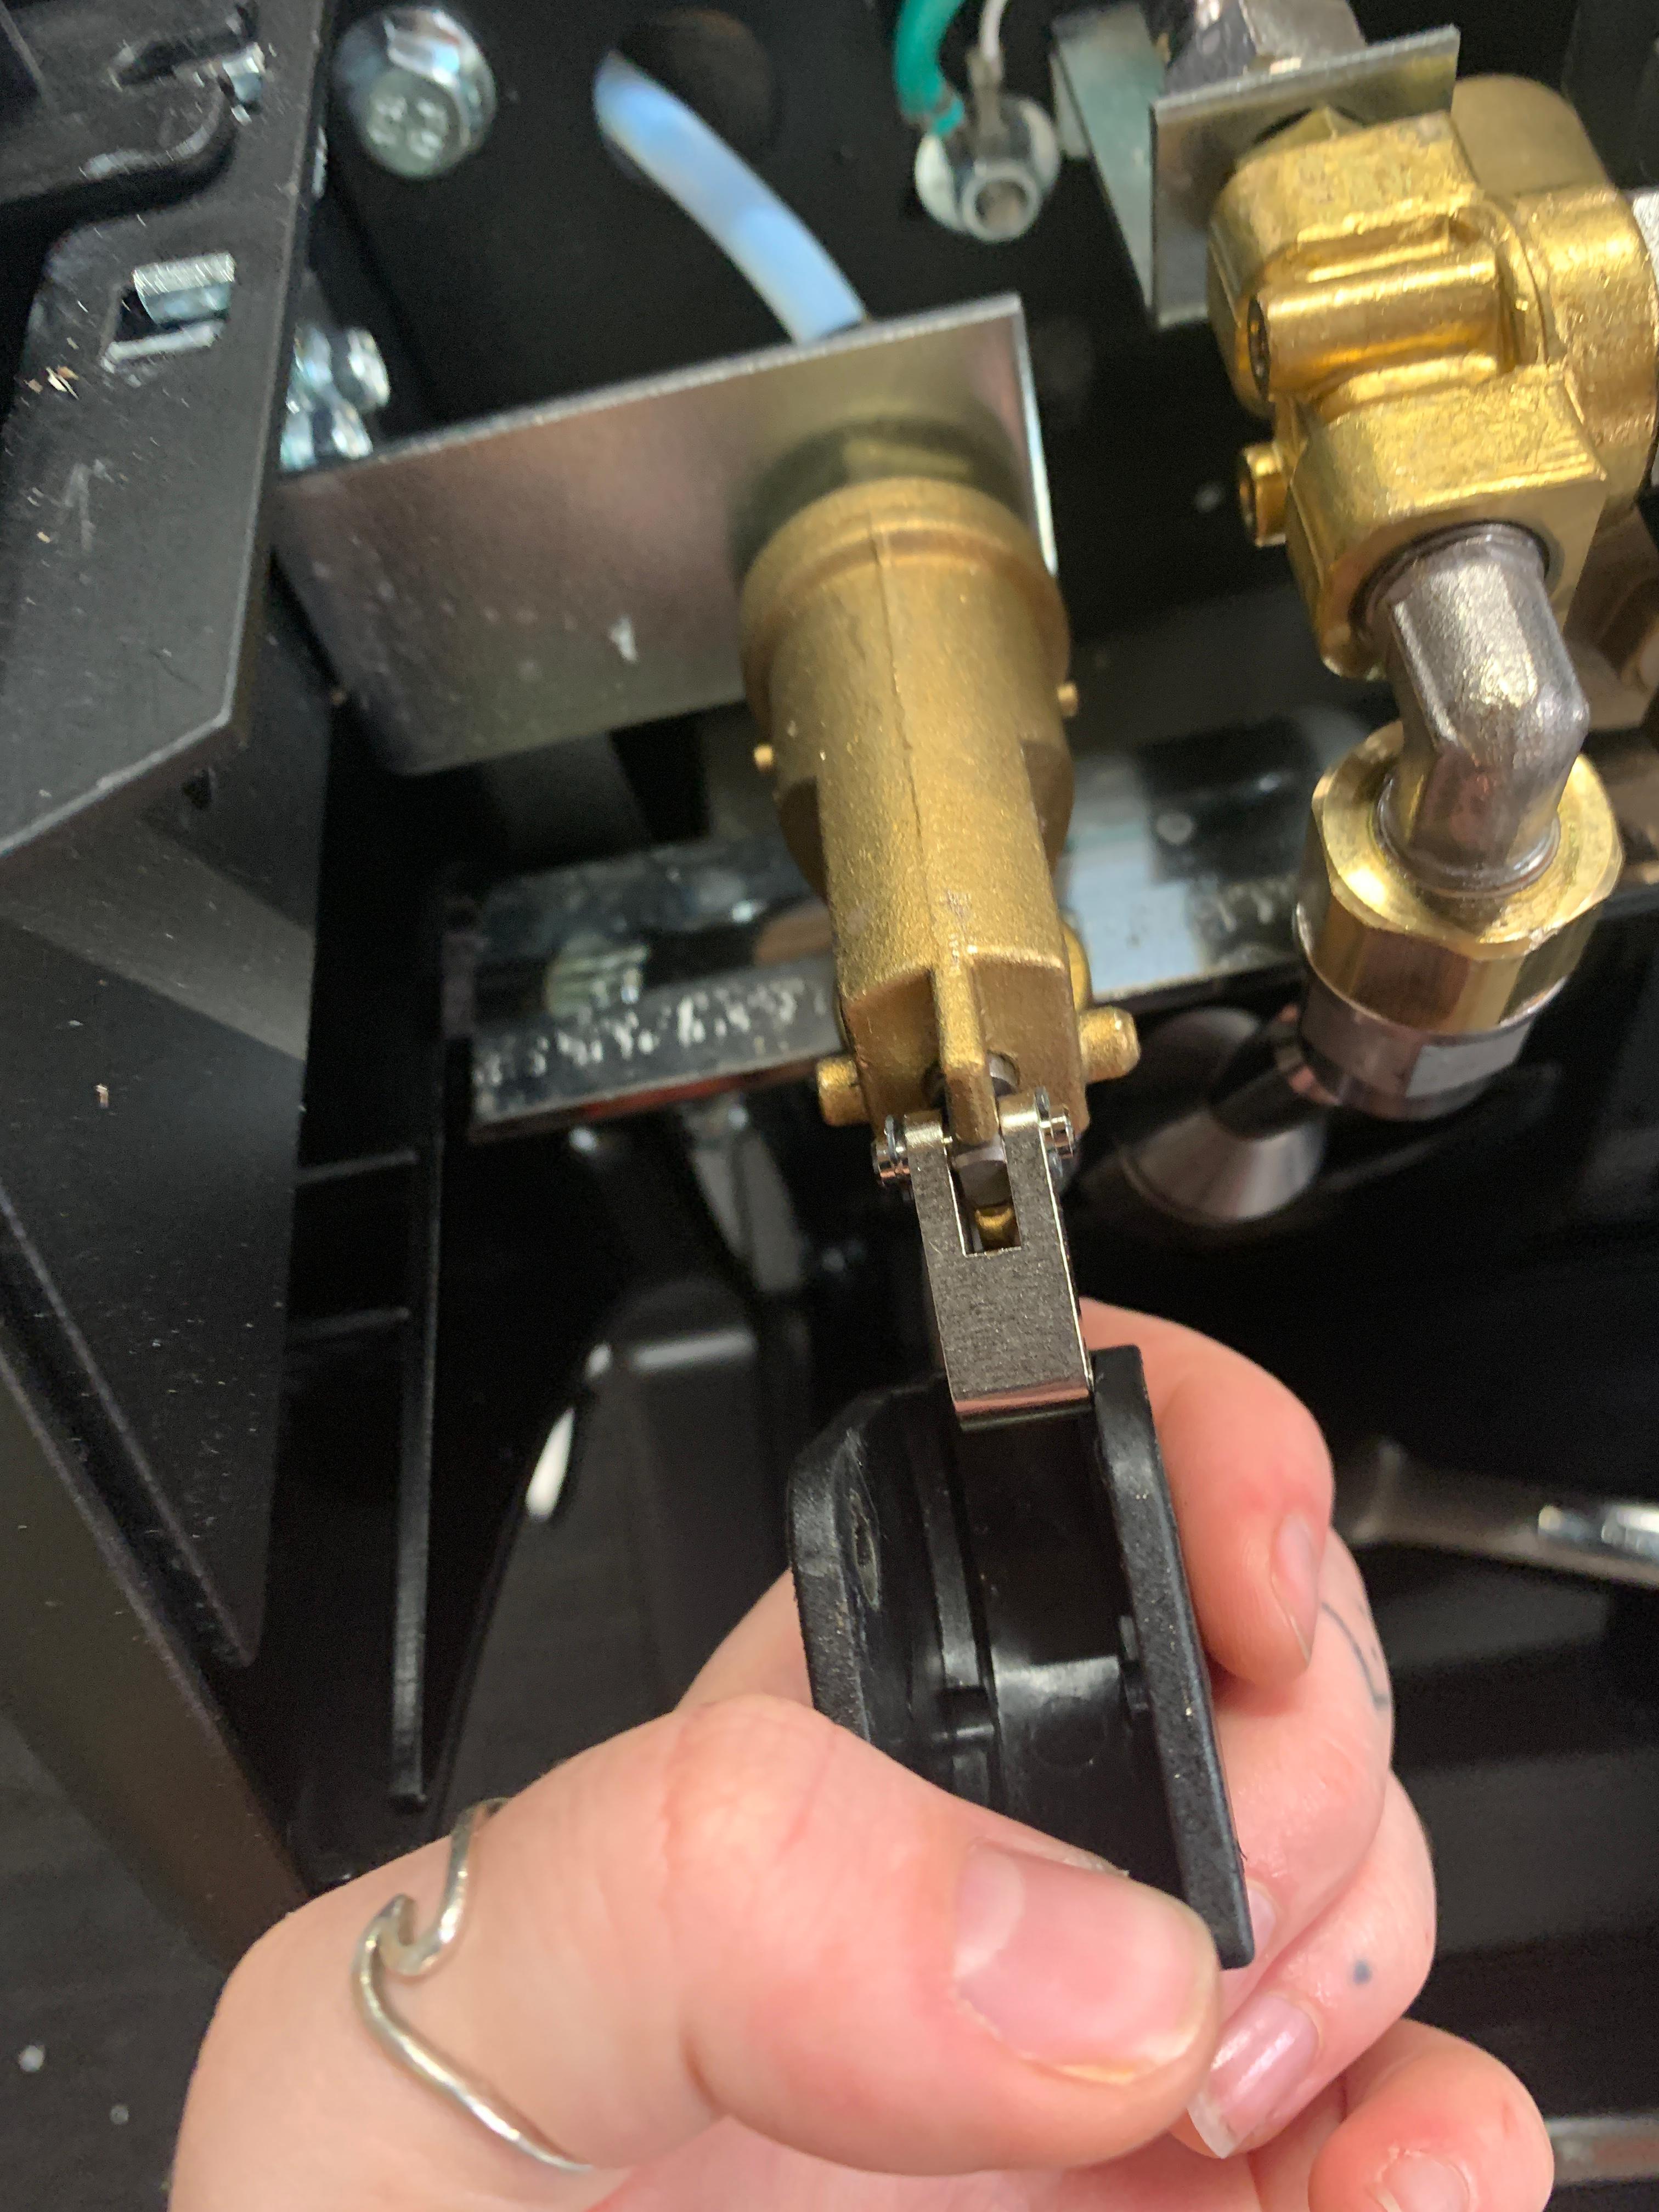 and do the same process on the metal lever assembly underneath
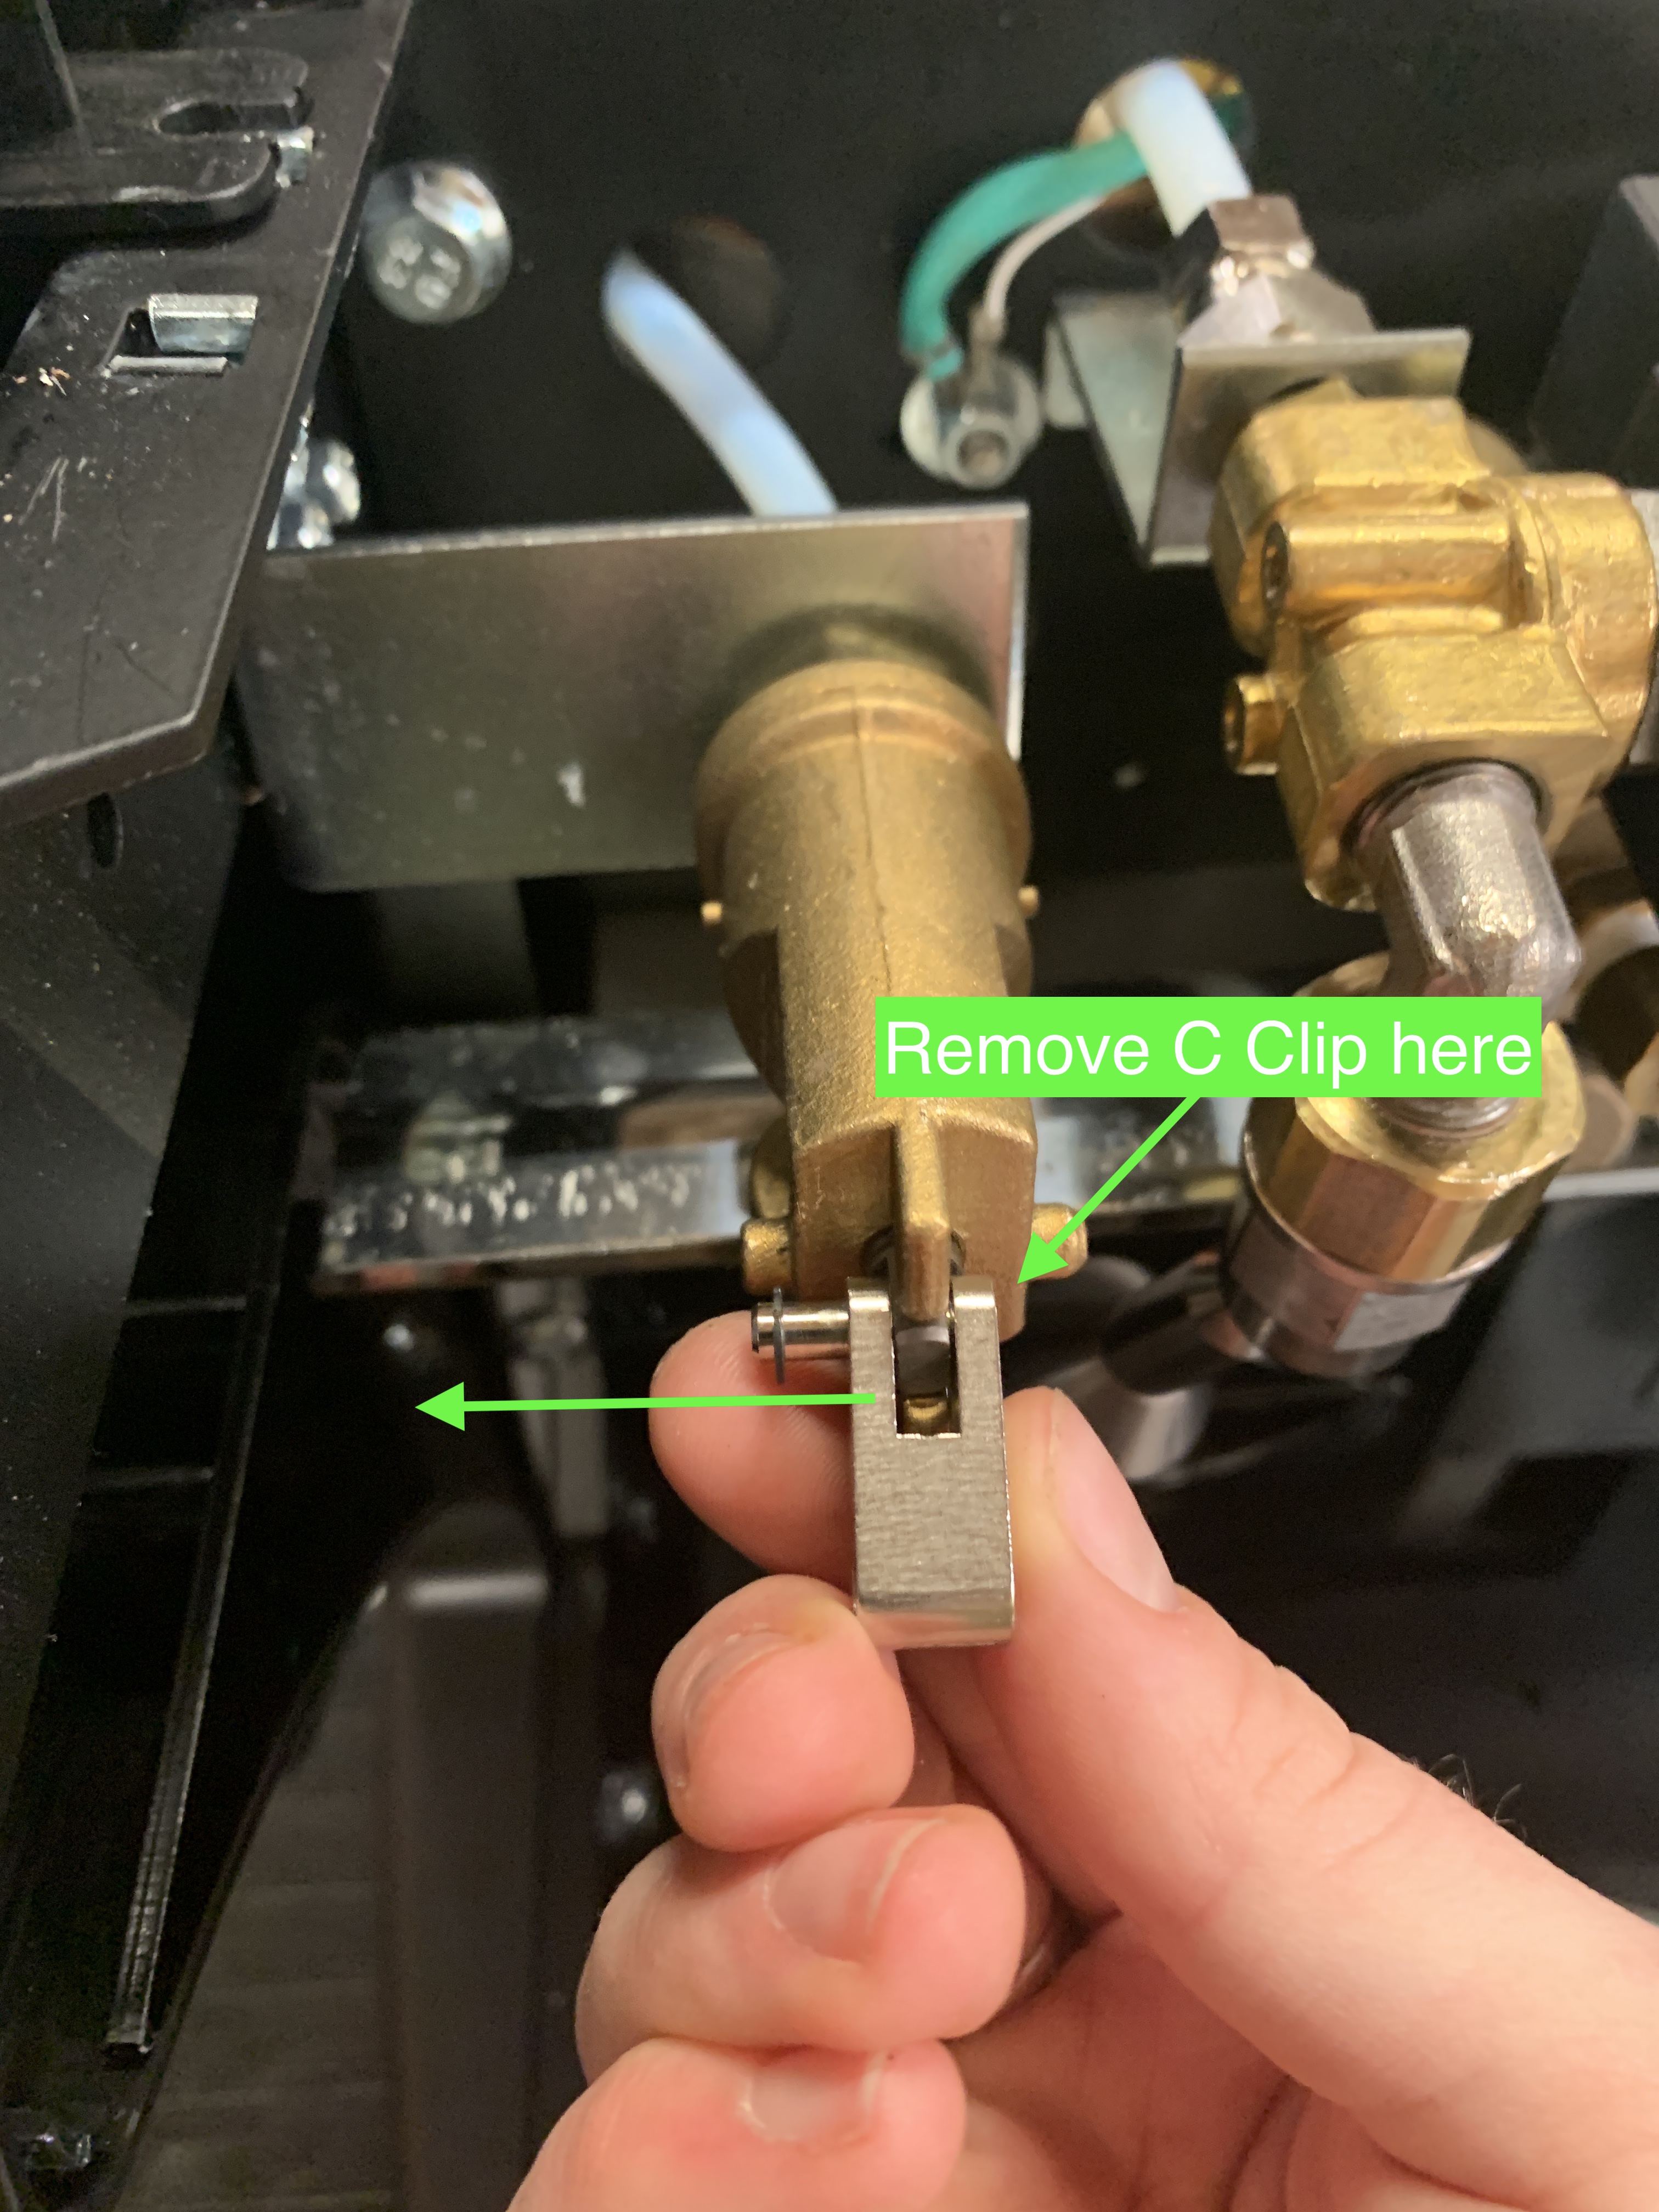
Save these pieces! You'll need them to reinstall onto your new steam valve.
Once the lever mechanism is free, remove the steam arm using the 19mm wrench.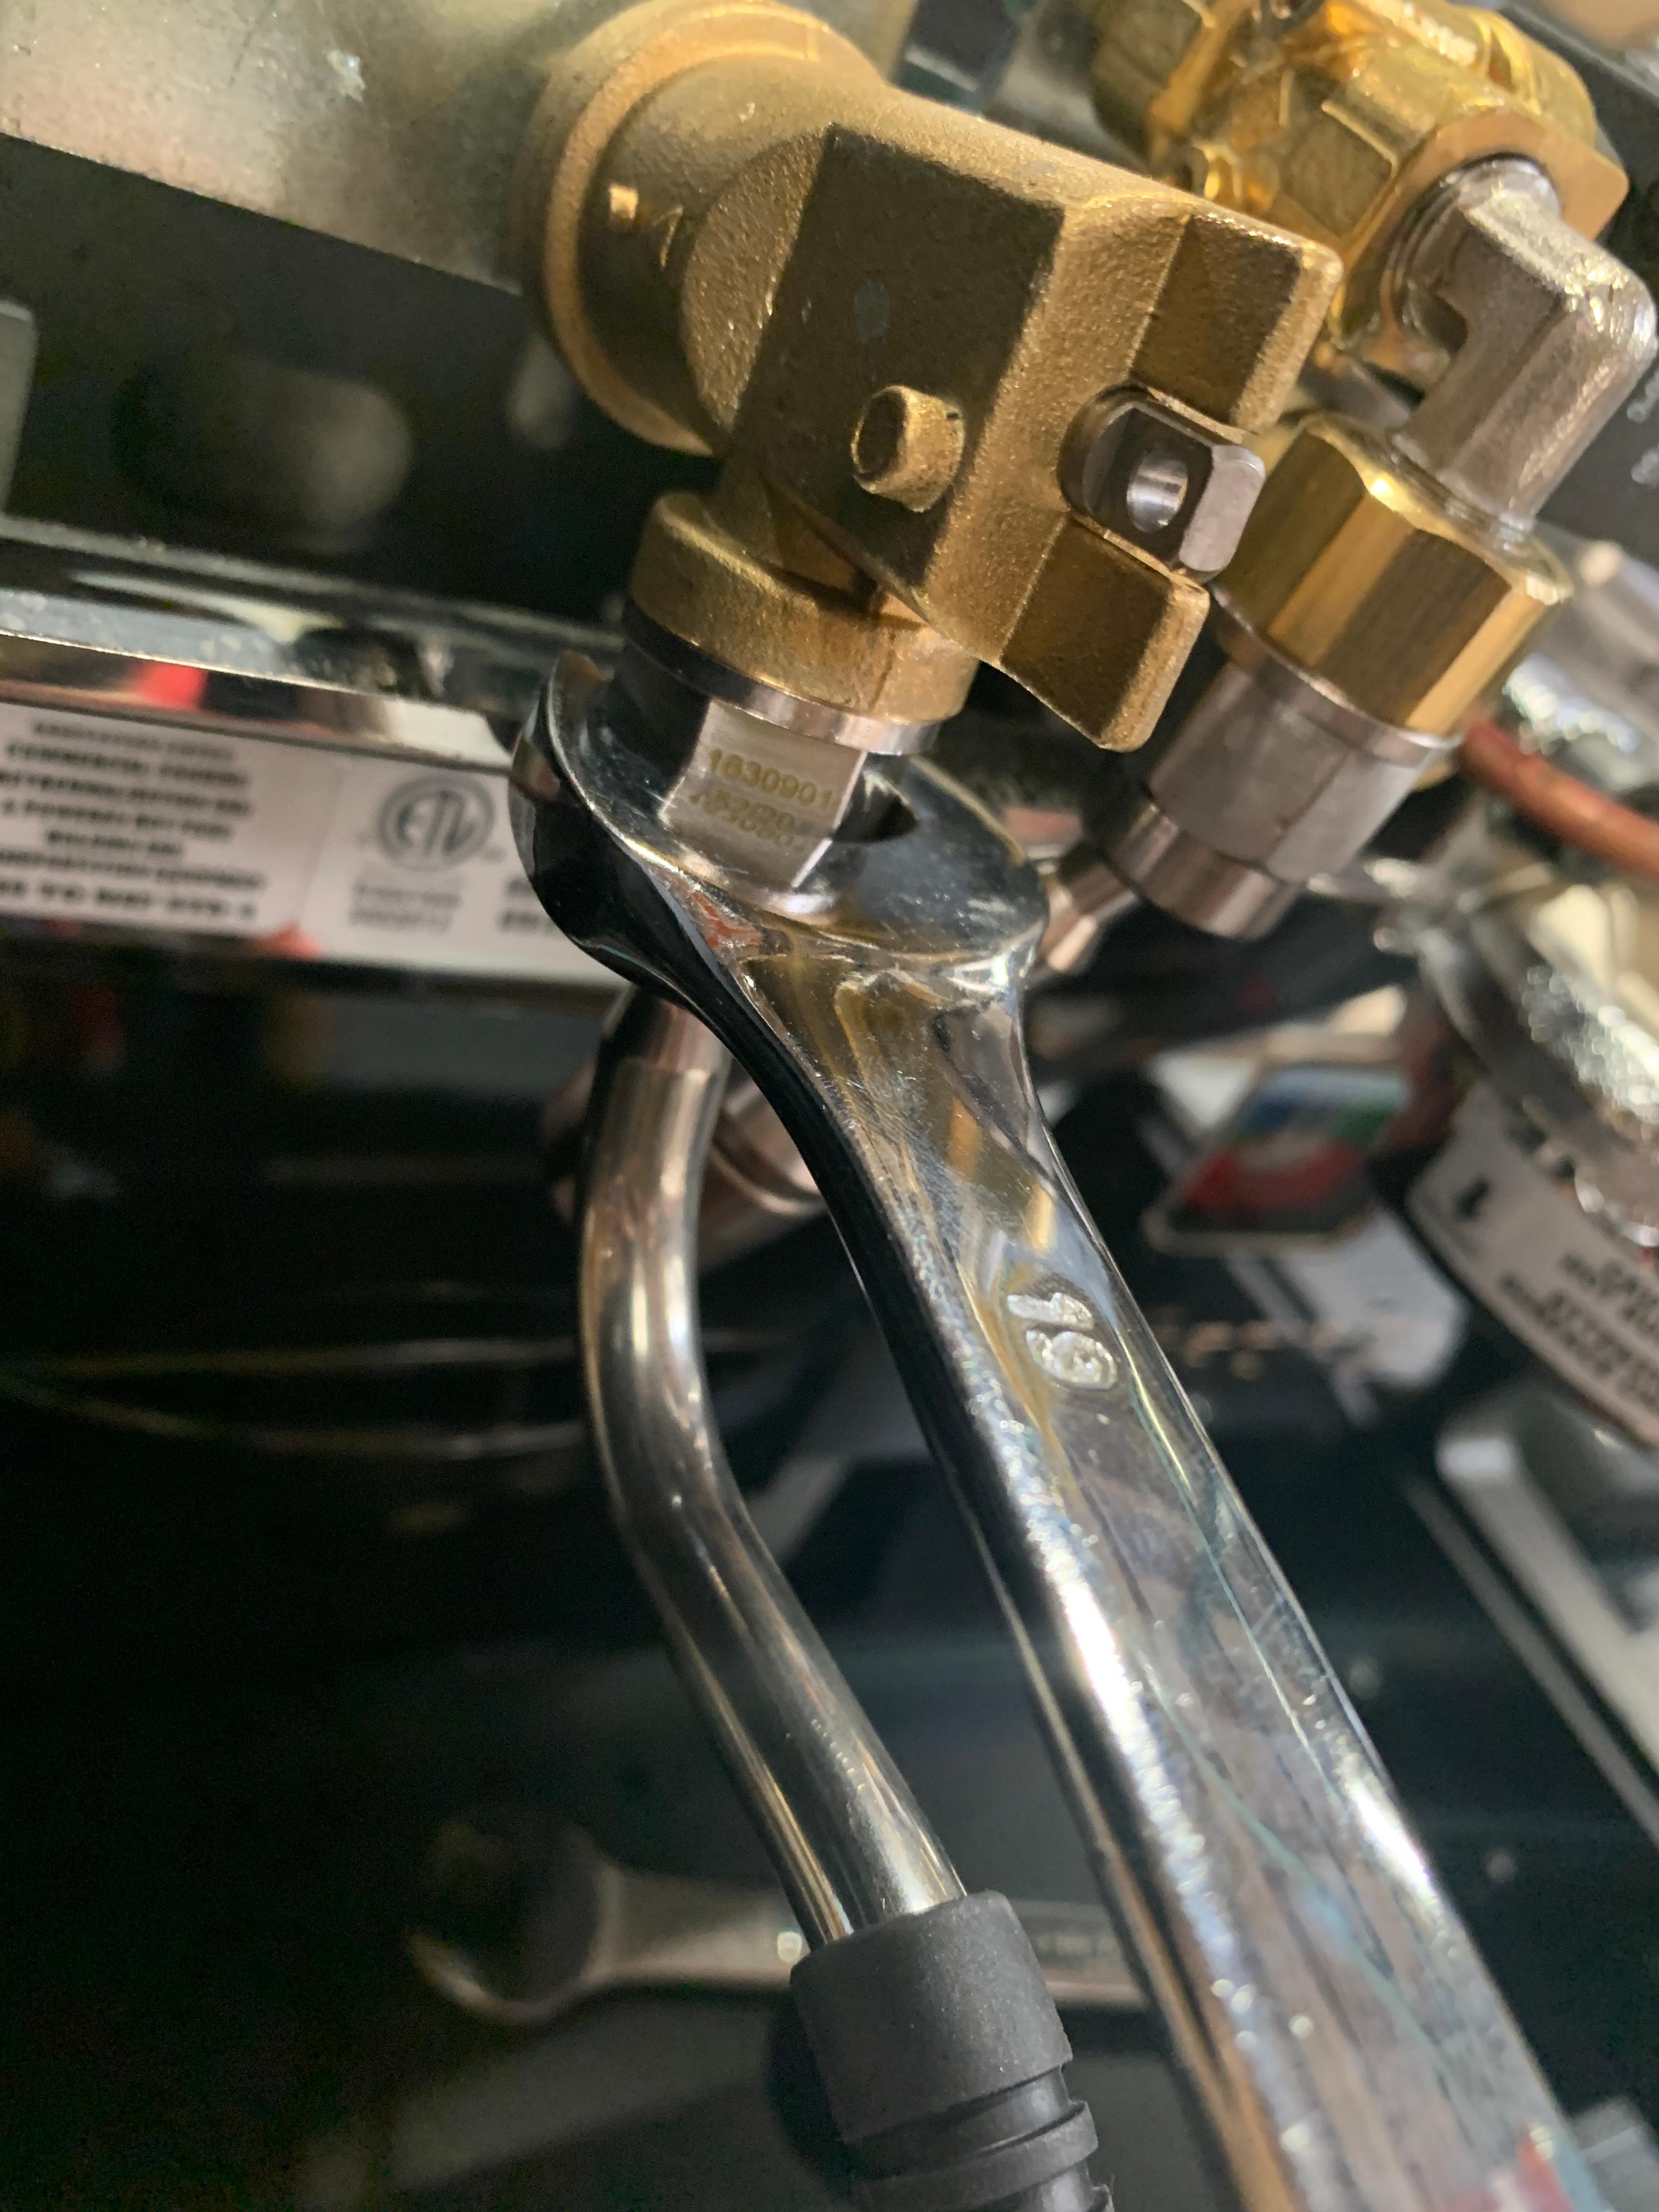
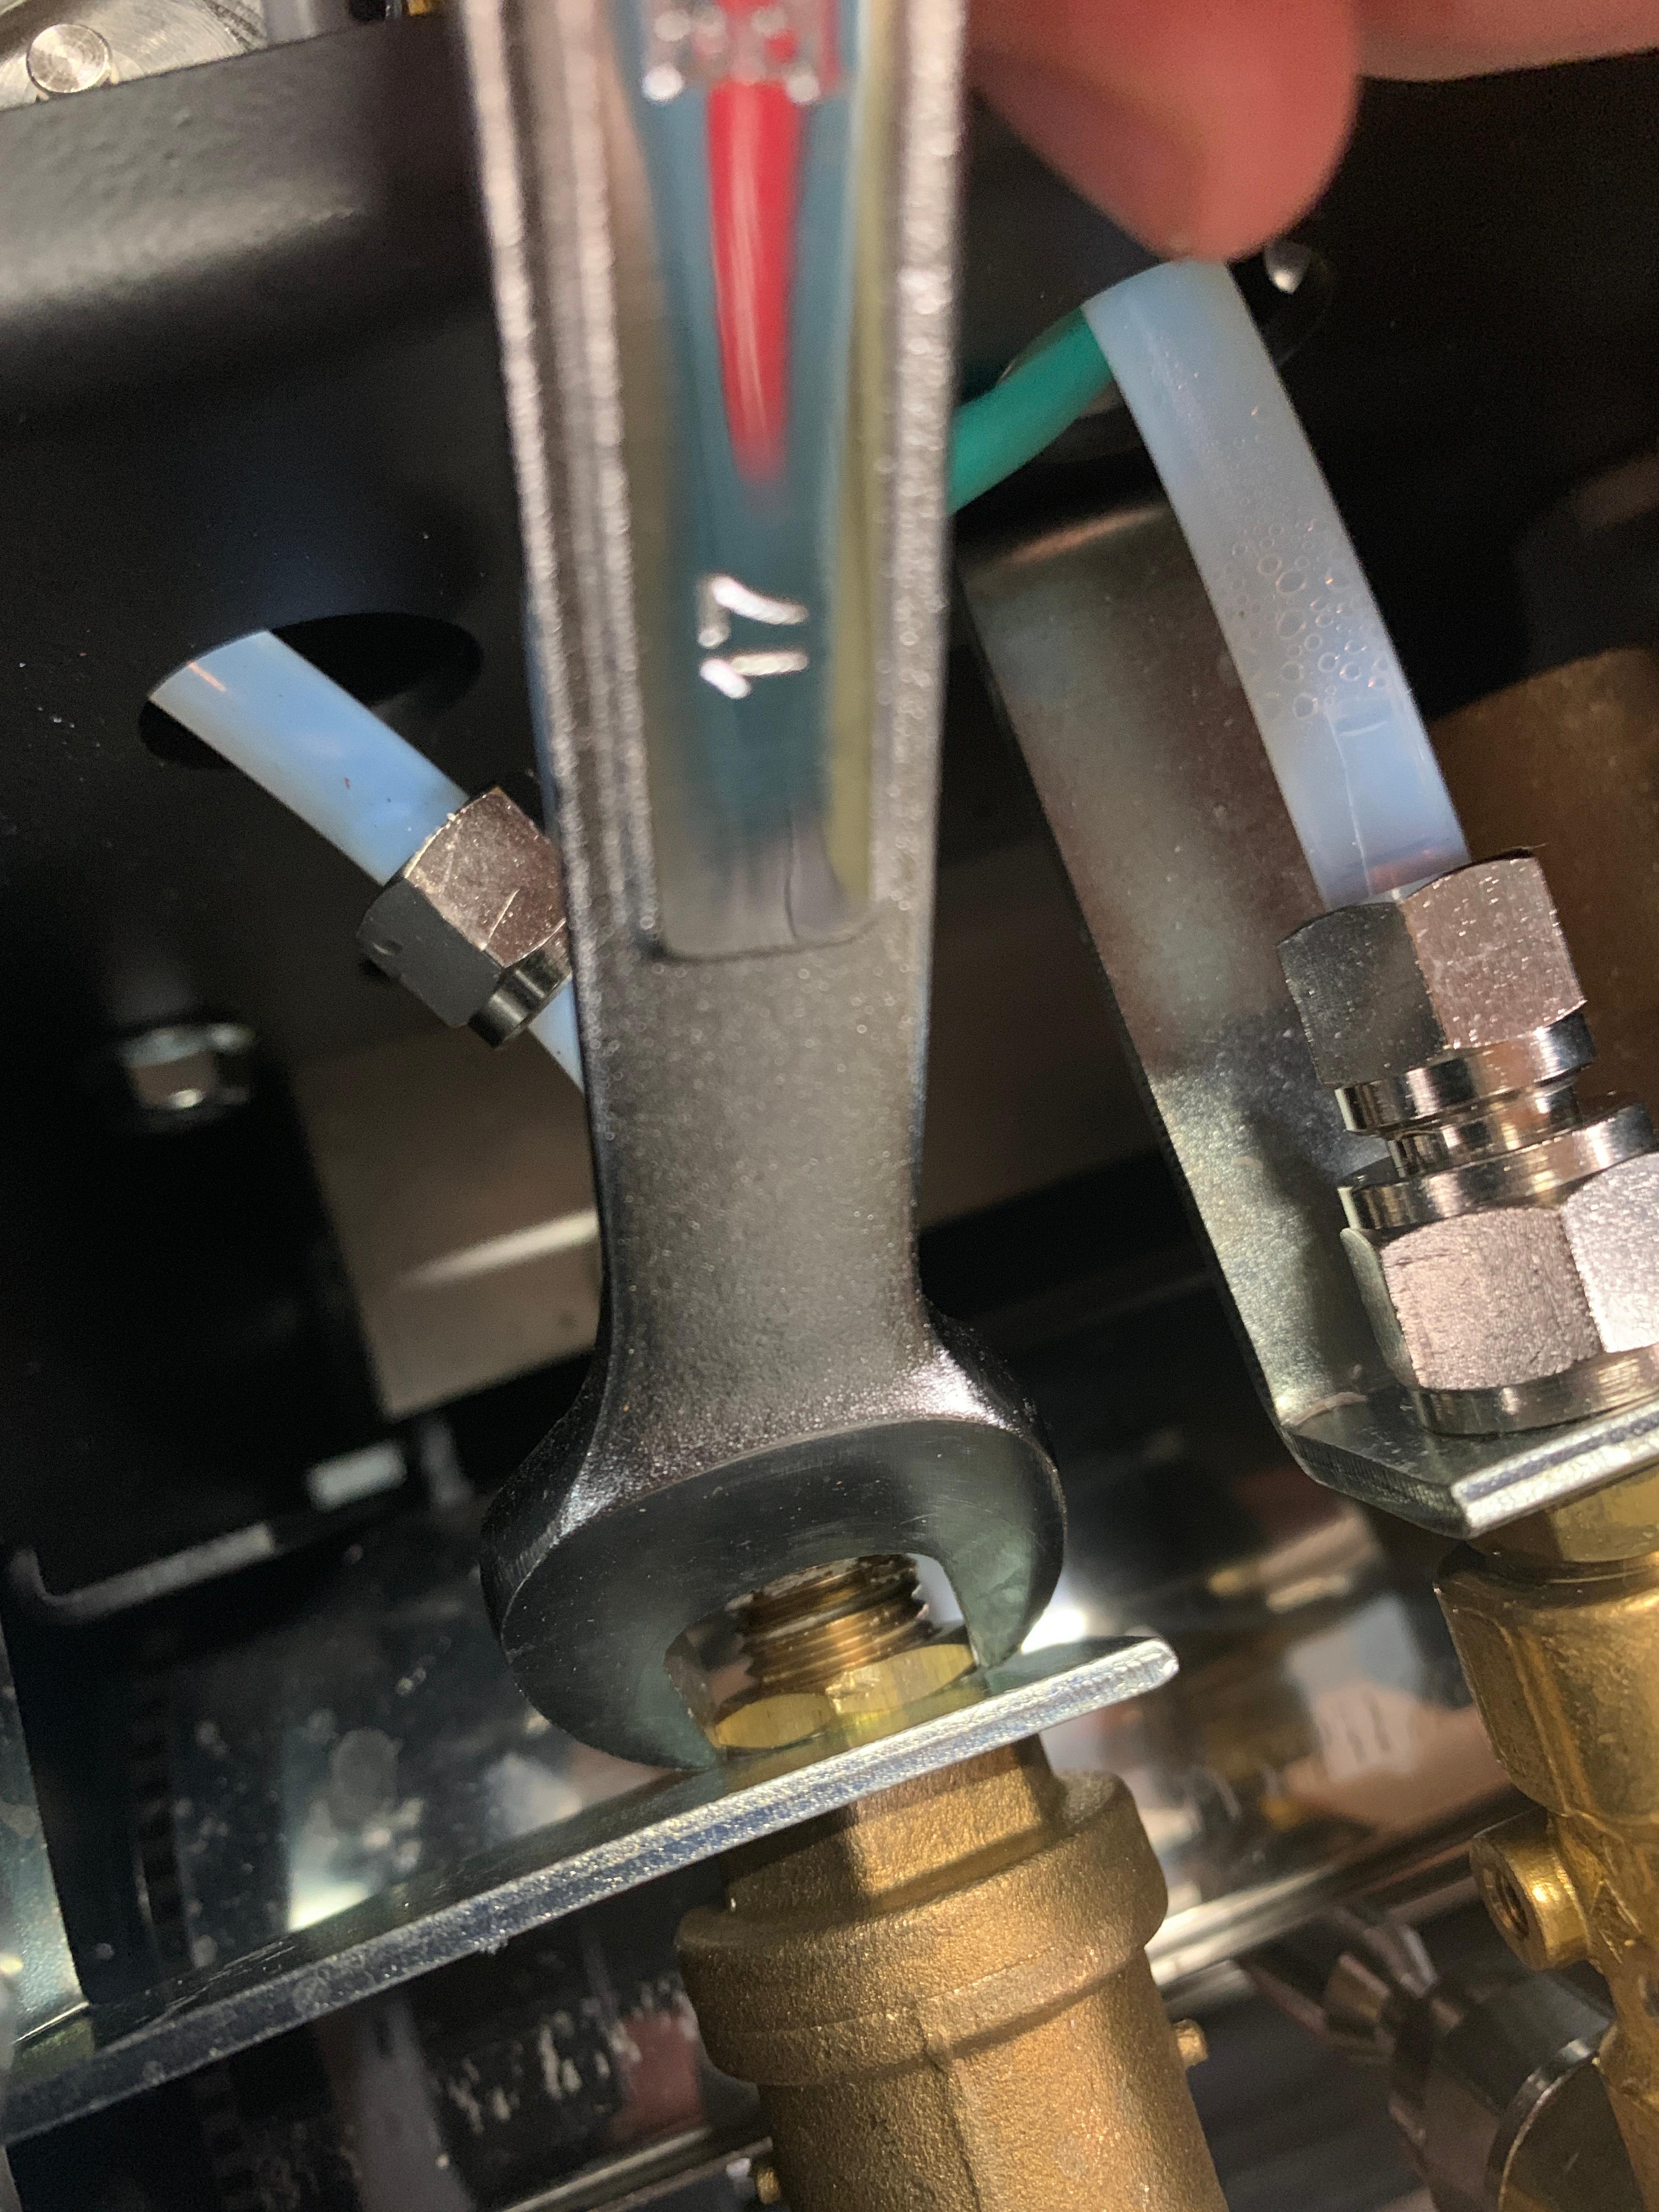
Once the add-ons are removed from the valve assembly, we can remove the valve from the machine! The first piece to remove is the nut fastening the steam delivery tube to the valve using the 14mm wrench. You can use the 17mm wrench here to hold the valve steady and make it easier to break the 14mm nut free. 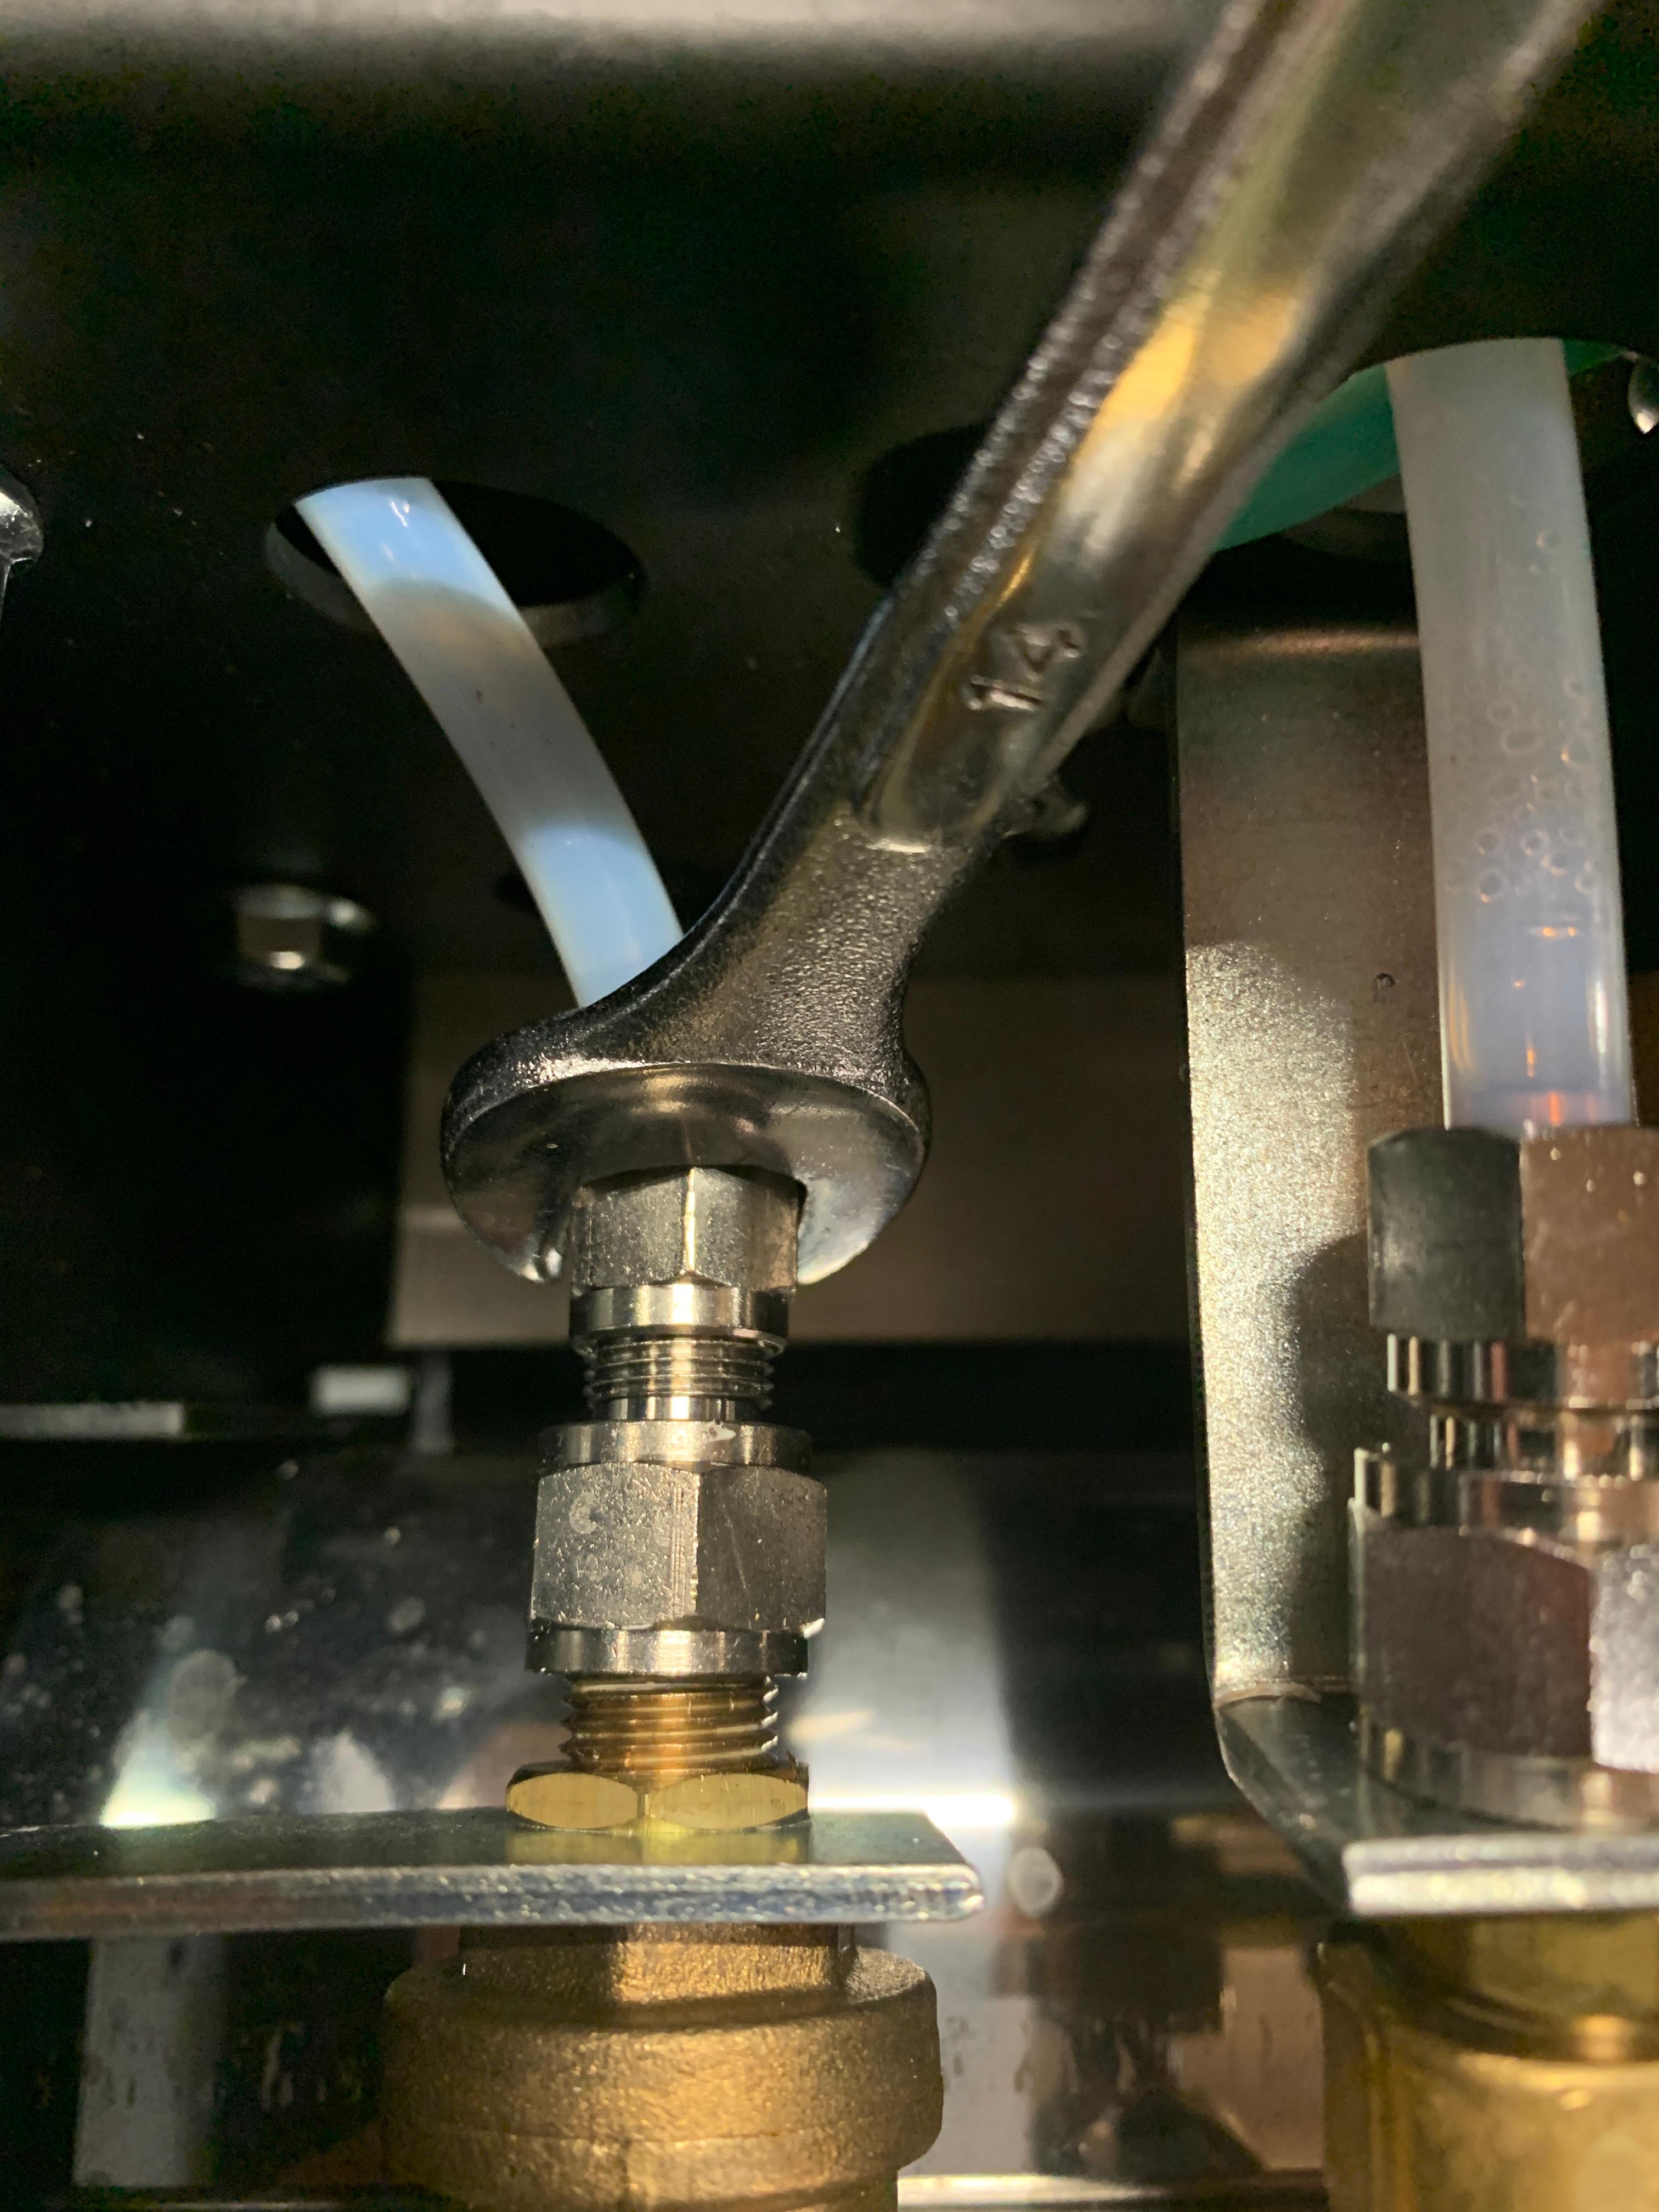
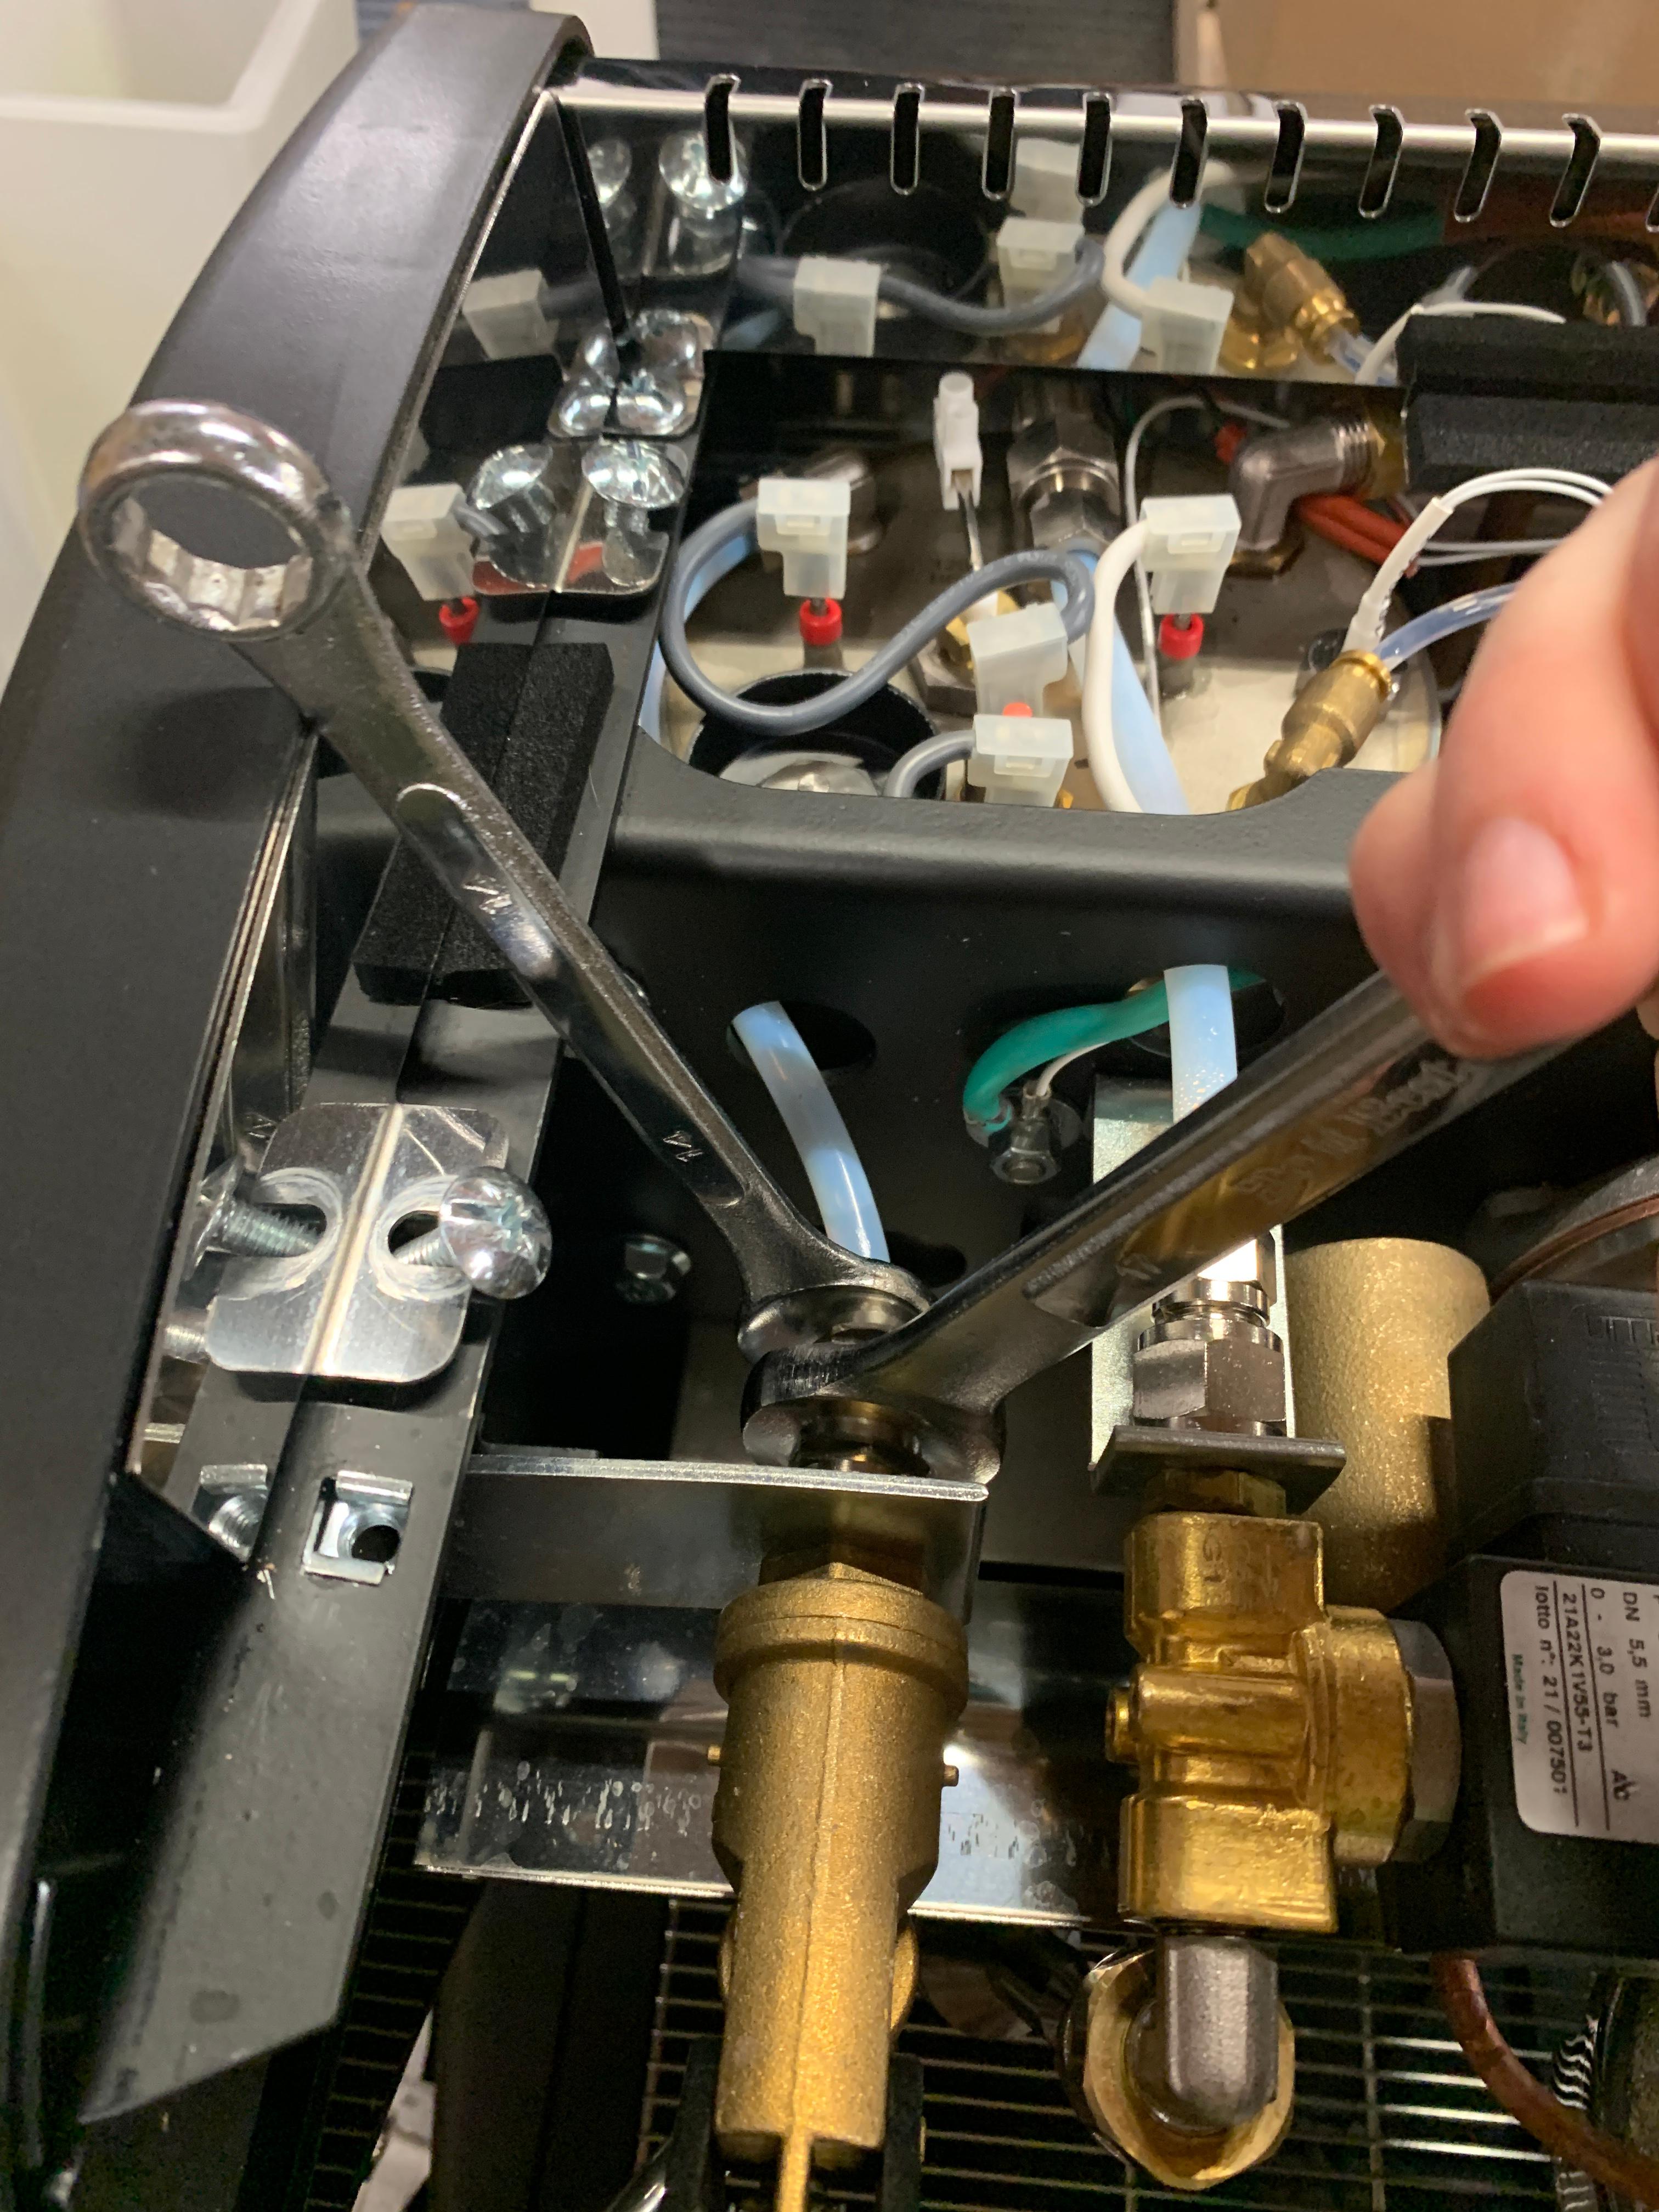
Remove the tube and then loosen the two 17mm nuts fastening the valve to that bracket. Using the adjustable wrench on the front of the valve will hold it steady while you loosen these nuts. 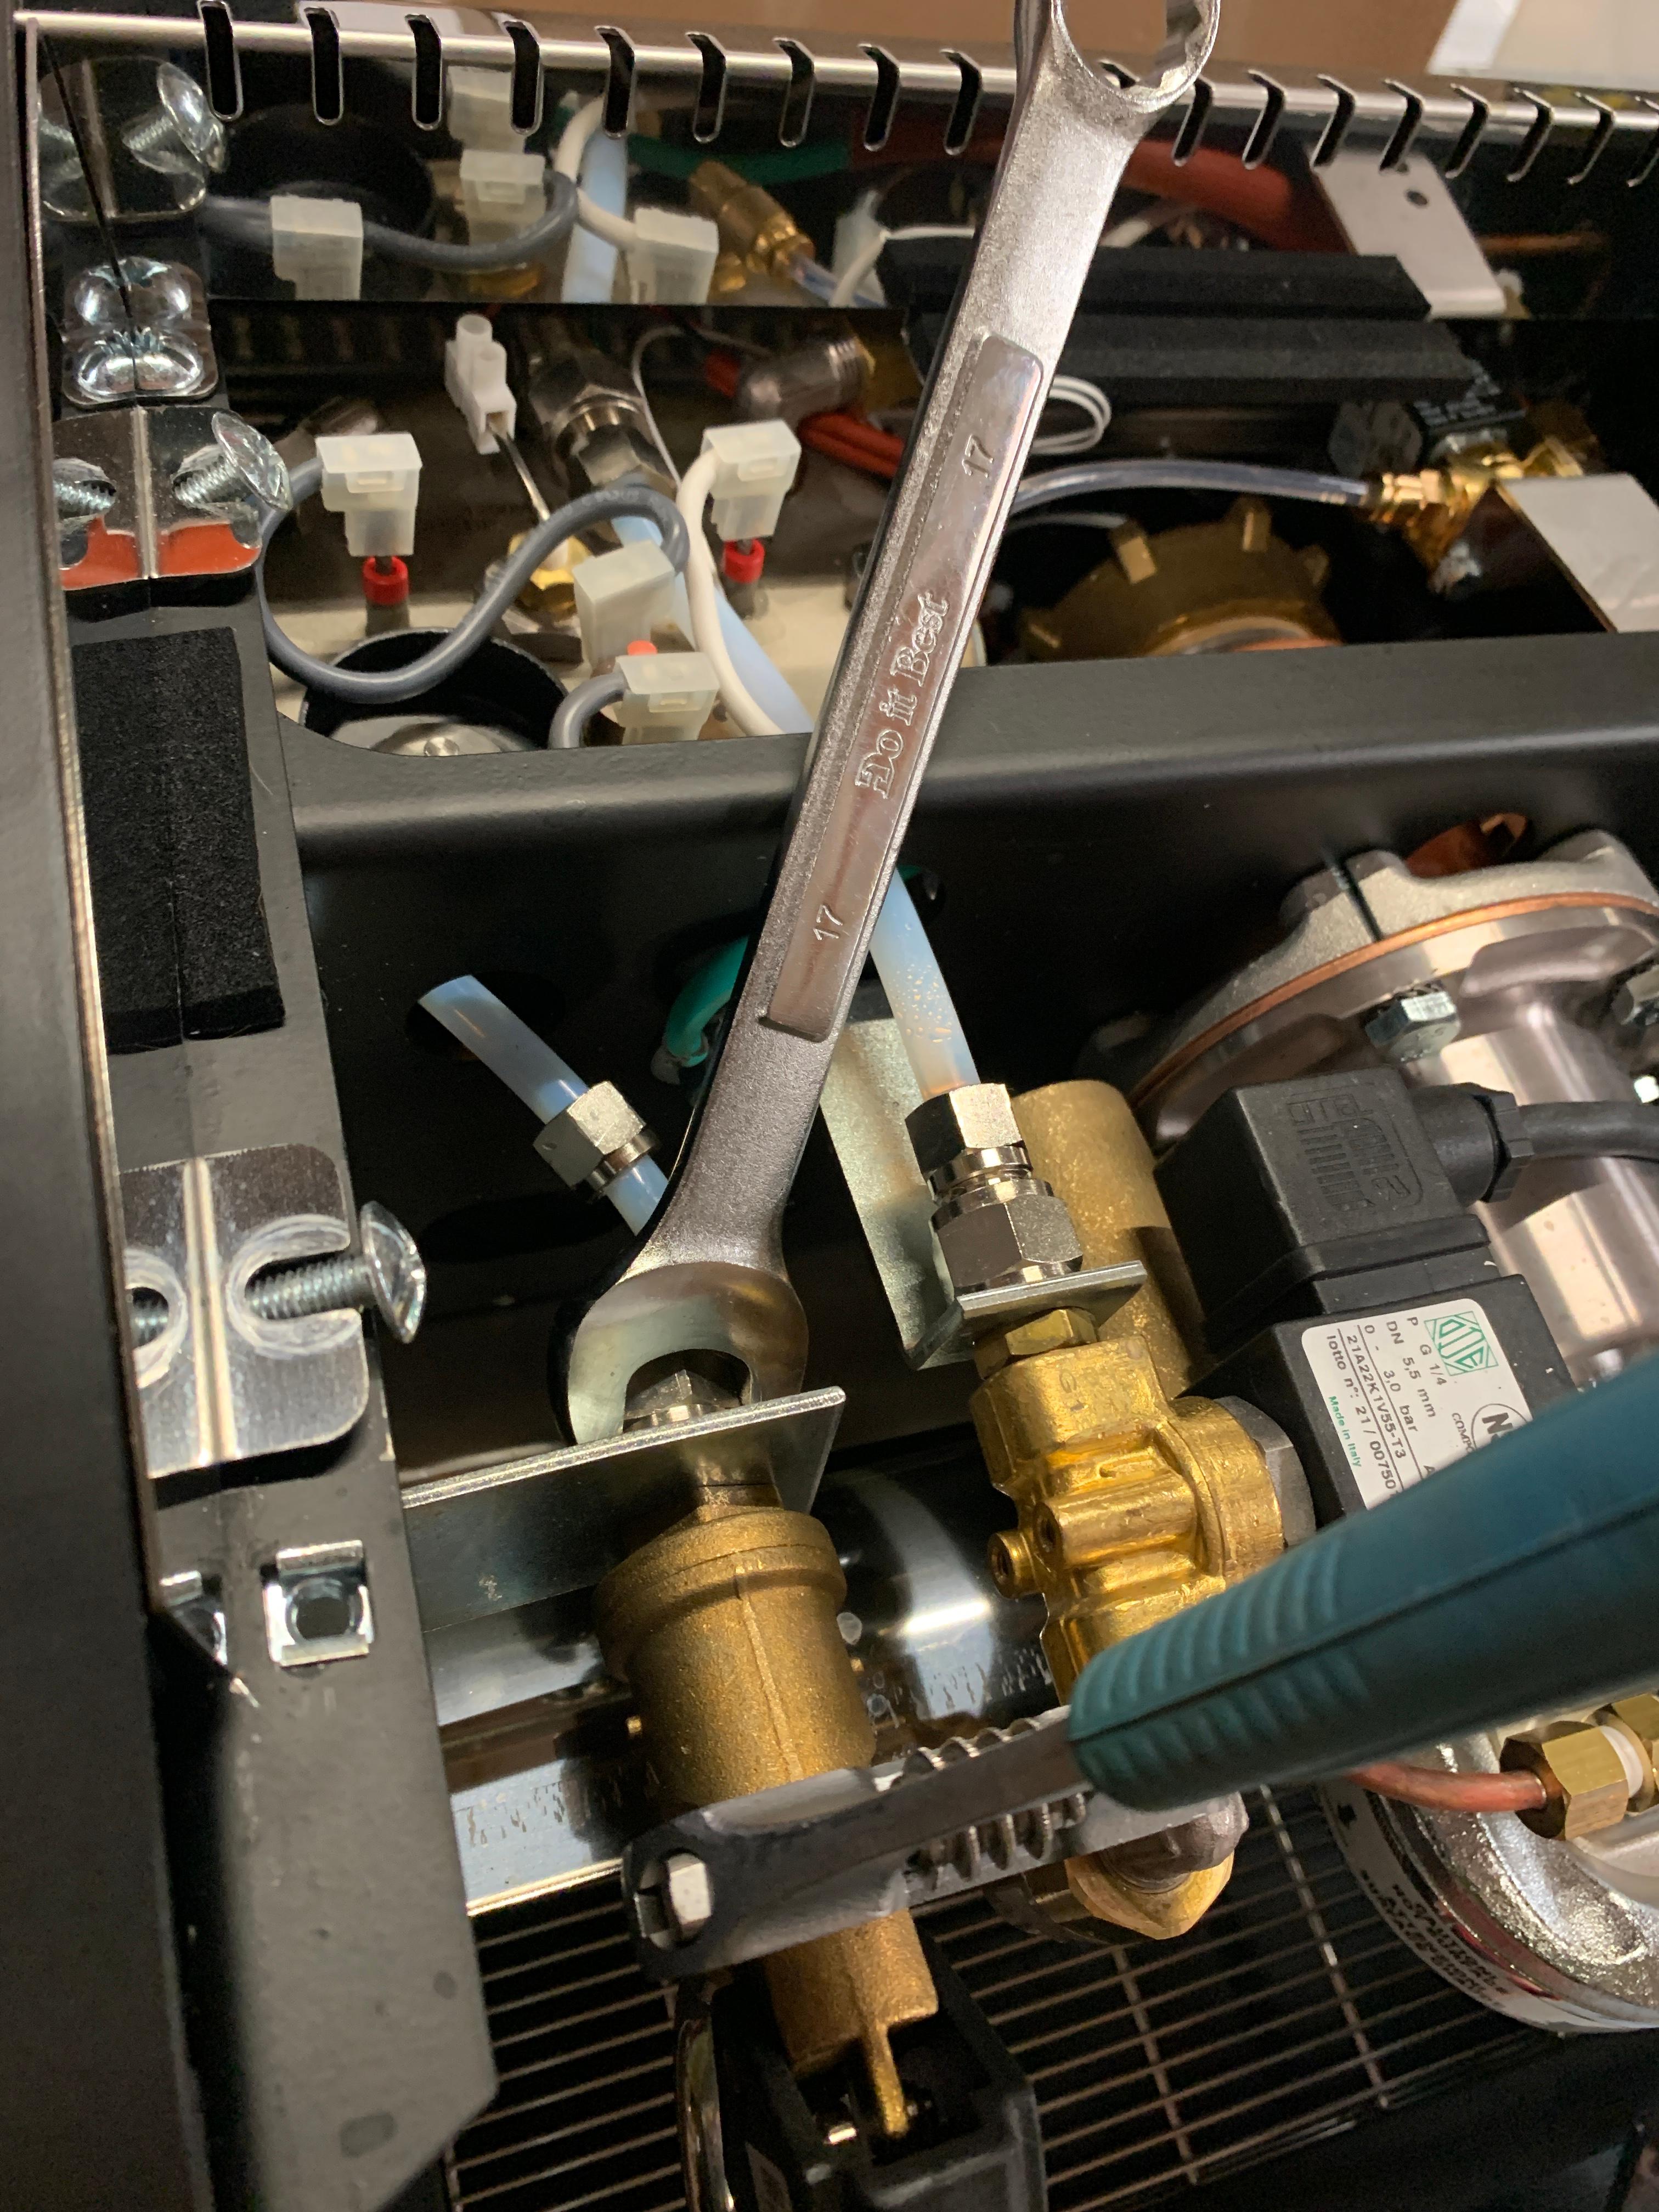
 Once the nuts are removed, pull the valve straight out through the front of the bracket.
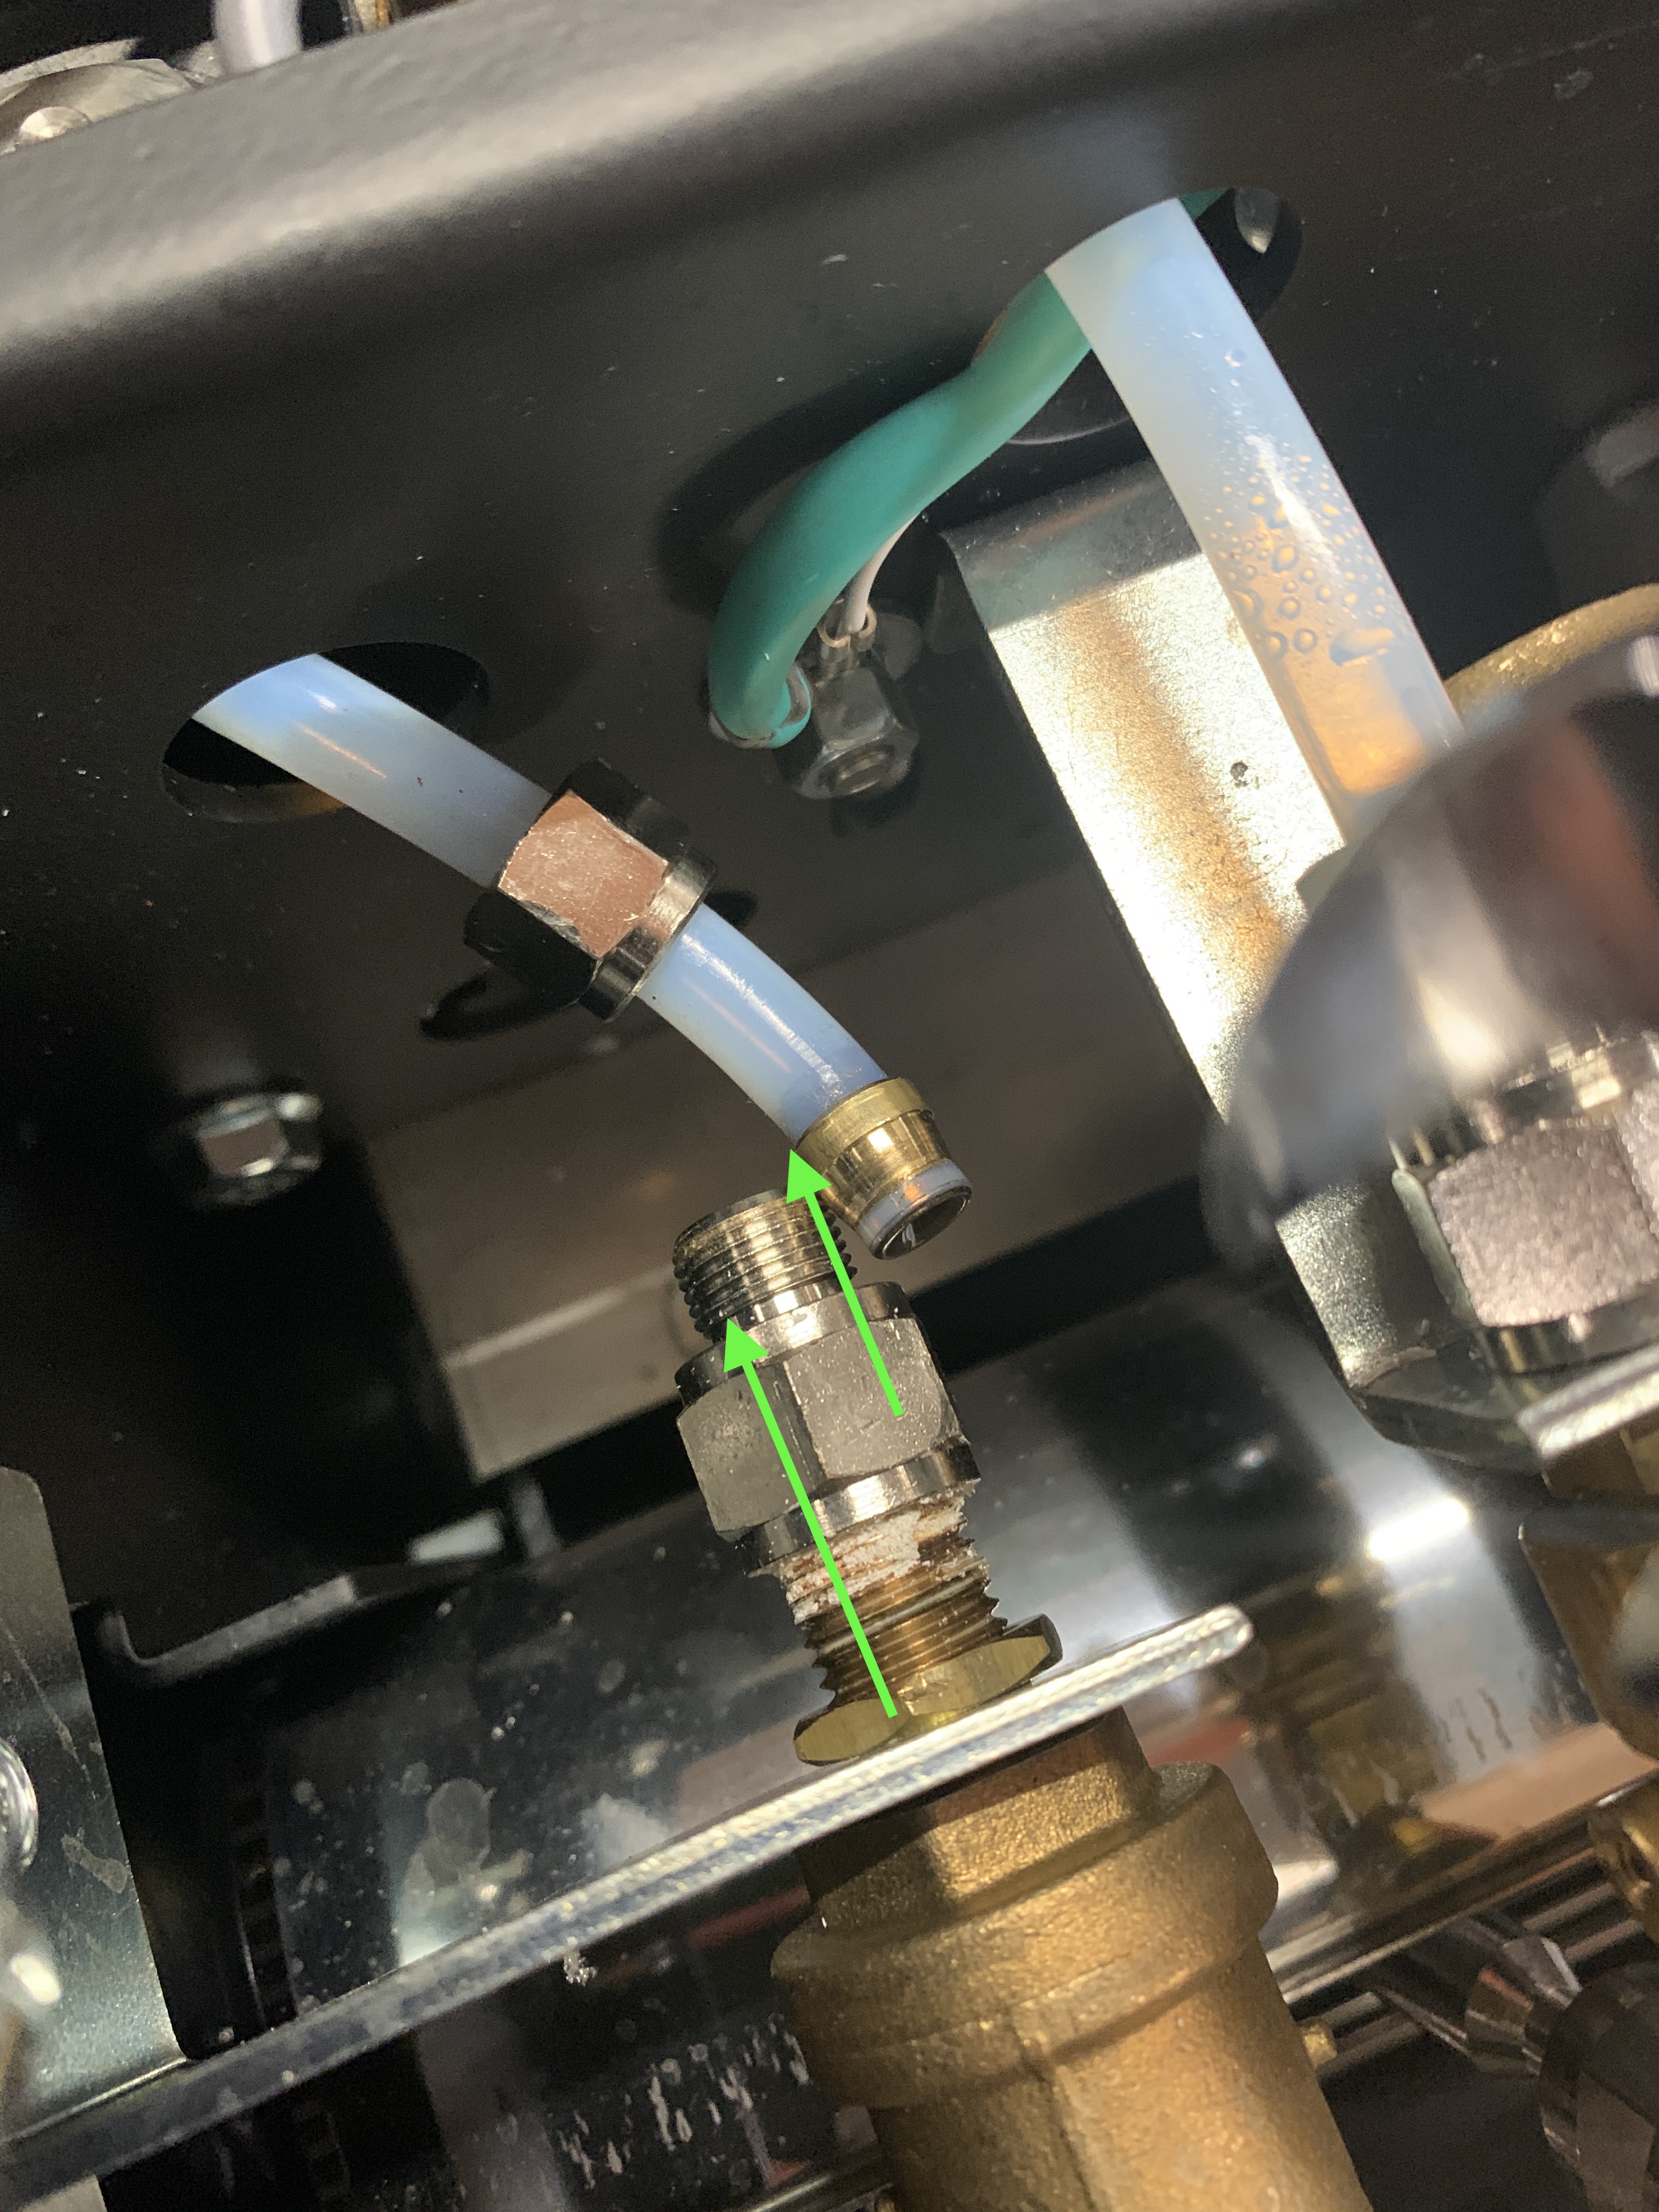
To install the new one, follow these steps in reverse order. If you have any questions, contact us at [email protected]