LUCCA M58: Thermal Probe Test/ReplacementUpdated 6 months ago
Before testing, machine must be unplugged and COMPLETELY COOL or resistance readings will be inaccurate. Remove drip tray and water tank as well.
Tools needed:
- #2 Phillips Screwdriver (+)
- Needle Nose Pliers
- Small adjustable crescent wrench (or 5.5mm wrench if you have one)
- 17mm wrench
- Teflon tape/ thread lock
- Multi-Meter
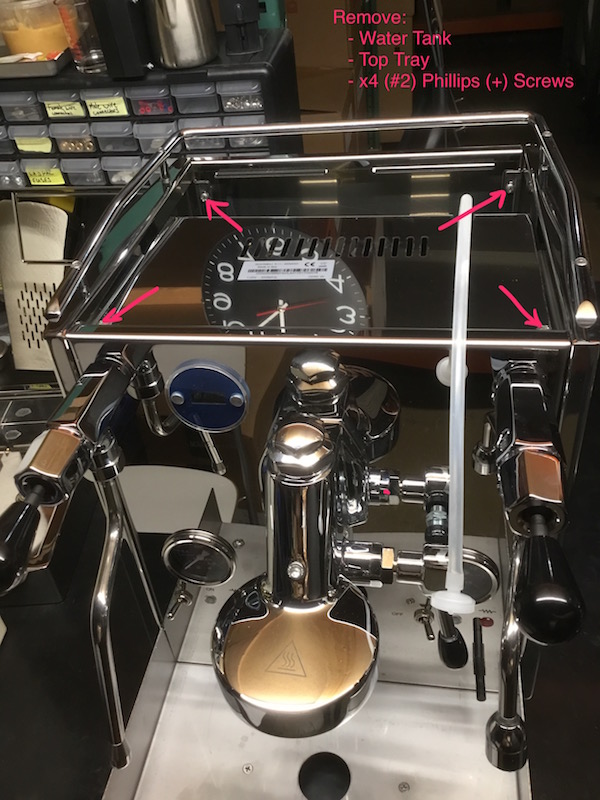
1. After Top Tray and Water Tank are removed, remove four screws pictured below.
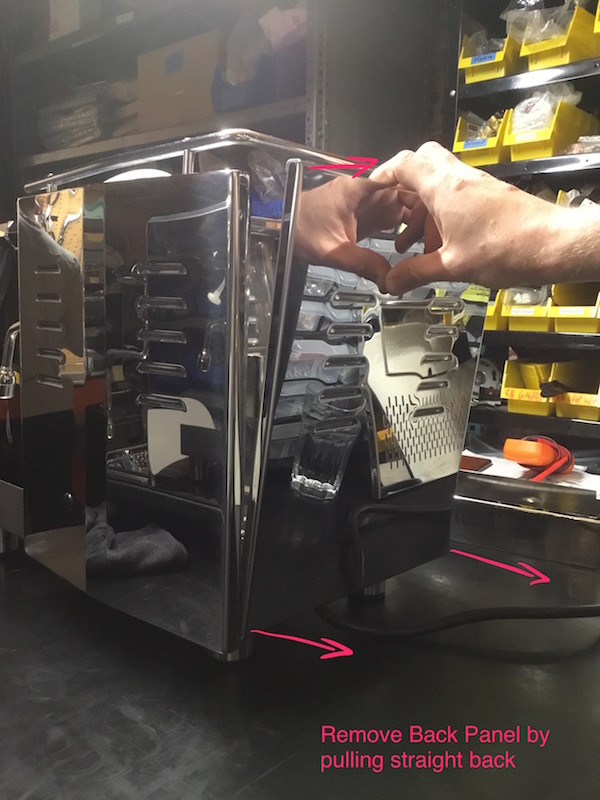
2. Remove Back Panel by pulling straight back, pressure pins near bottom panel corners will give some resistance. Be careful not to bend them.
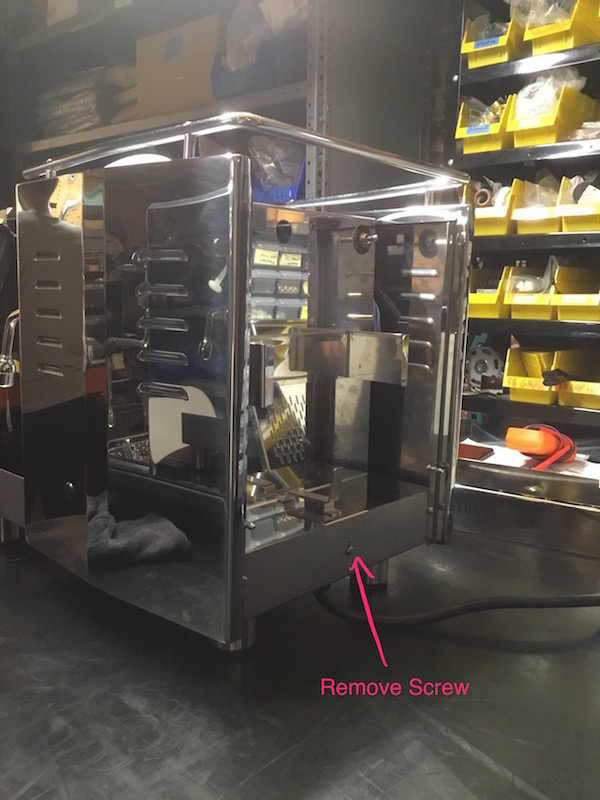
3. Remove center base screw. Tank holder/interior cover will now be loose. With some finesse you can work it out the back of the machine, be careful not to shear any wires or break the Tanica/Rete switch.
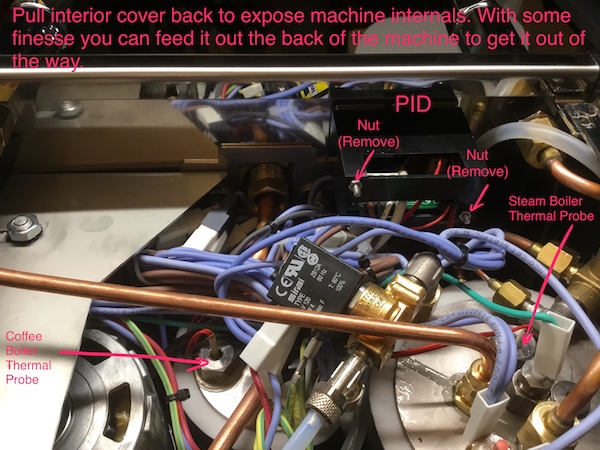
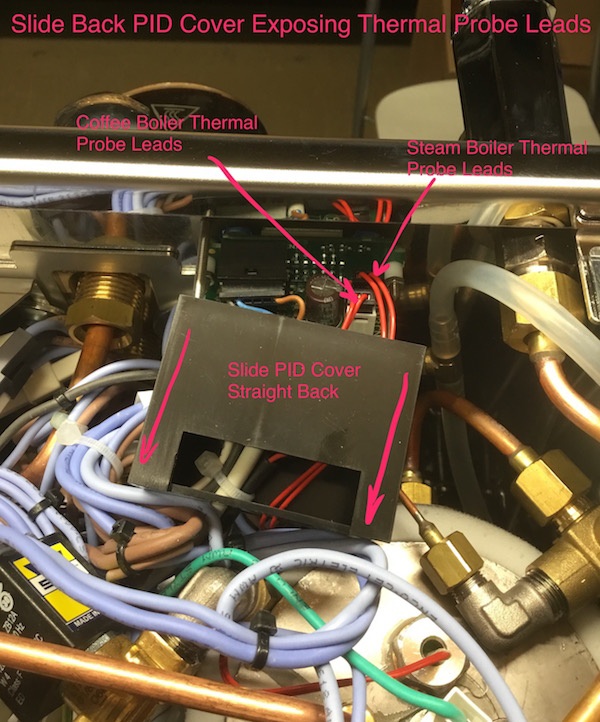
4. Using a small crescent wrench (or 5.5mm wrench if you have it) remove nuts from back of PID casing. Notice location of Coffee Boiler and Steam Boiler Thermal Probe locations. If after testing you determine they need to be replaced refer back to this picture for location reference.
5. Slide back PID cover exposing Thermal Probe leads.
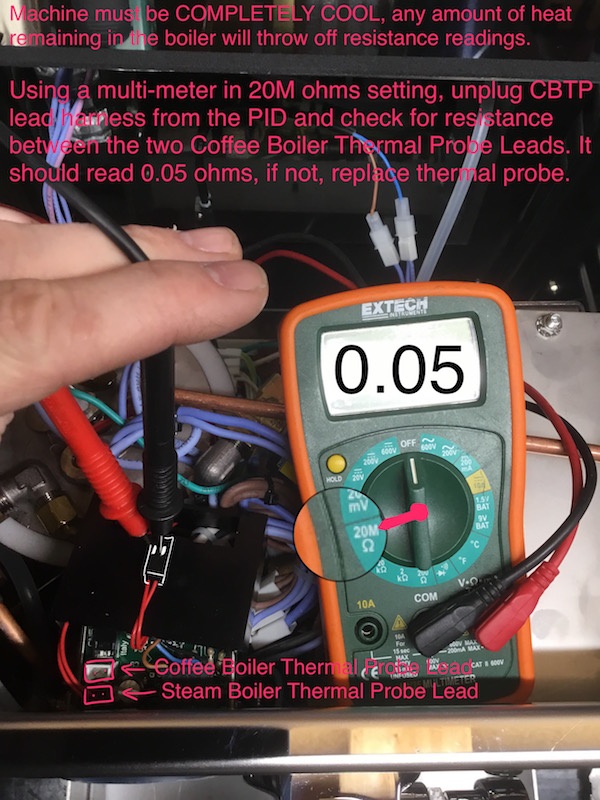
6. Unplug Coffee Boiler Thermal Probe lead from PID. Using a multi-meter in the 20M ohms setting, test resistance between the two wire leads within the CBTP harness. It should read around 0.05 ohms, if the machine is warm it will increase the resistance. You can also check between either leg of the CBTP lead and "ground" (any metal on the machine). If you read any connection whatsoever replace the thermal probe. It should be isolated from ground.
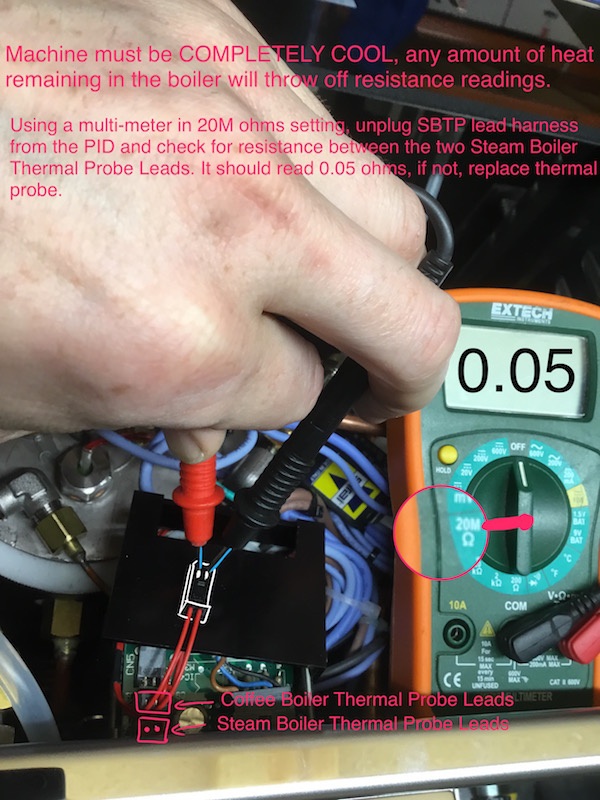
7. Unplug Steam Boiler Thermal Probe lead from PID. Using a multi-meter in the 20M ohms setting, test resistance between the two wire leads within the SBTP harness. It should read around 0.05 ohms, if the machine is warm it will increase the resistance. You can also check between either leg of the SBTP lead and "ground" (any metal on the machine). If you read any connection whatsoever replace the thermal probe. It should be isolated from ground.
8. If you determine that a thermal probe is failing, replace it.
Procedure:
- Reference Pic #4 for probe location.
- Unplug Probe Lead from PID.
- Using a 17mm wrench, remove probe turning counter clockwise.
- When installing new probe be sure to use teflon tape/thread lock to seal it in place.
- When plugging lead into PID be sure all leads/harnesses are properly plugged in before replacing PID cover.