LUCCA A53 / Mini / Vivaldi: Testing the Coffee Boiler Temperature SensorUpdated 6 months ago
Tools Needed:
- Multimeter
- Clip-style multimeter leads
- Pick or similar implement
- Wire snips or scissors
Remove the panels from the machine to access the temperature sensor.
1. Identify the coffee boiler temperature sensor.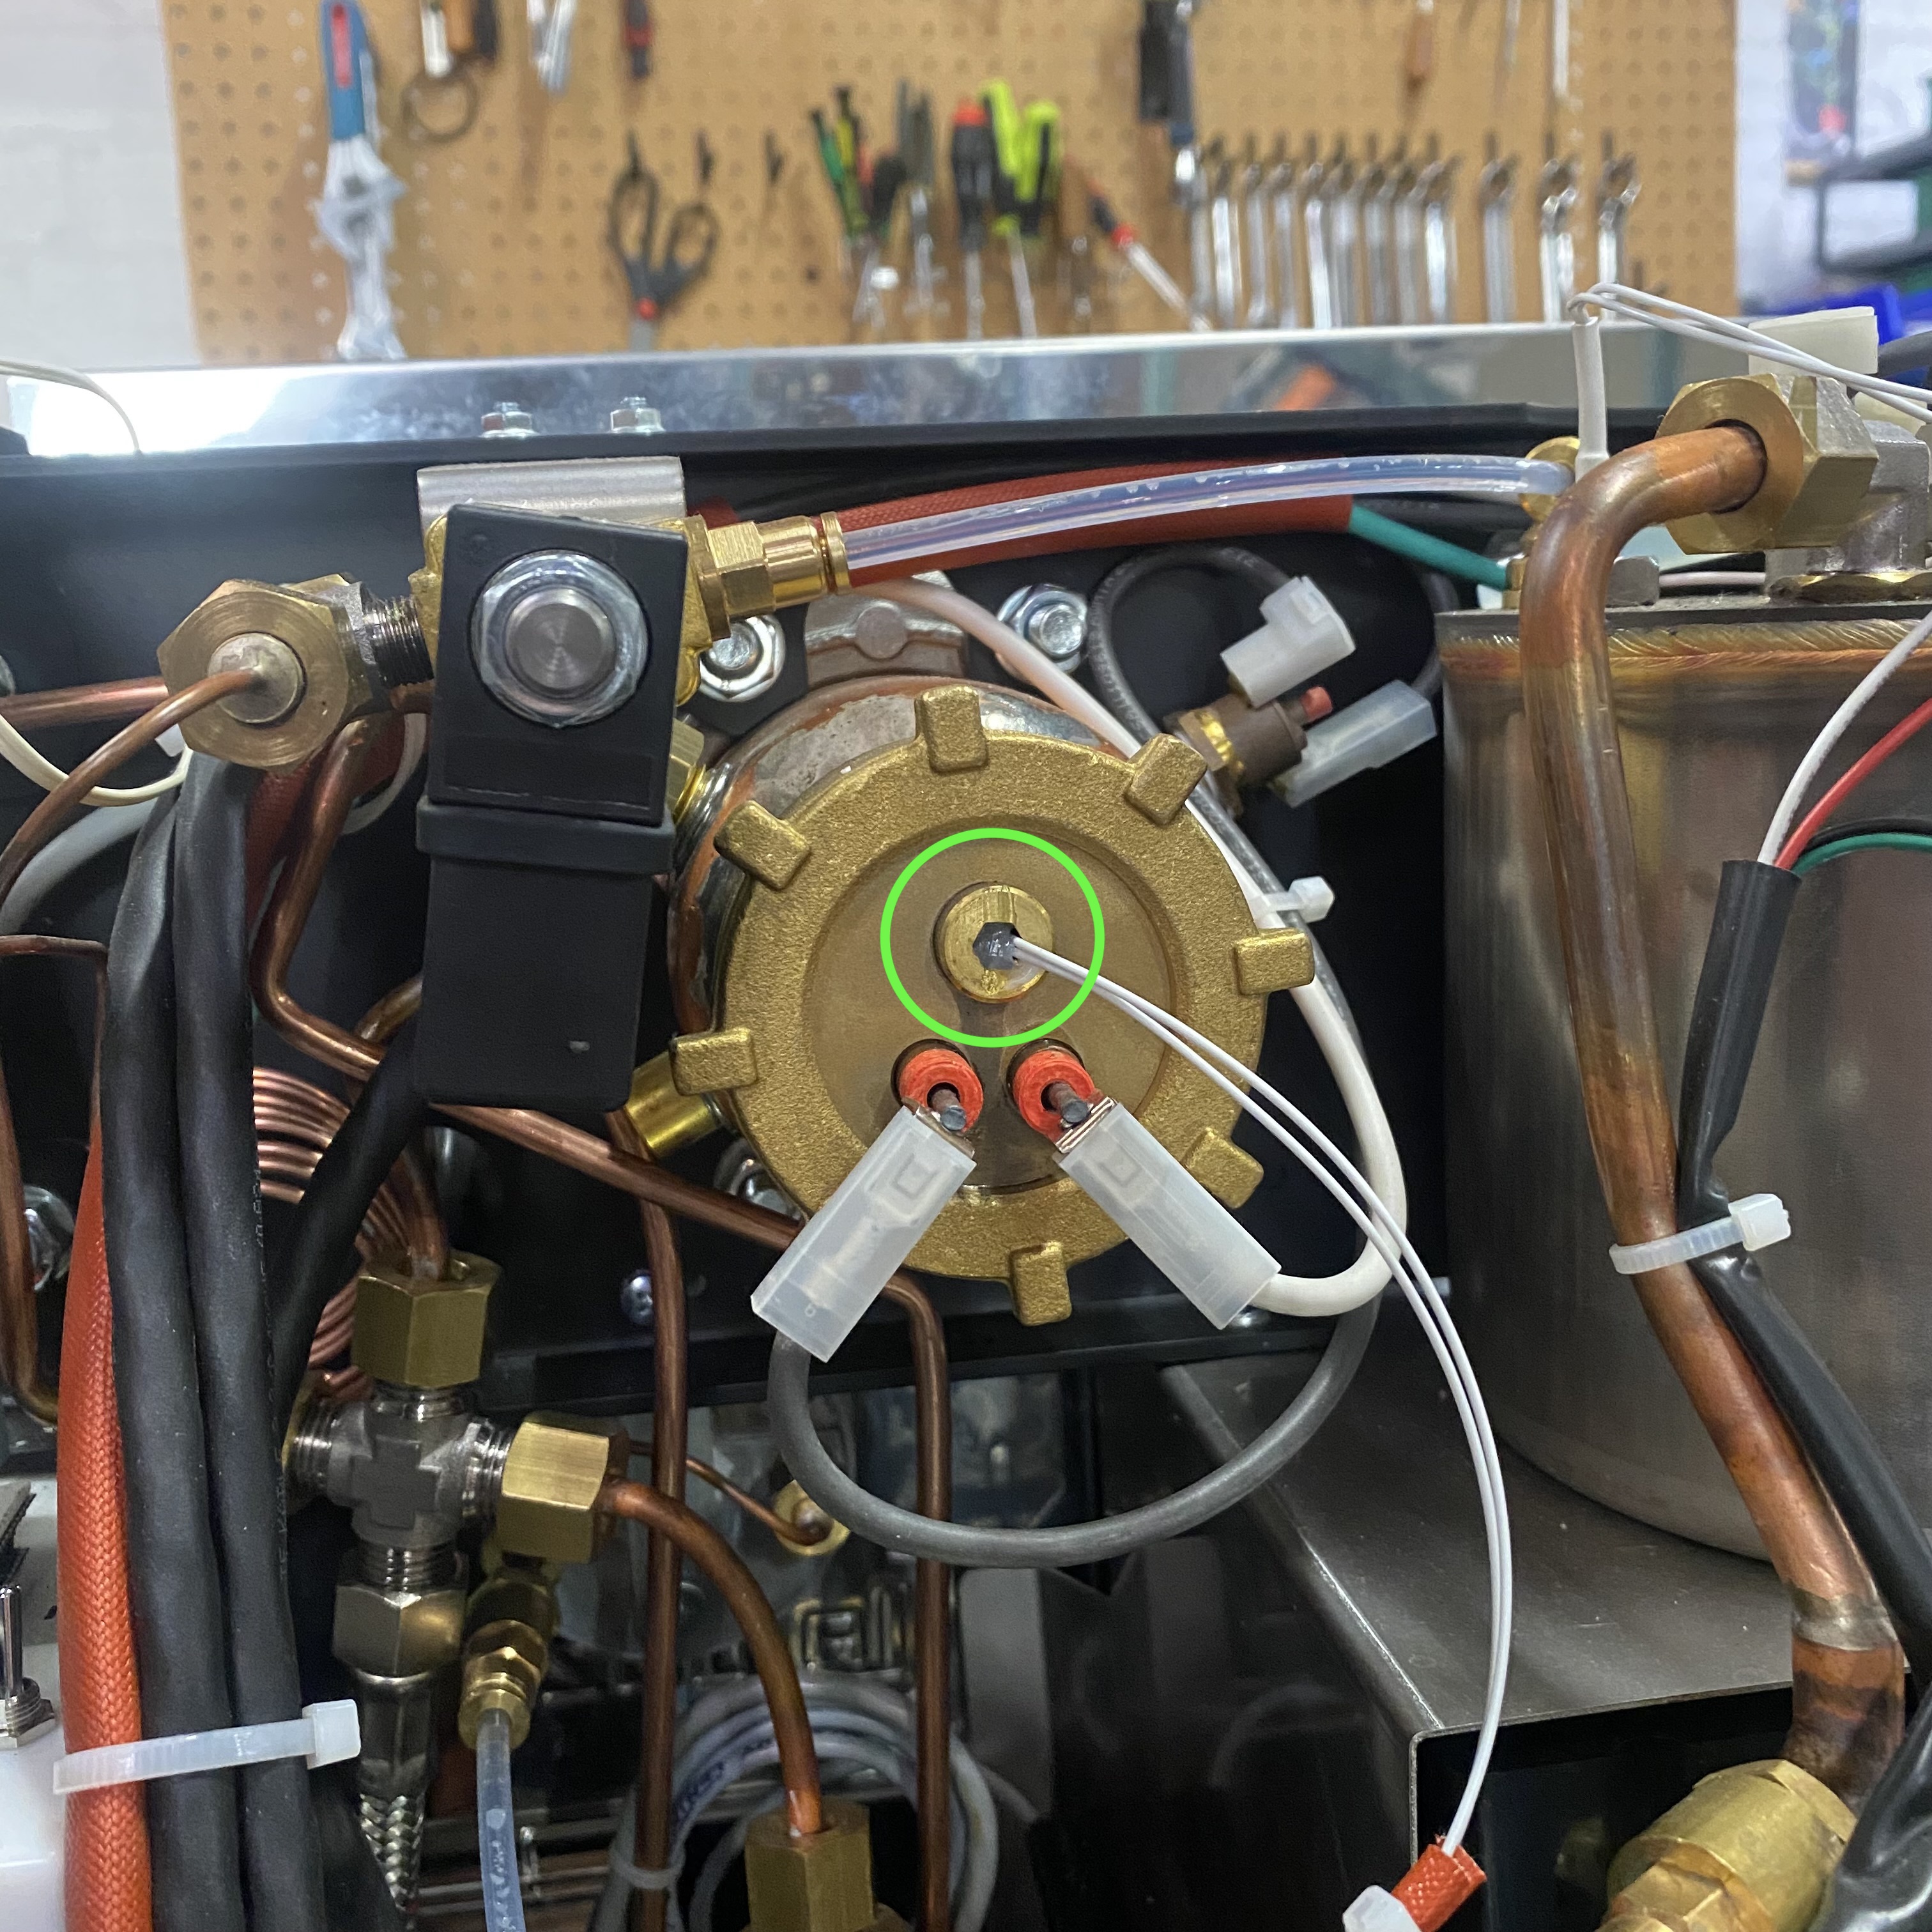
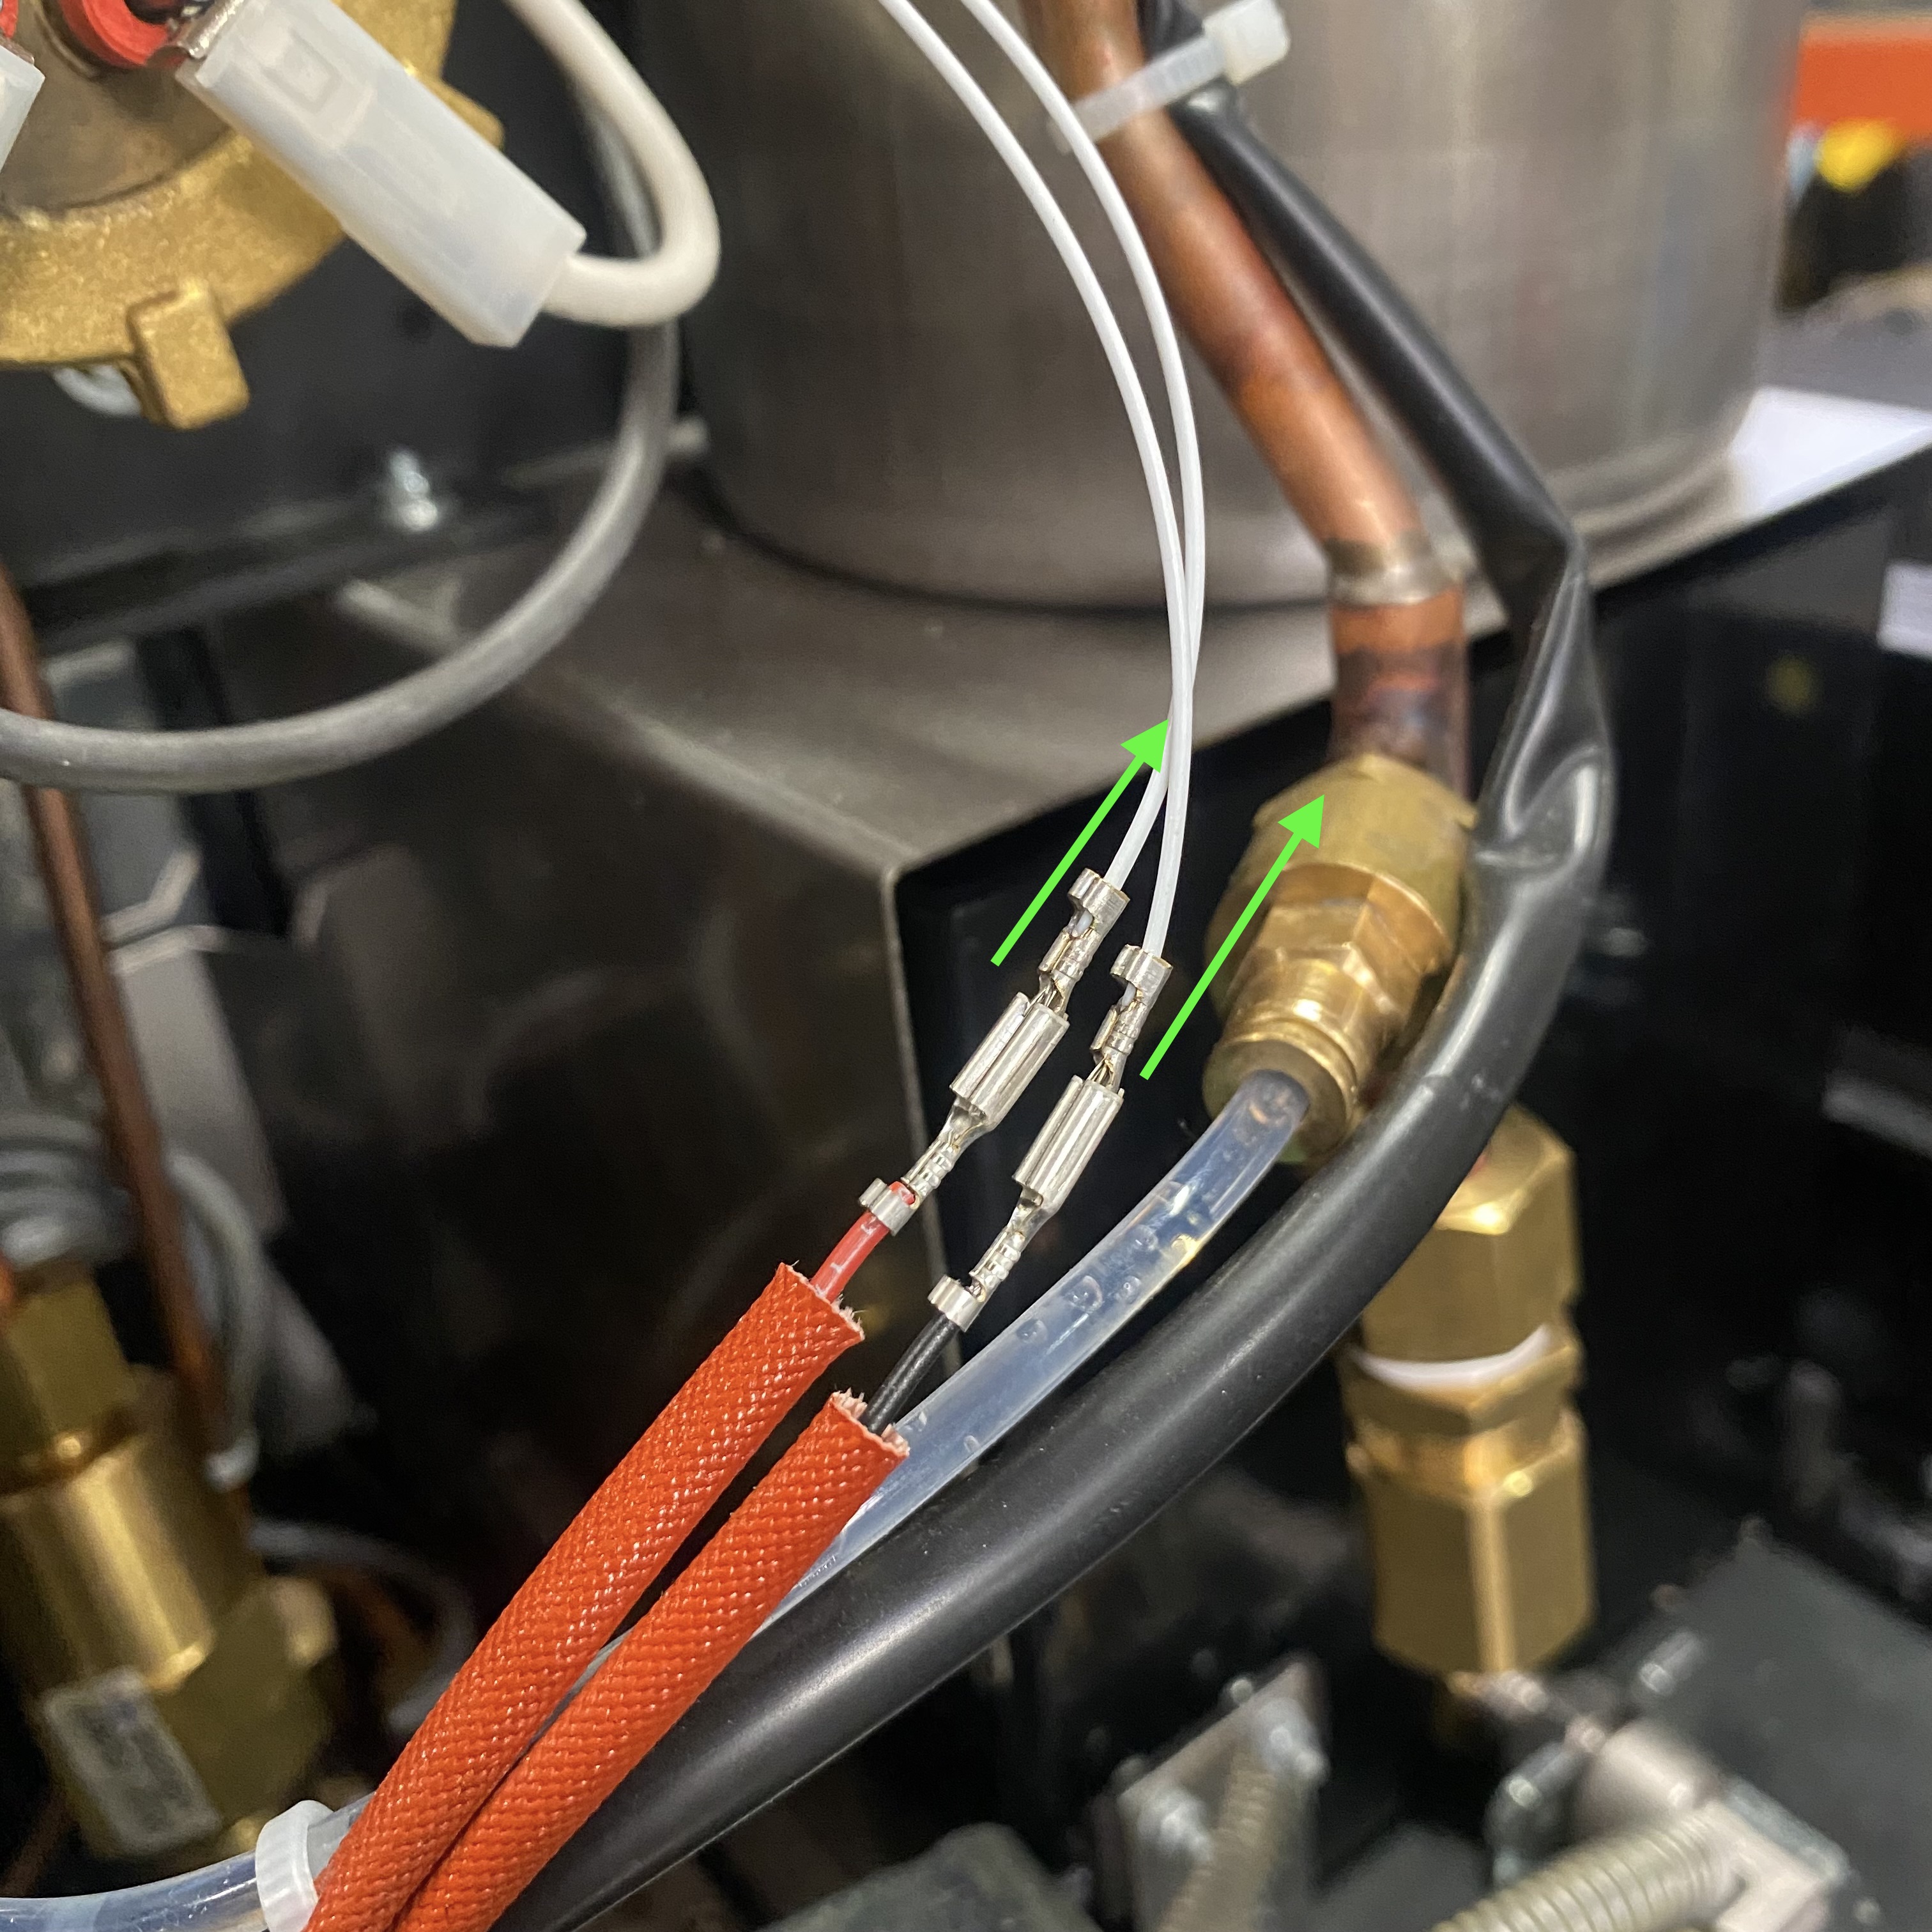
2. Snip the zip tie holding the temperature sensor leads together. Pull back the insulators and separate the electrical connections.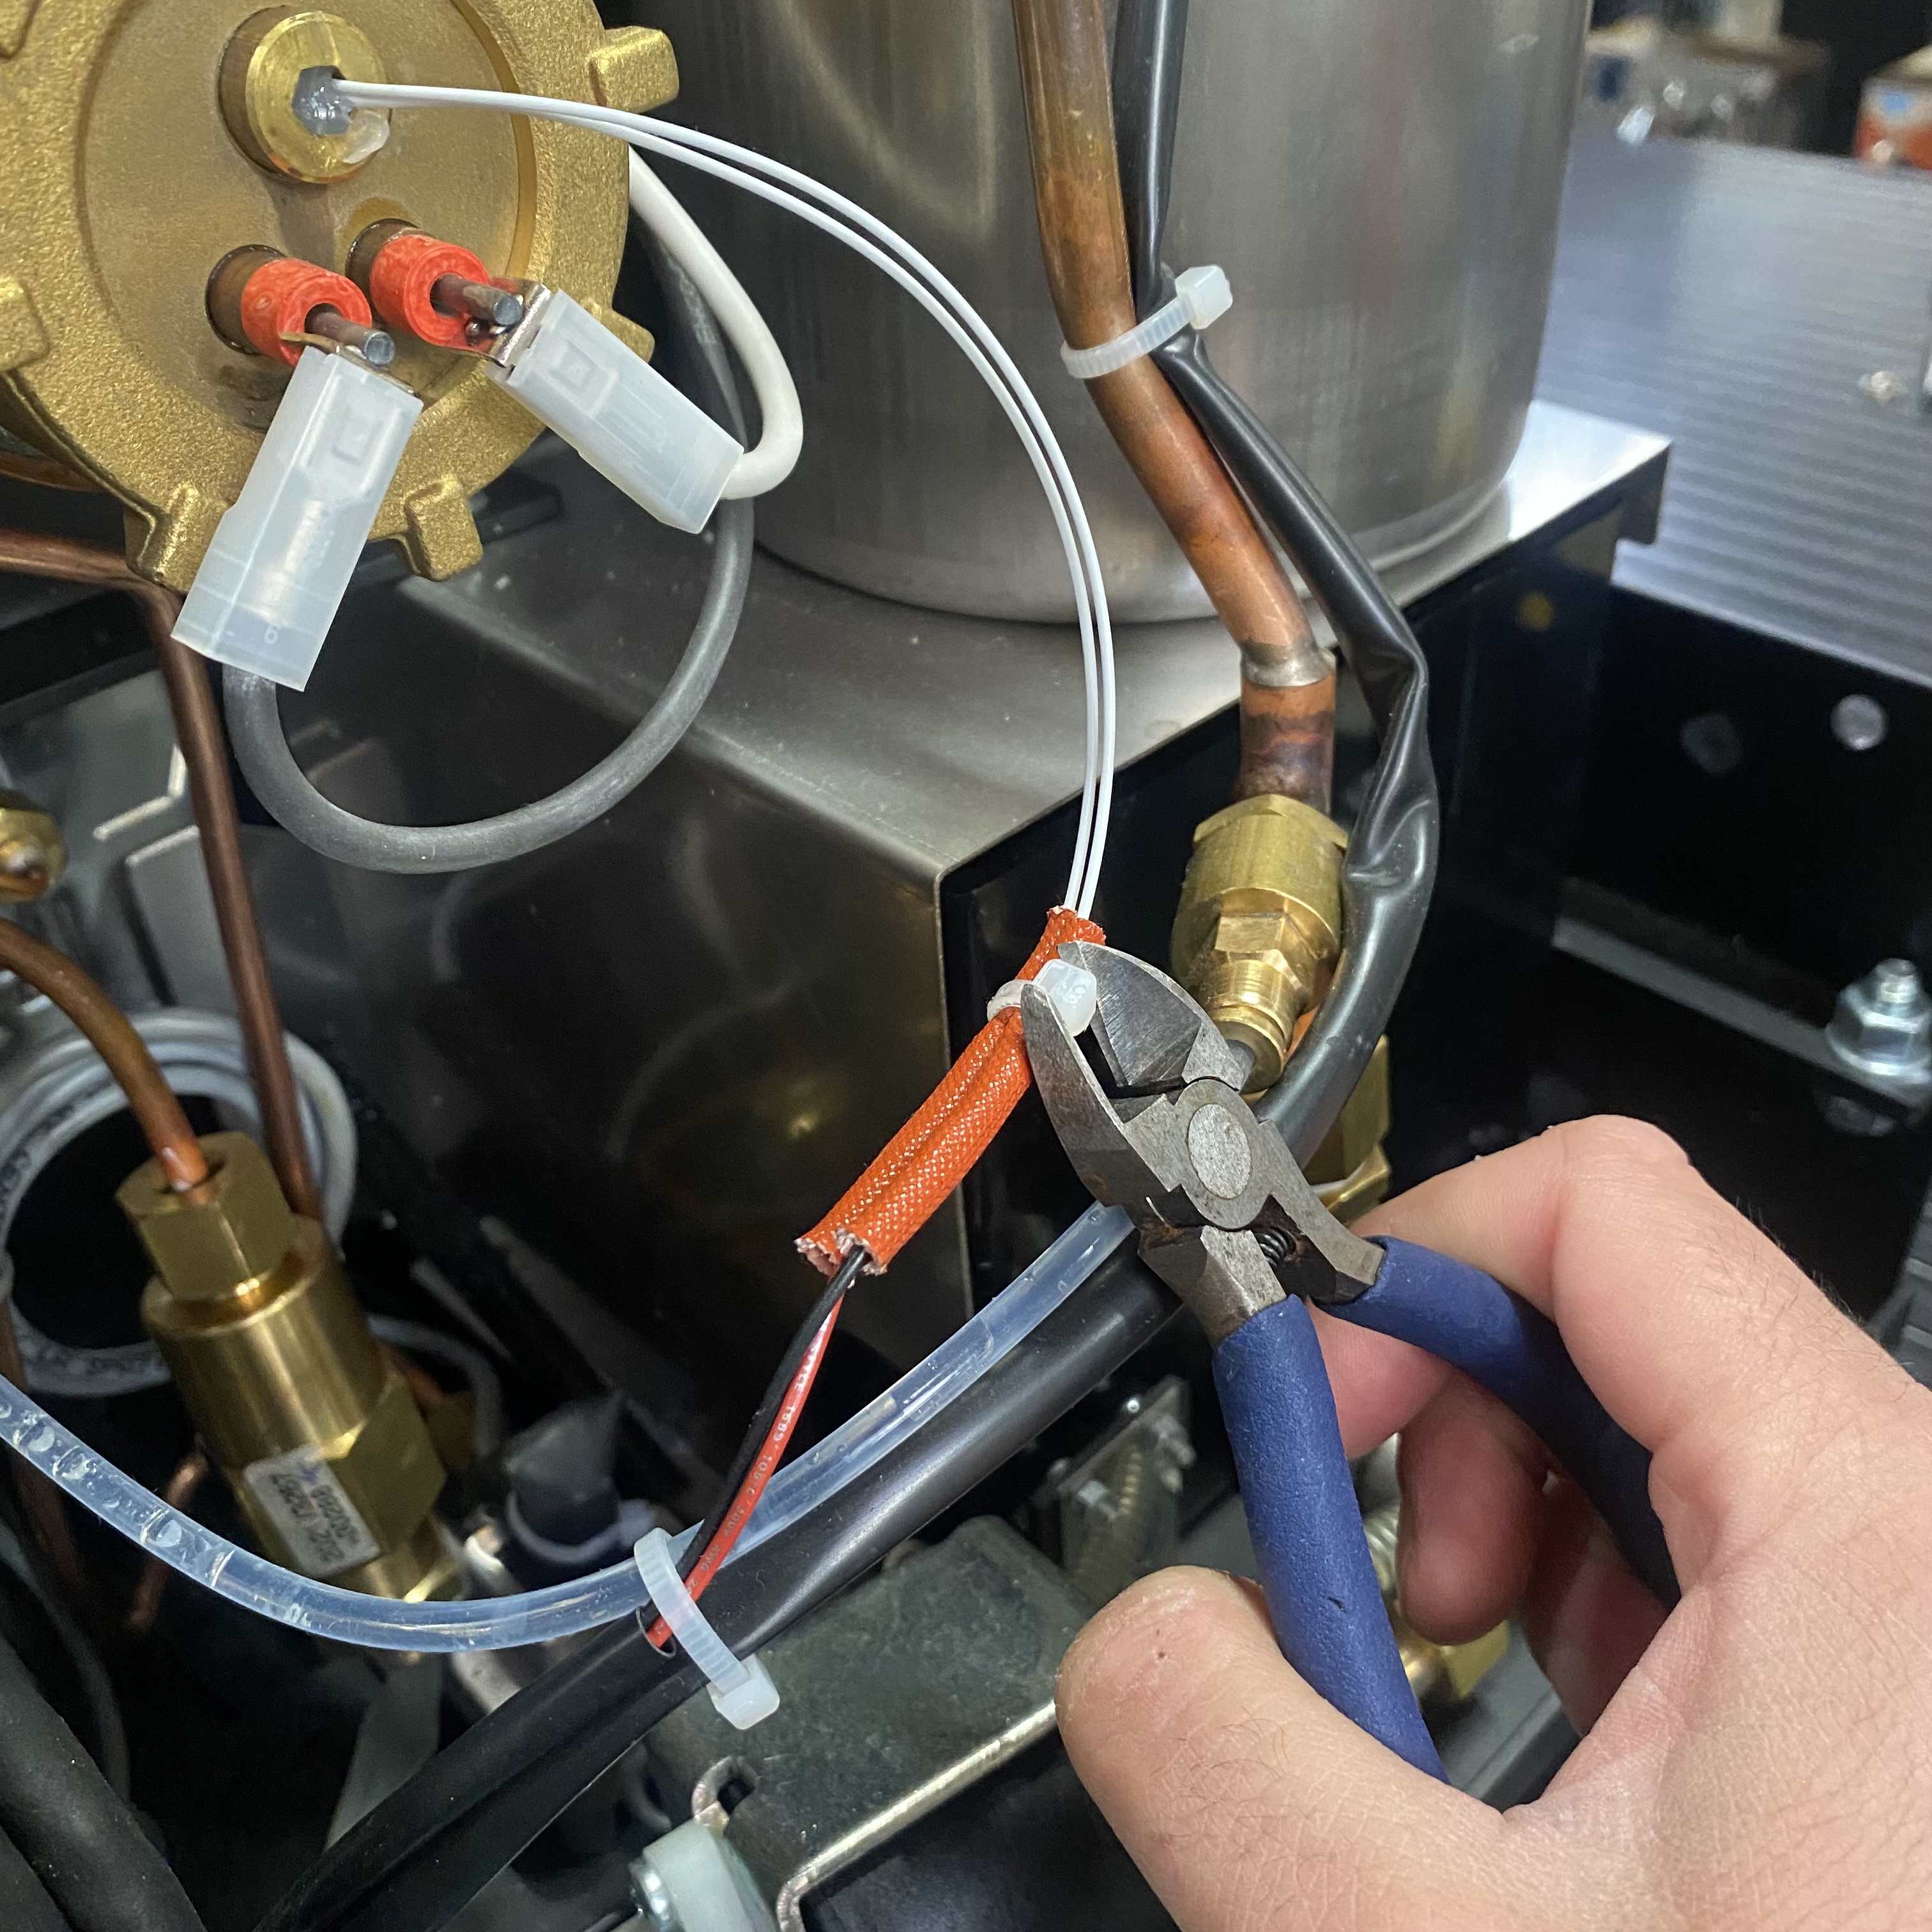
3. Use a pick or similar implement (a small screwdriver works well) to remove the silicone plug that holds the temperature sensor in place, then pull the sensor from the machine.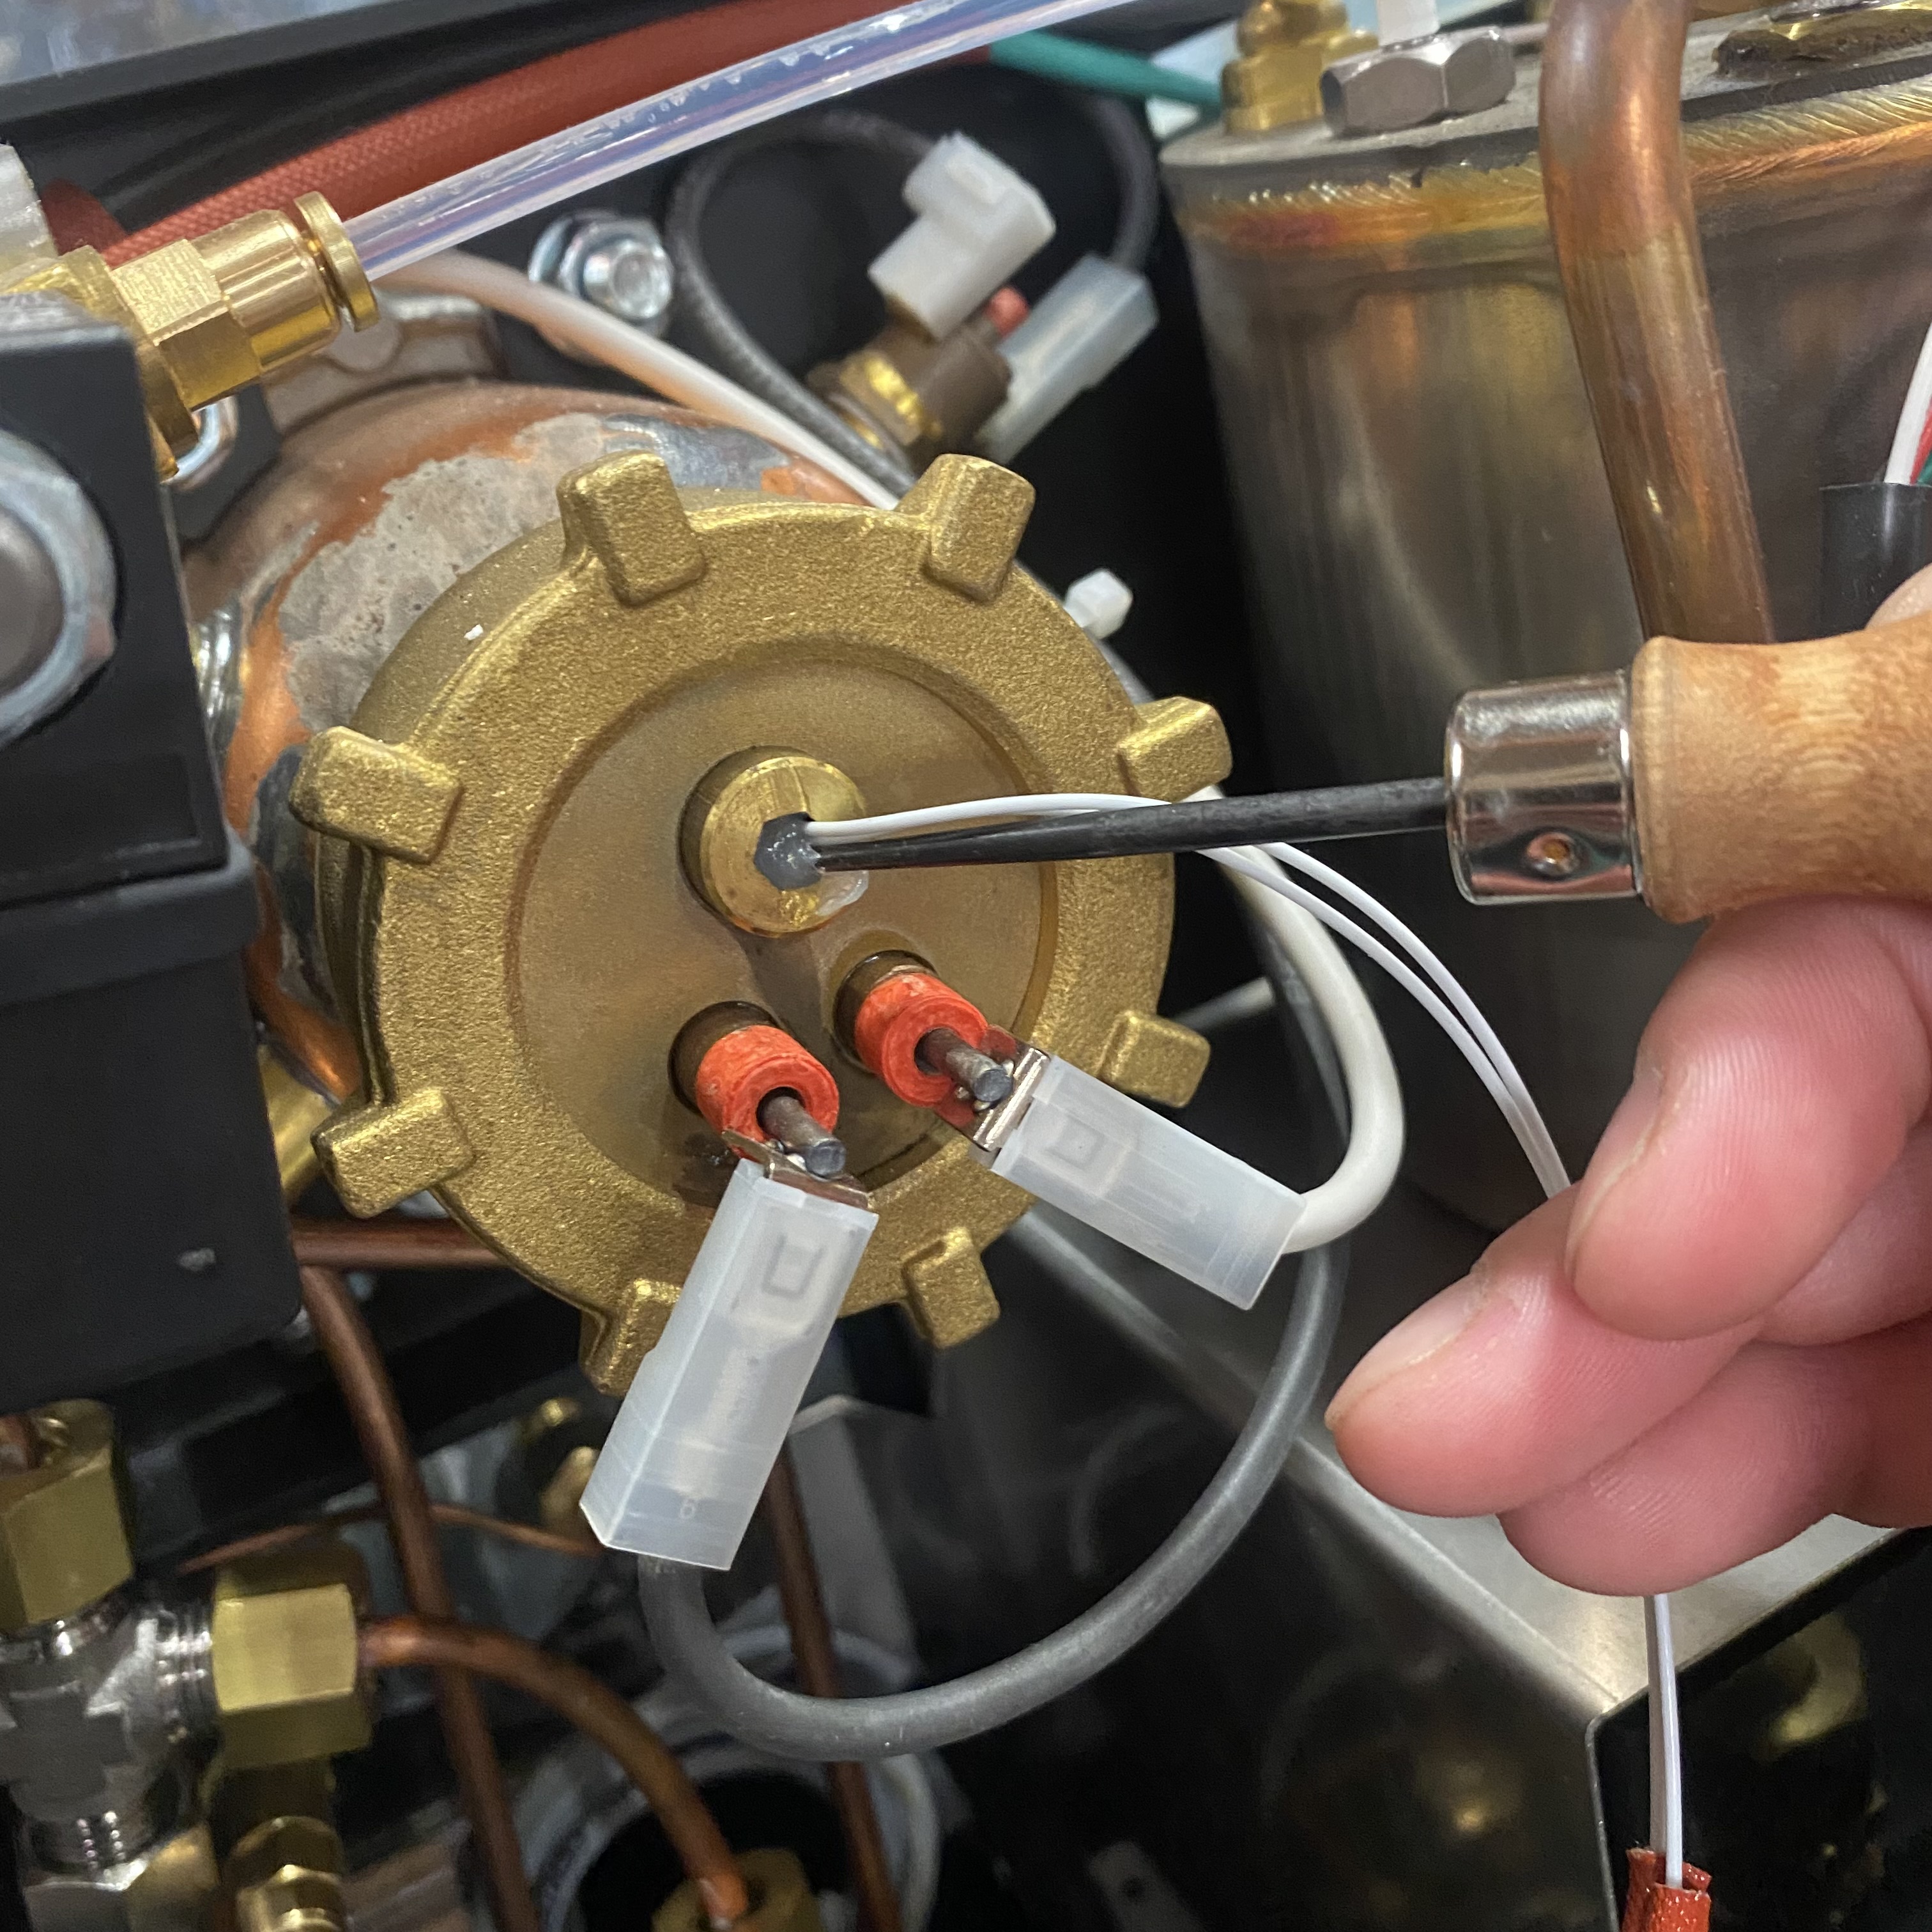
4. Set your multimeter to the resistance setting (Ω) and set the range to the 20M setting. Touch the multimeter probes to the temperature sensor leads or attach the multimeter clips.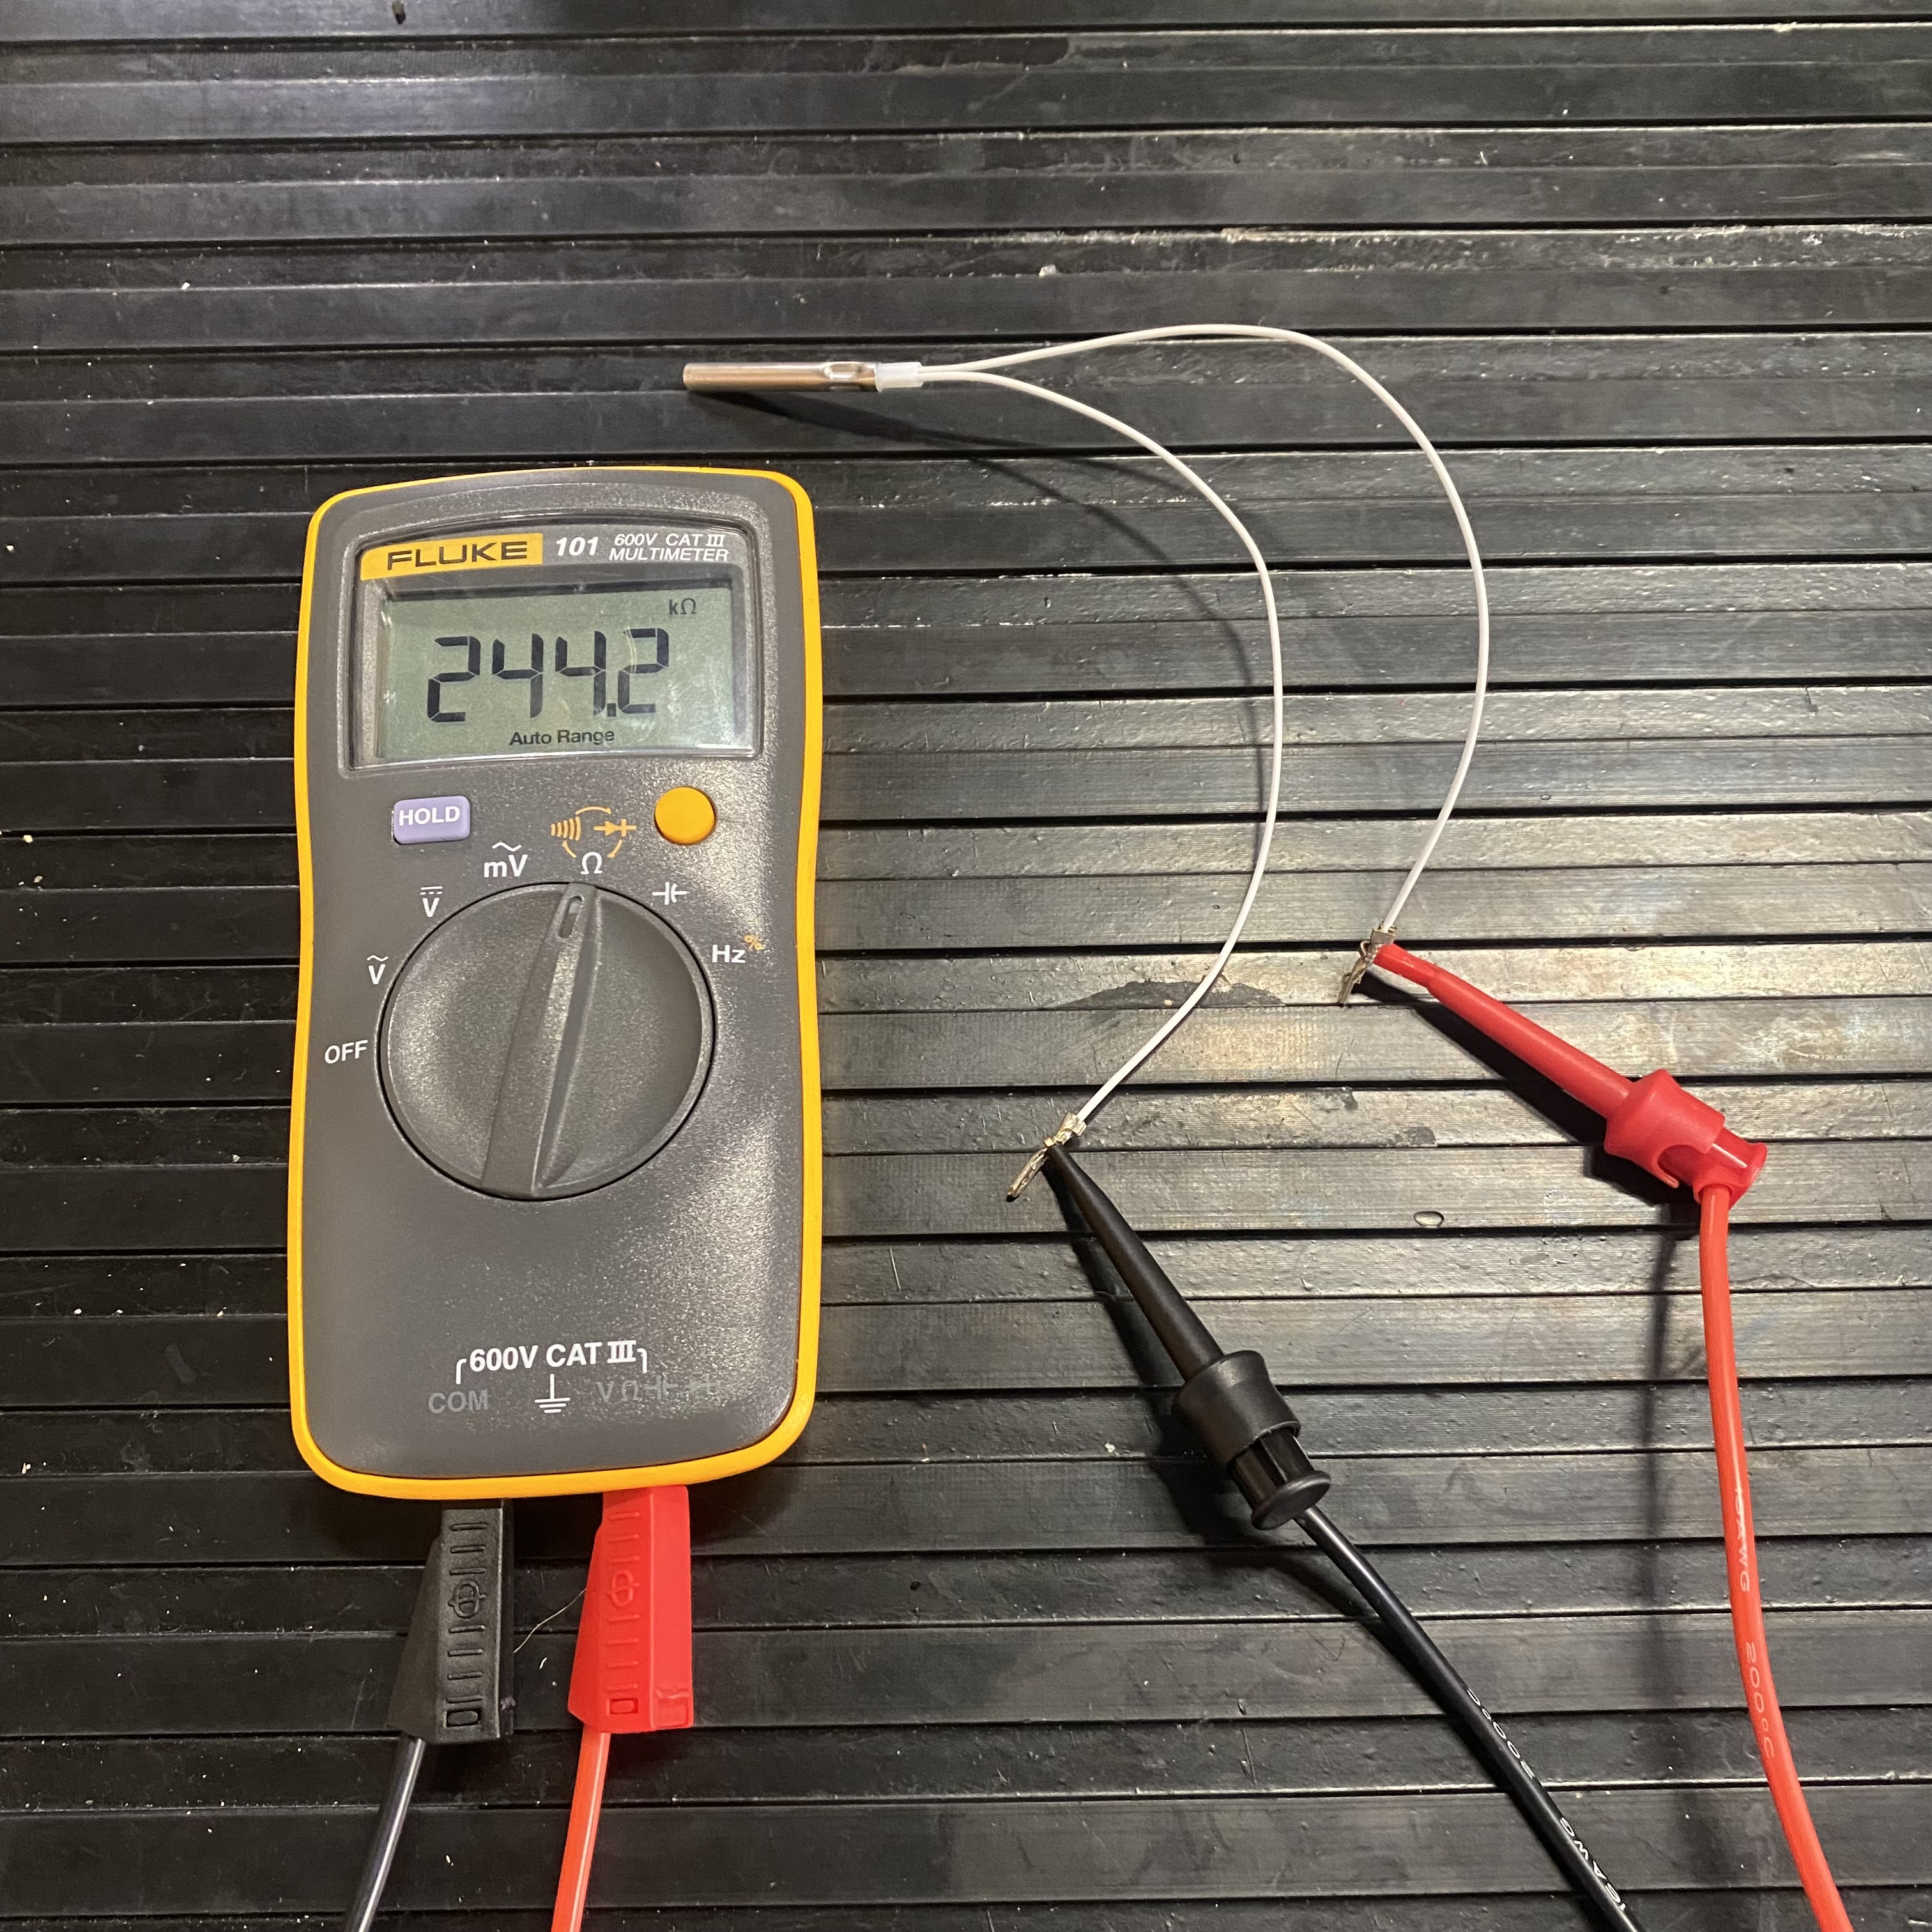
The temperature sensor acts as a variable resistor, with the resistance value changing inversely in response to changes in ambient temperature. The resistance value decreases as the temperature of the sensor increases and vice versa. At roughly room temperature the probe should display a resistance of between 200kΩ and 300kΩ (or 0.20MΩ to 0.30MΩ).
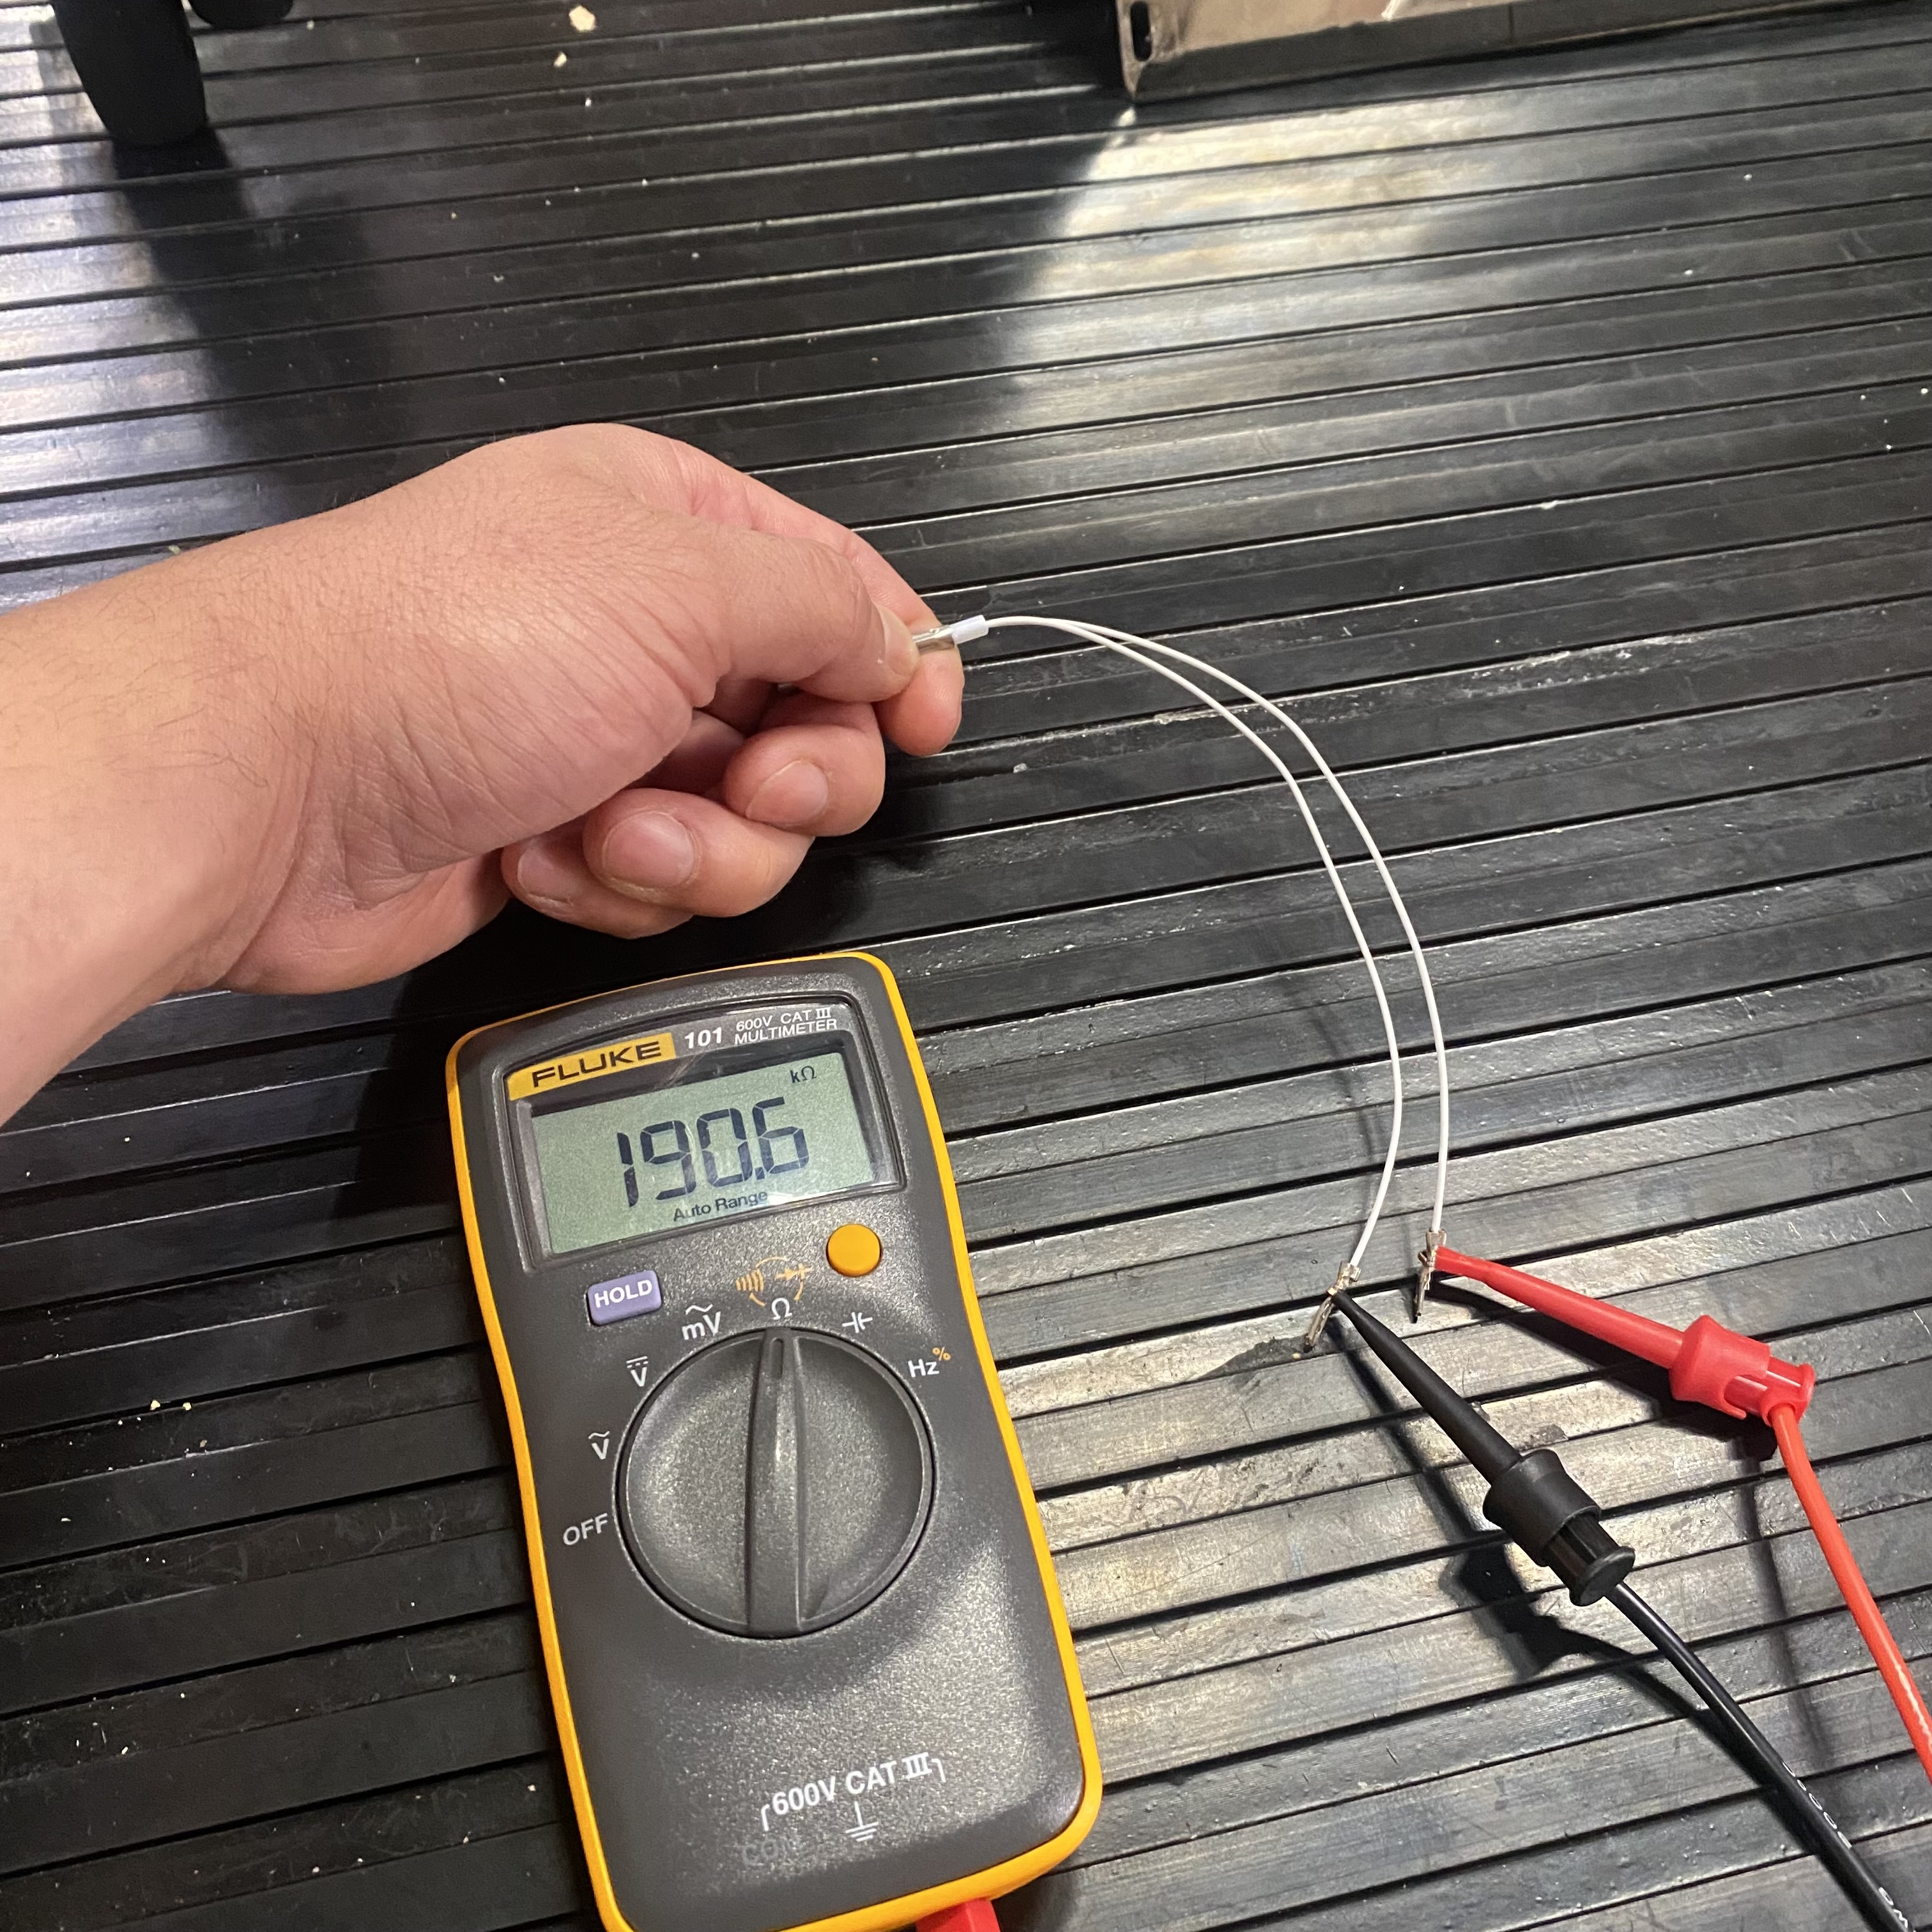
5. Warm the sensor up in your hand, while keeping an eye on the multimeter display. You should see the resistance value start to drop almost immediately as the sensor warms up. Look for a steady decrease. Let go of the multimeter and watch as the resistance value climbs back up as the sensor cools down.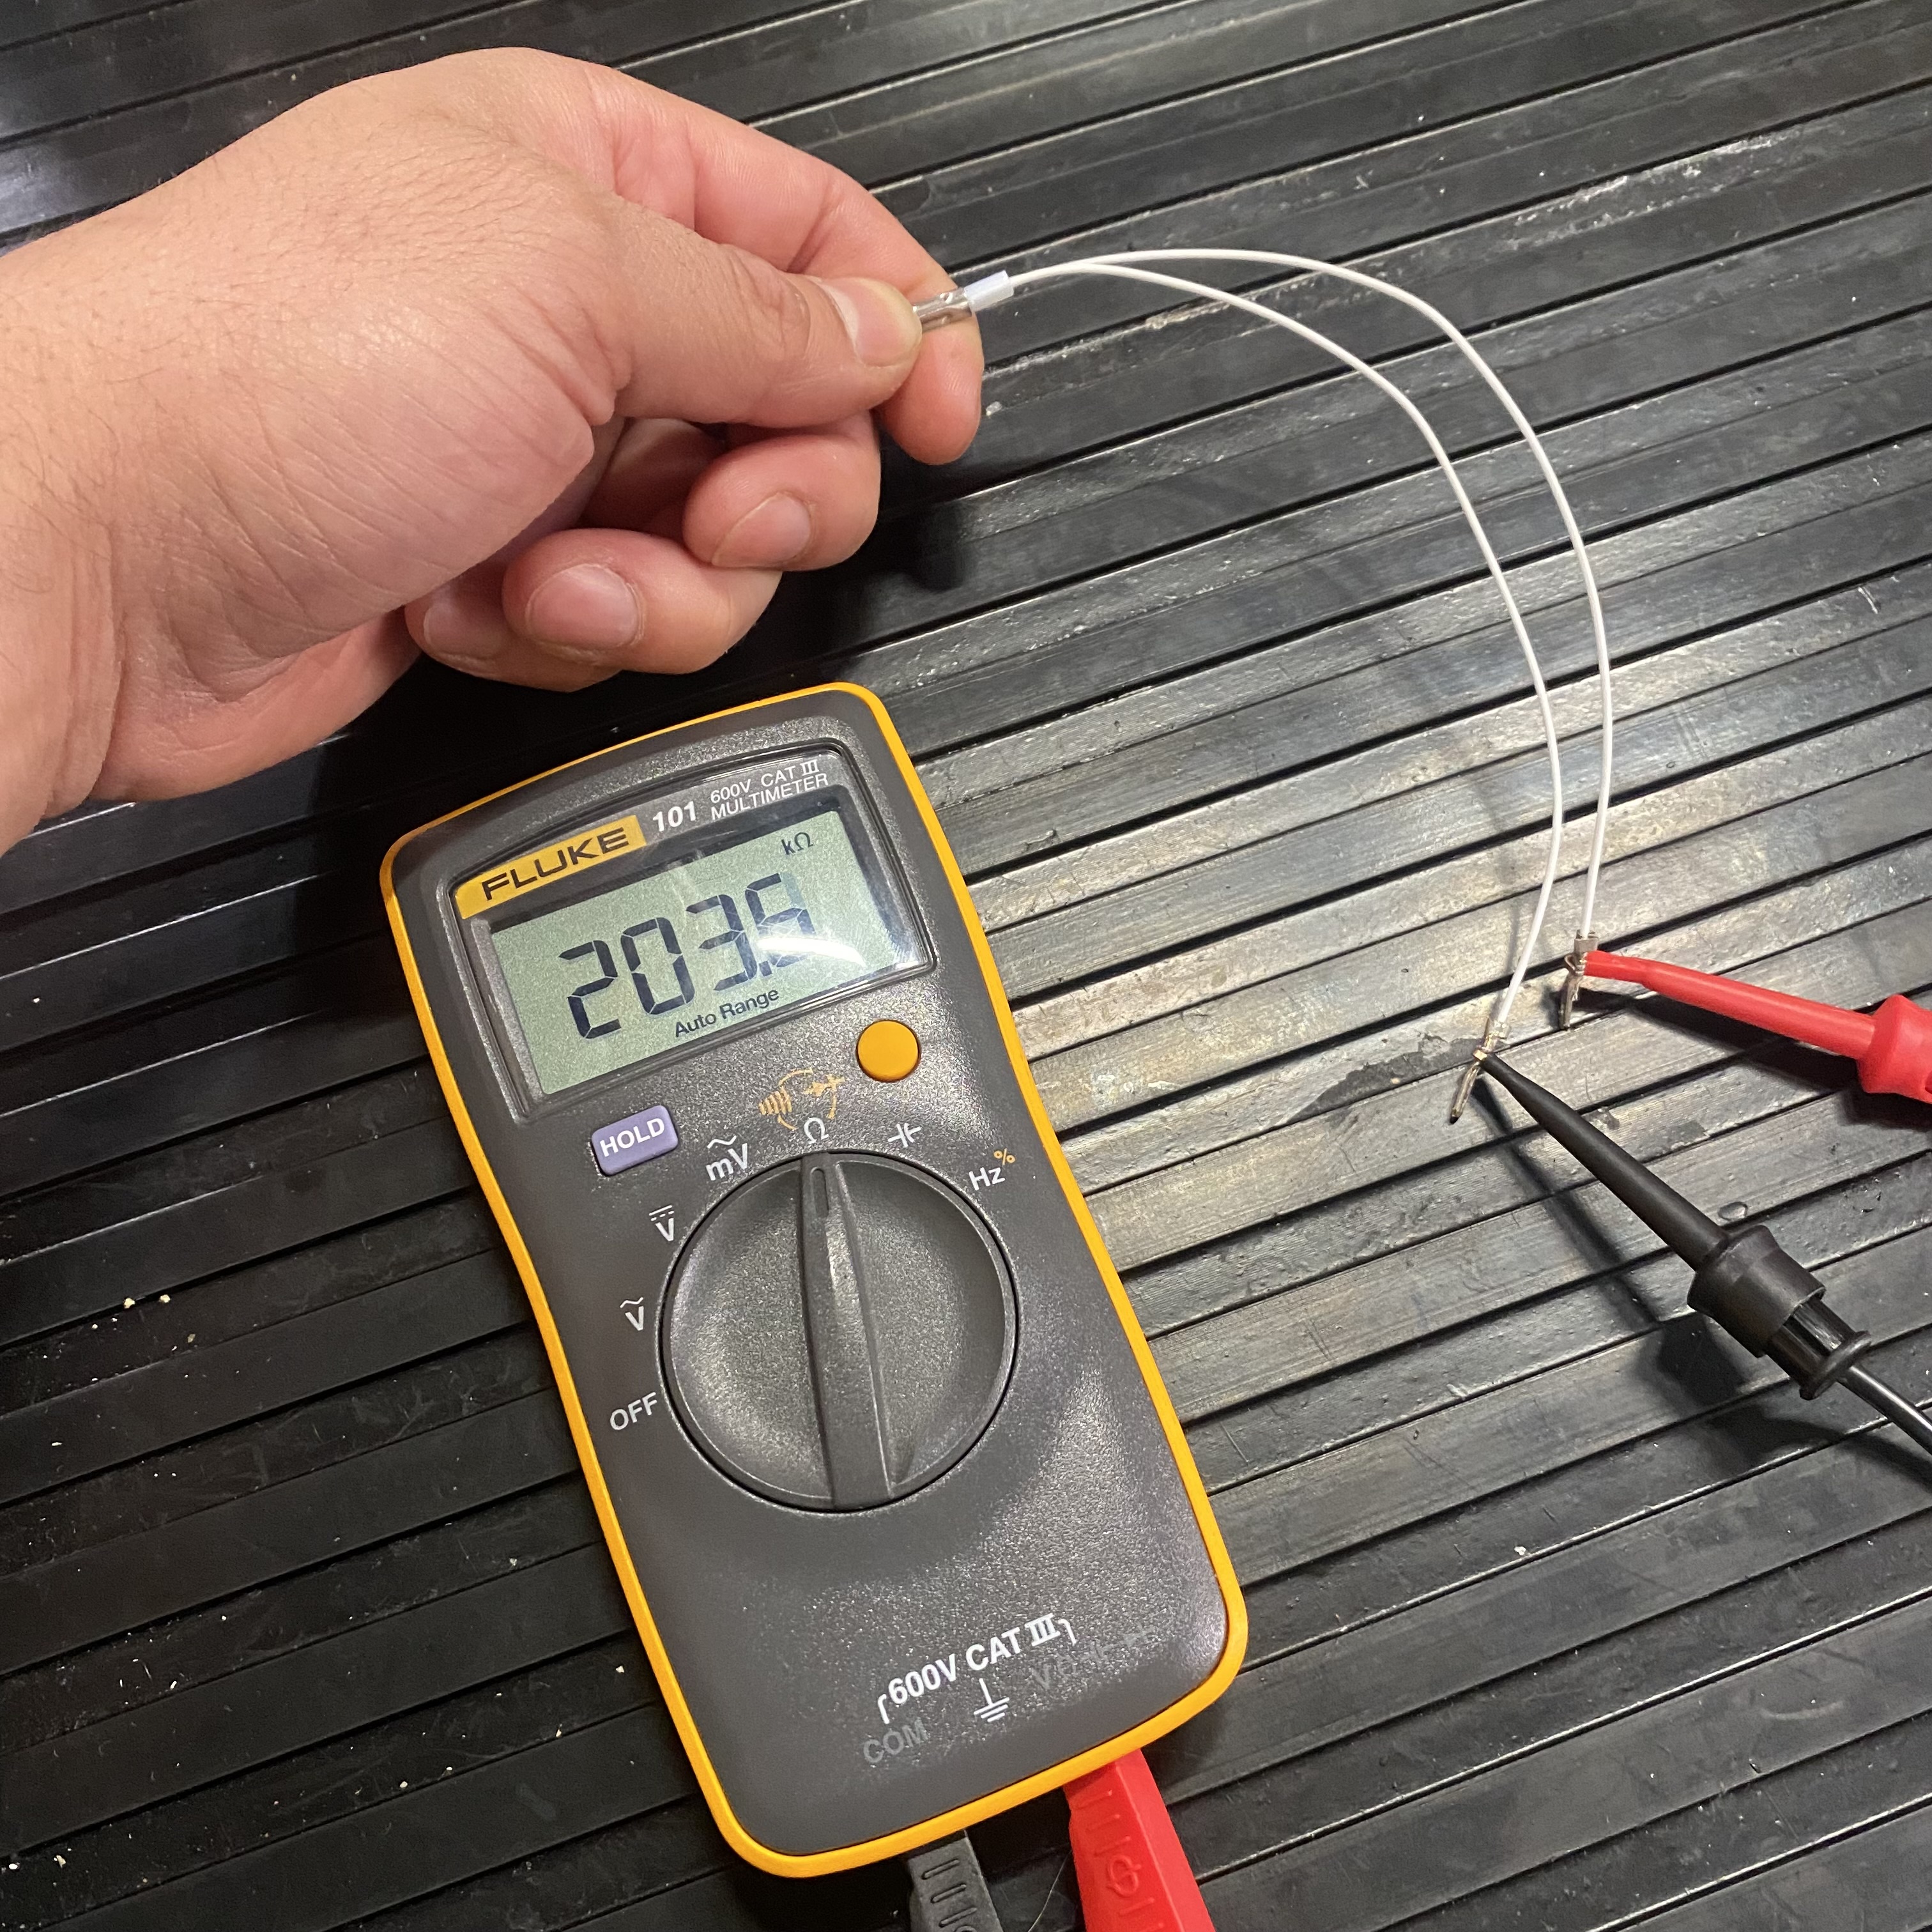
If your multimeter displays 0 resistance or infinite resistance (O.L.), the temperature sensor is most likely faulty. If the temperature sensor does not consistently respond to changes in temperature that is also an indication that it's likely faulty.
NOTE: LUCCA A53 / Vivaldi: Replacing Coffee Boiler Temperature Sensor