LUCCA A53 / A53 Mini / Vivaldi / Mini Vivaldi: Cleaning or Replacing Group Head Solenoid (pre-2019)Updated 5 months ago
Below you will find a step by step guide on removing the front panel of your machine and checking the grouphead solenoid.
Tools Needed:
- Phillips Screwdriver
- Adjustable Wrench x 2
- 3mm Allen Wrench
- If you need a new 3-Way Solenoid, it can be found here: La Spaziale Grouphead Solenoid
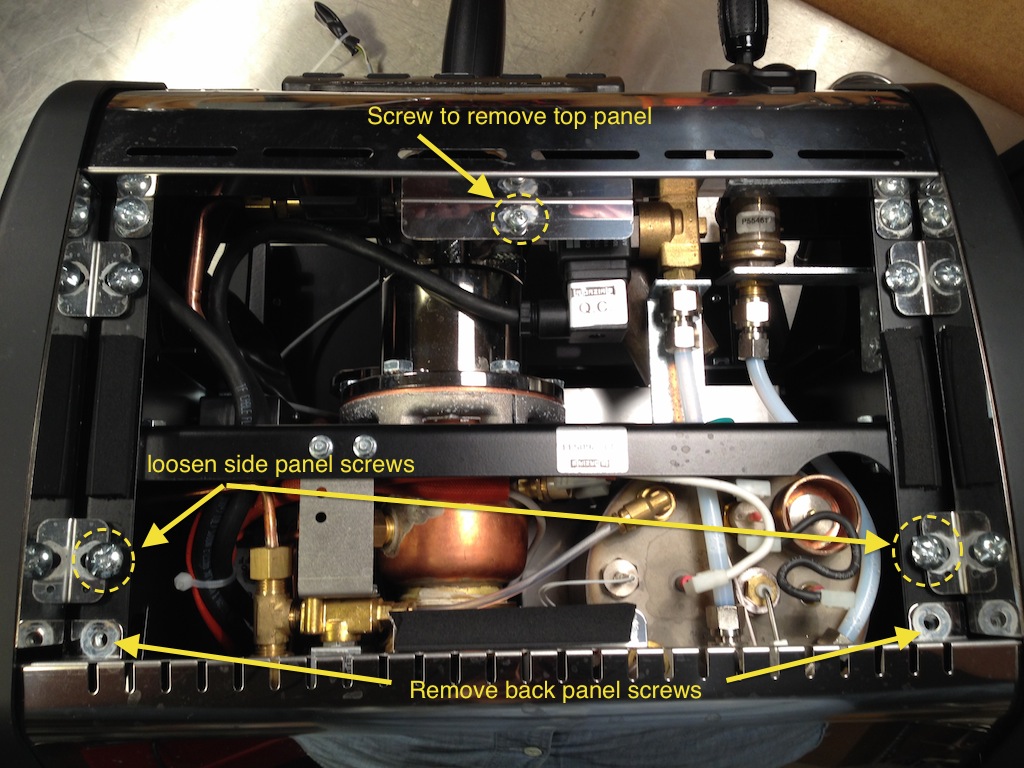
1. Remove top panel and remove the 4 side panel screws along with the 2 screws in the front face plate. For this procedure, you will not need to remove the side panels completely and the back panel will stay on.
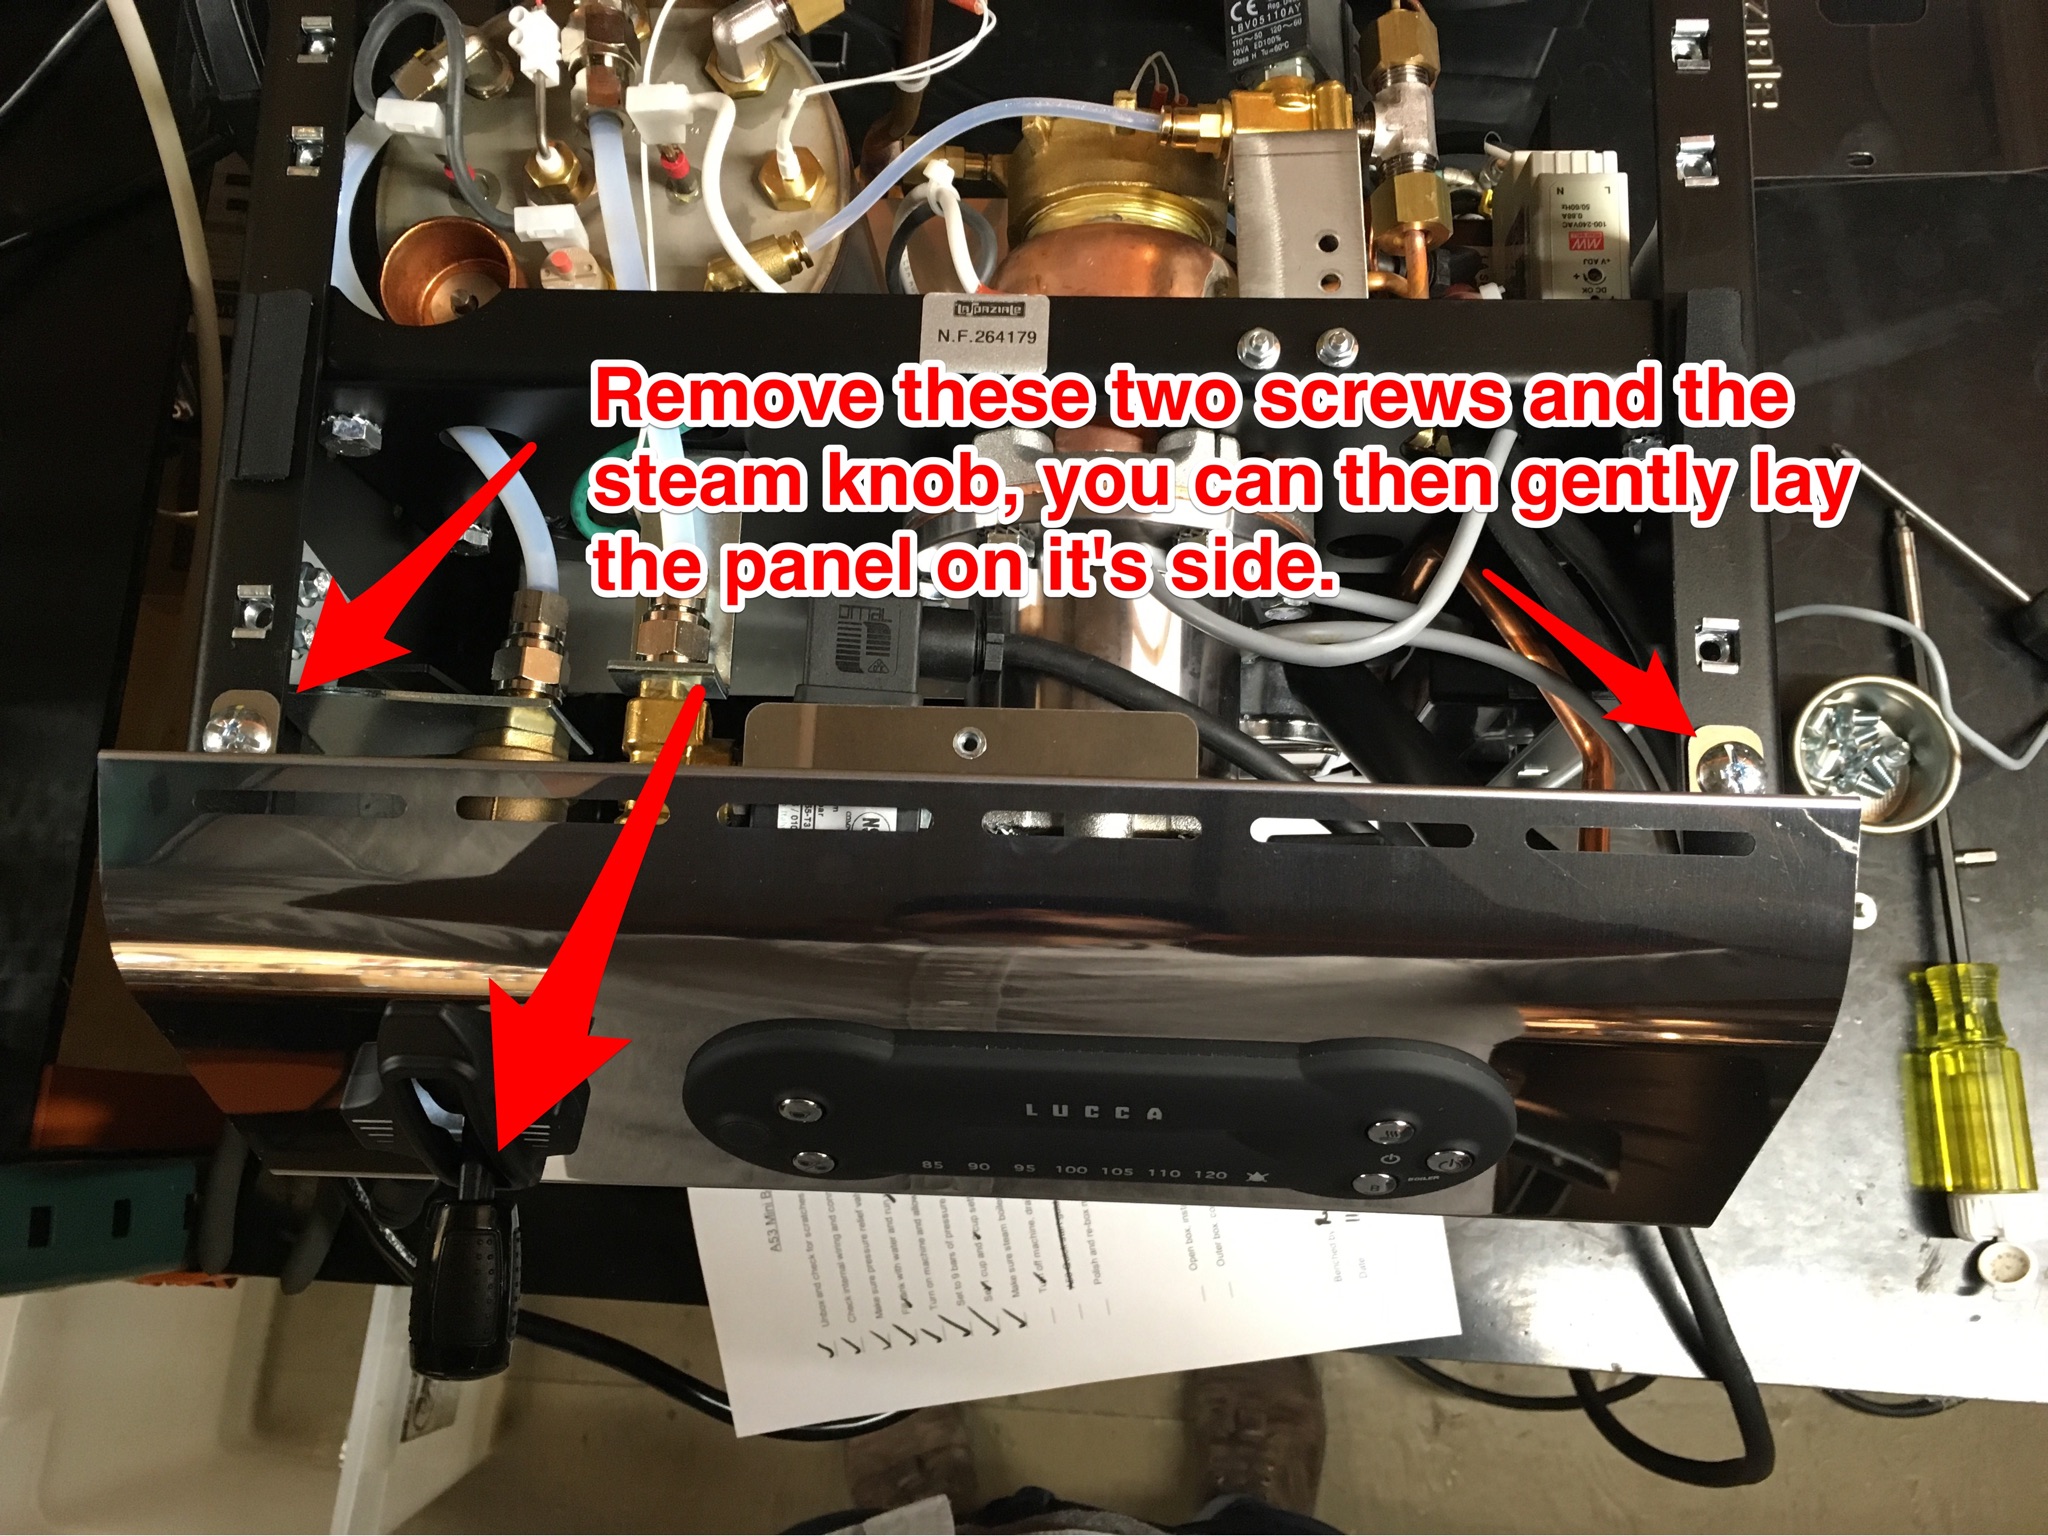
2. Remove the front panel by leaning the side panels outwards, and with the steam knob removed, you should be able to get the face place out of the way to get to the group head solenoid.
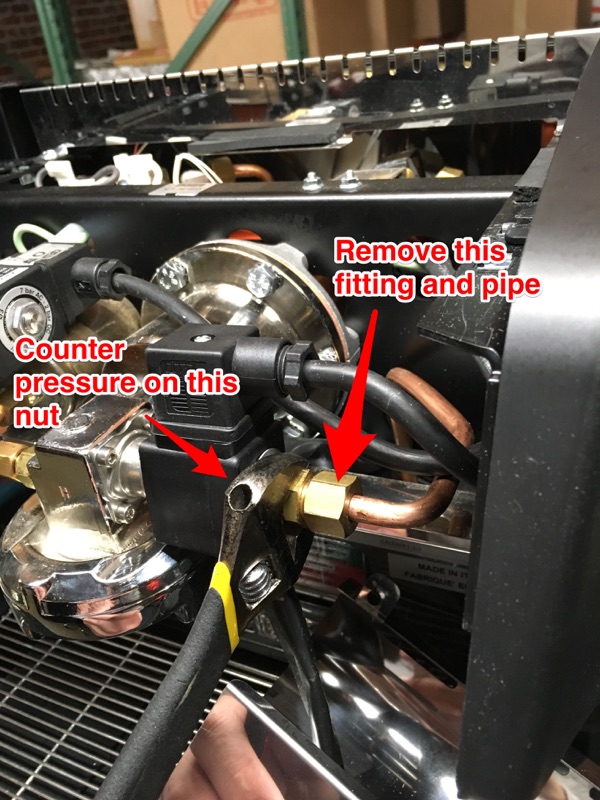
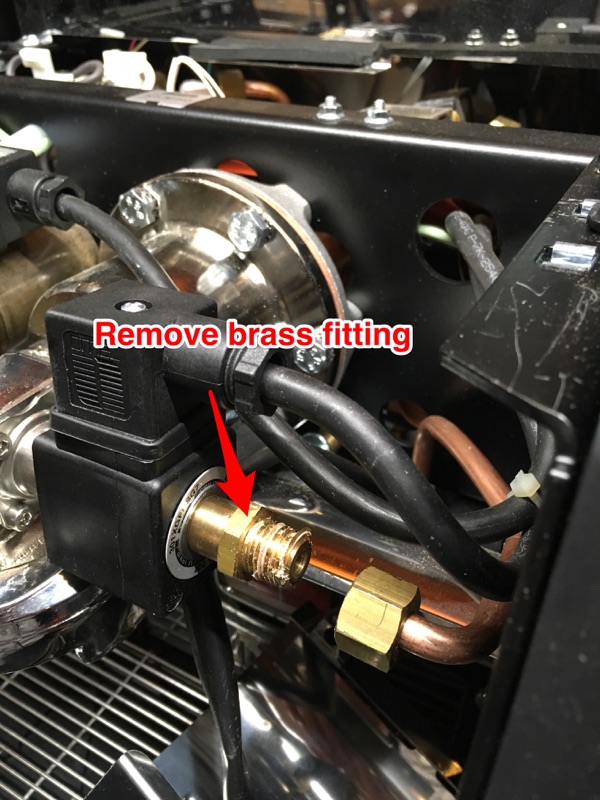
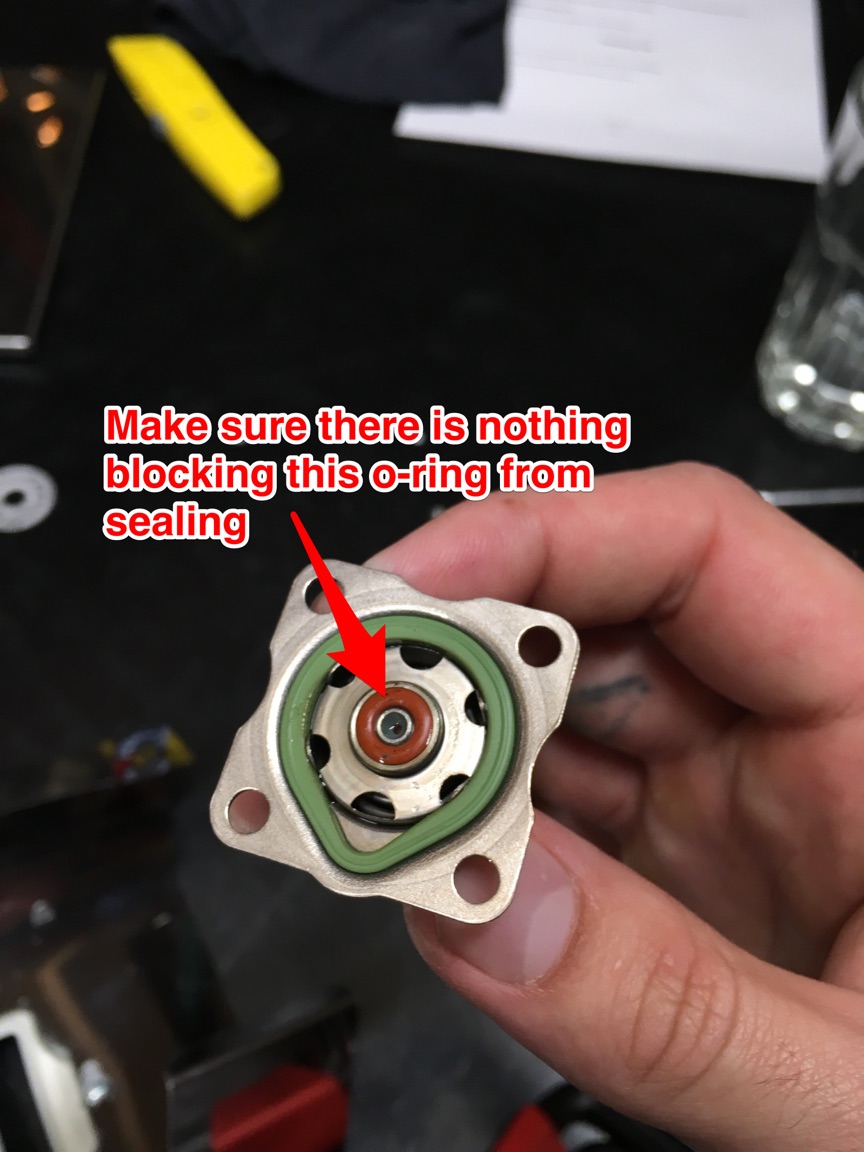
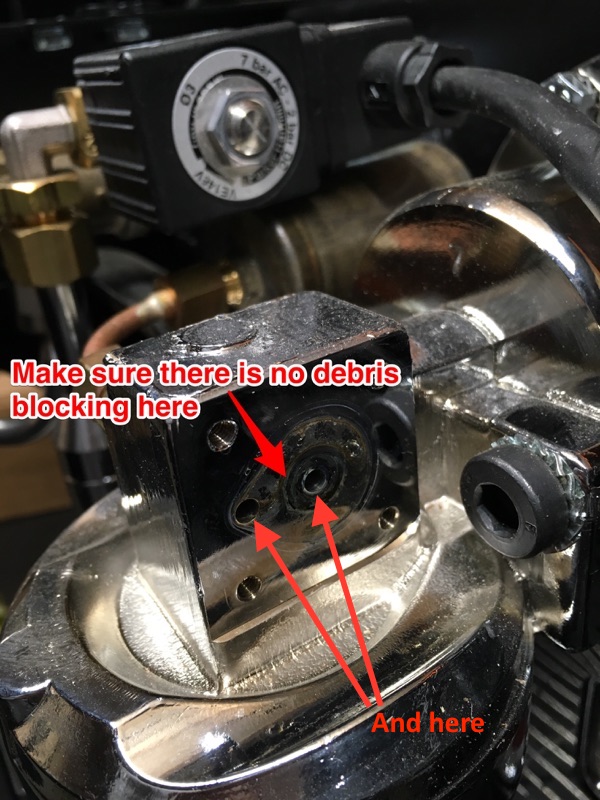
3. Follow the following steps to check for blockages in the group head solenoid.

4. Once passageways are clear, reinstall the solenoid, being careful all gaskets are still in place and do not get pinched.
*NOTE: The manufacturer has switched to an updated the design for the group head solenoid on S1 machines. The new group head solenoids are backwards compatible with older machines, but will require longer mounting screws; M4x10mm socket cap Allen head screws should be readily available at any local hardware store.
**NOTE: If you're troubleshooting a no-flow condition from your A53's group head, it may be necessary to dismount the group head to clear its passages of any potential obstructions.