LUCCA A53 / A53 Mini / Vivaldi / Mini Vivaldi: Cleaning or Replacing Group Head Solenoid (2019-Present)Updated 5 months ago
Tools Needed:
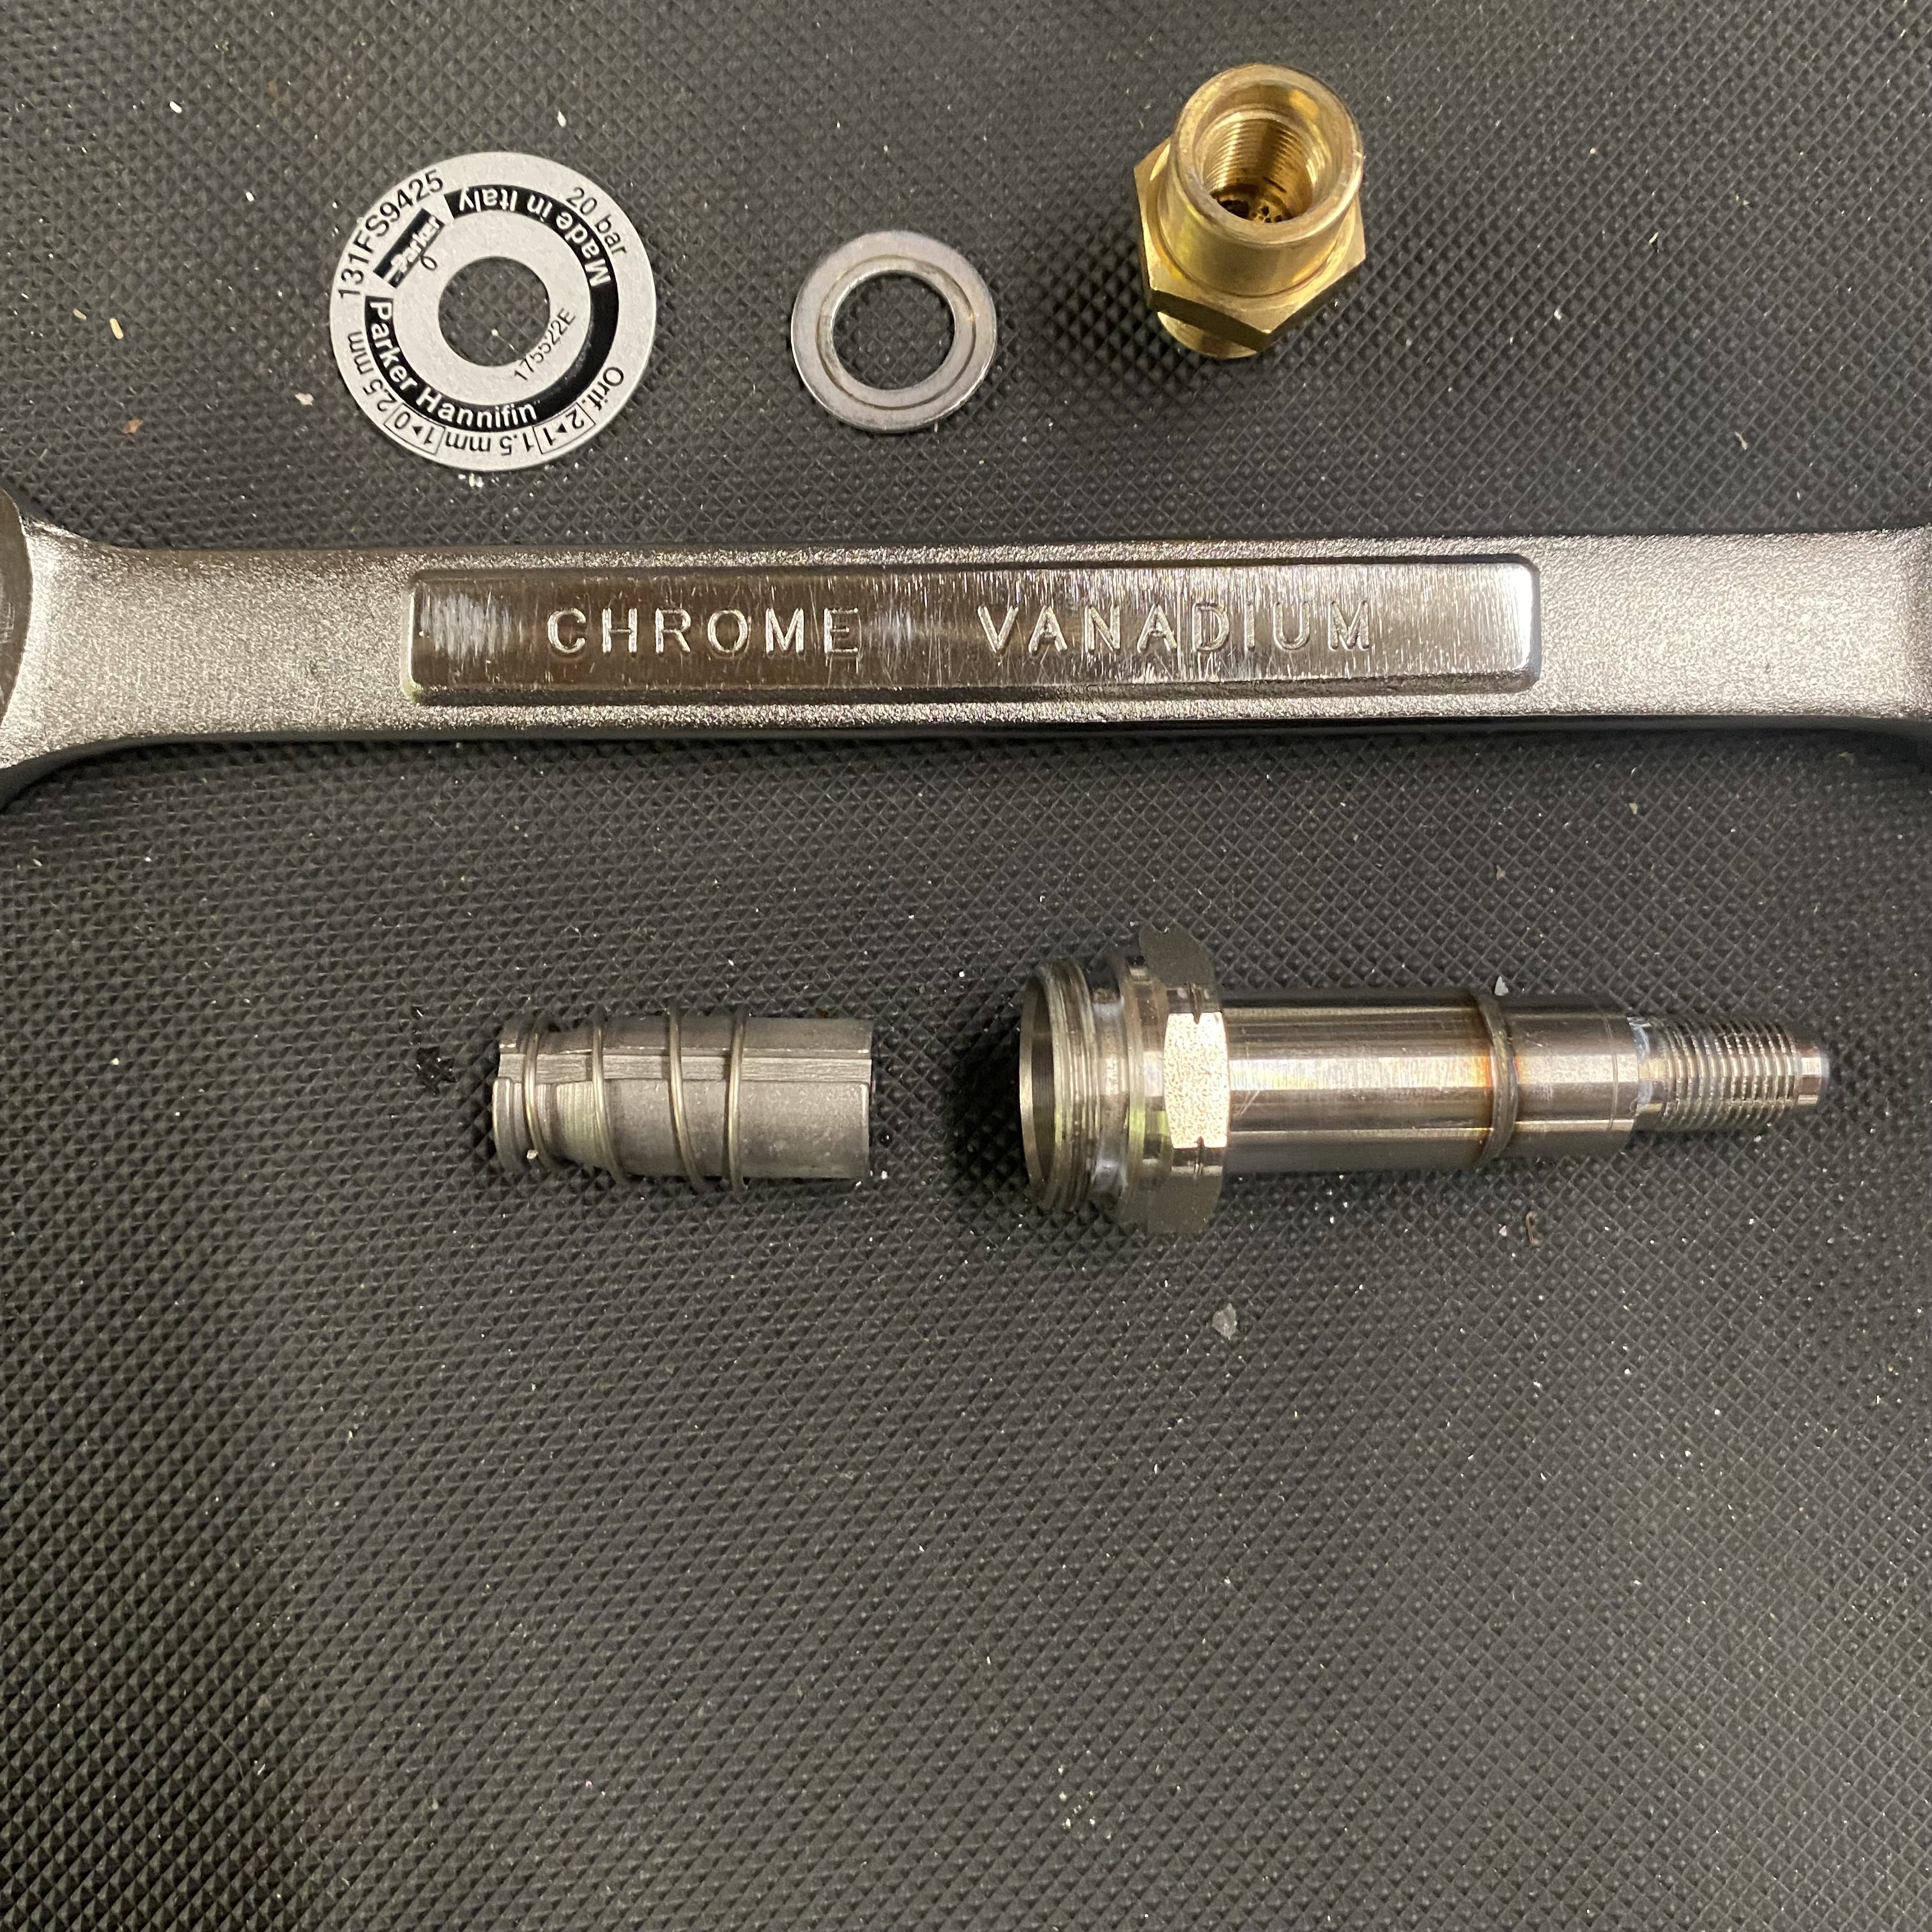
- 17mm, 22mm crescent wrenches
- Adjustable wrench
- 3mm Allen key or hex driver
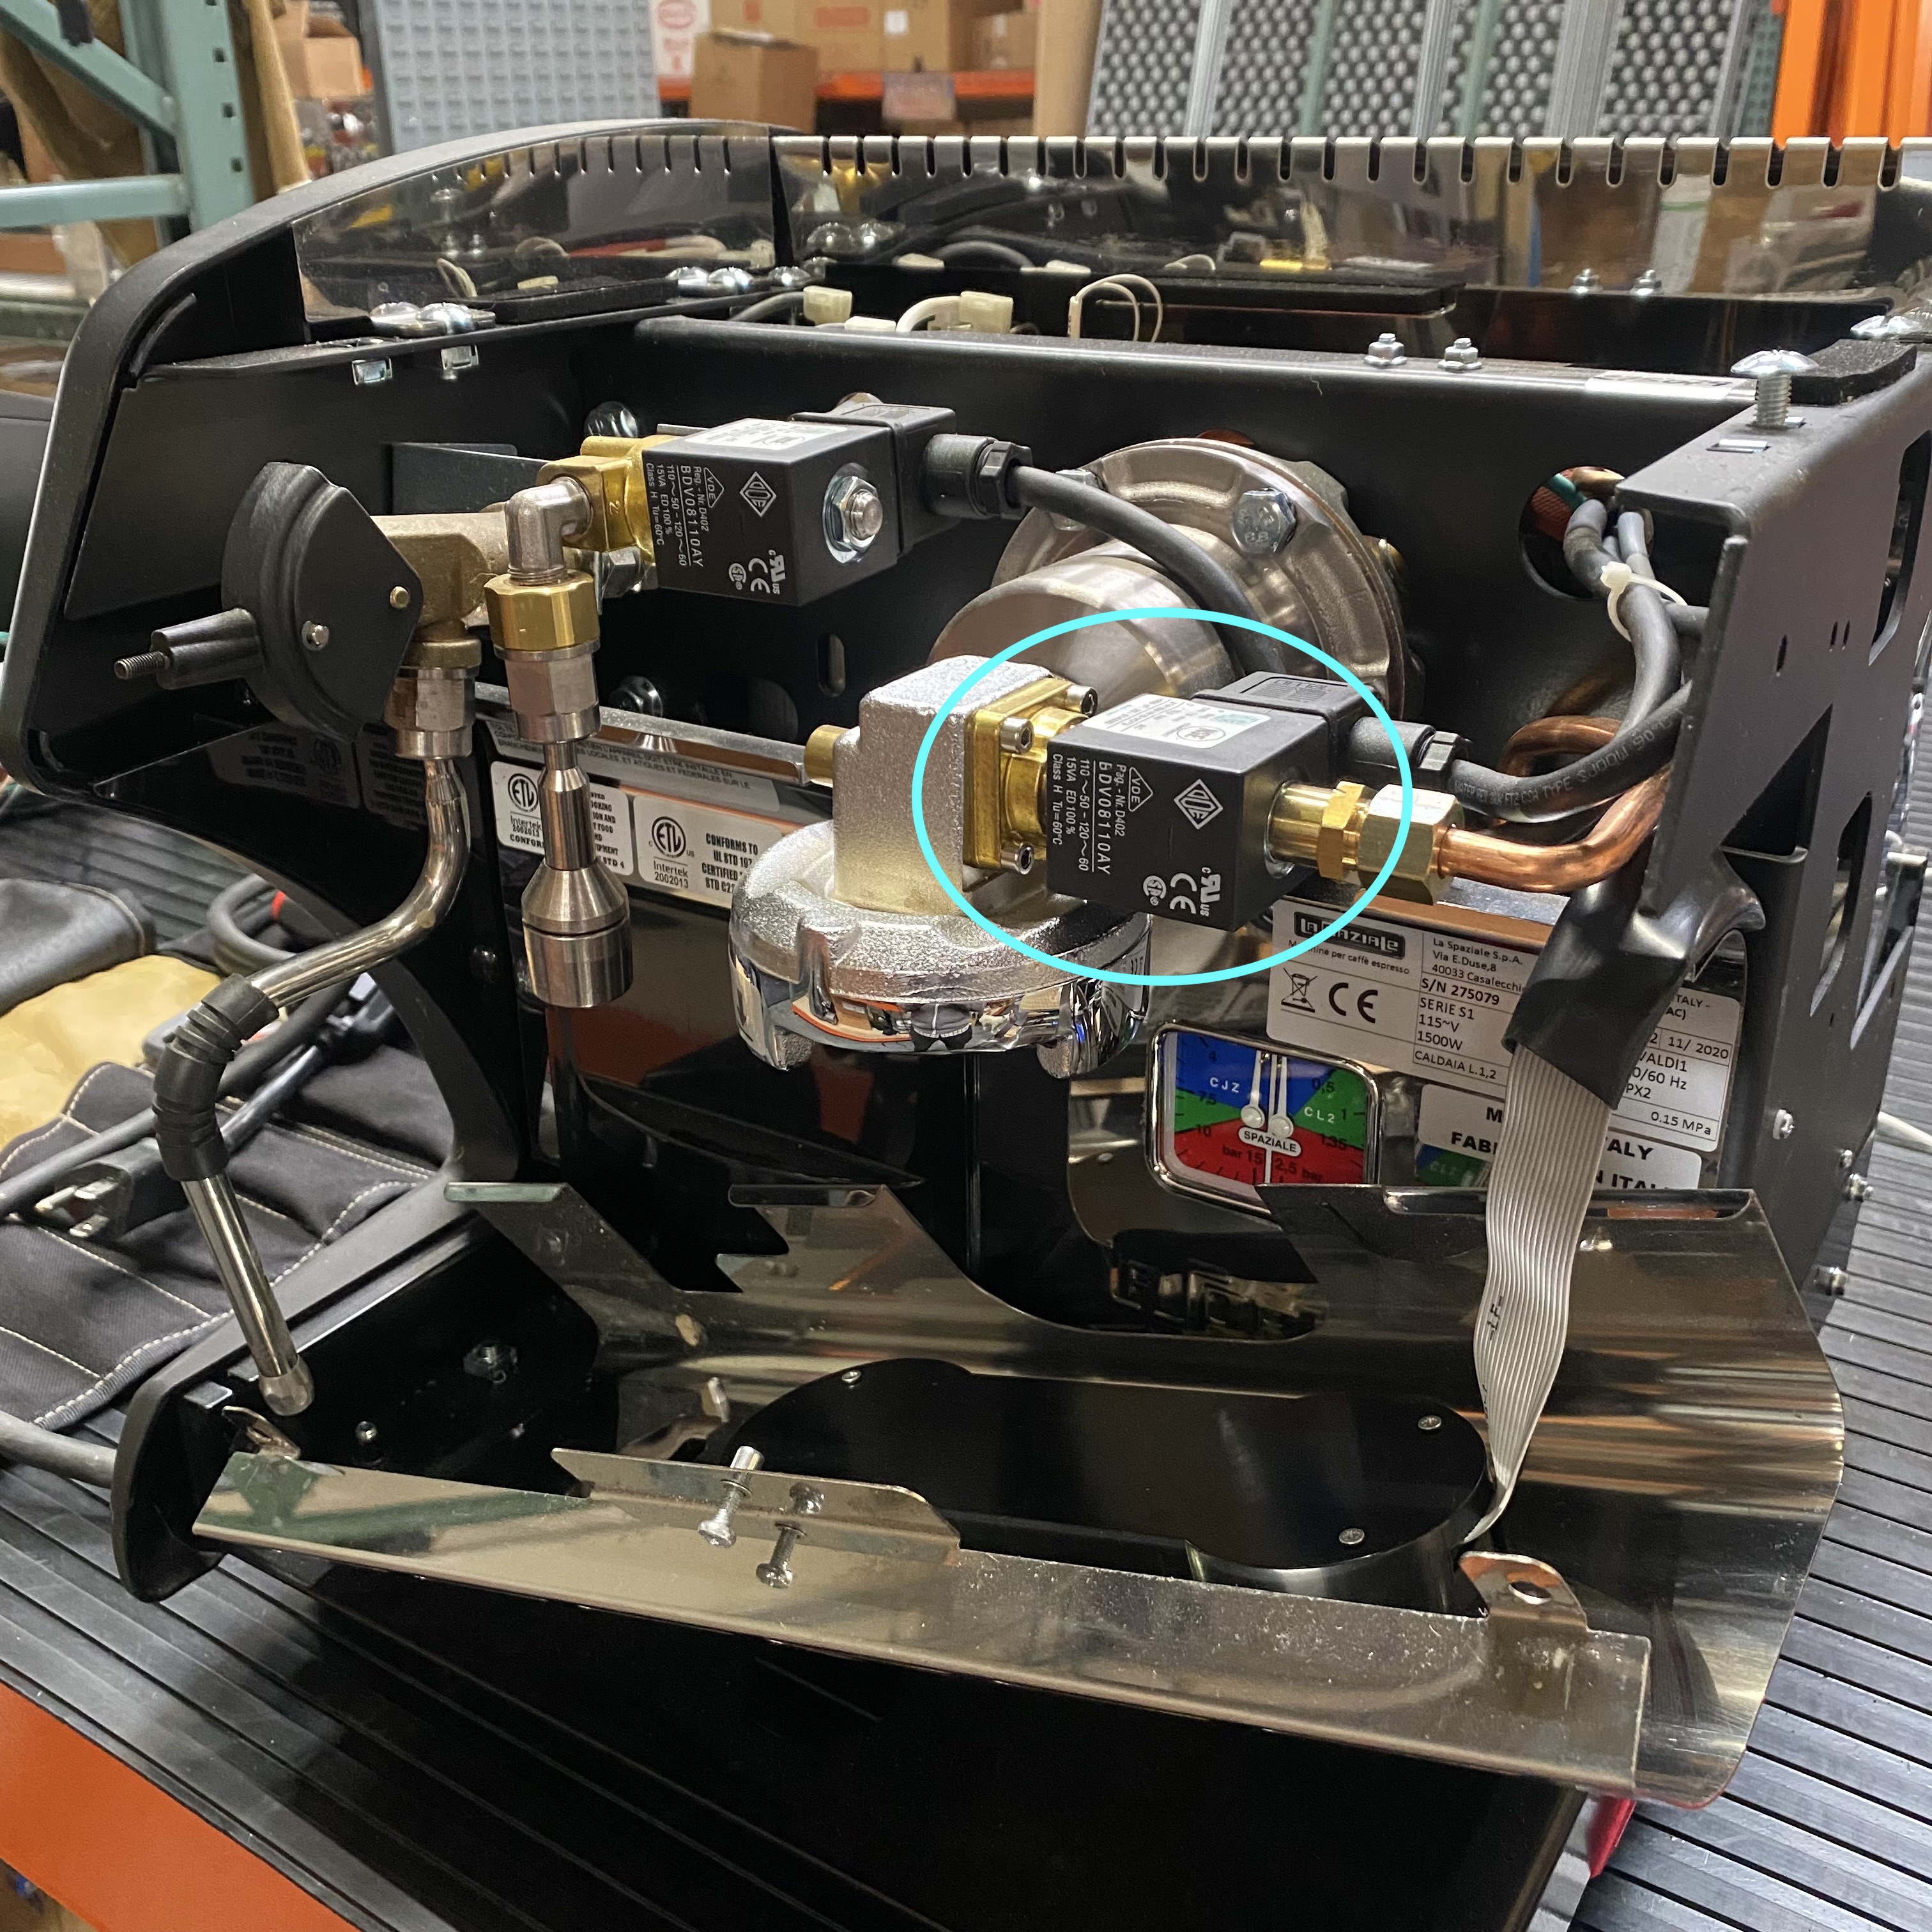
1. Remove the front panel from the machine and set aside. Identify the group head solenoid.
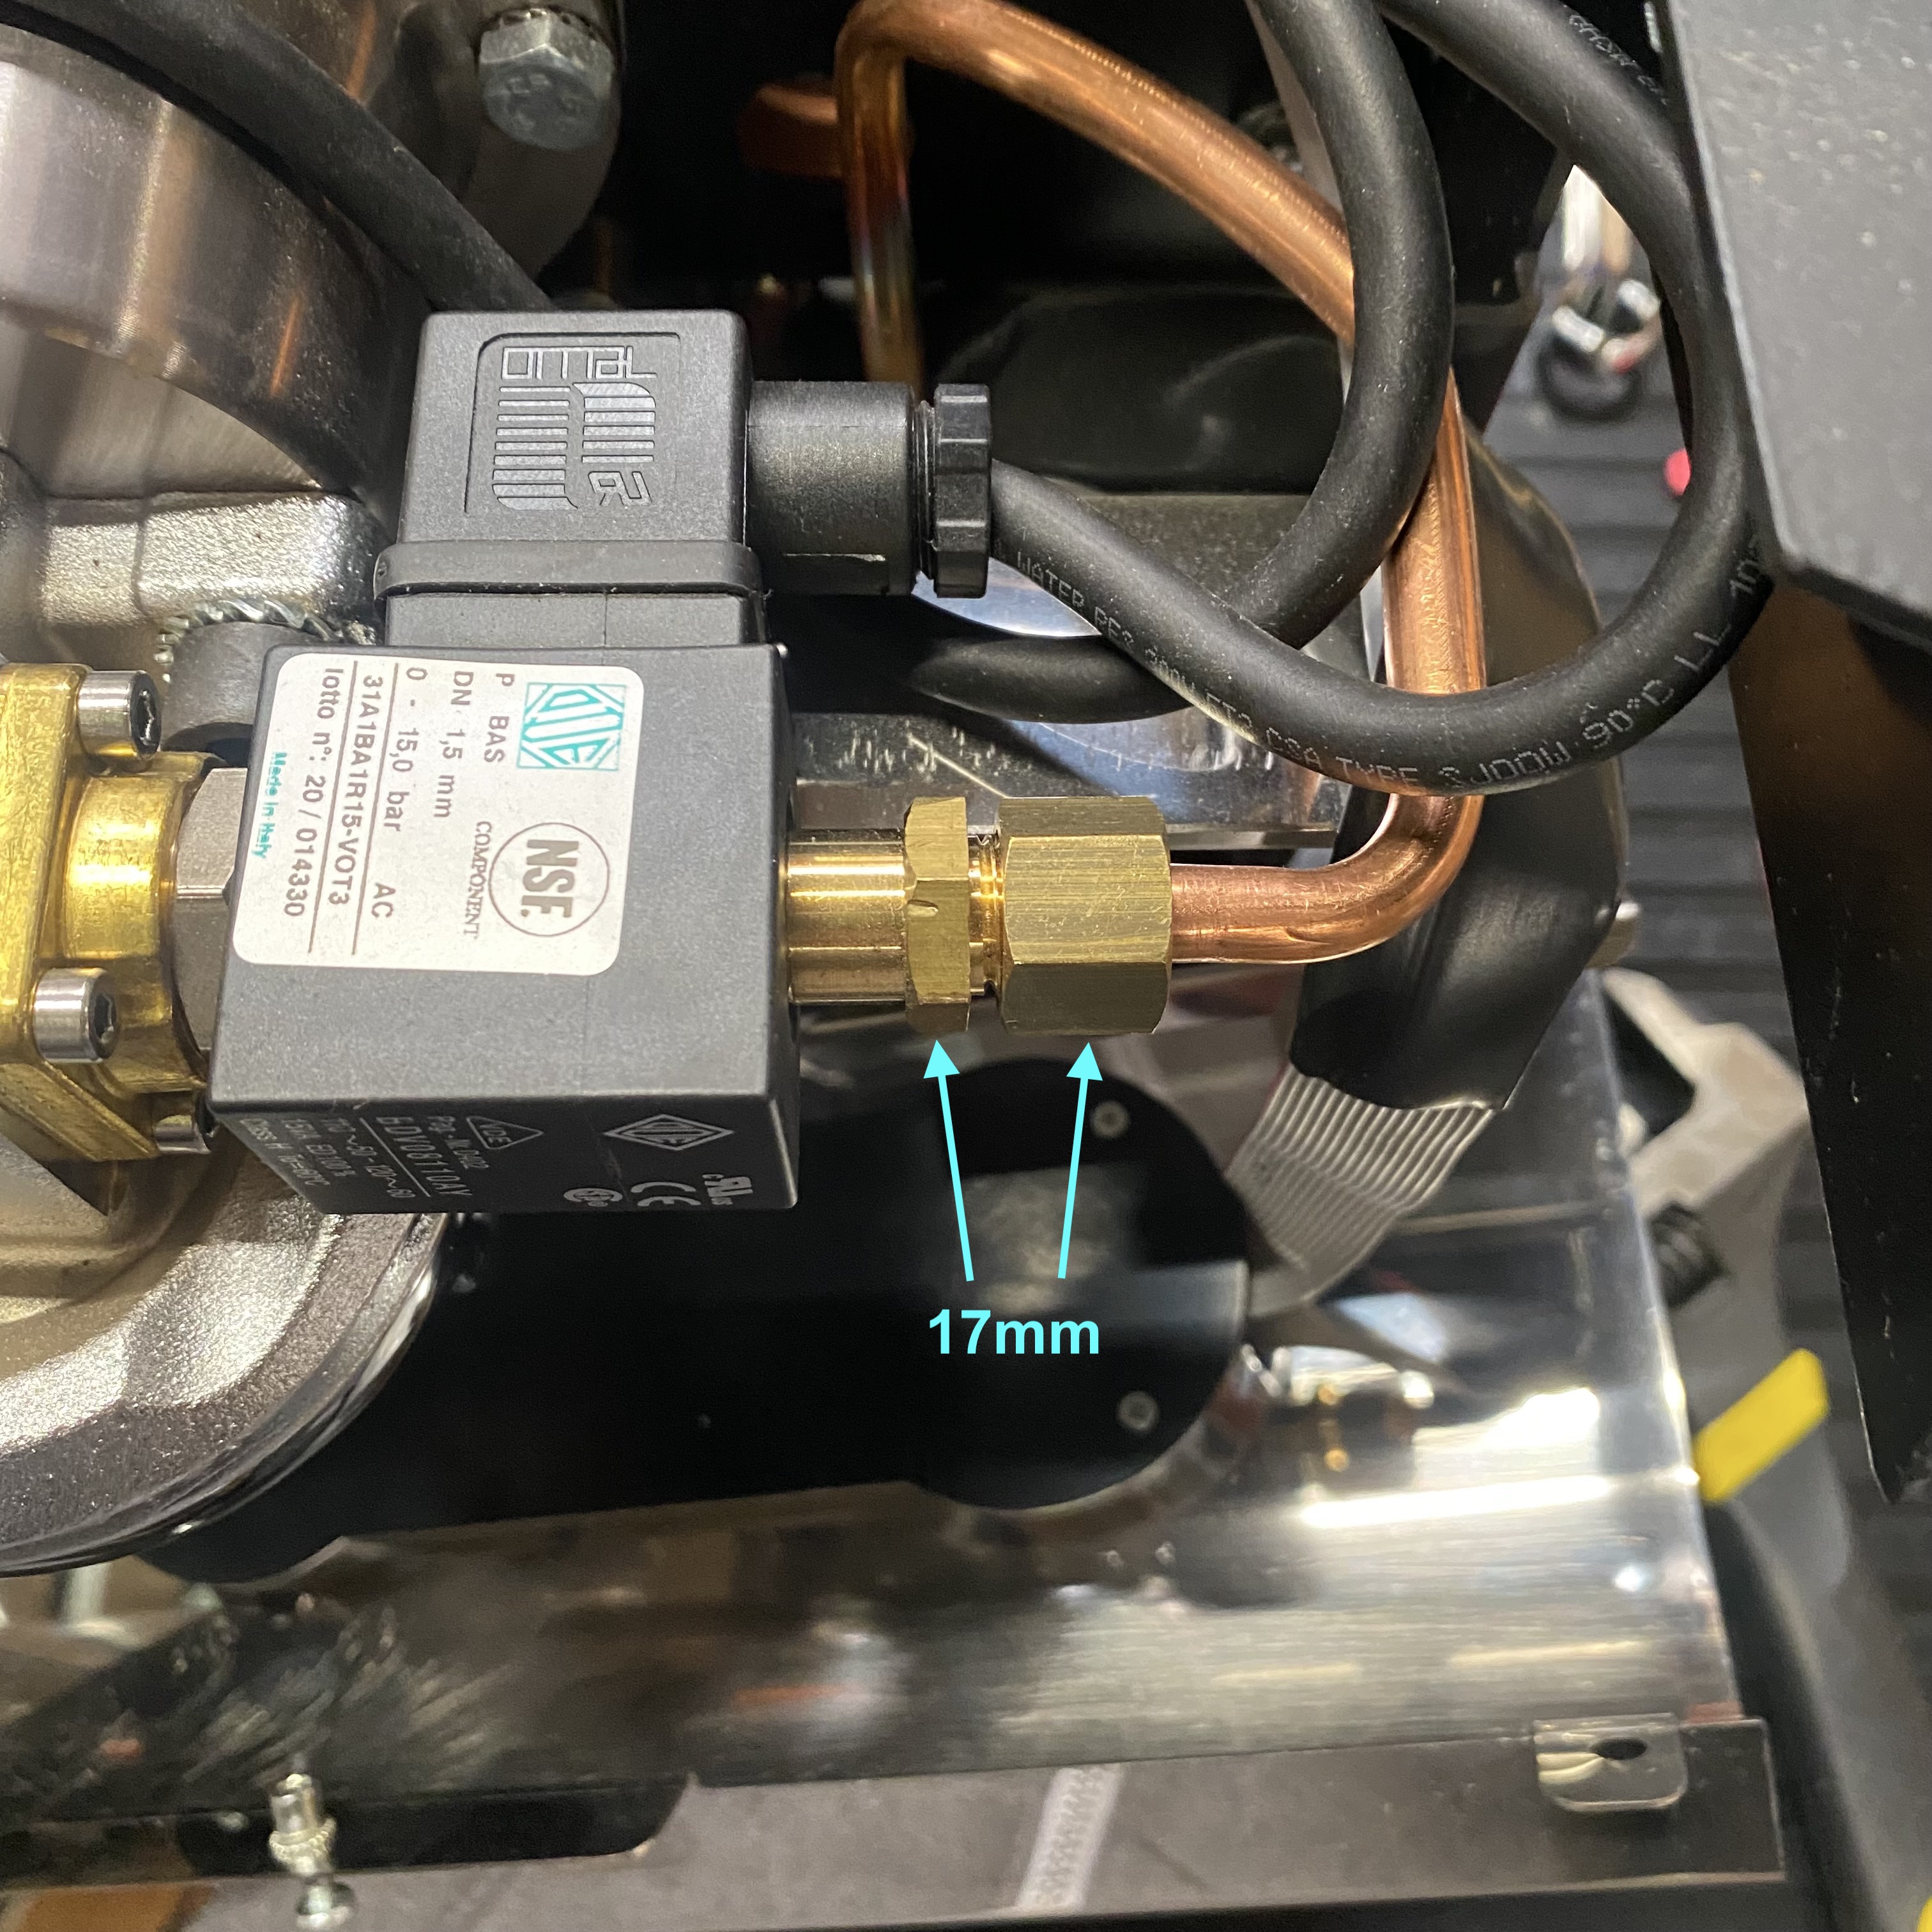
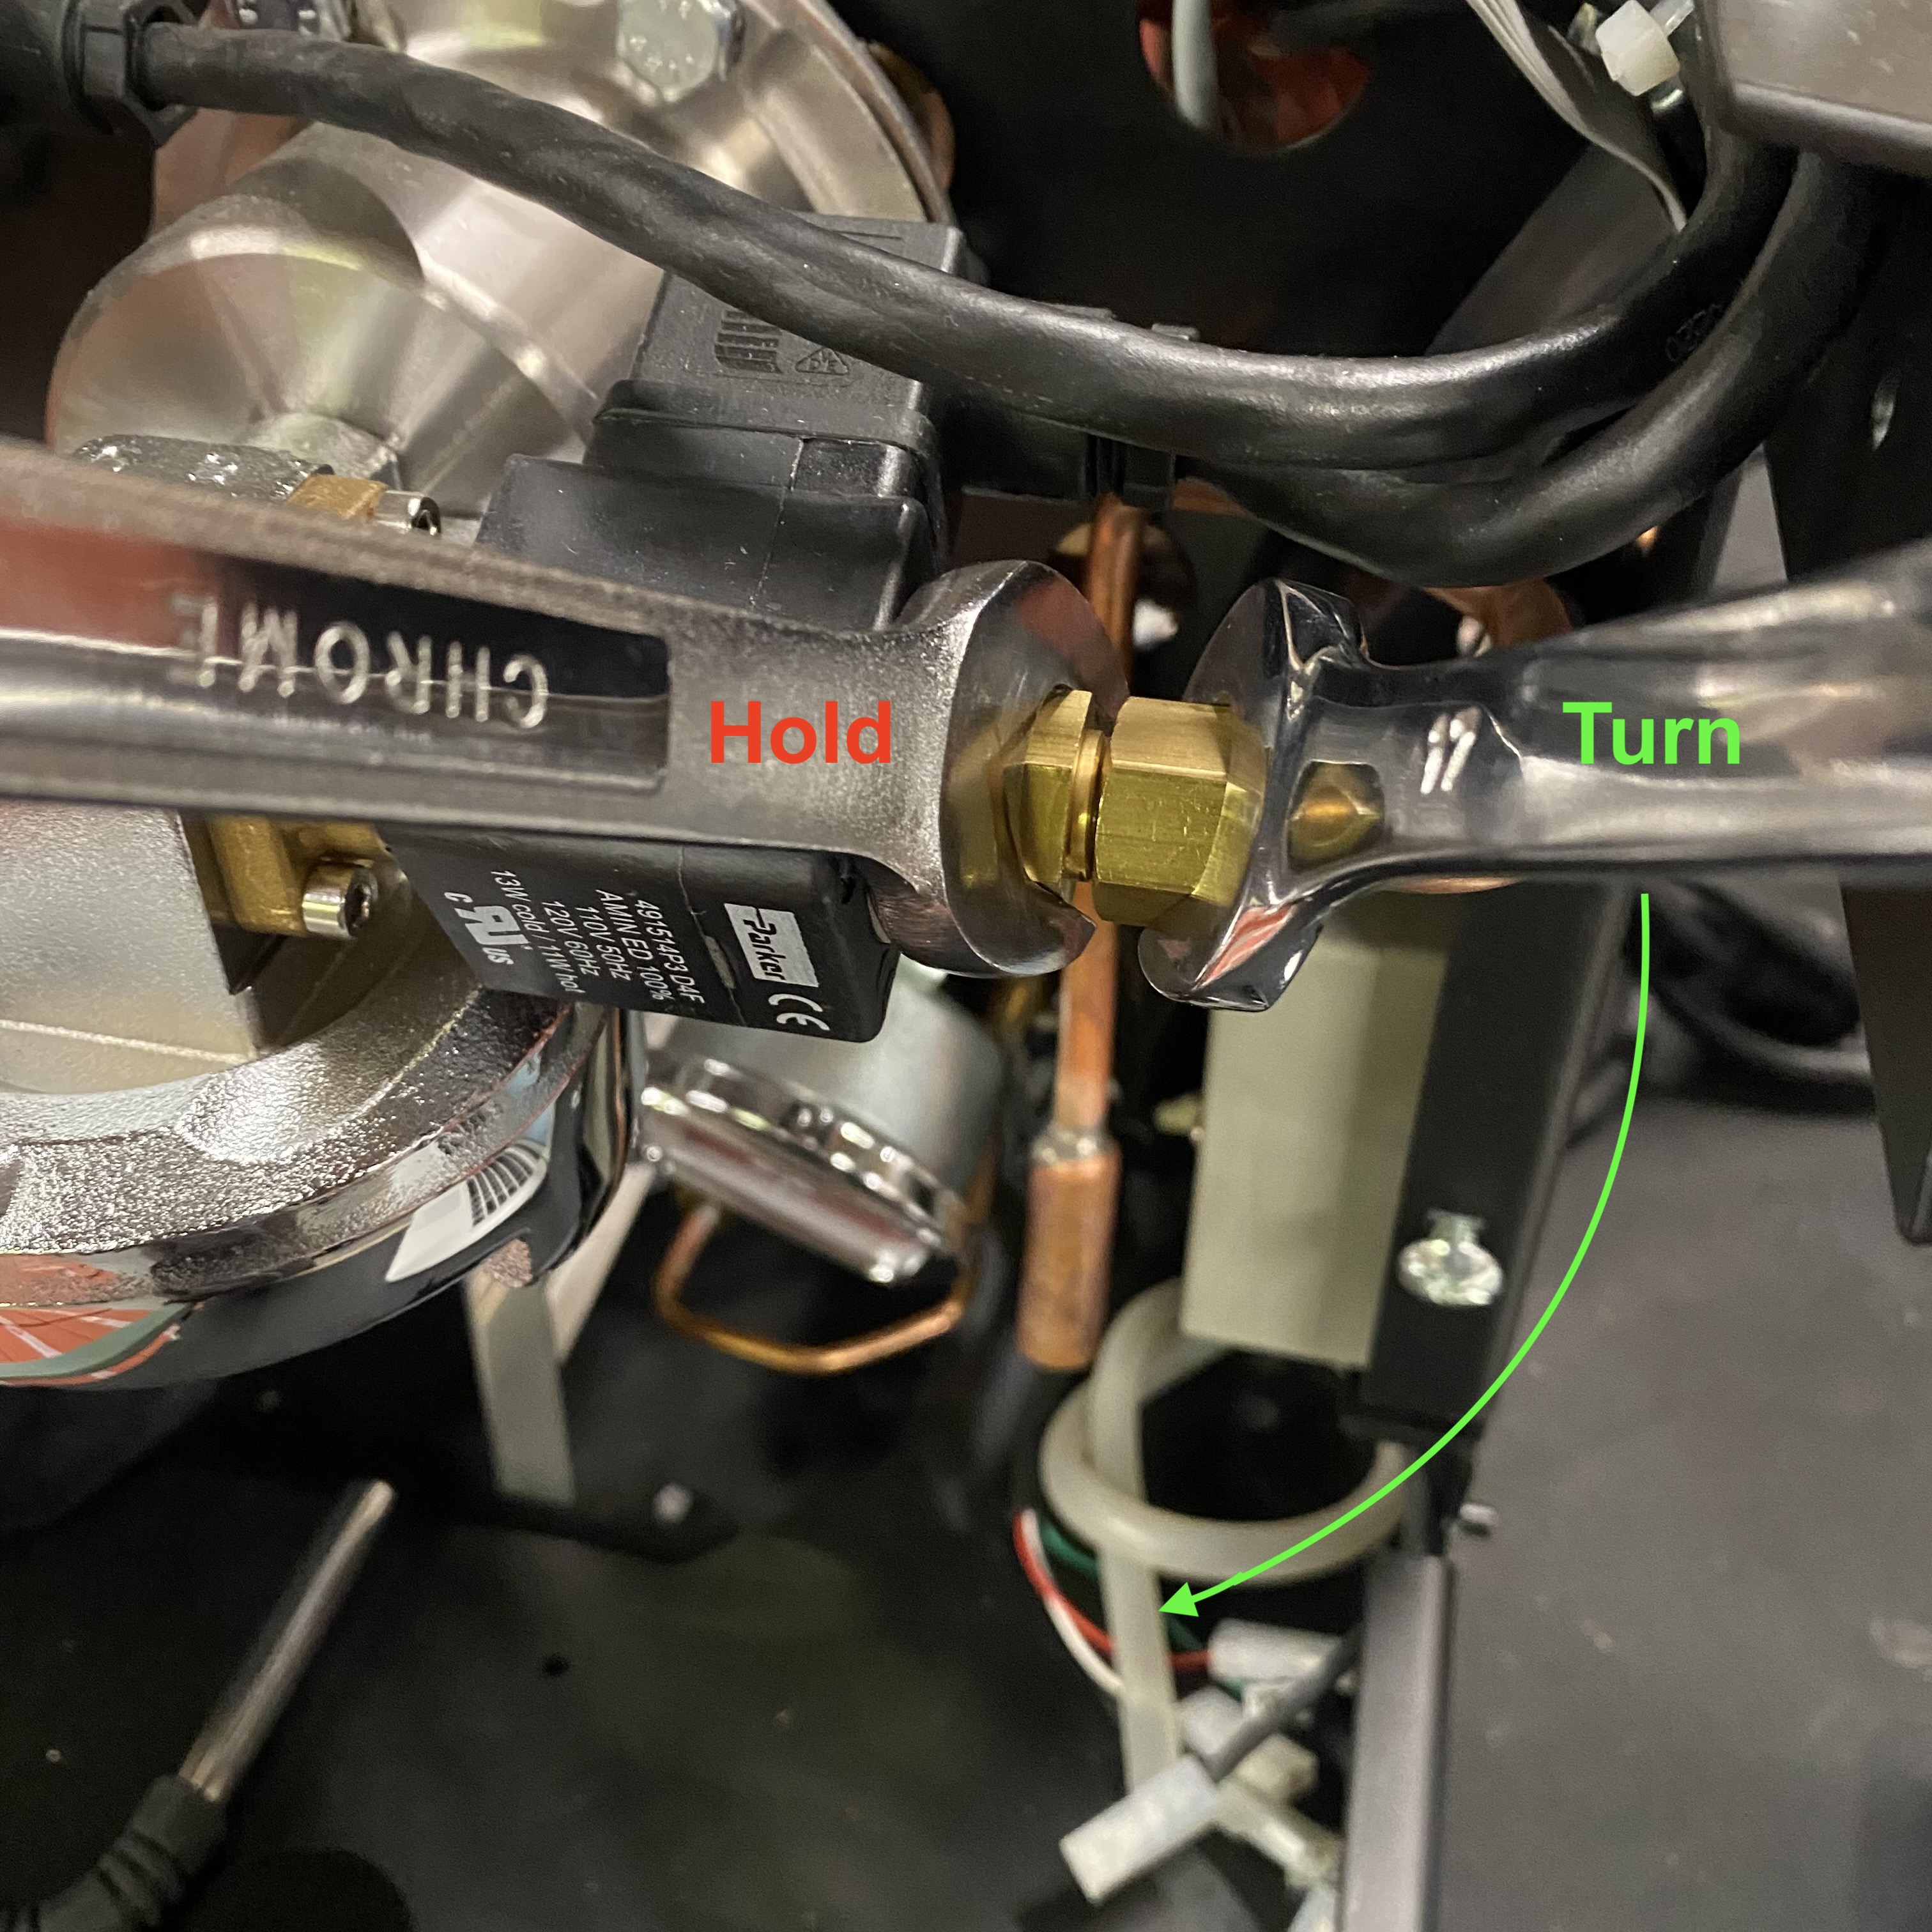
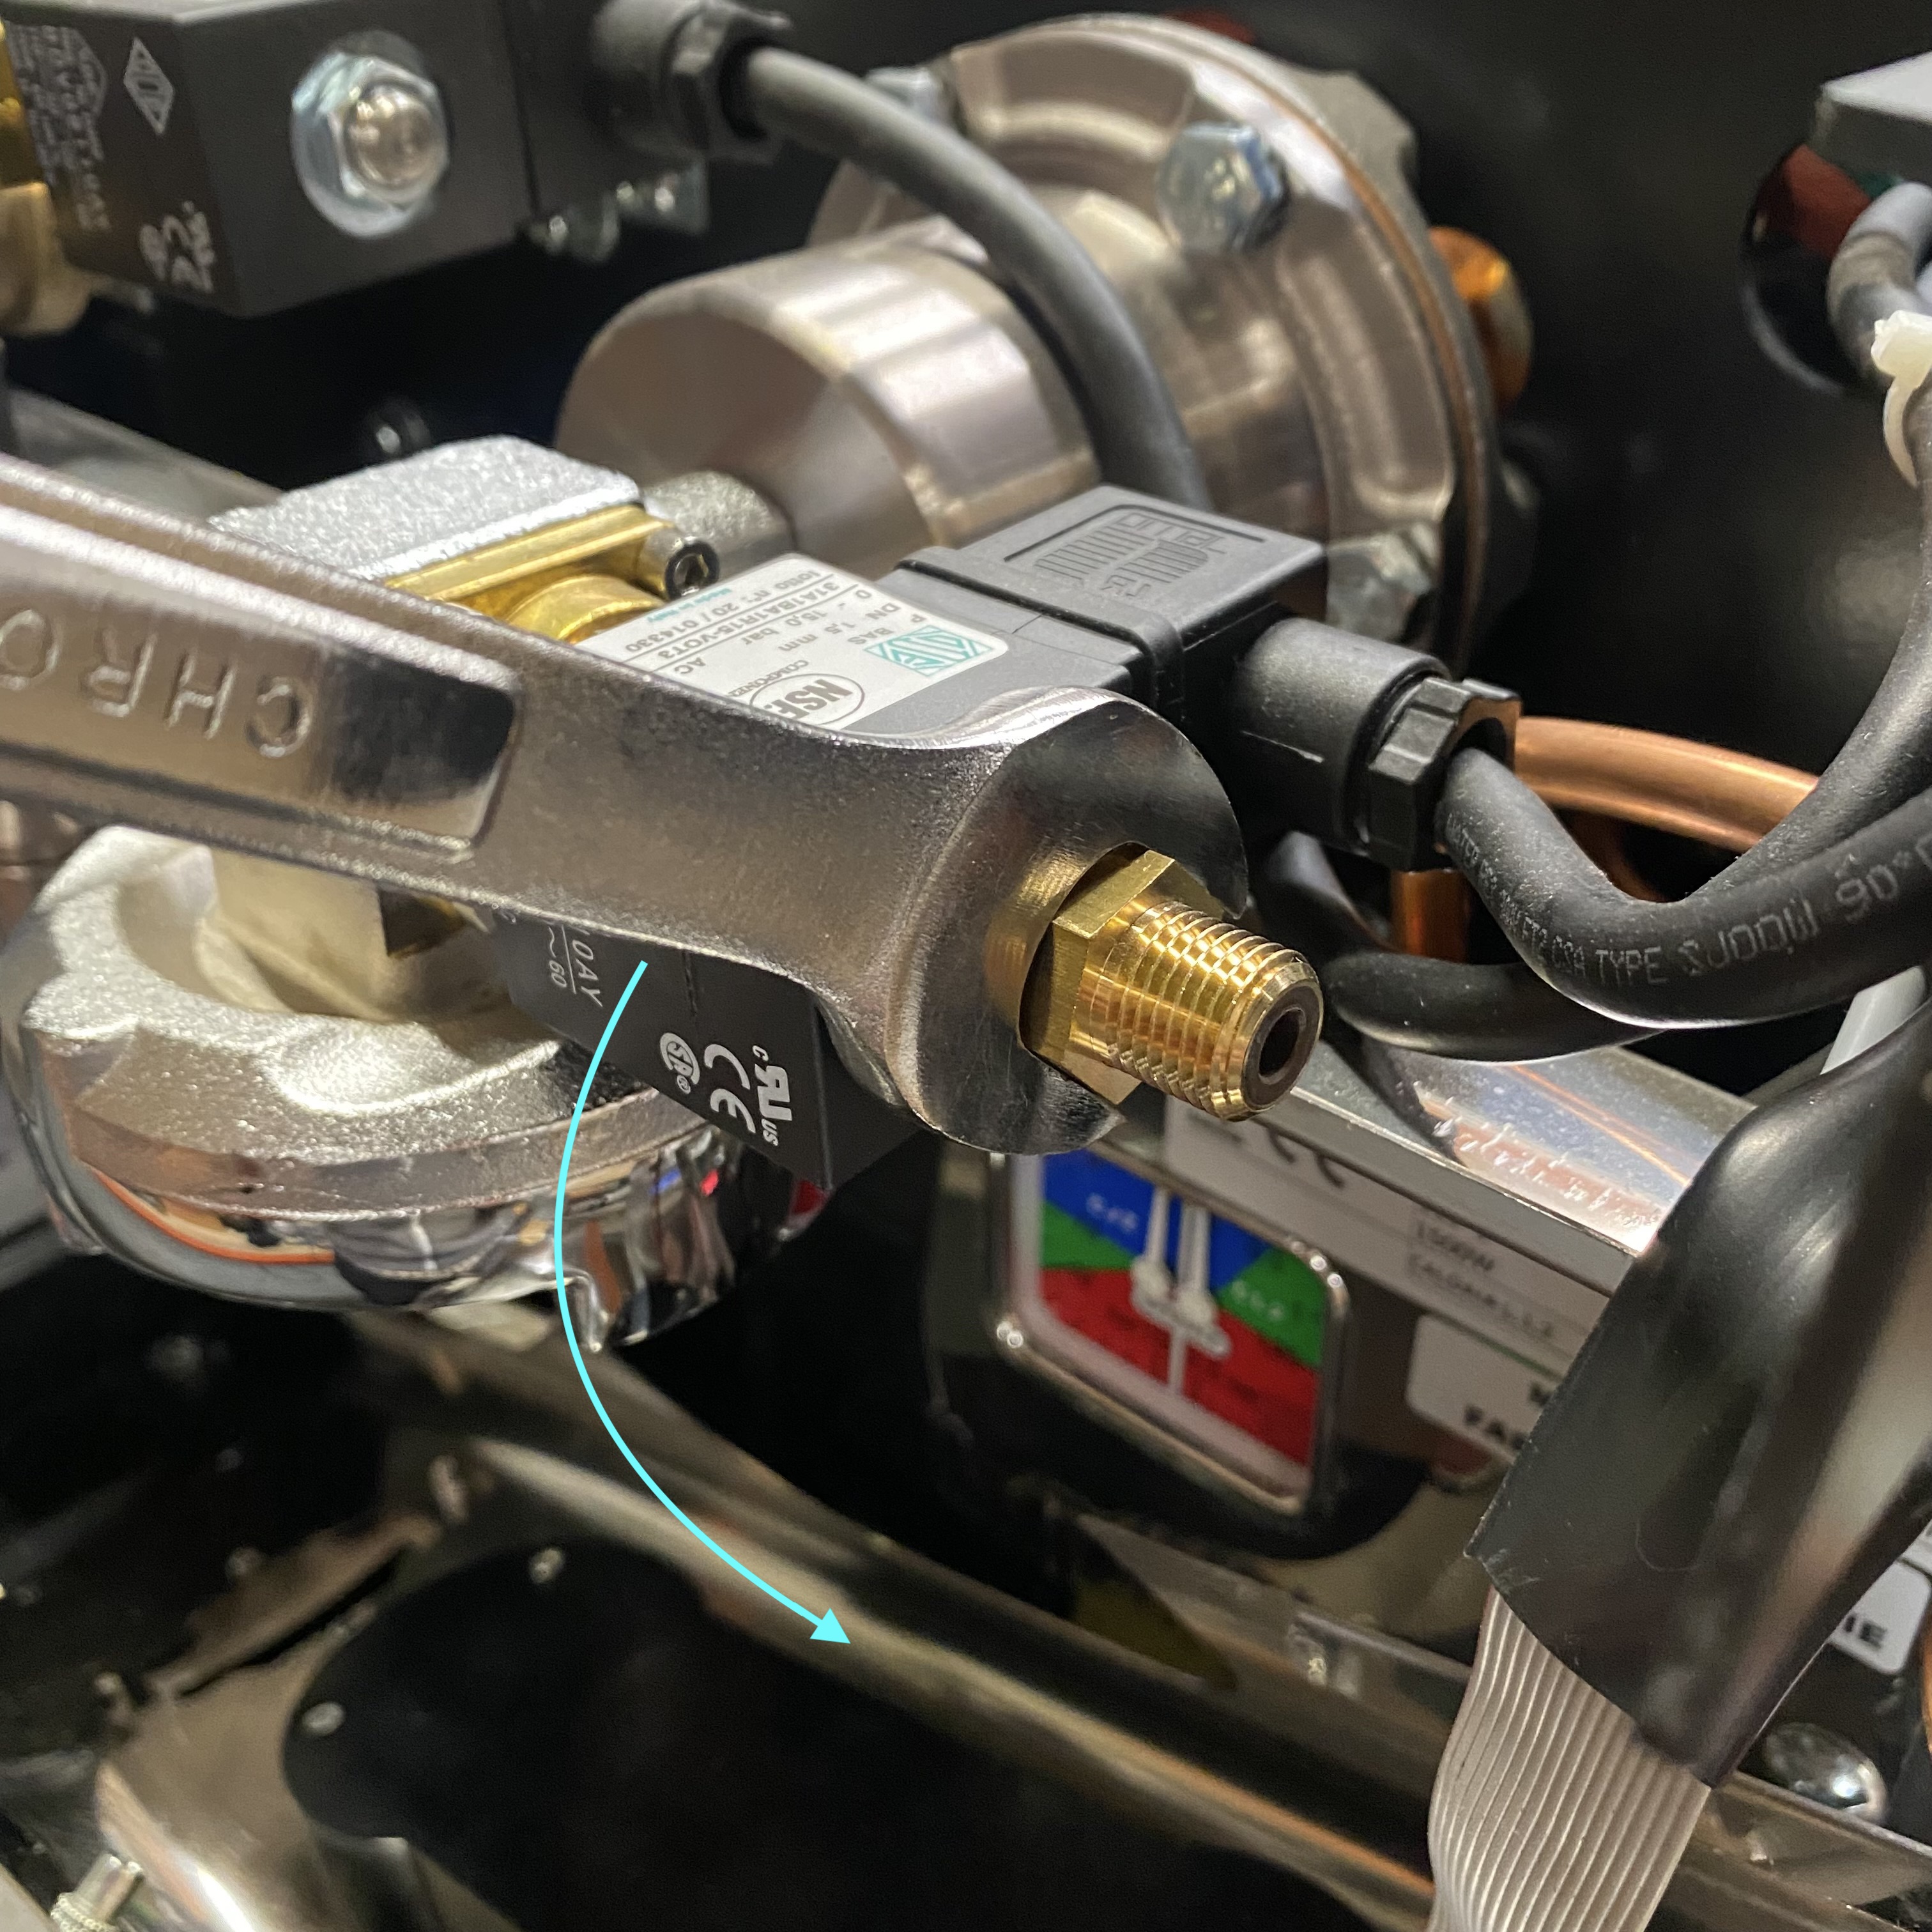
2. Use the 17mm wrench and the adjustable wrench to remove the drain tube fitting from the solenoid retaining fitting. Hold the solenoid retaining fitting steady with one wrench, while you unscrew the drain tube fitting with the other wrench.
3. Use the 17mm wrench to remove the solenoid retaining fitting from the valve armature.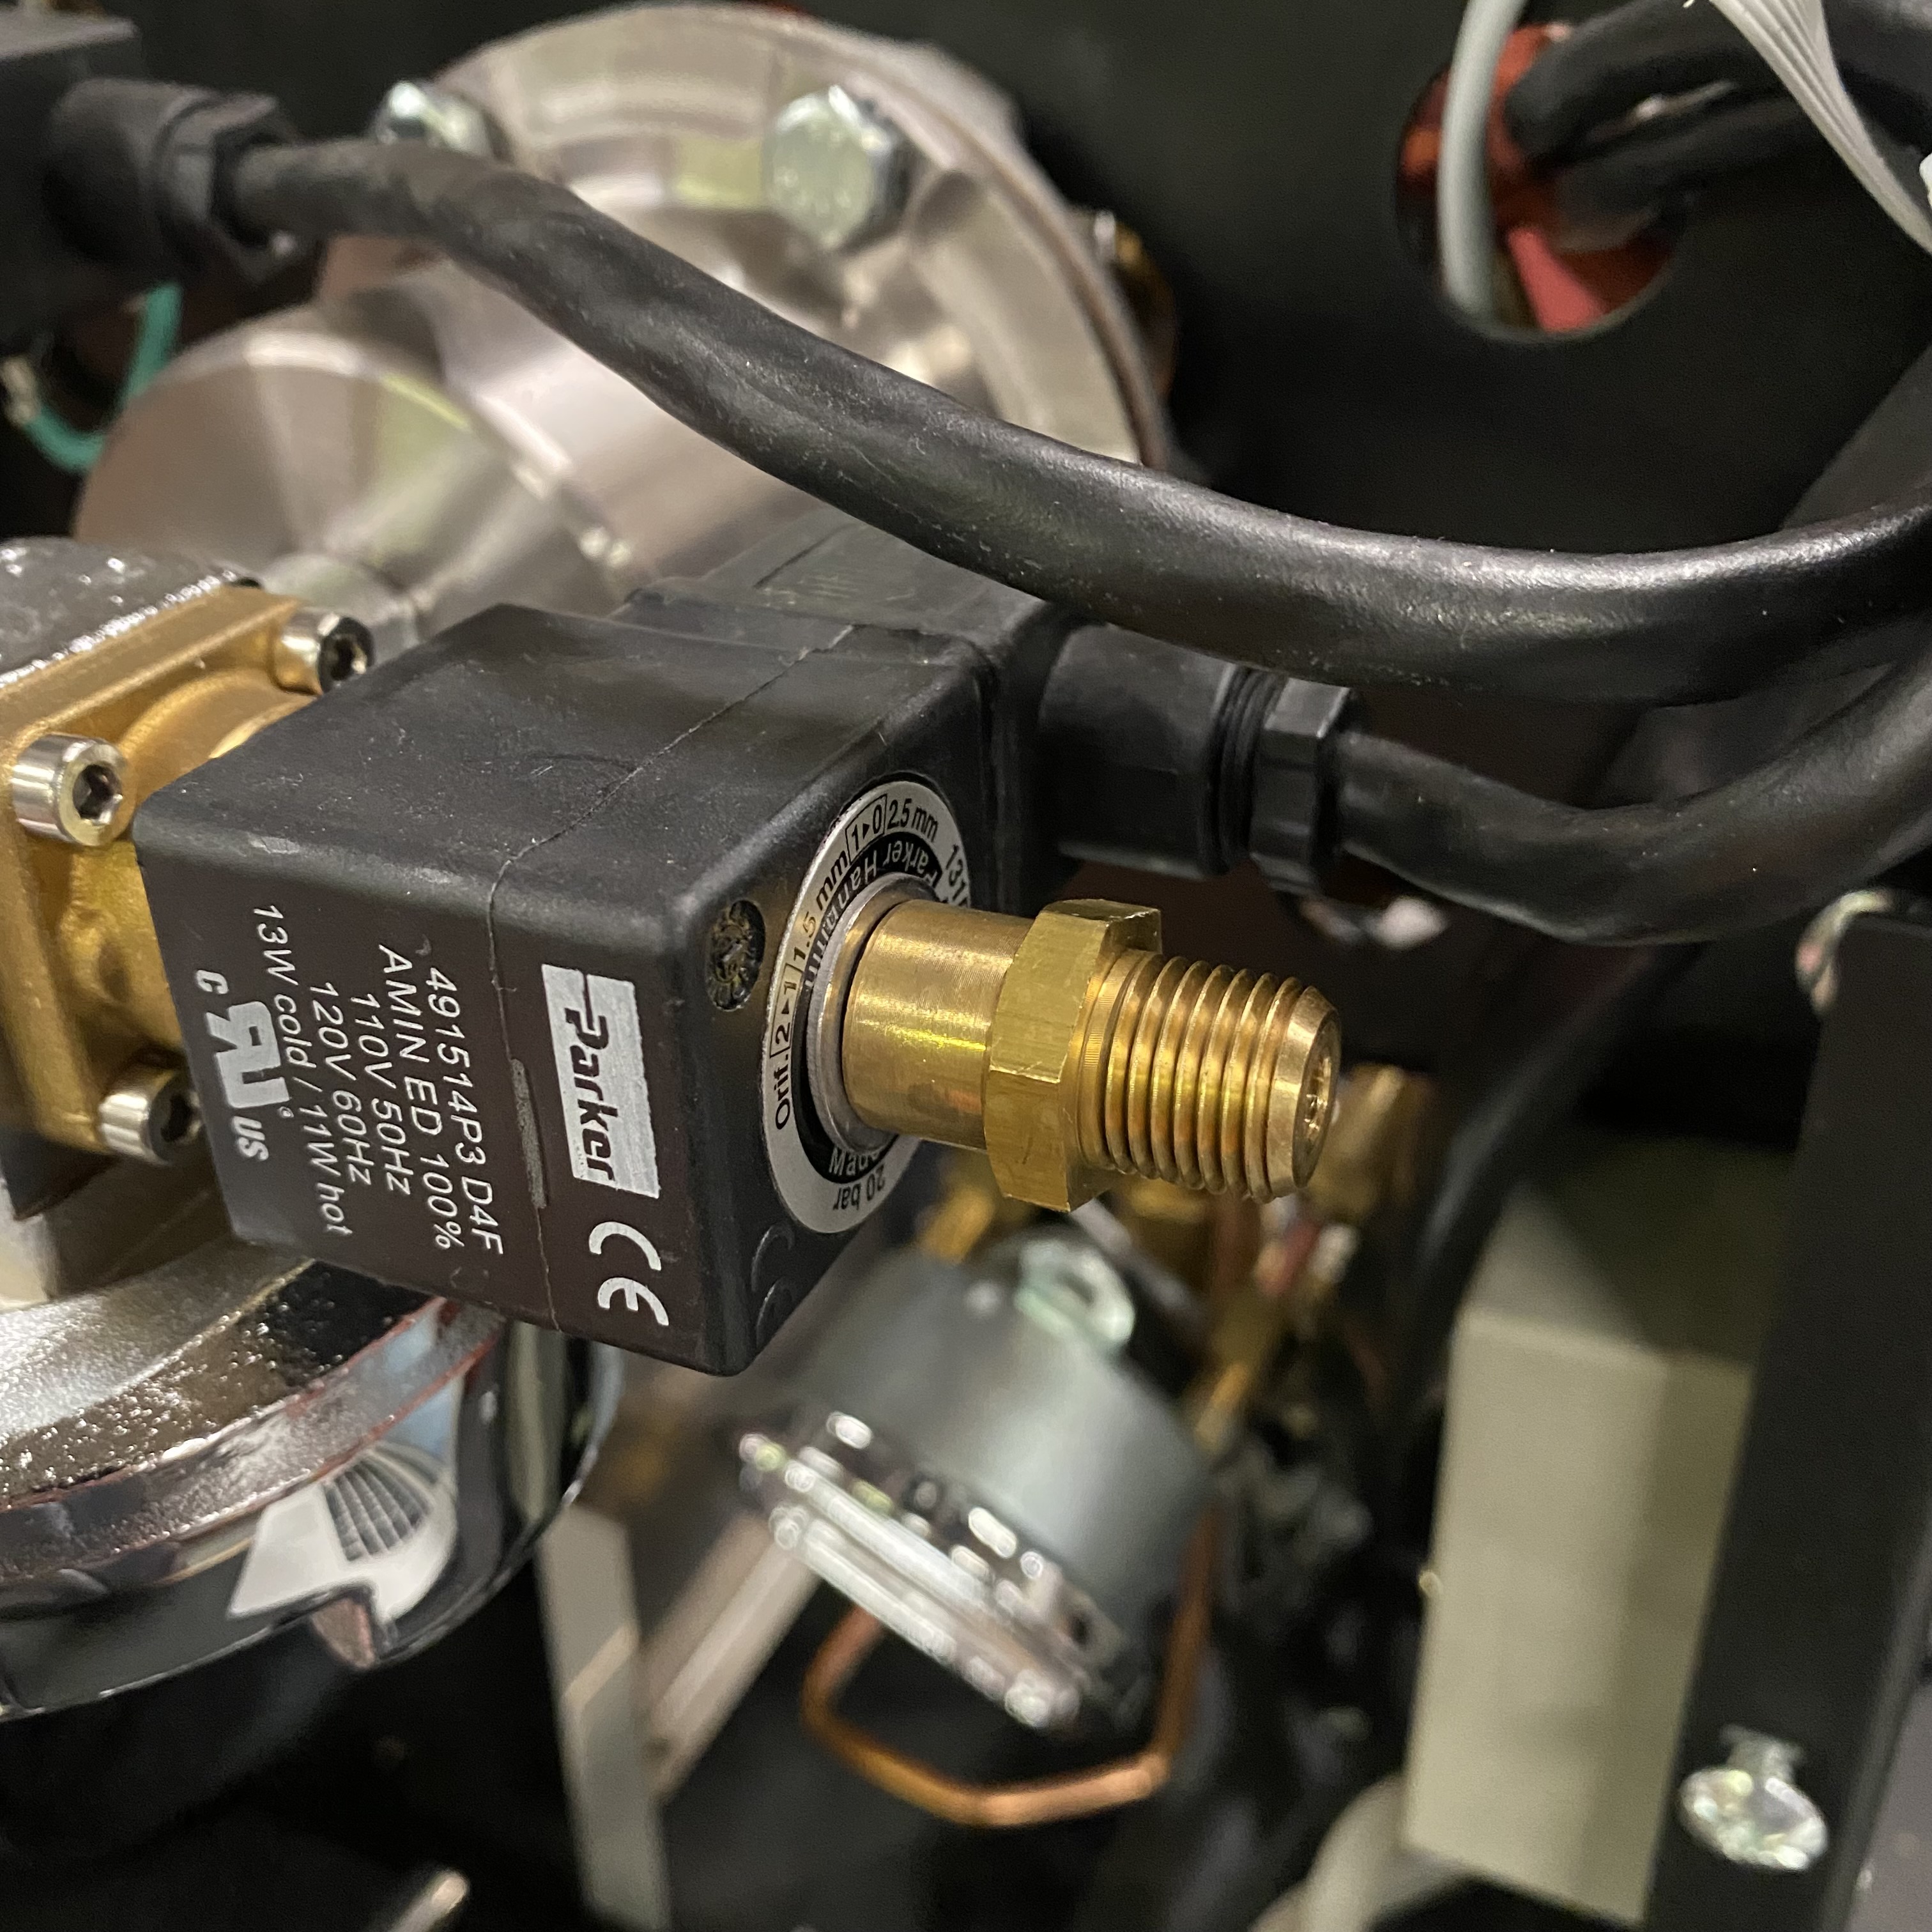
4. Slide the solenoid box off of the valve armature and set aside. (Be careful not to lose the washers that go between the box and the retaining fitting).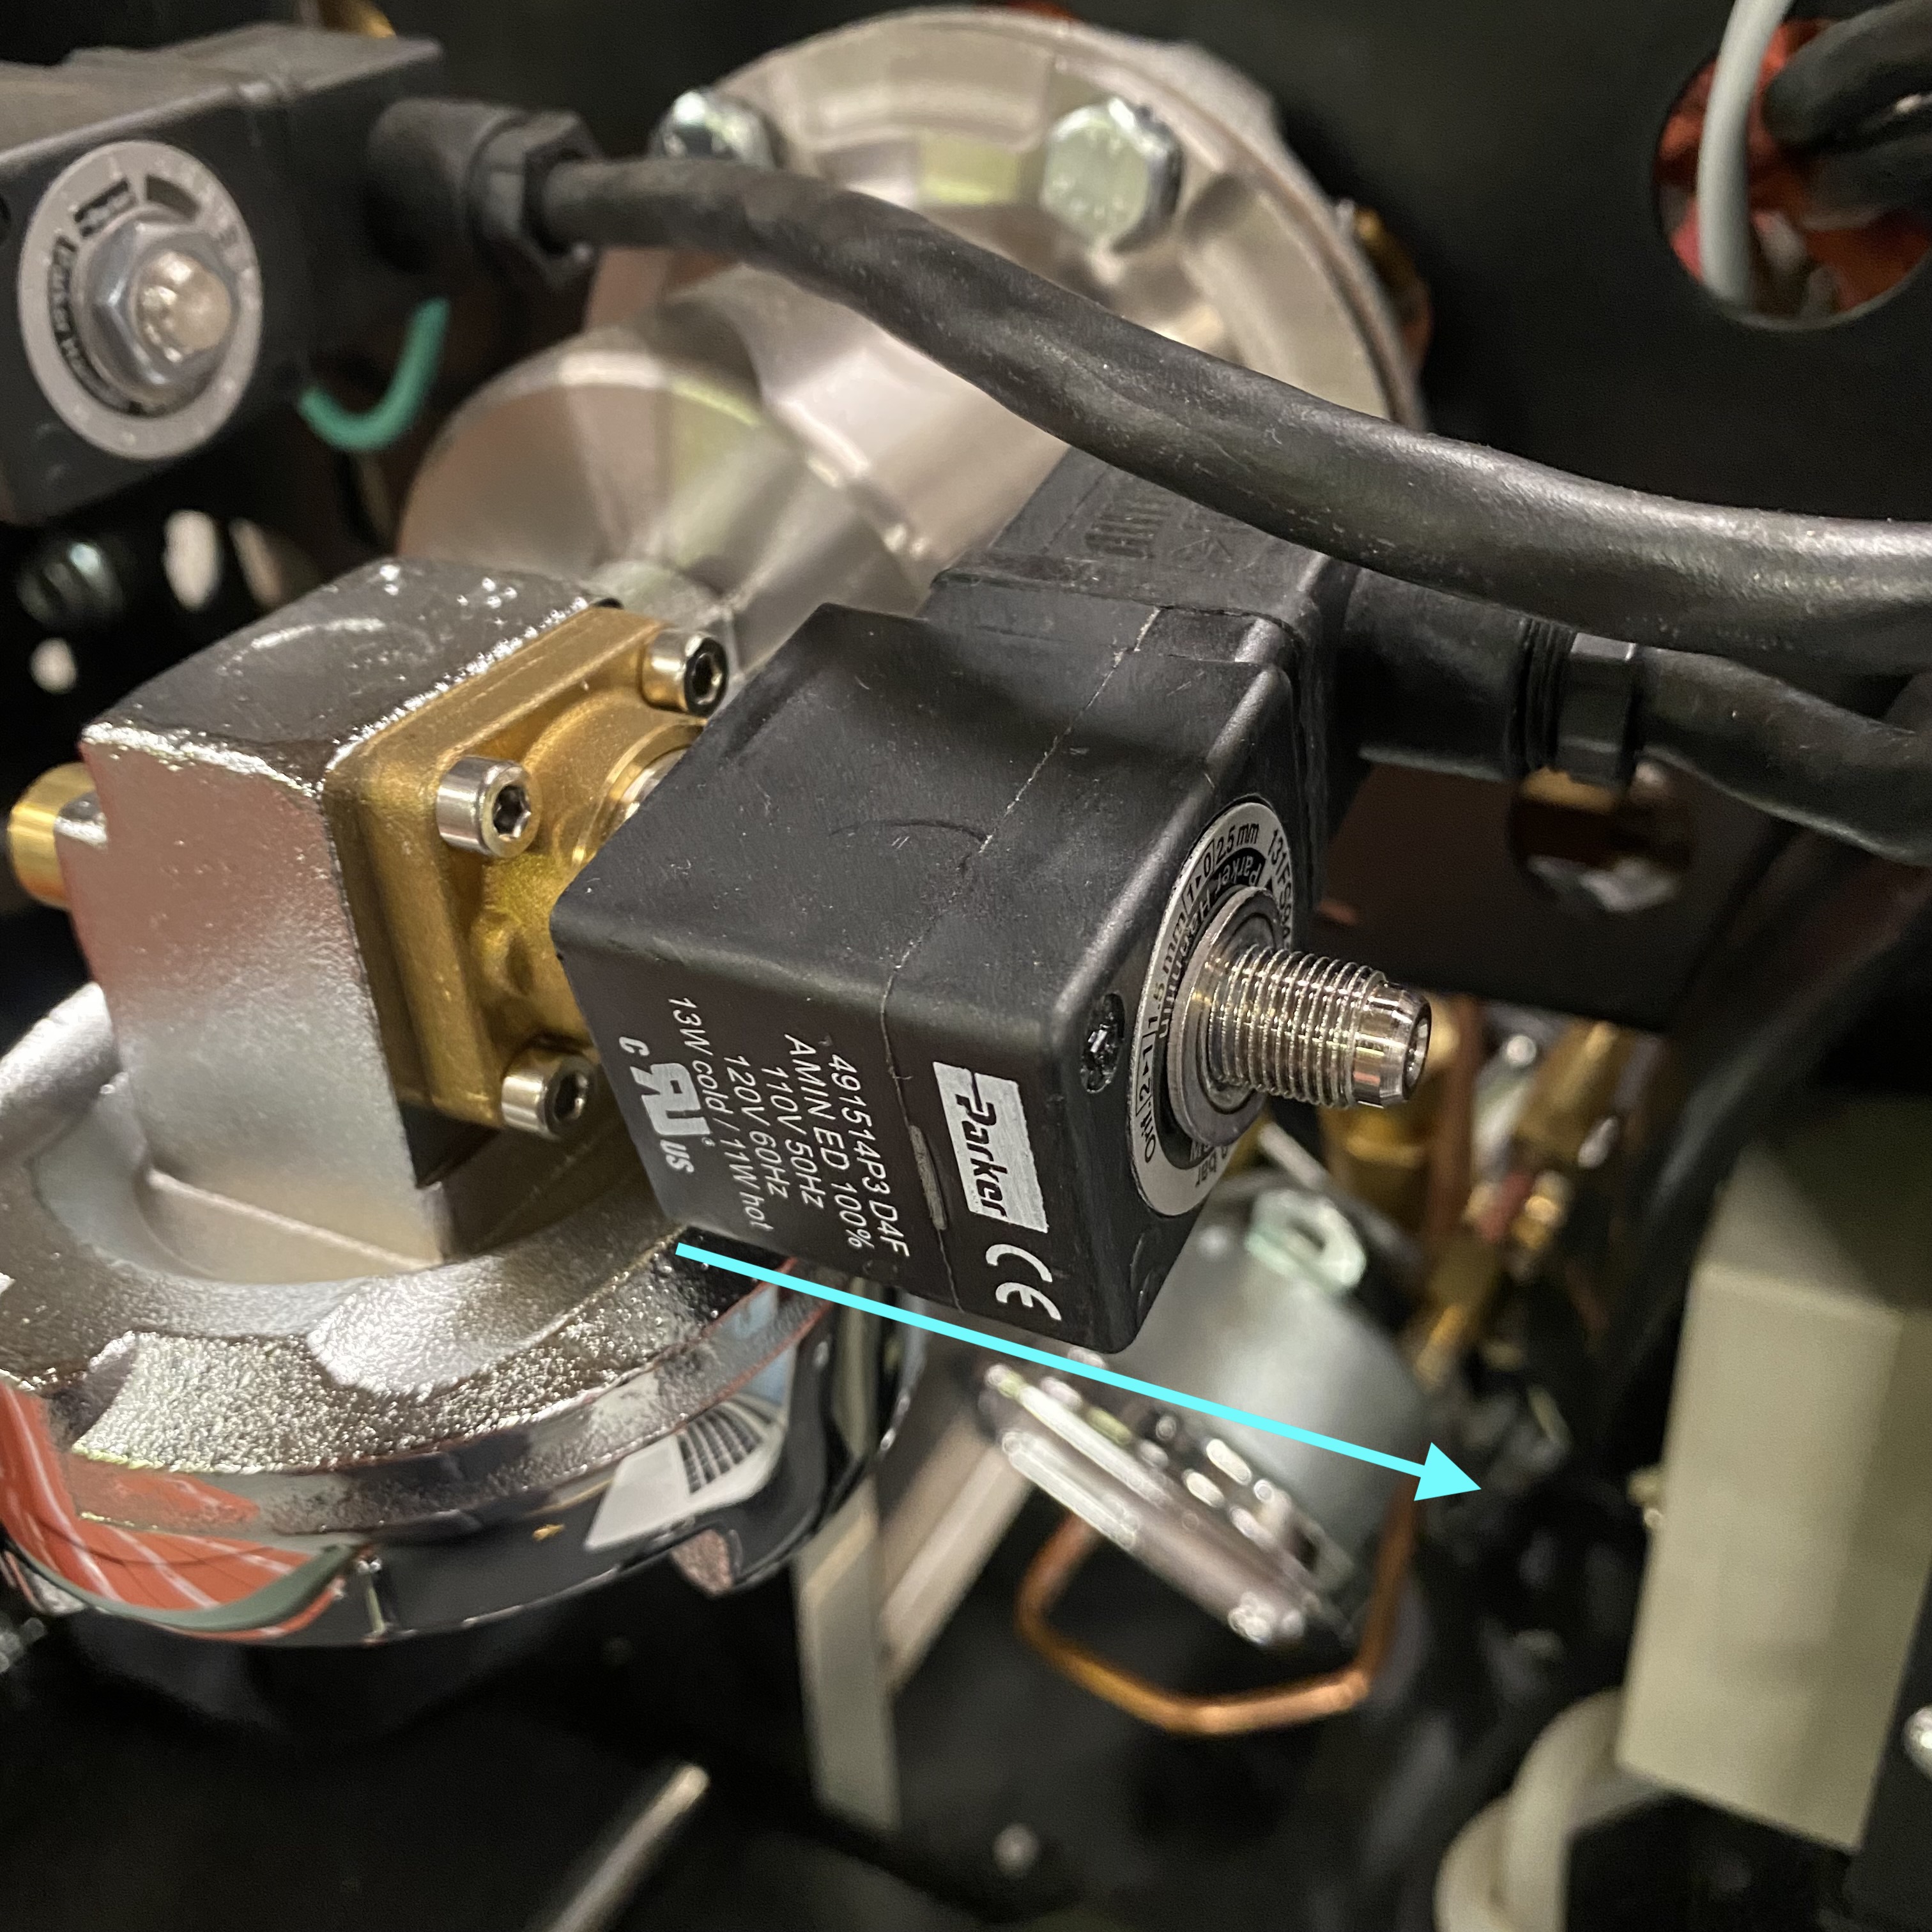
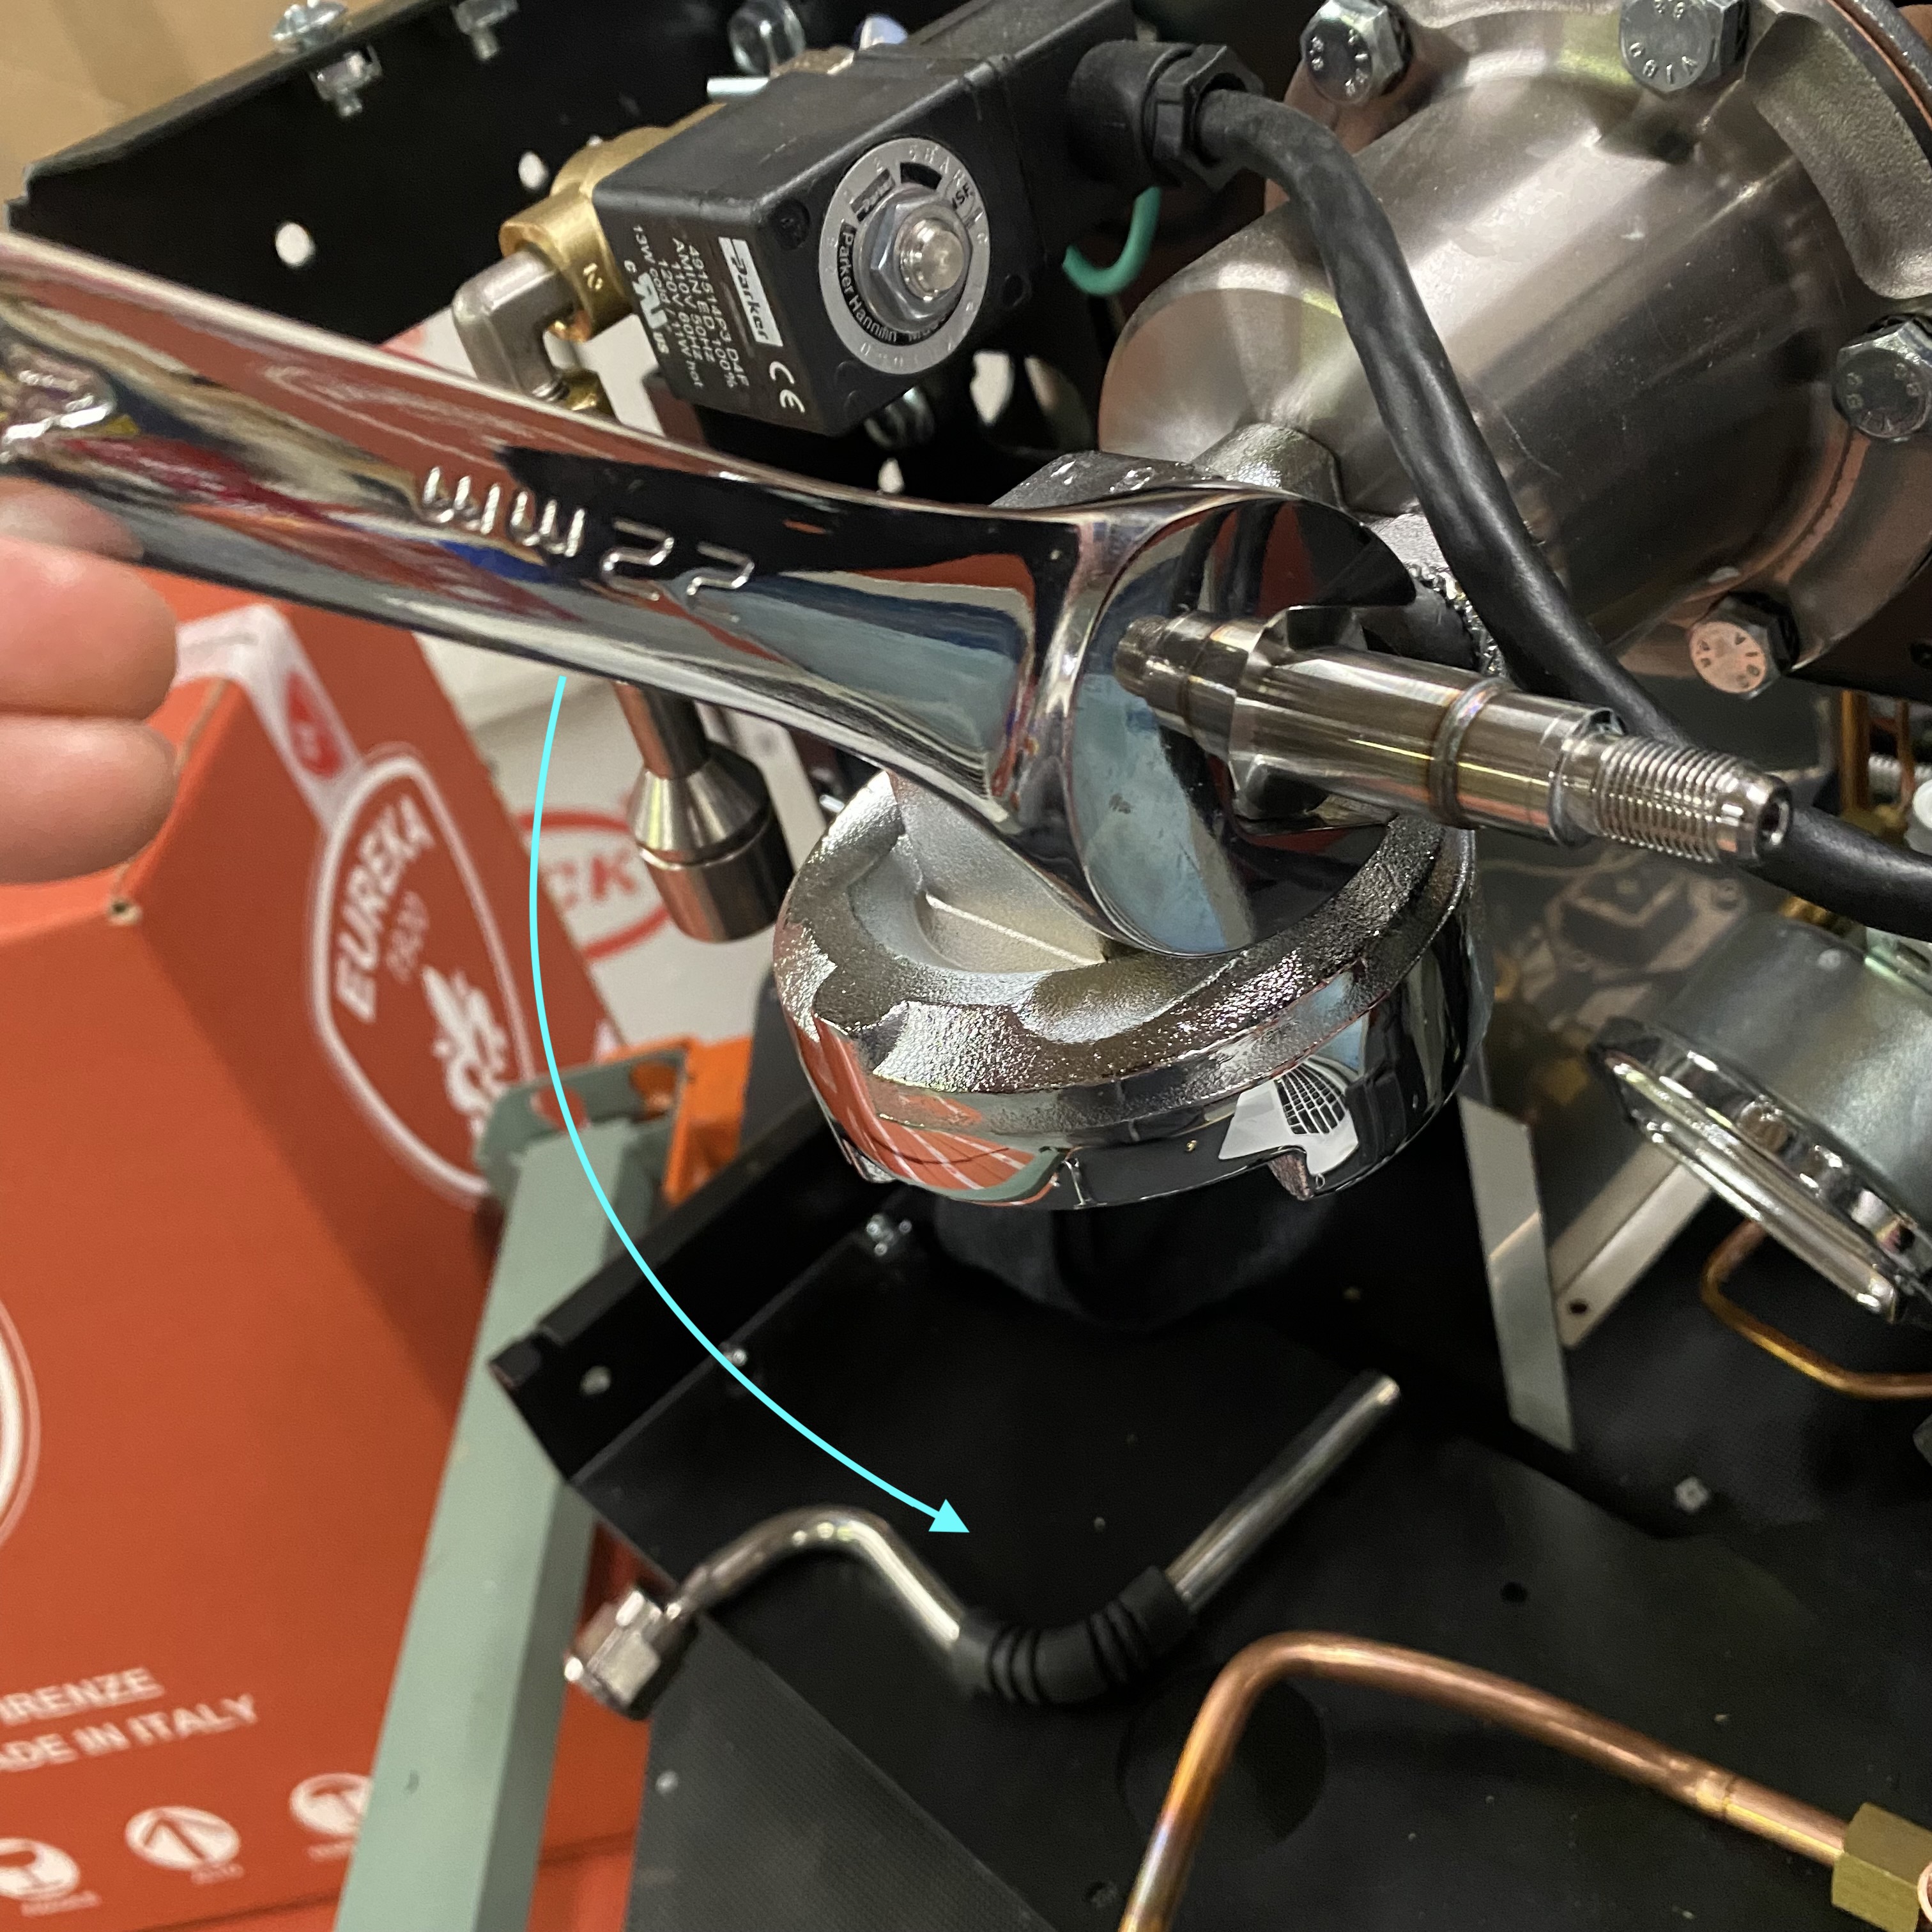
5. Use the 22mm wrench or a large adjustable wrench to unscrew the valve armature from the brass valve base.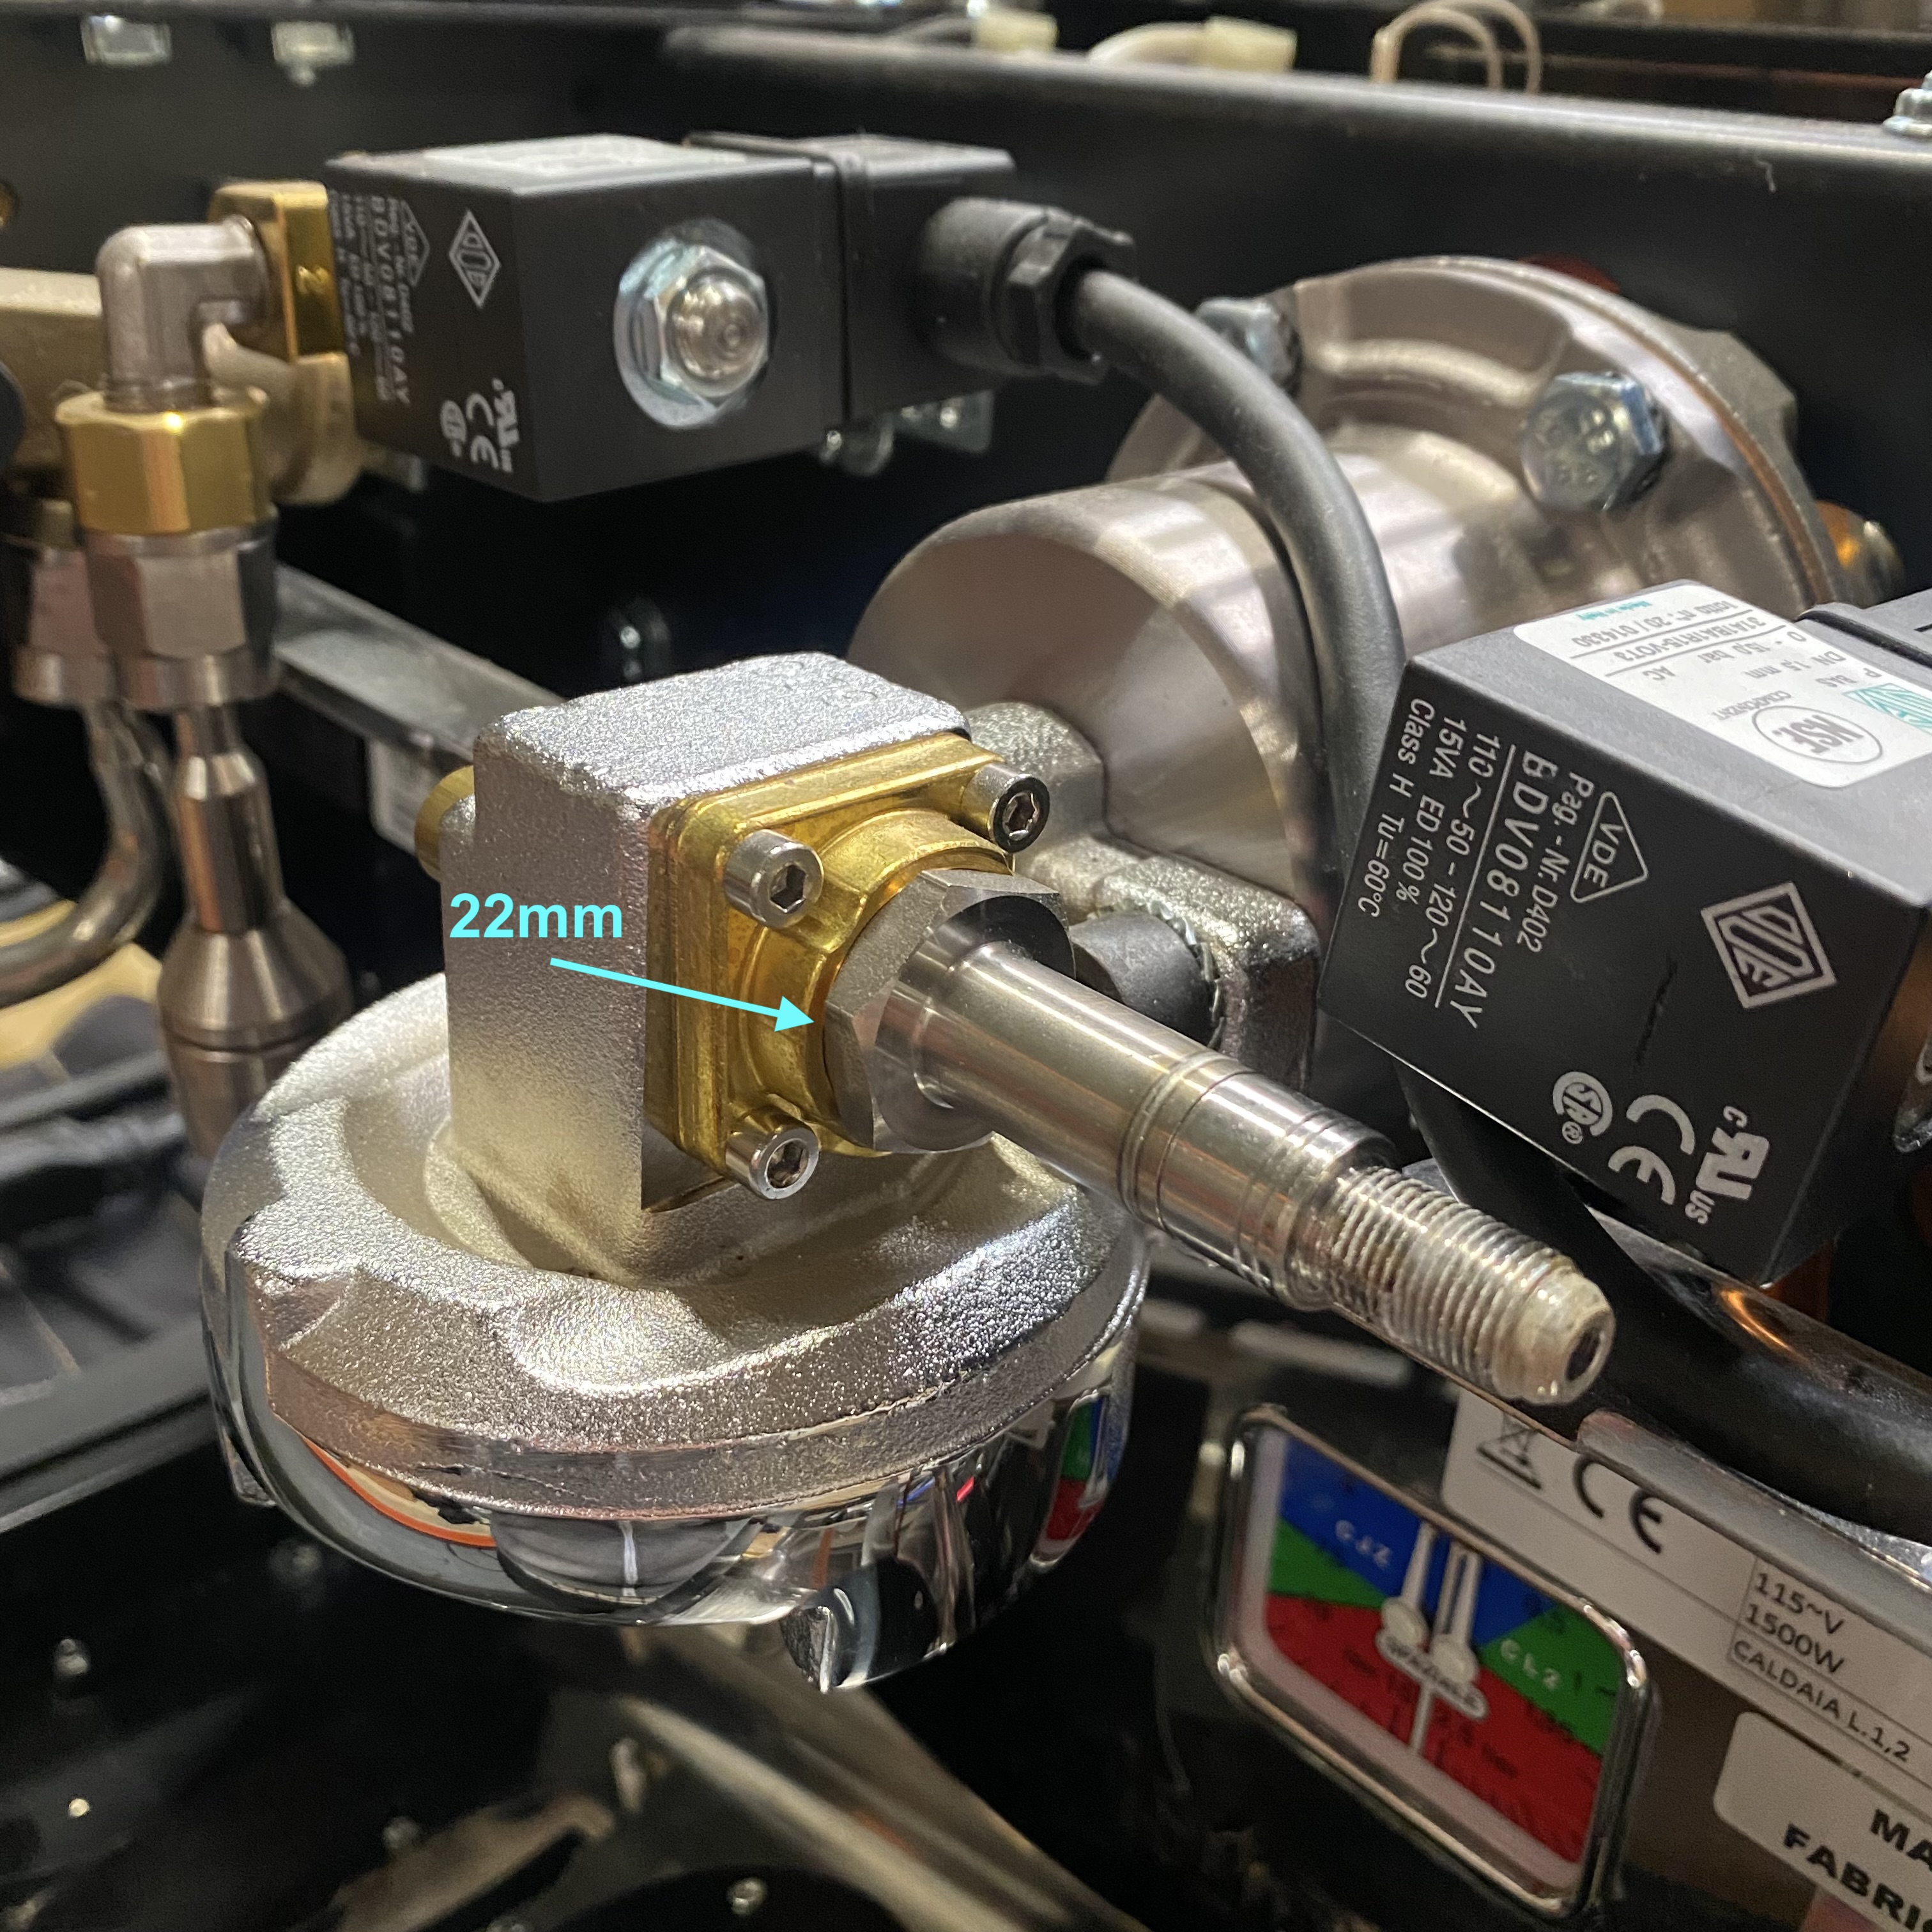
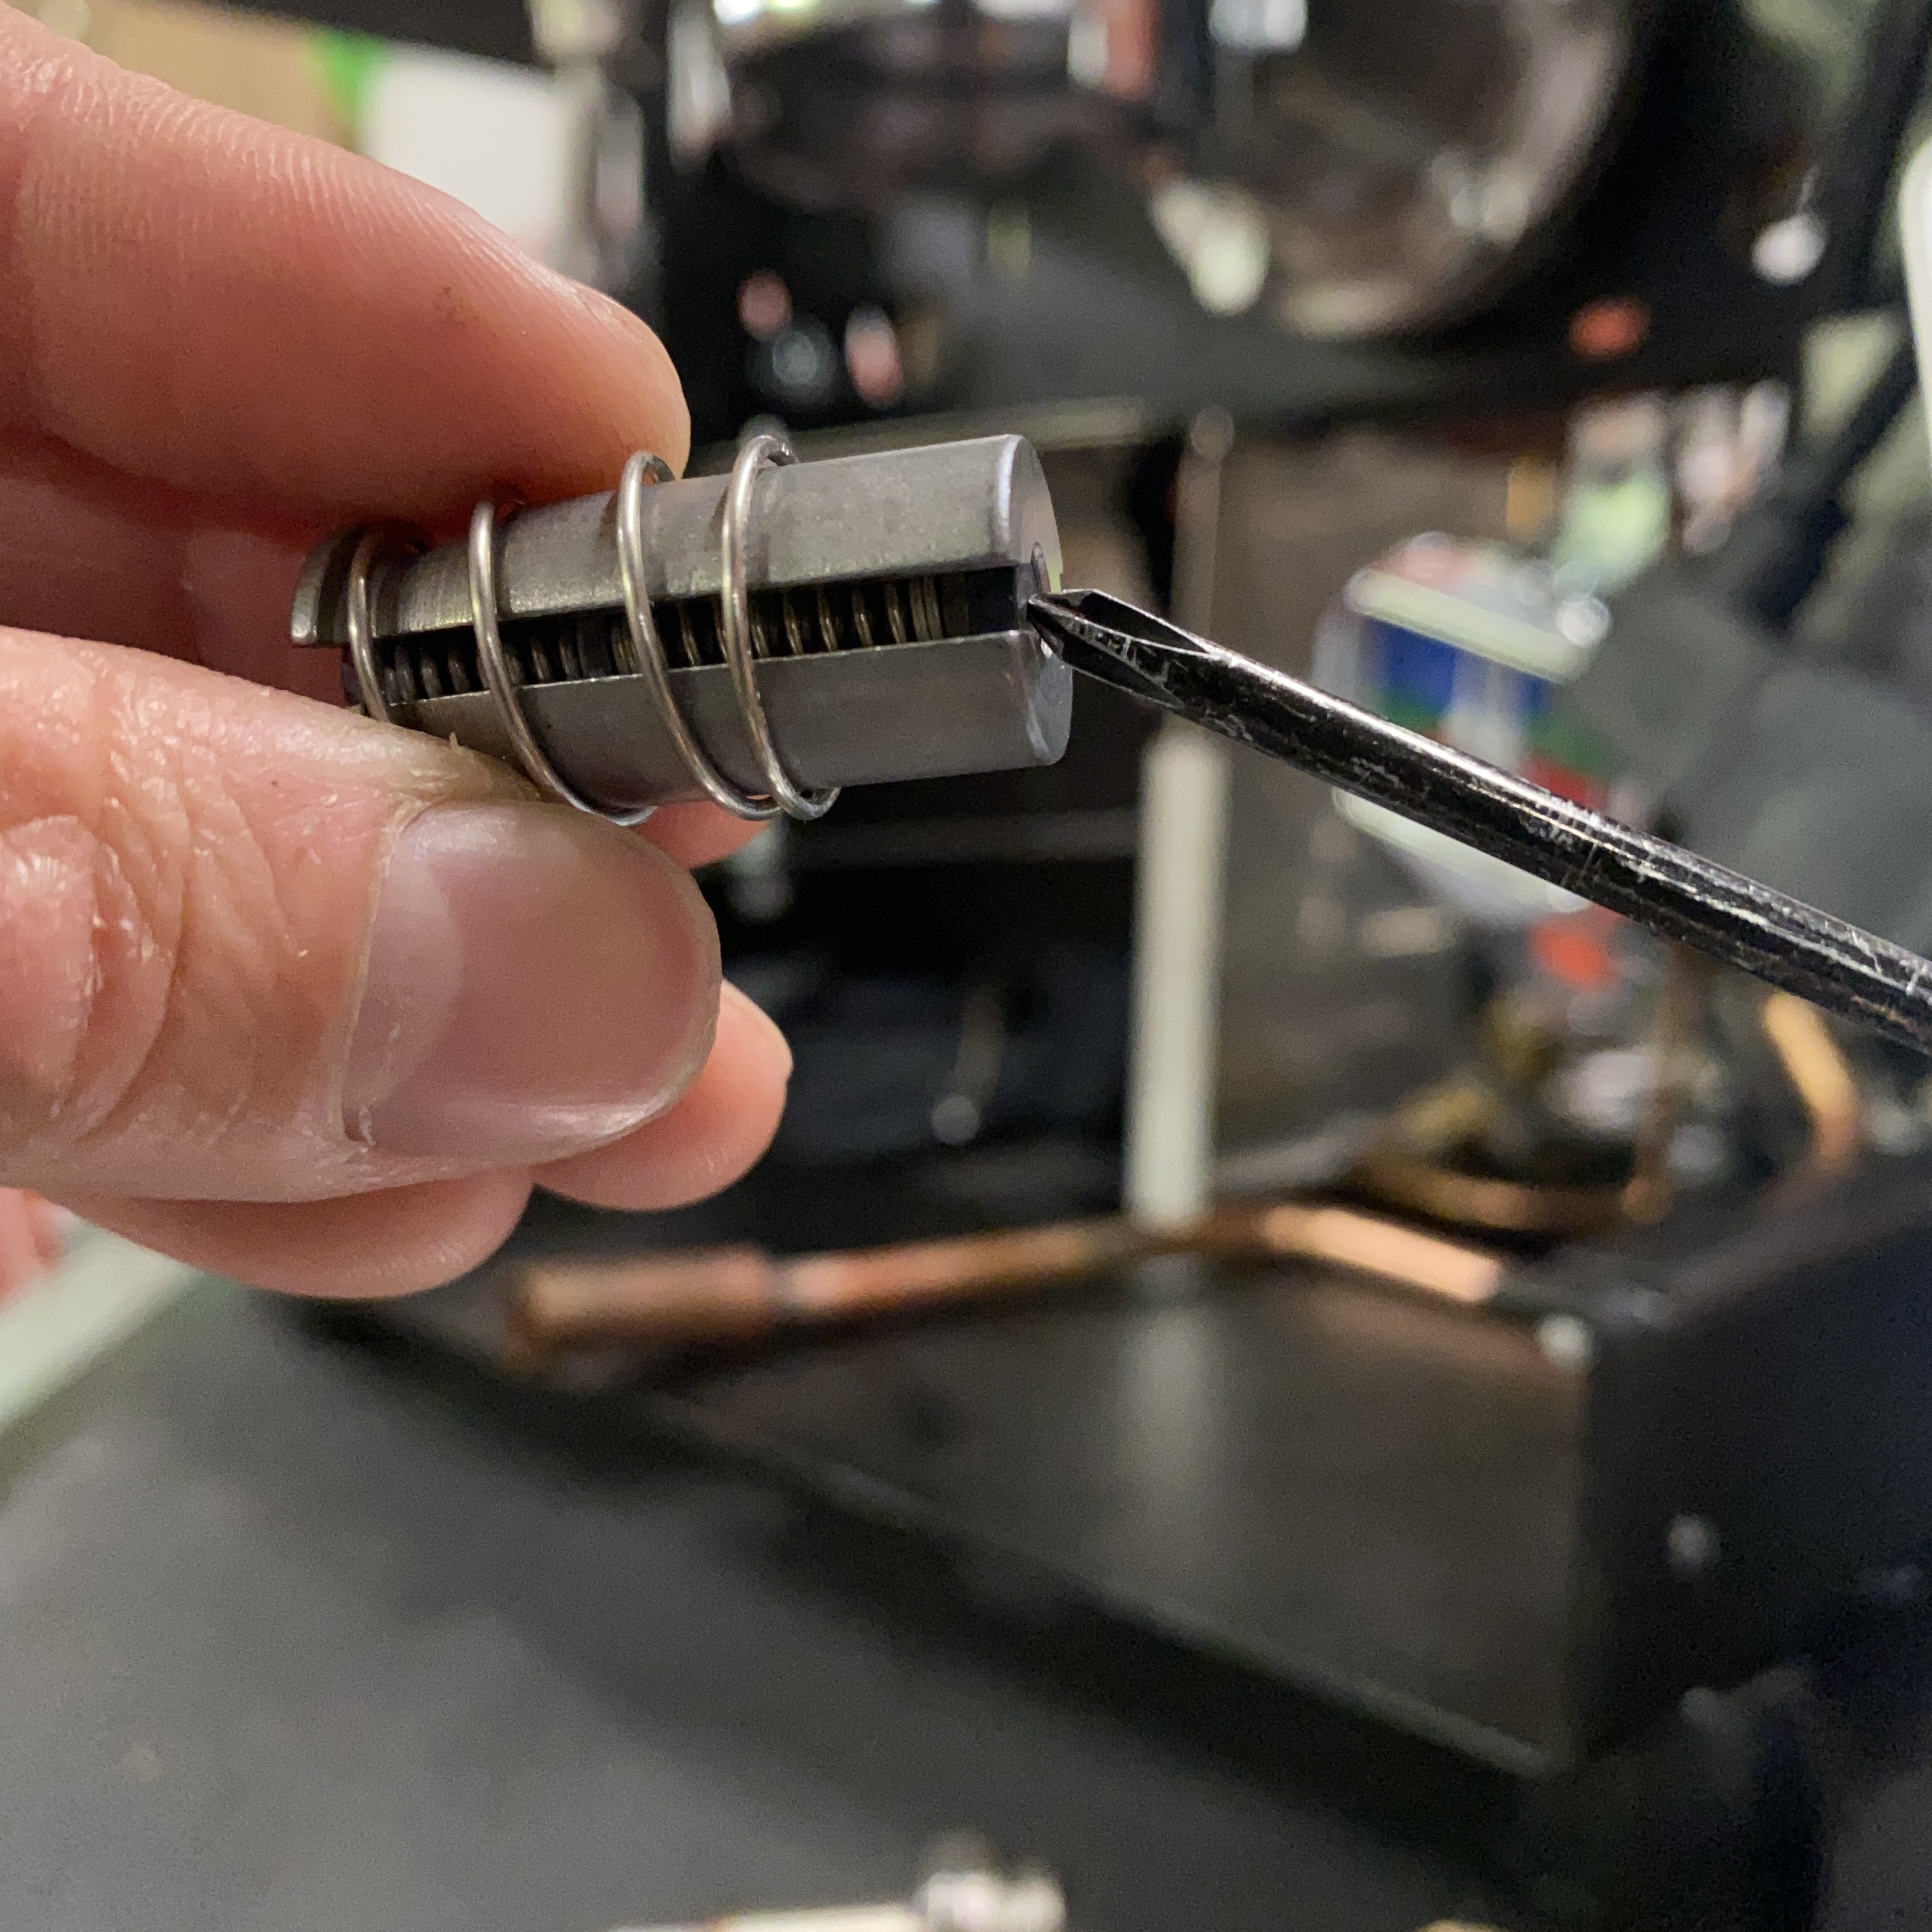
6. Inspect and clean the inside of the armature and piston. Make sure the pink rubber seat is intact and free of debris. Check to ensure that the internal piston springs move freely and are free from debris.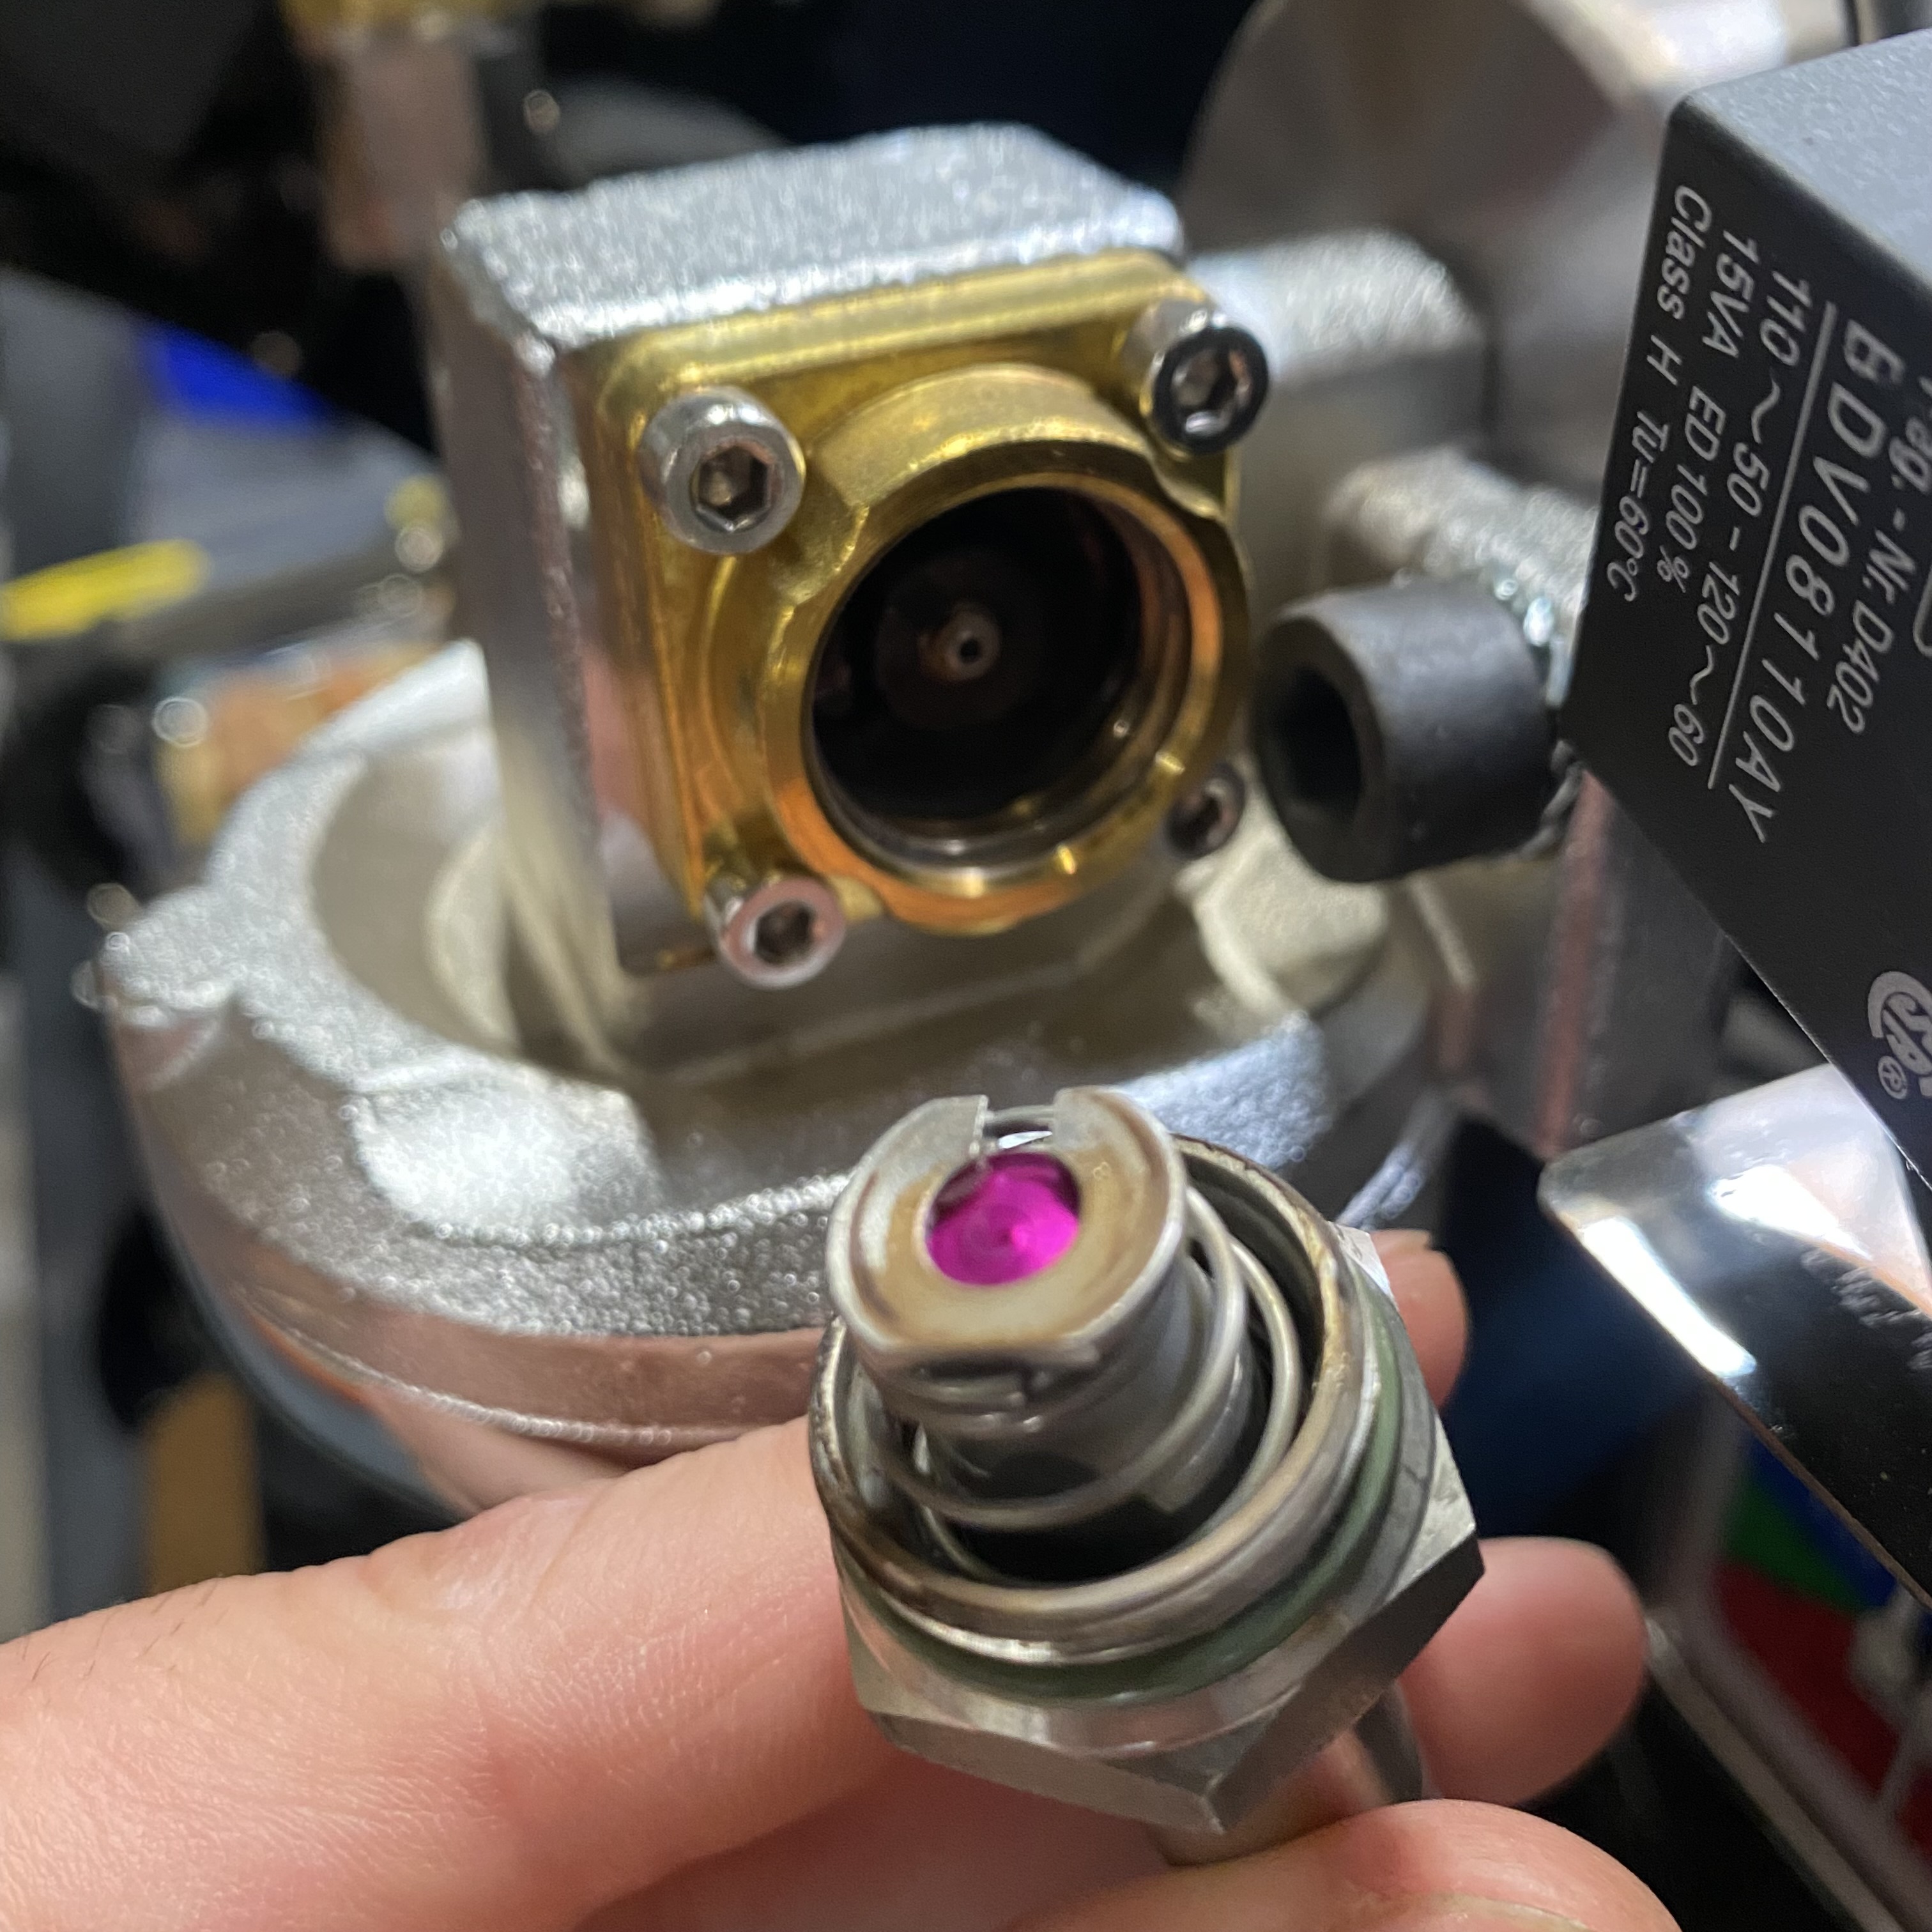
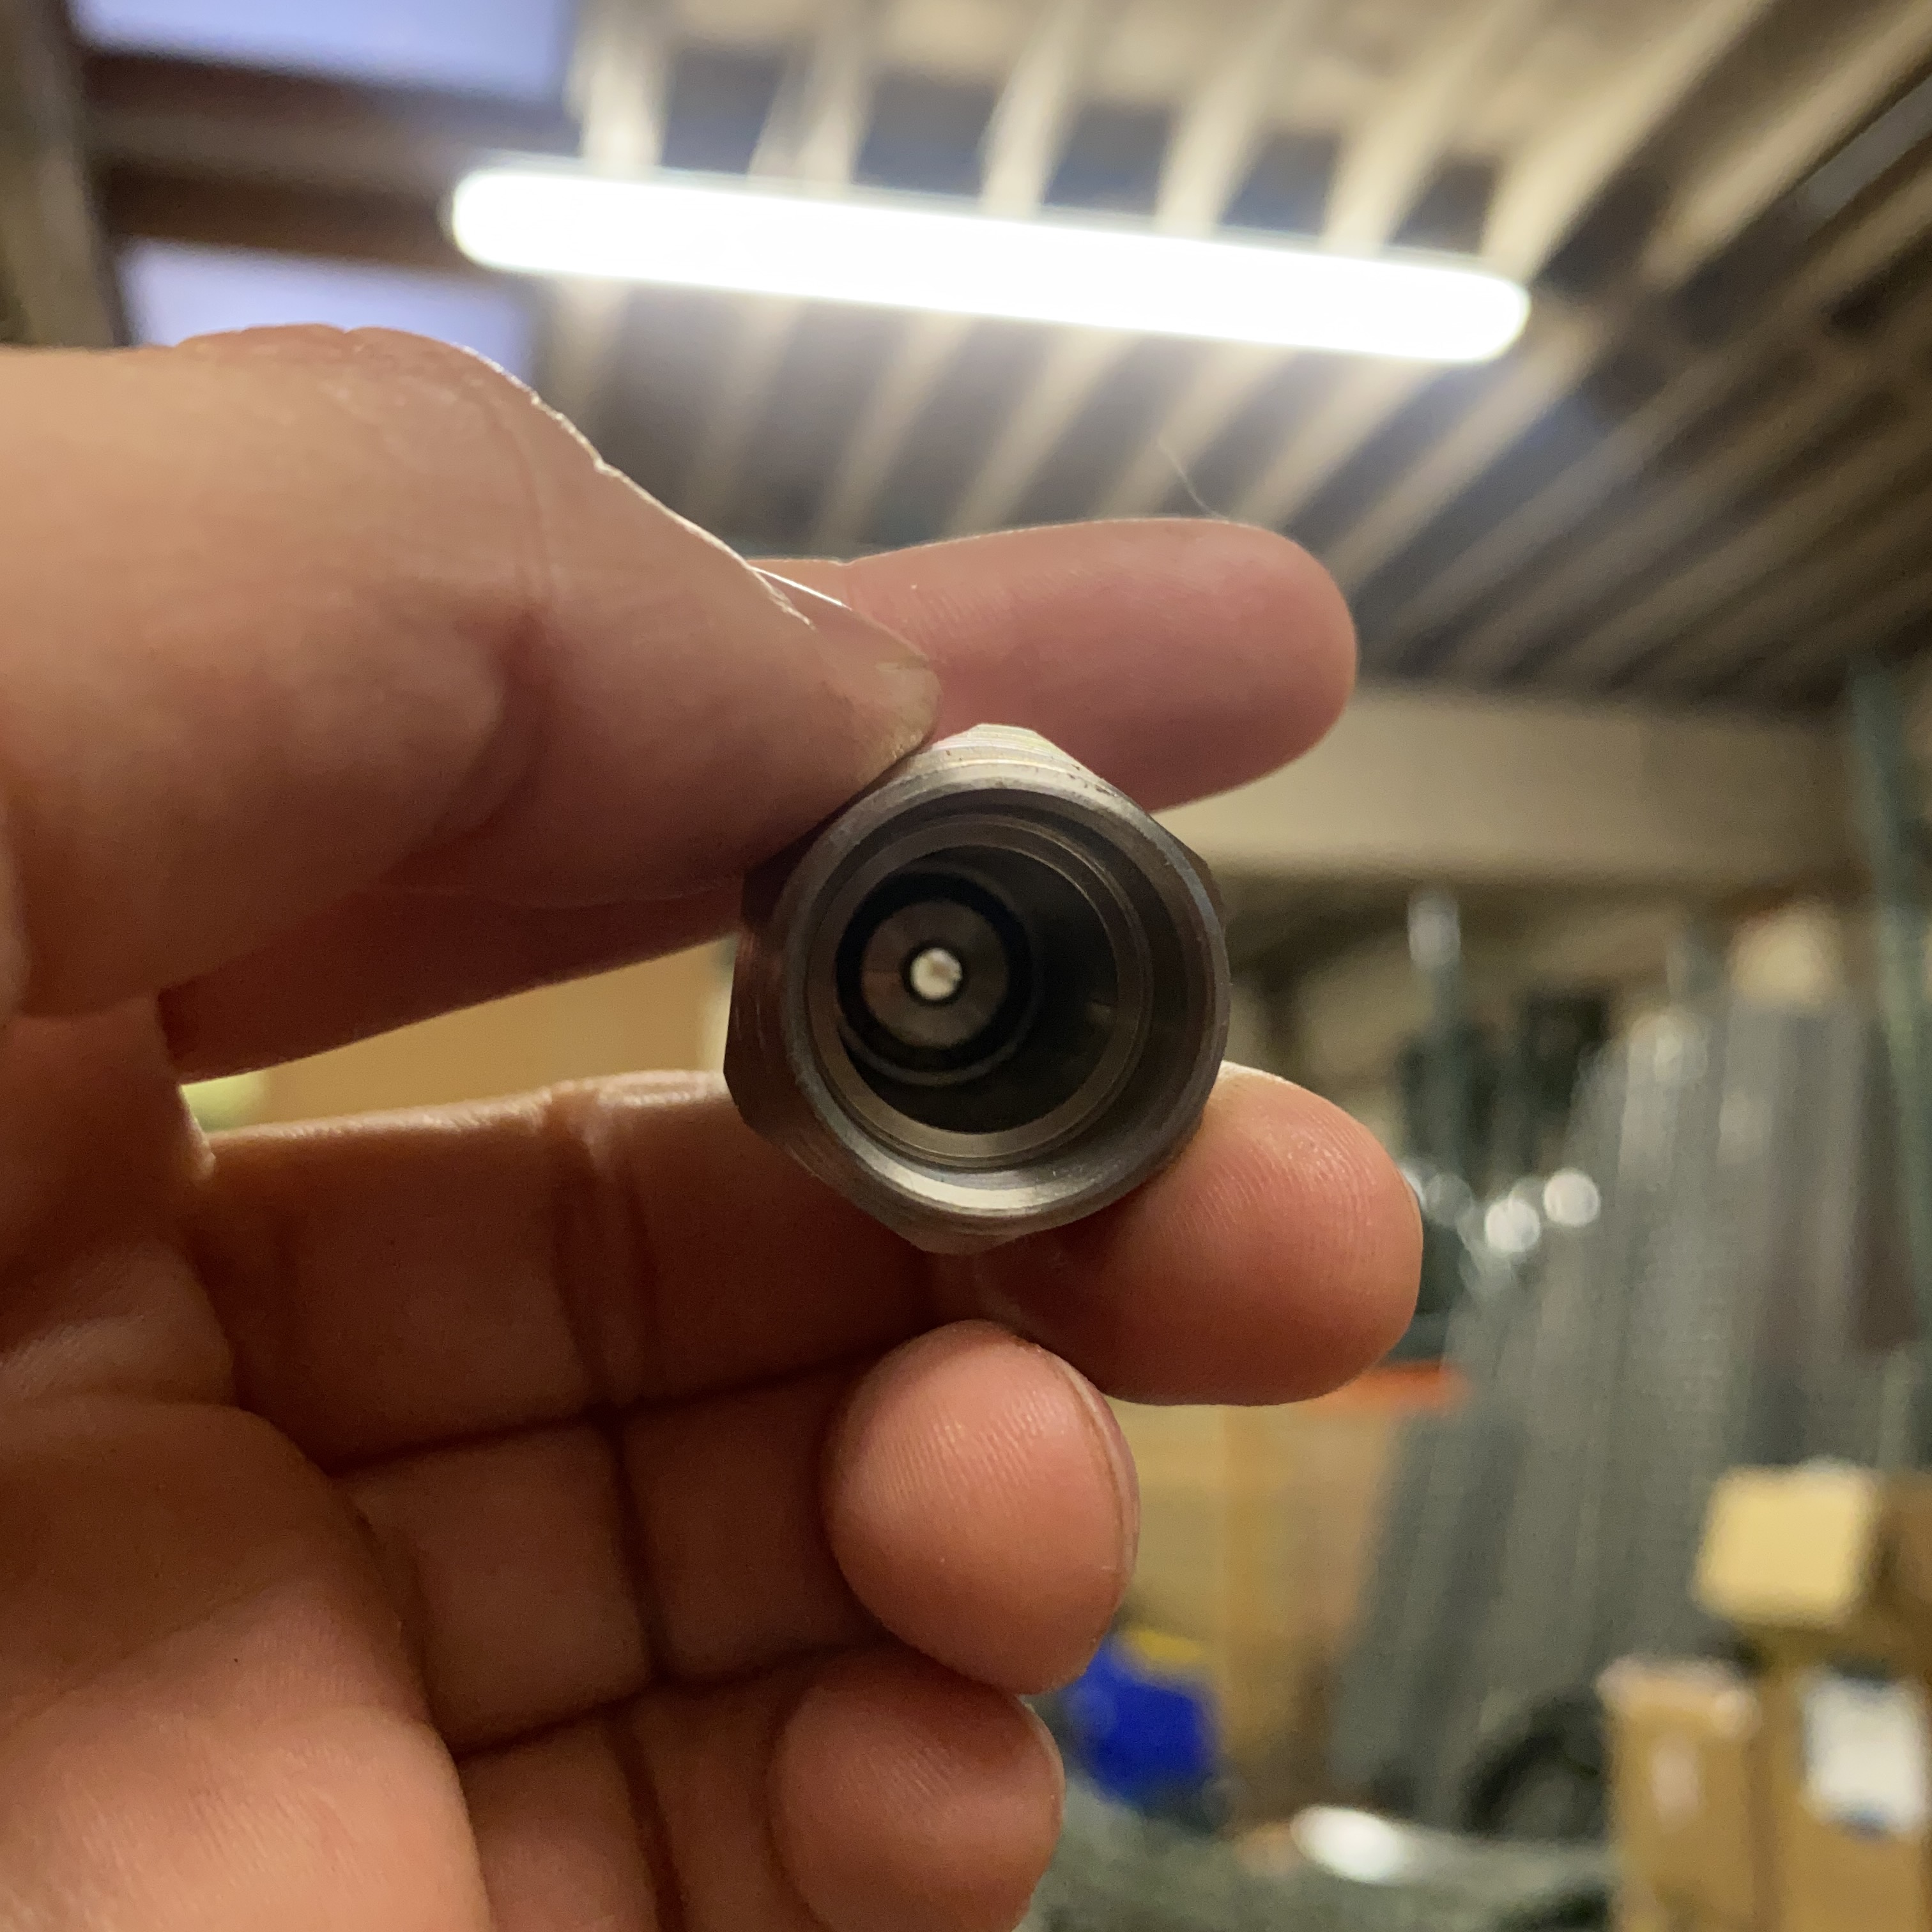
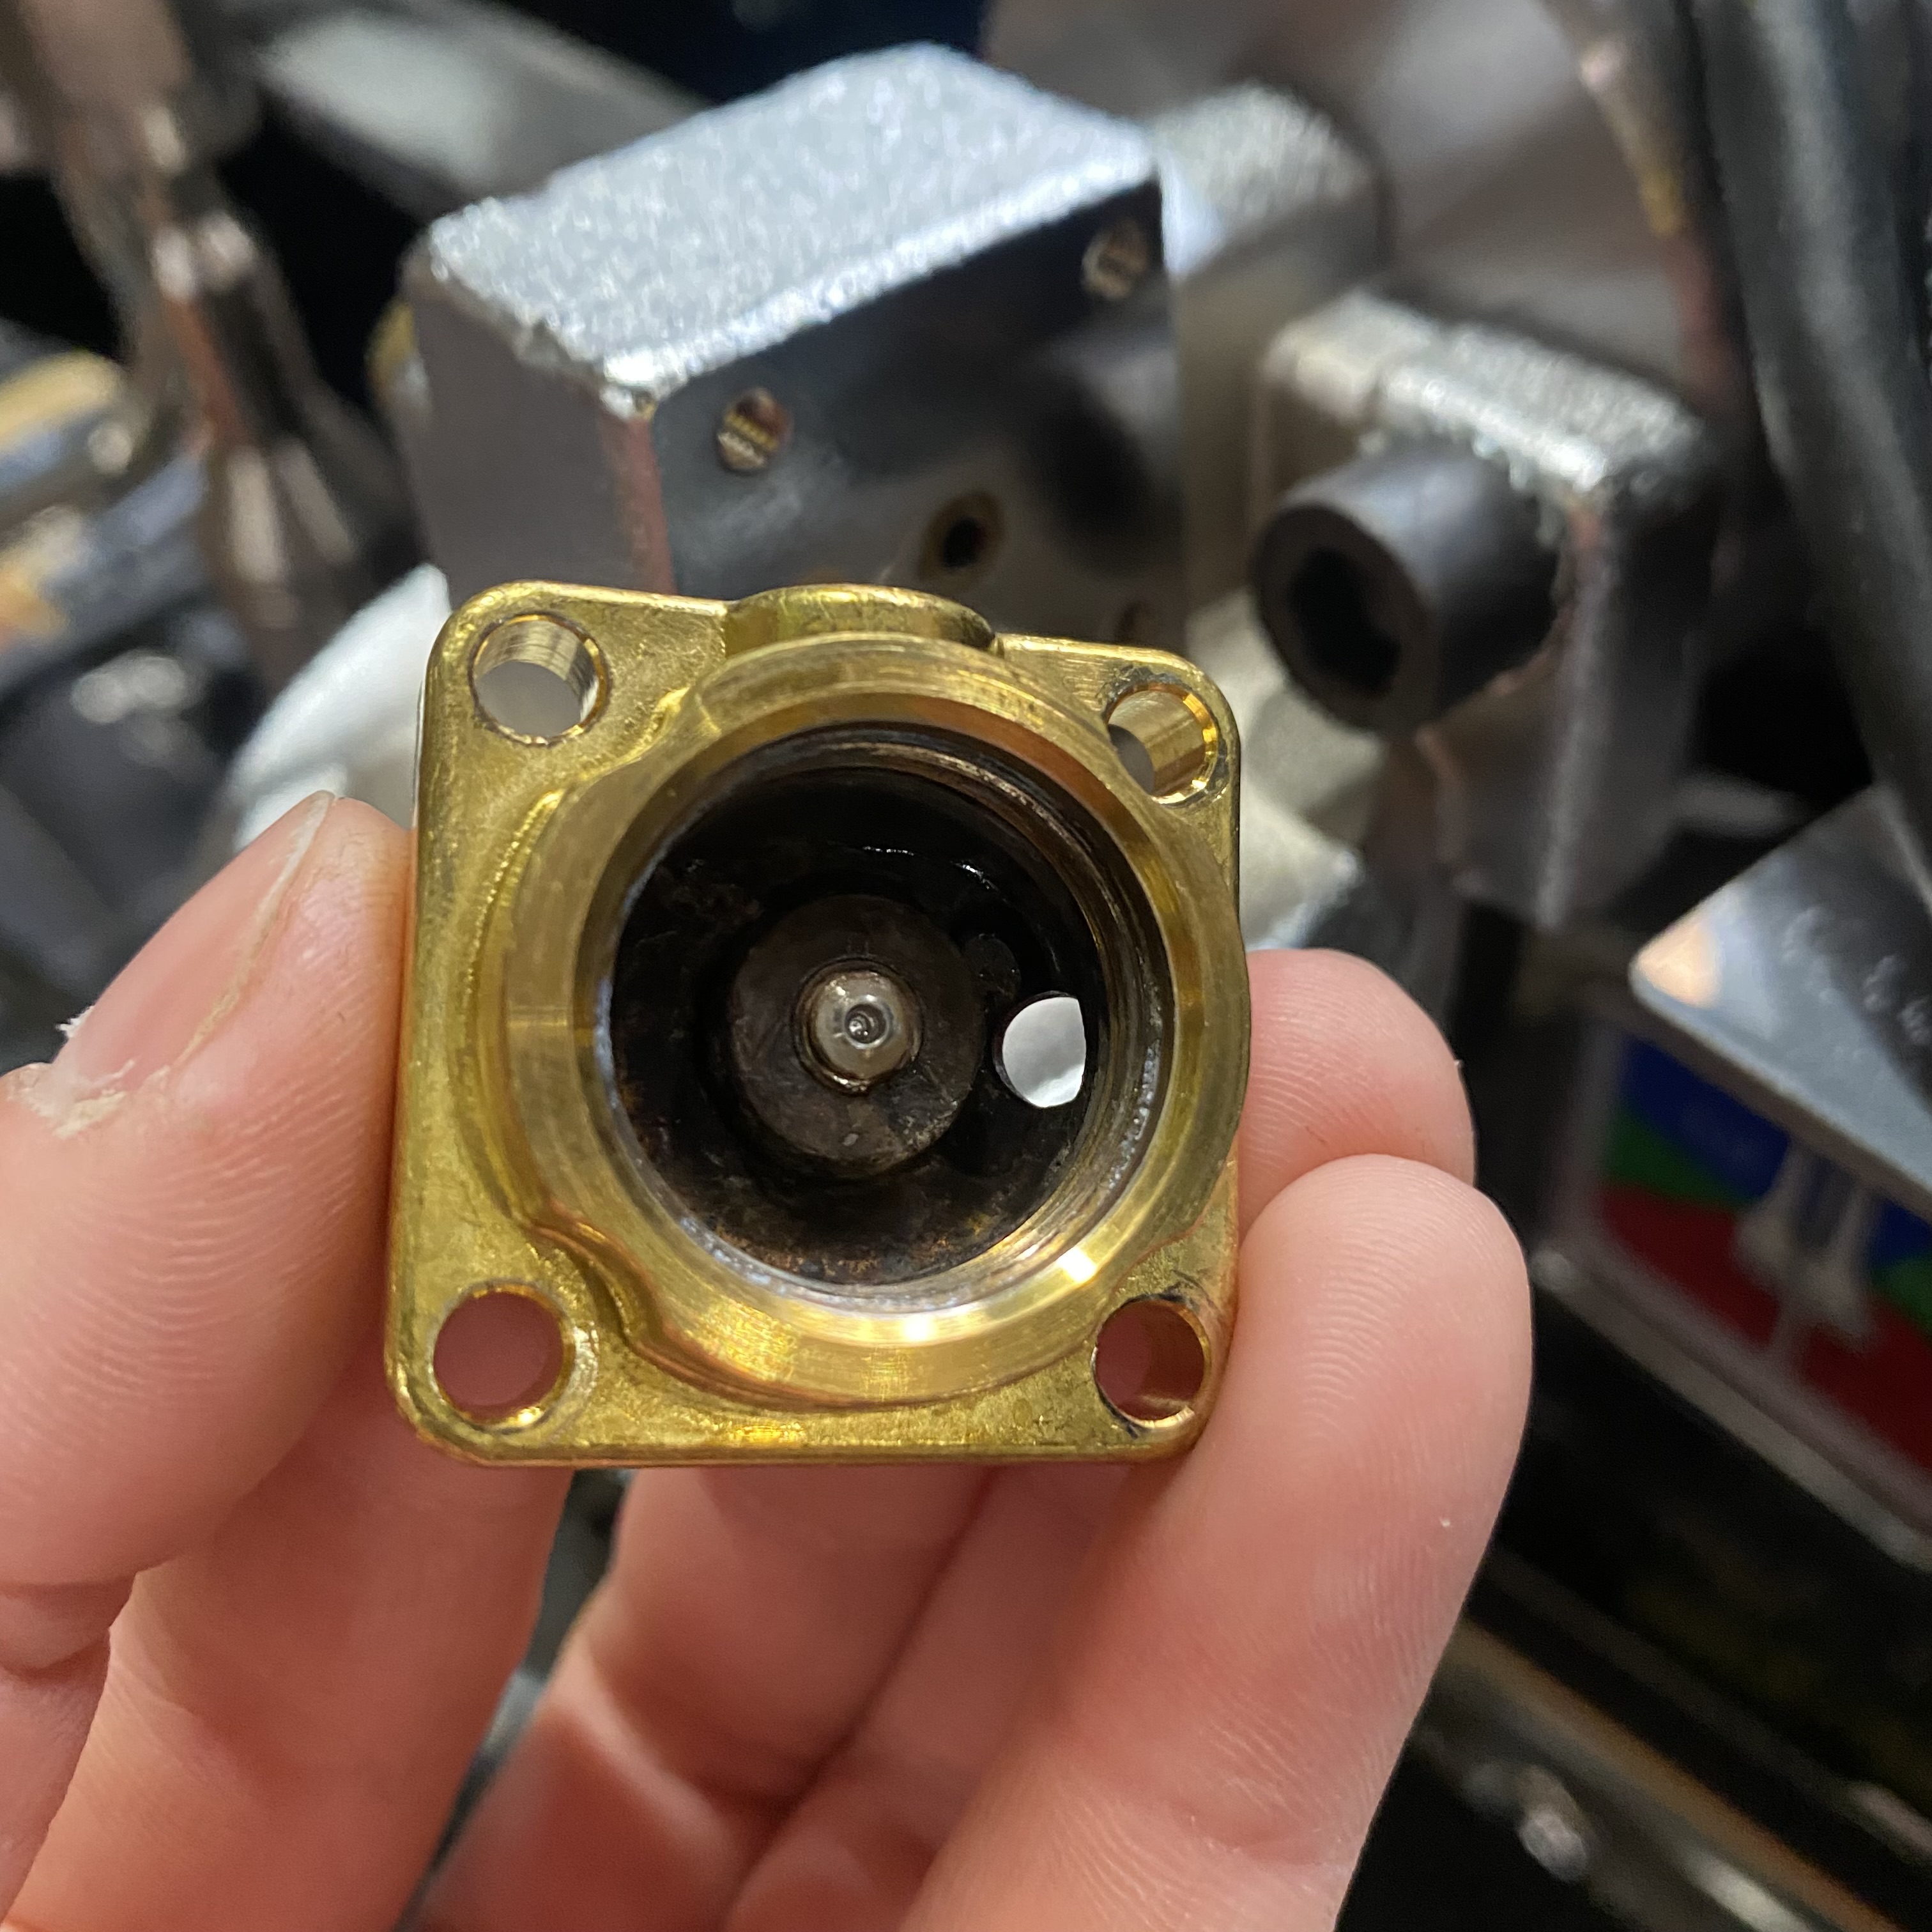
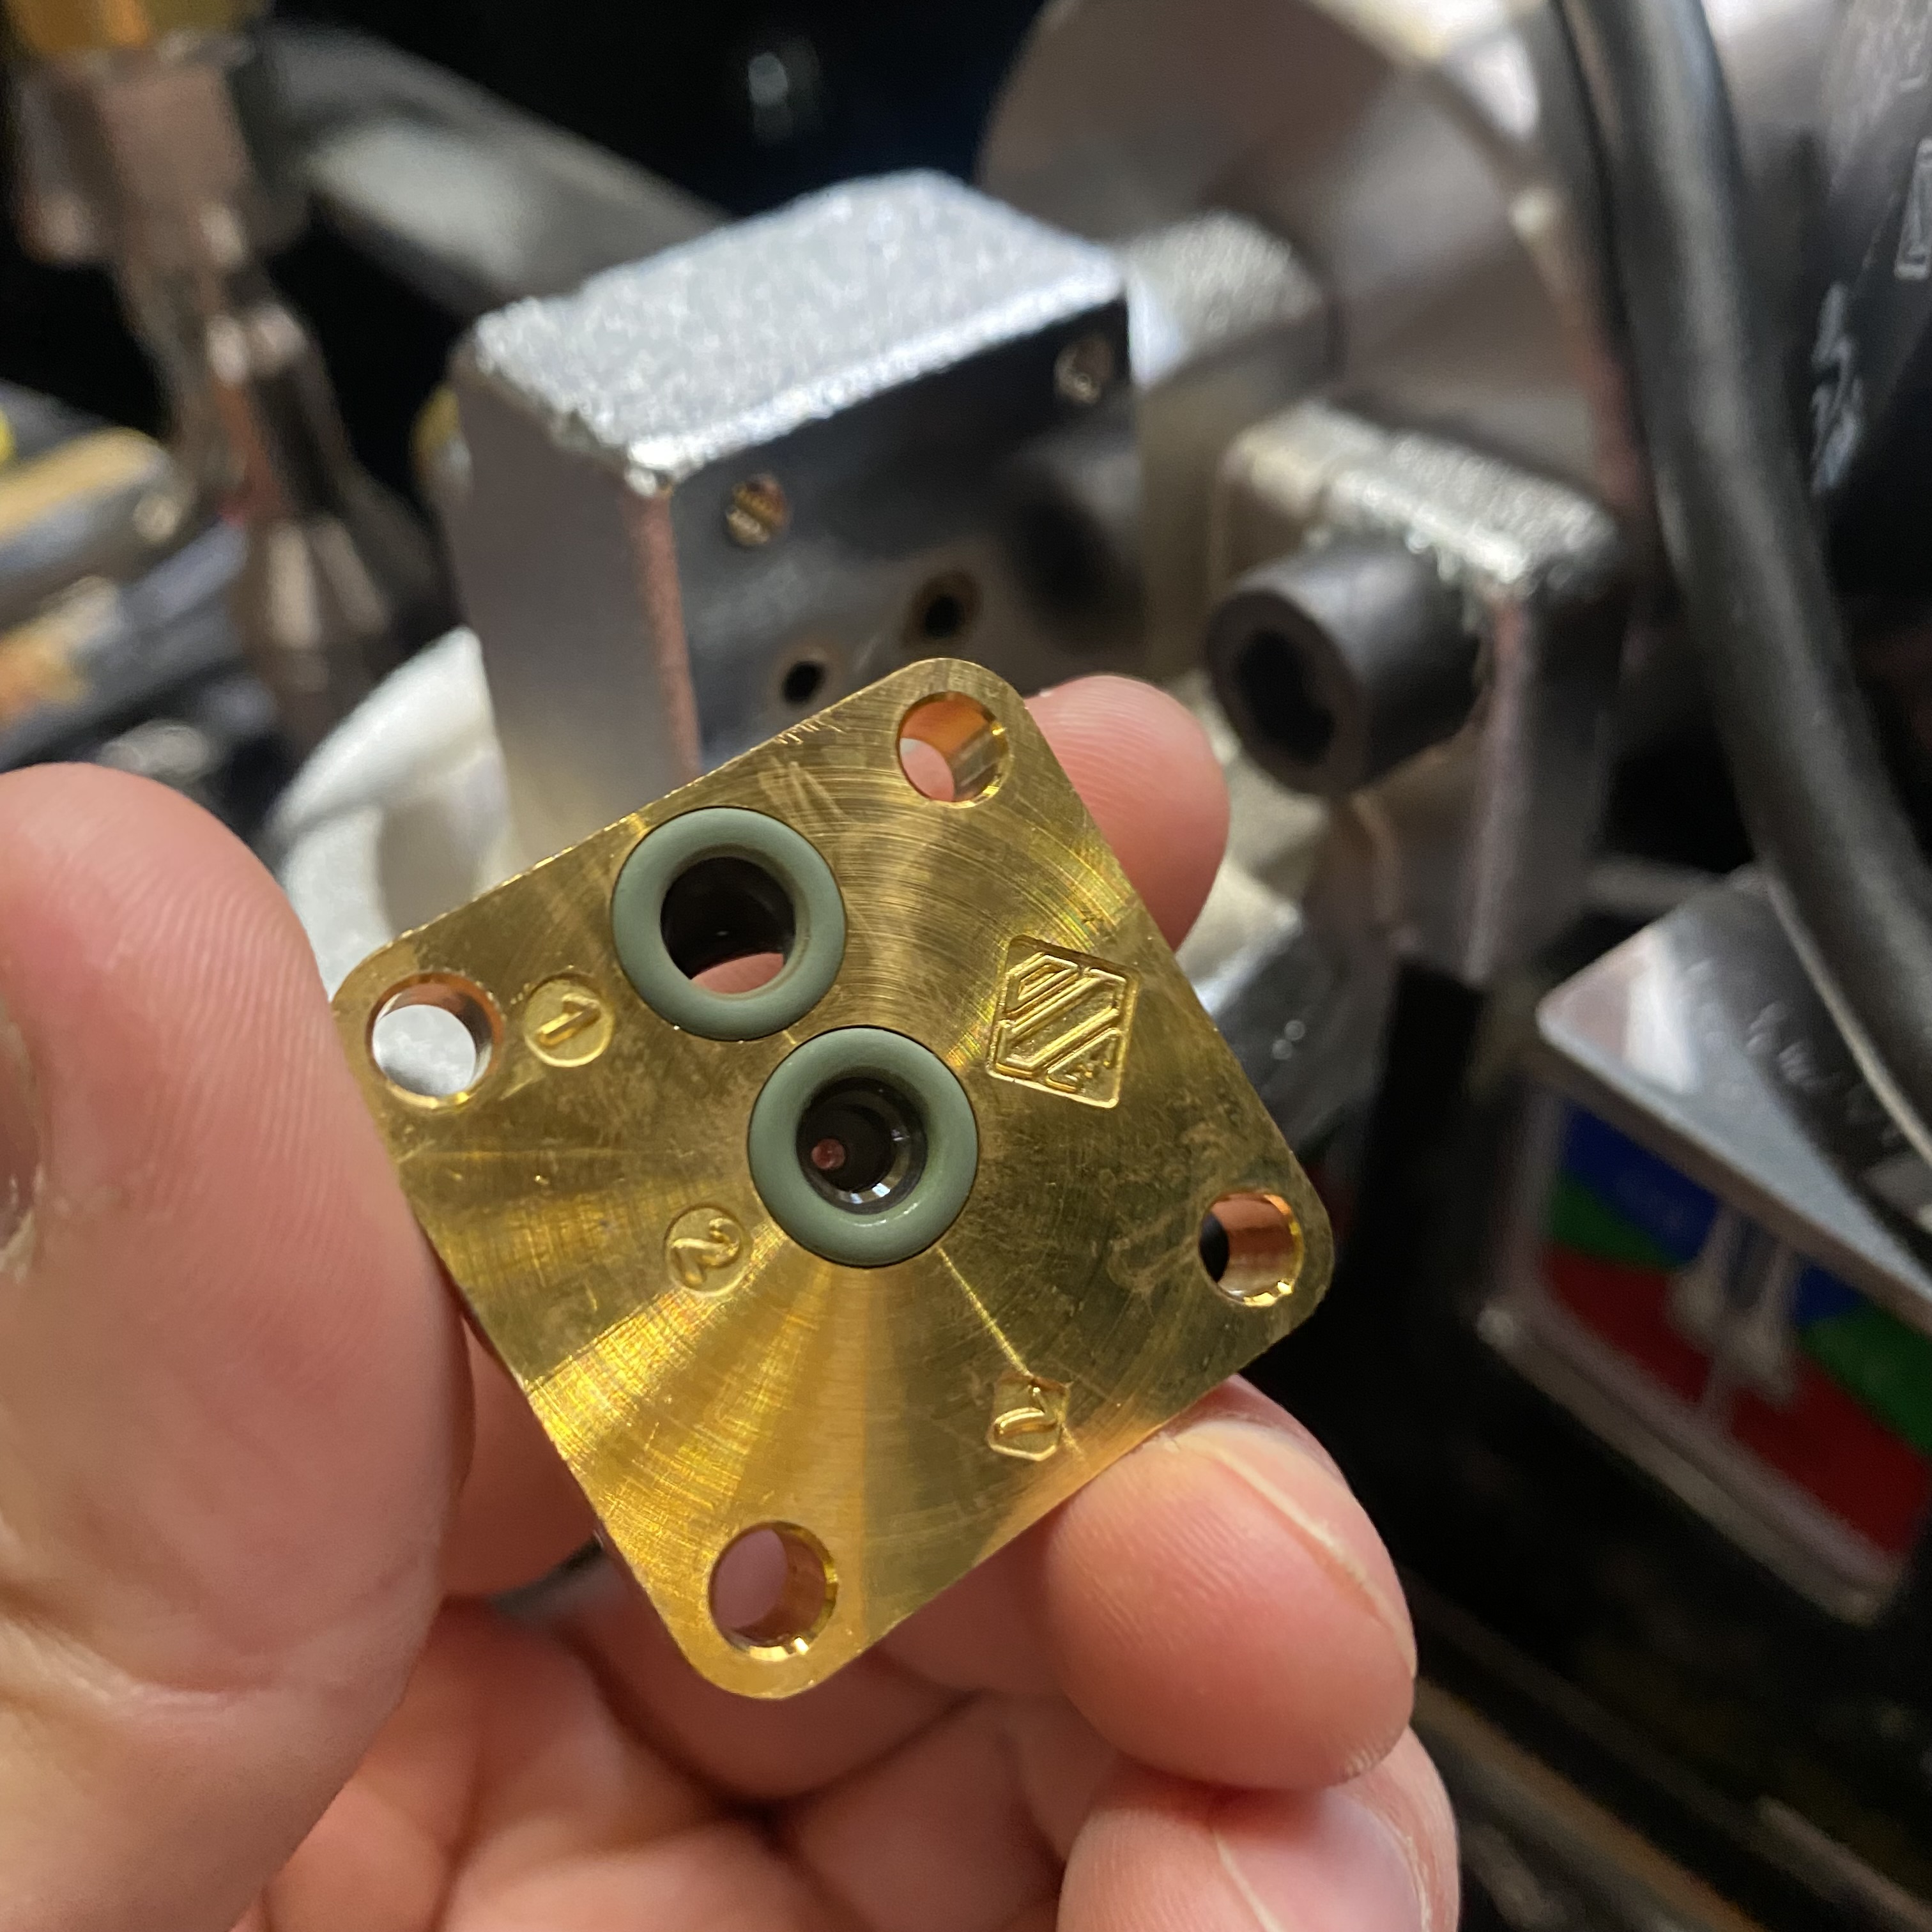
7. Use the 3mm Allen key or hex driver to dismount the brass valve base from the group head. Clean the two passages and make sure the o-ring gaskets are in good condition.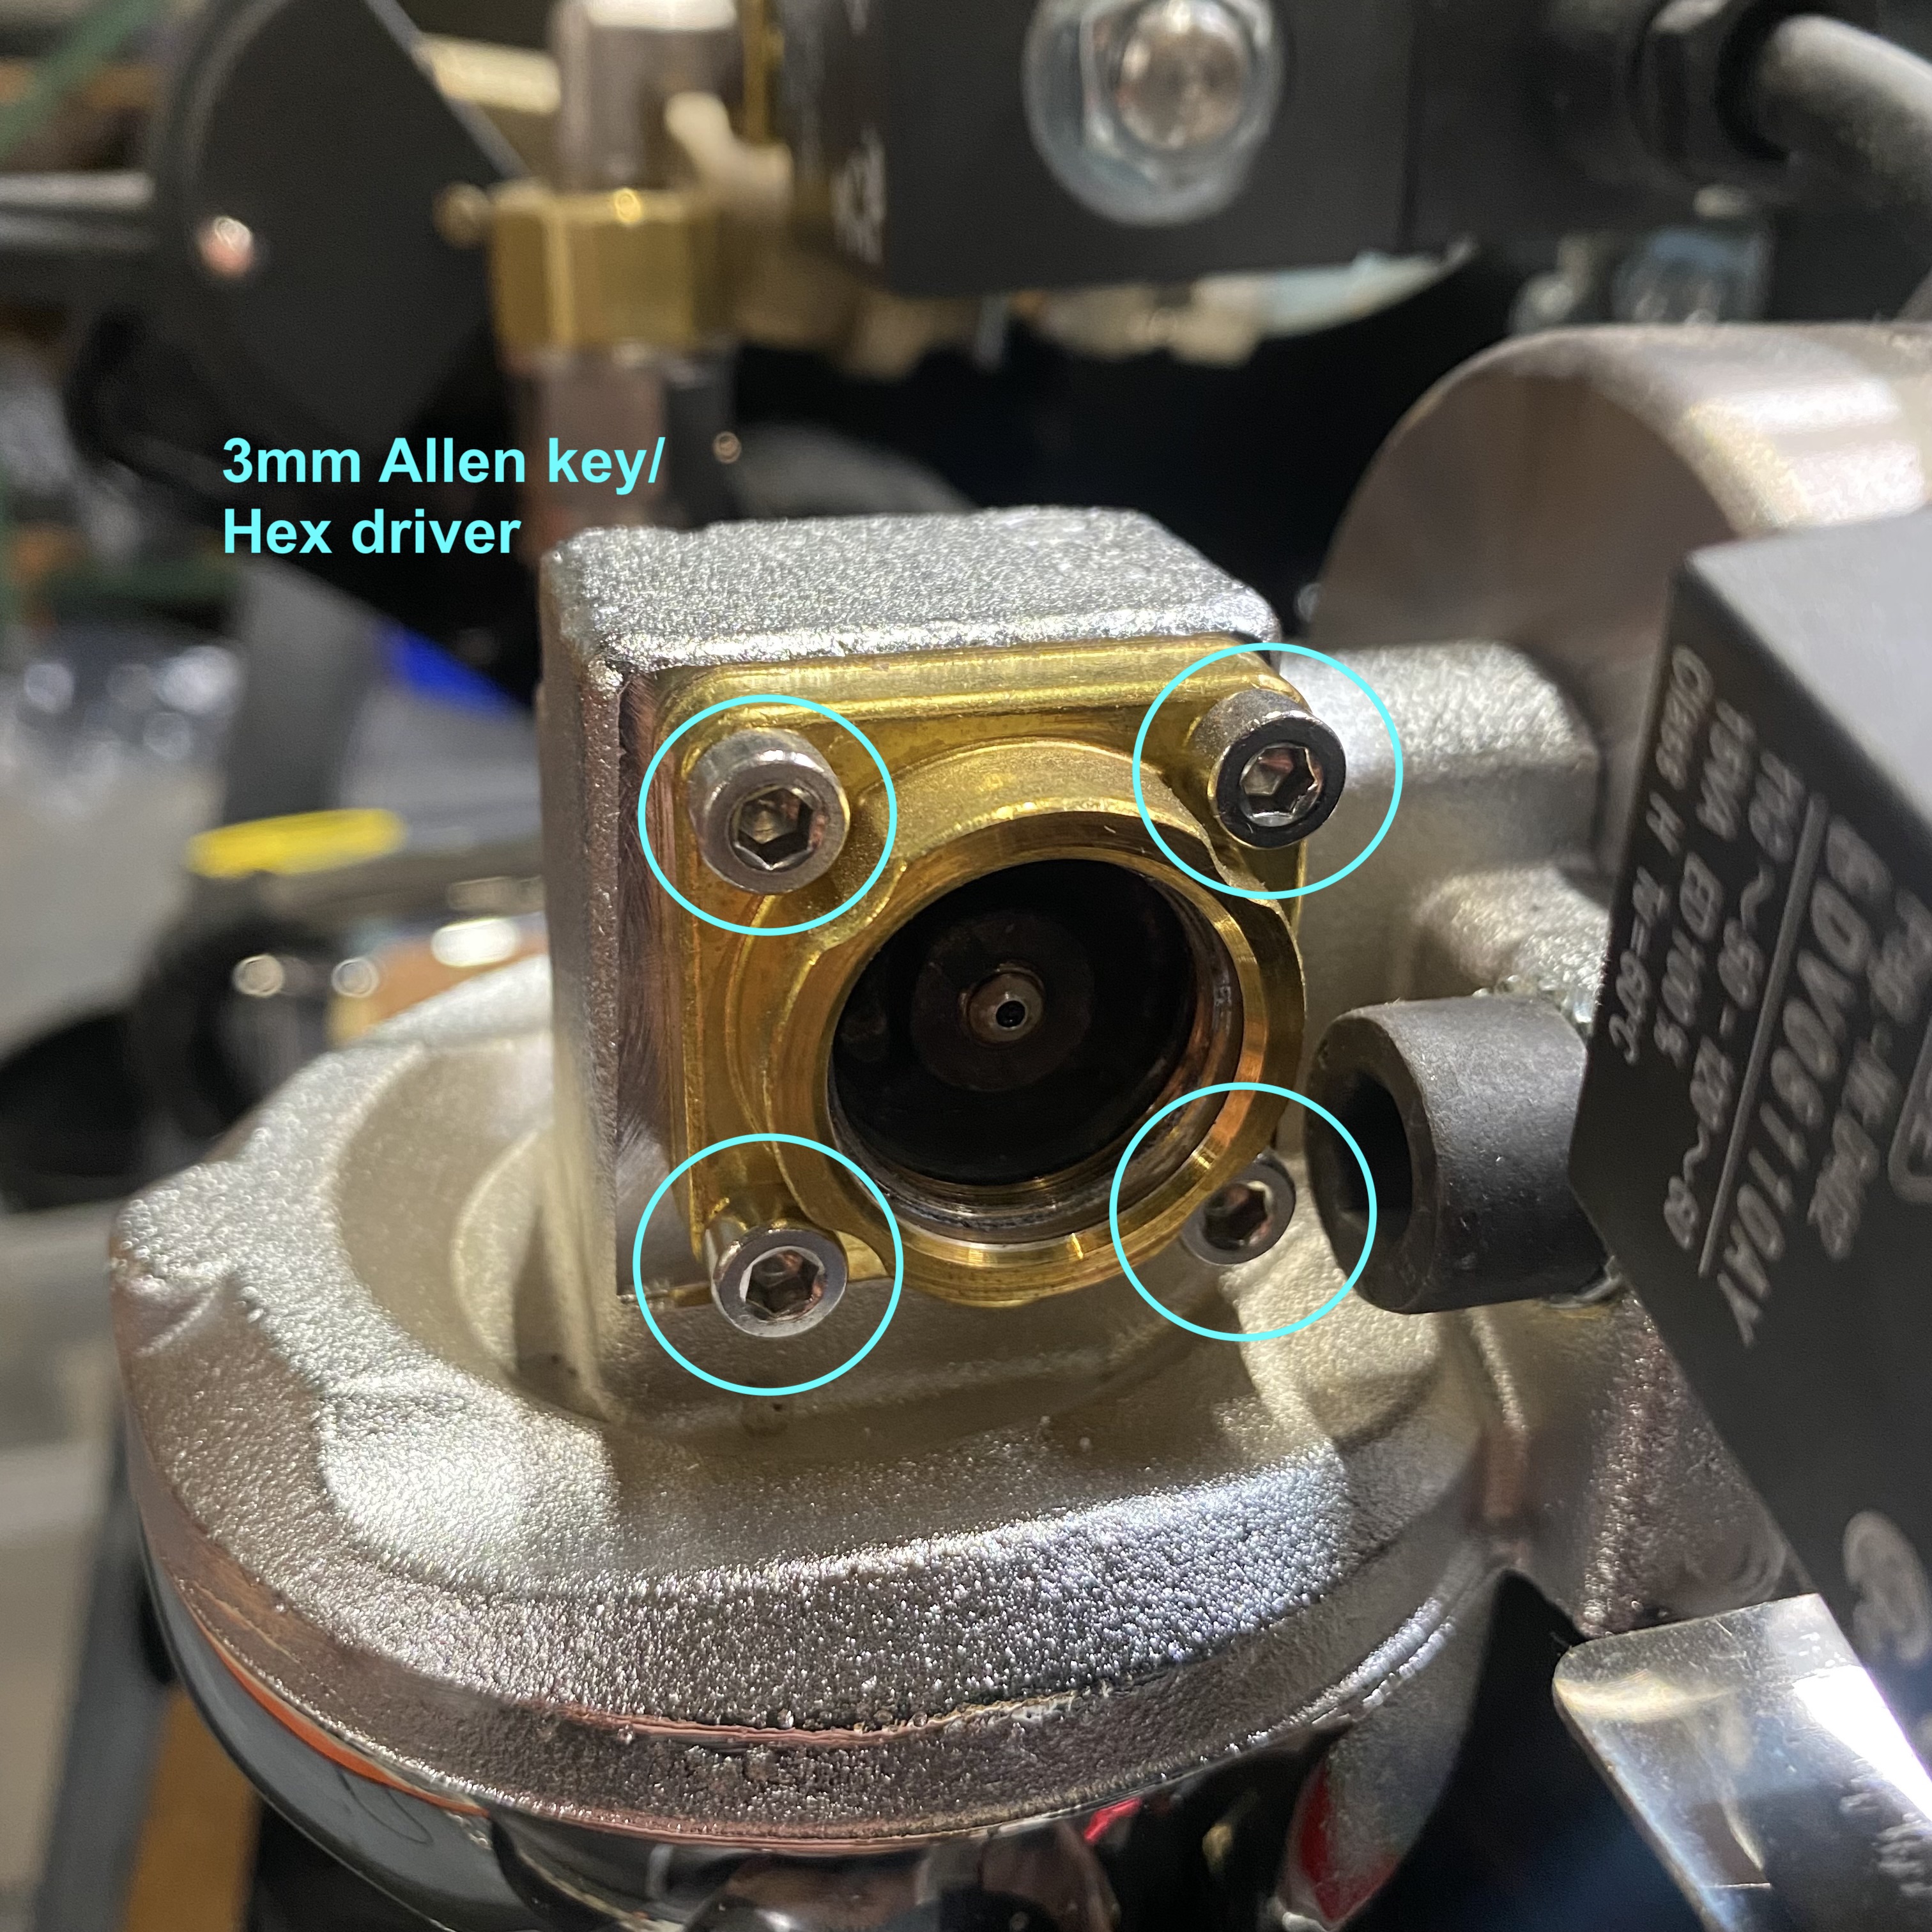
*NOTE: If you're troubleshooting a no-flow condition from your A53's group head, it may be necessary to dismount the group head to clear its passages of any potential obstructions.
8. Use these instructions in reverse to reassemble the group head solenoid.