ECM Mechanika V Slim: Steam and Hot Water Delivery Plumbing AccessUpdated 5 months ago
Tools Needed:
- 2.5 & 3mm Hex driver or Allen Key for panel removal
- 17mm Open-ended wrench
- 22mm Open-ended wrench
- Adjustable wrench
- Pipe cleaning brushes
- Compressed air
- Shop Towels
1. Drain the boiler and allow the machine to cool.
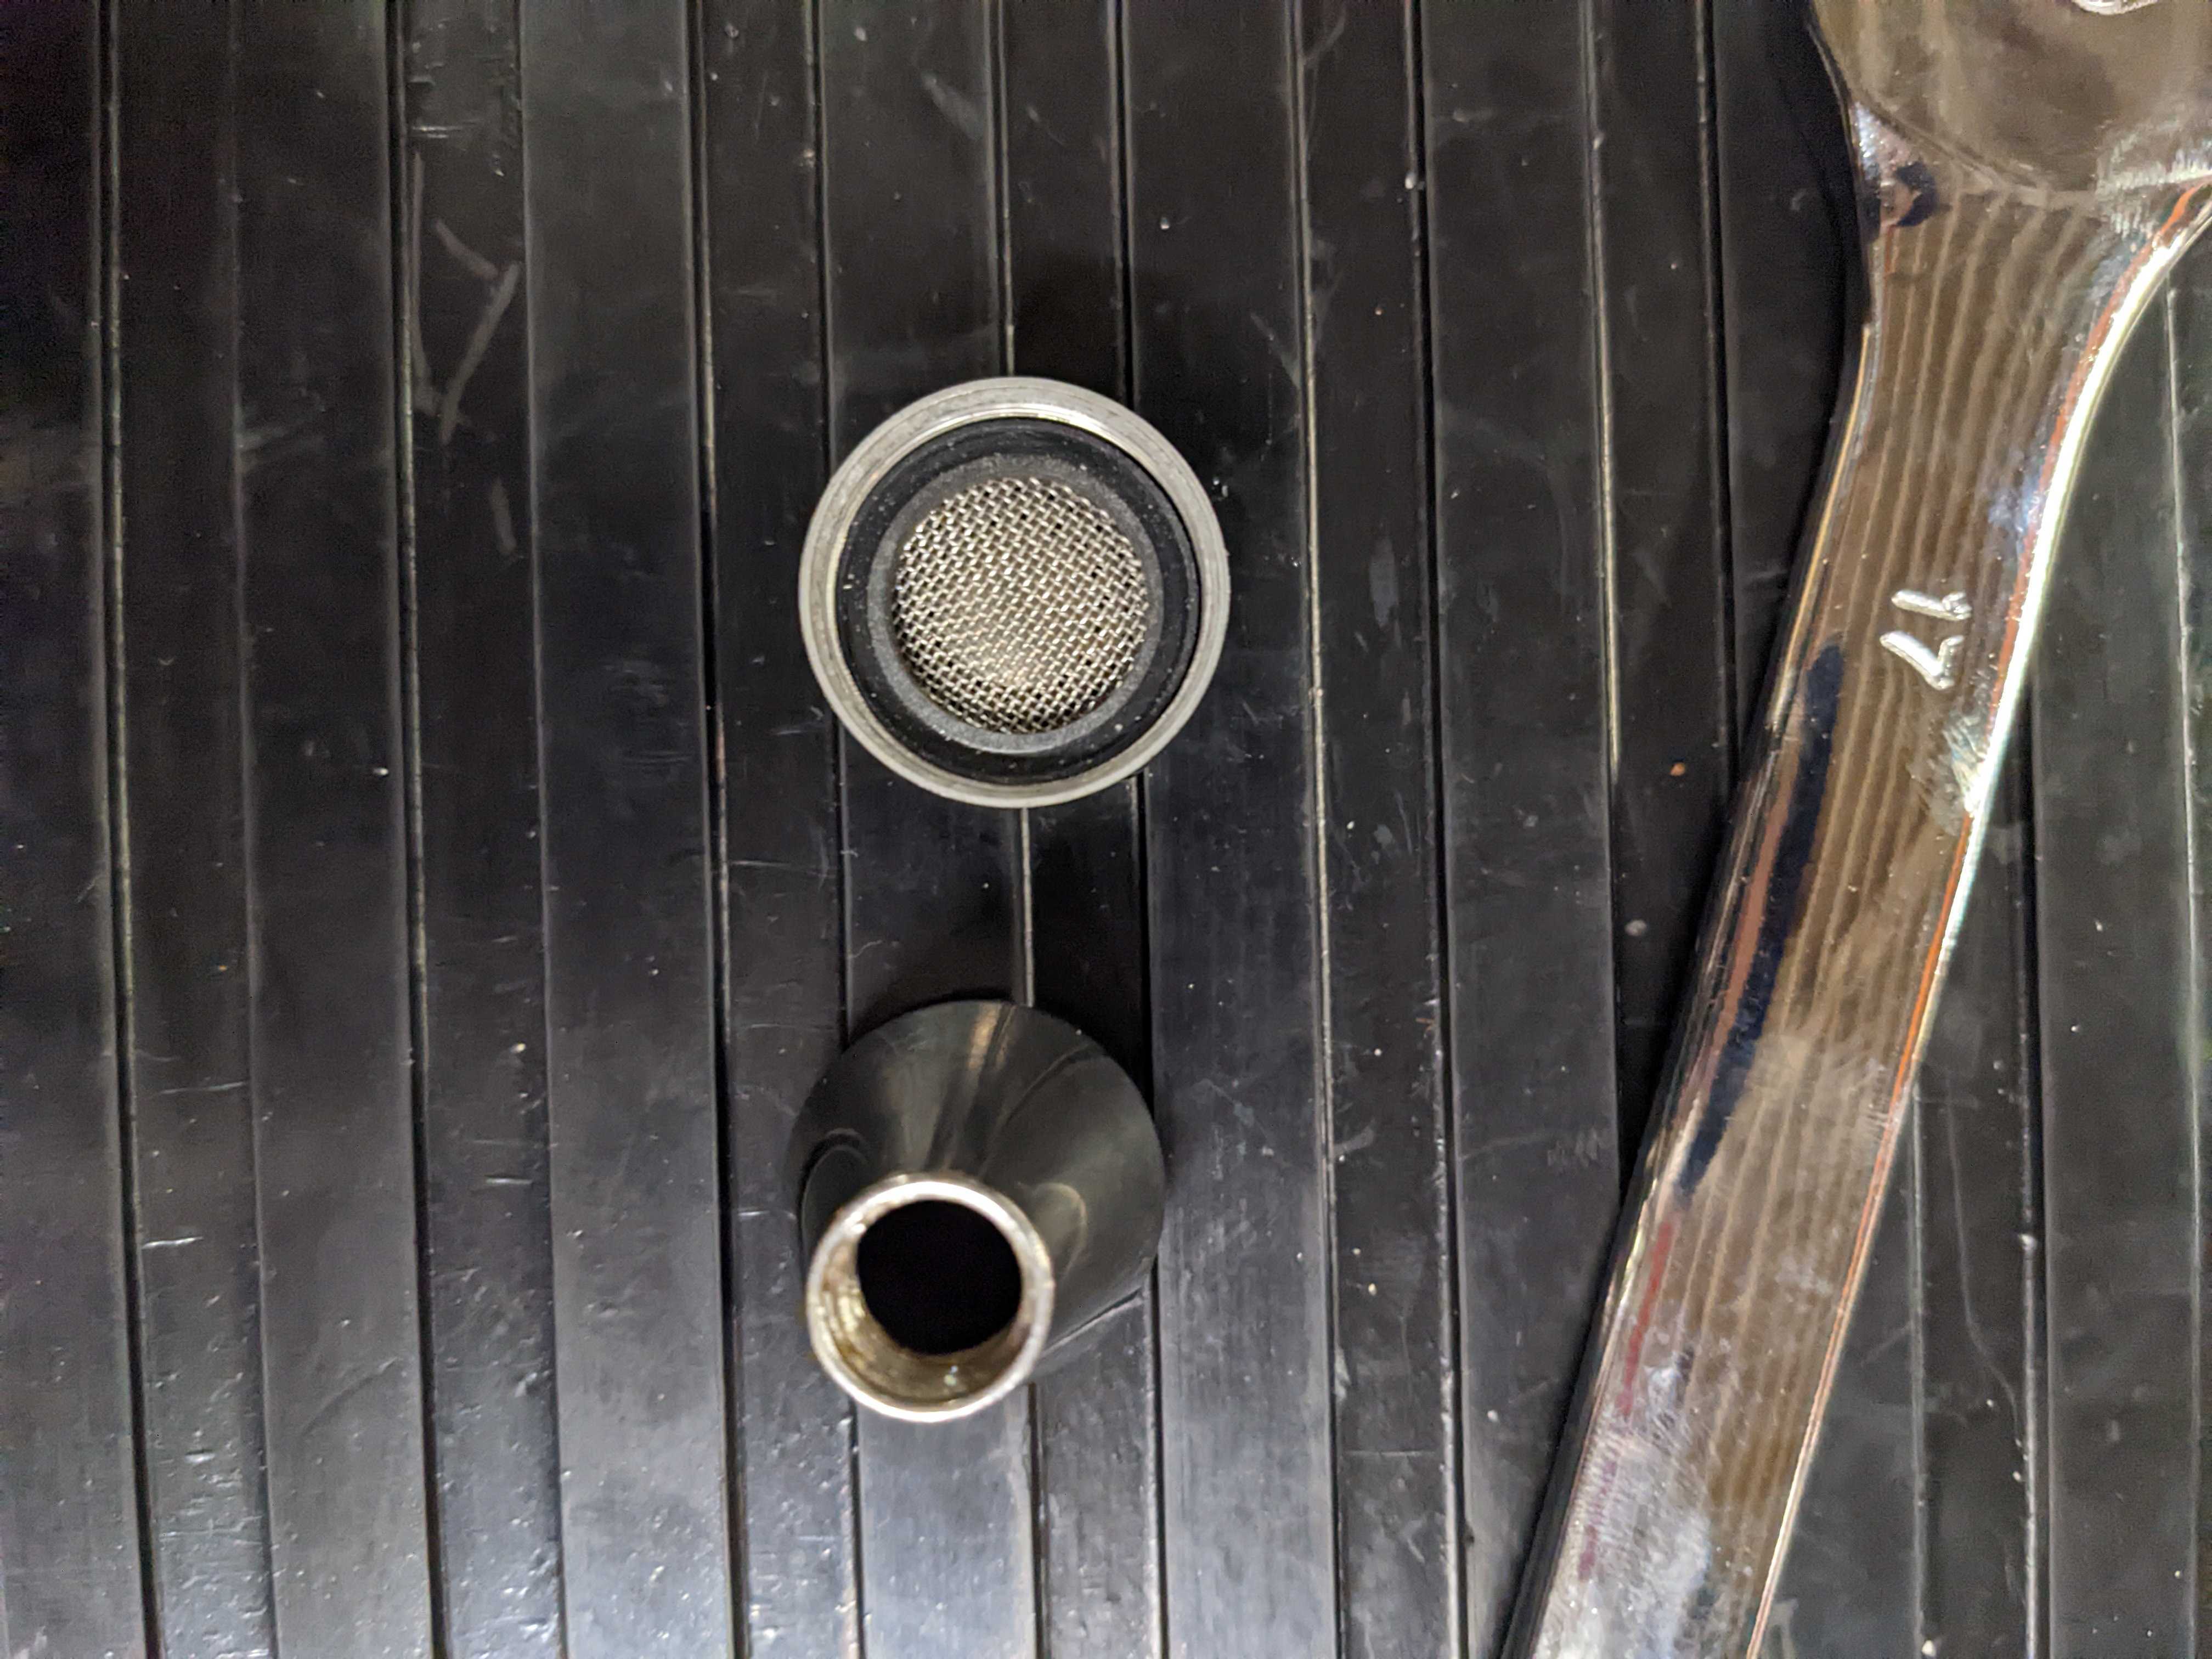
3. Unthread the hot water dispensing nozzle from the delivery arm, unthread the upper and lower pieces, inspect and remove any debris from the screen and reassemble.
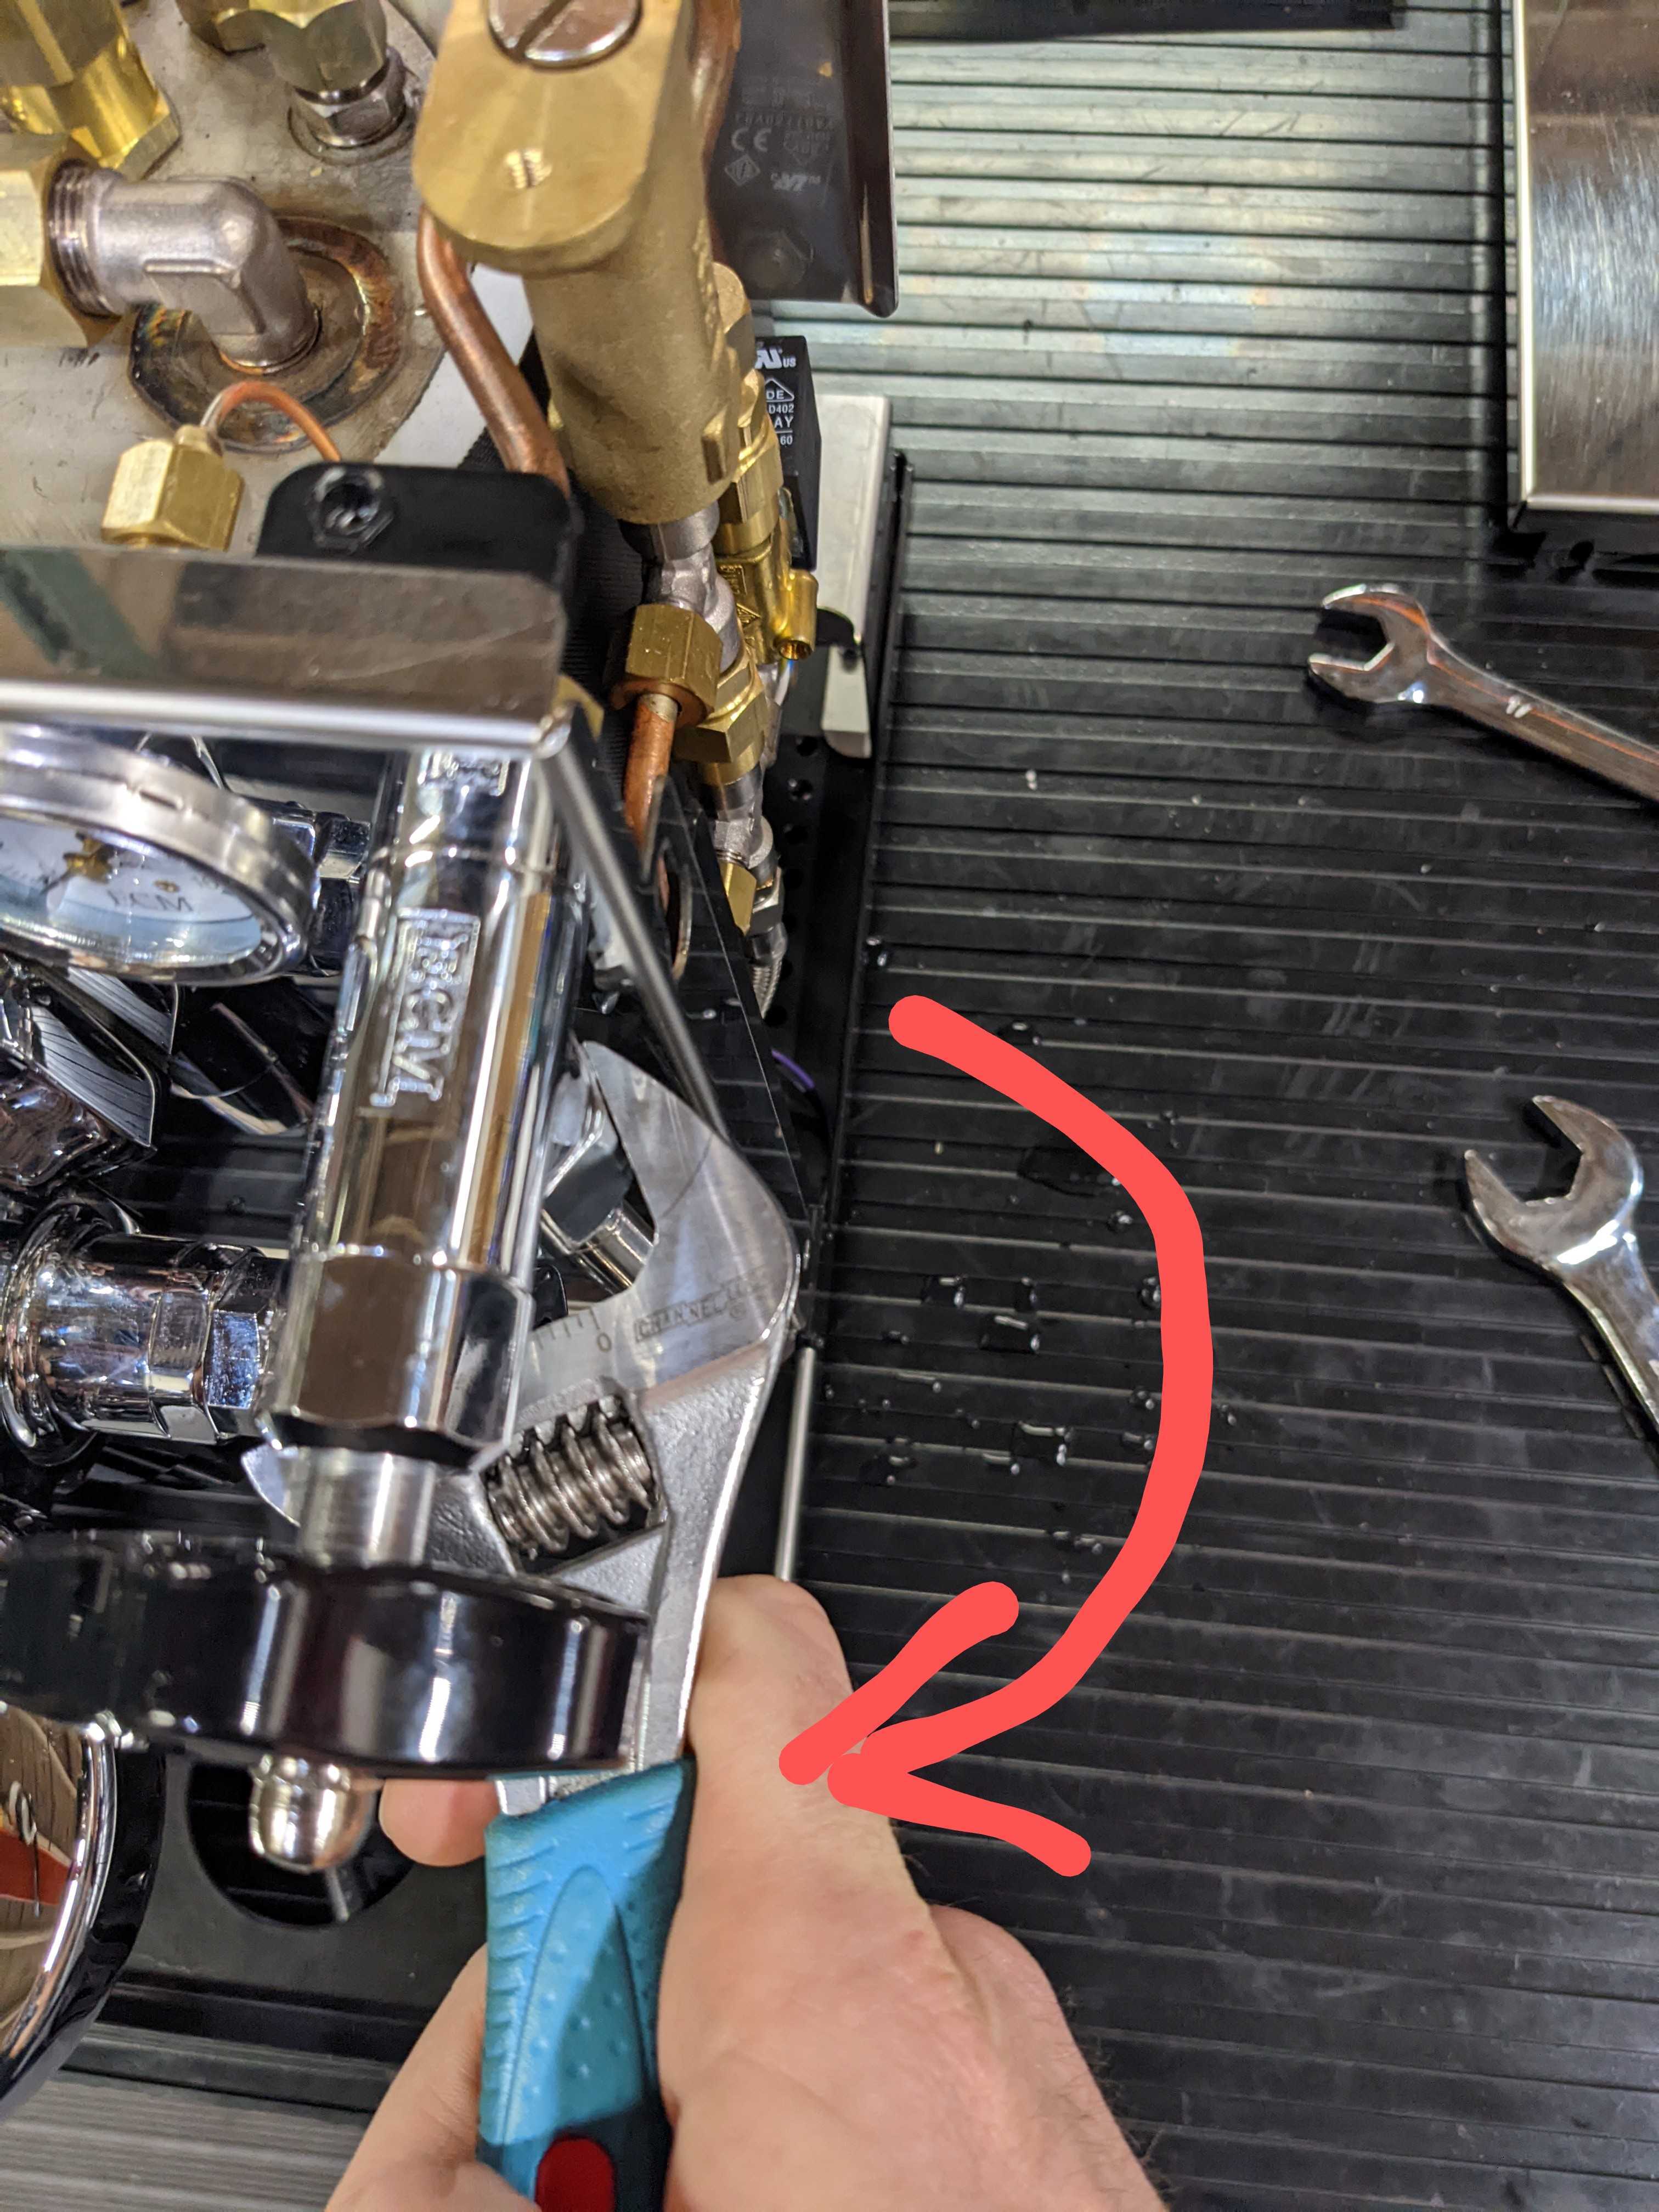
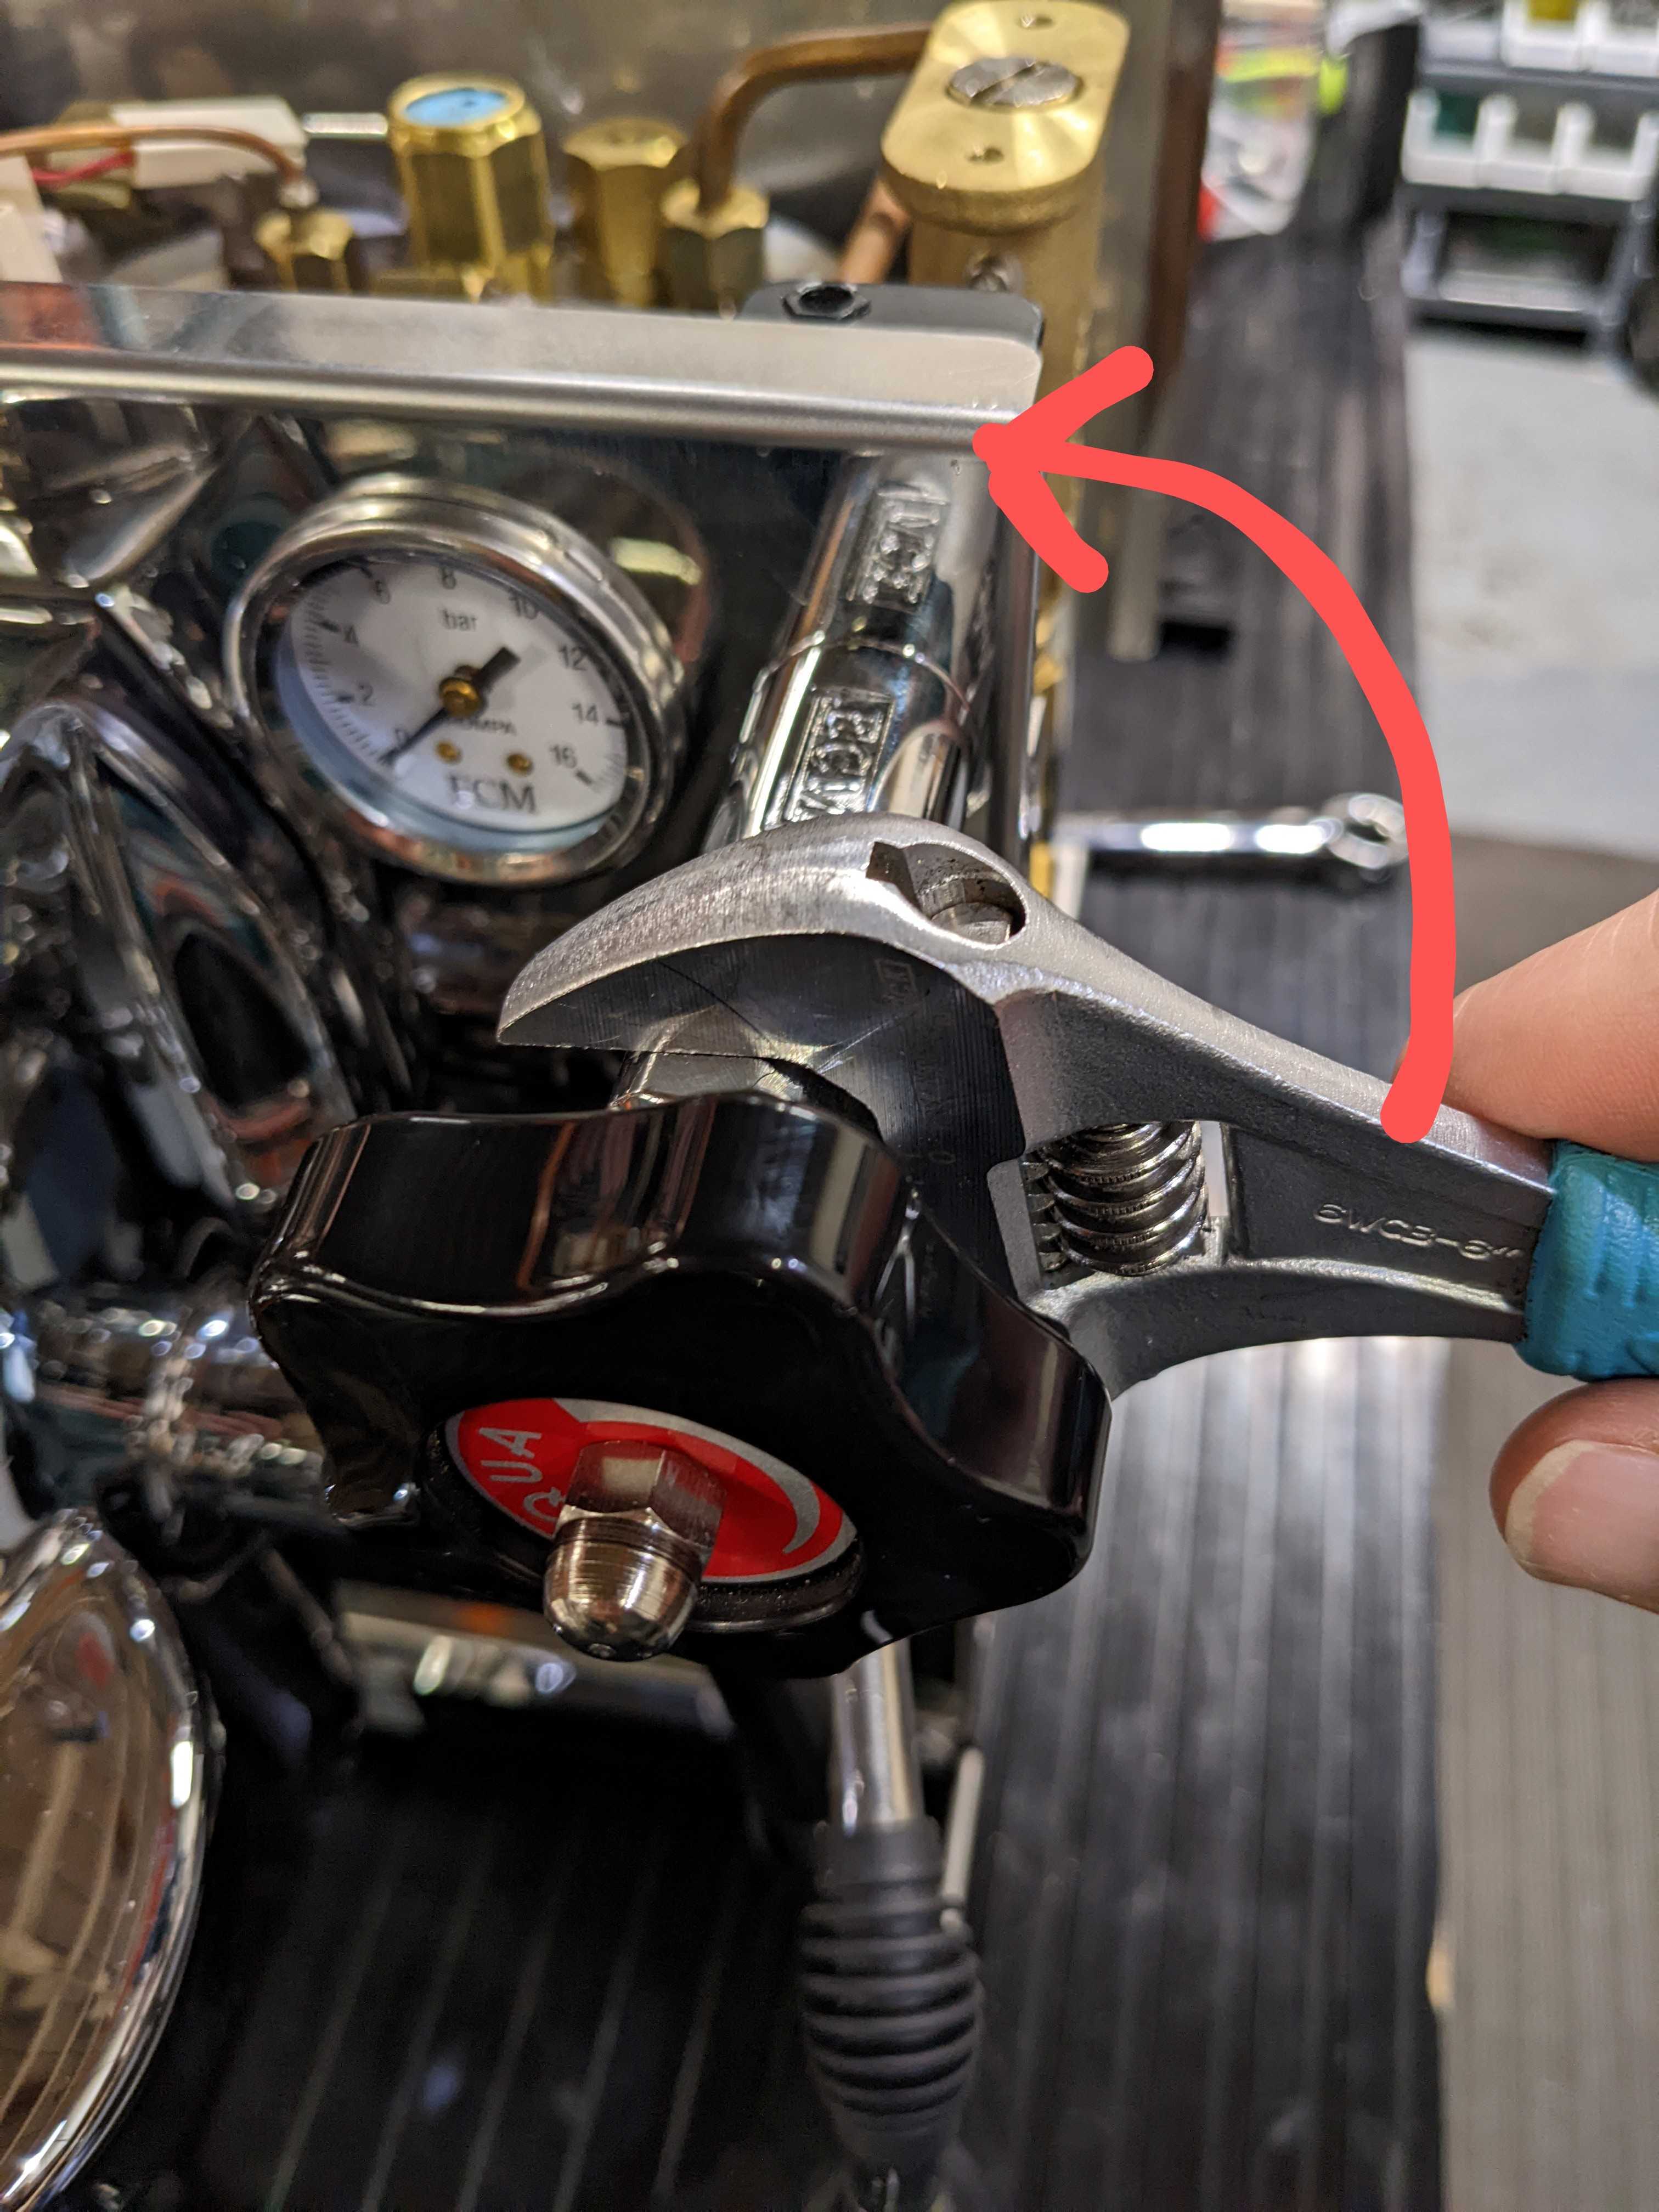
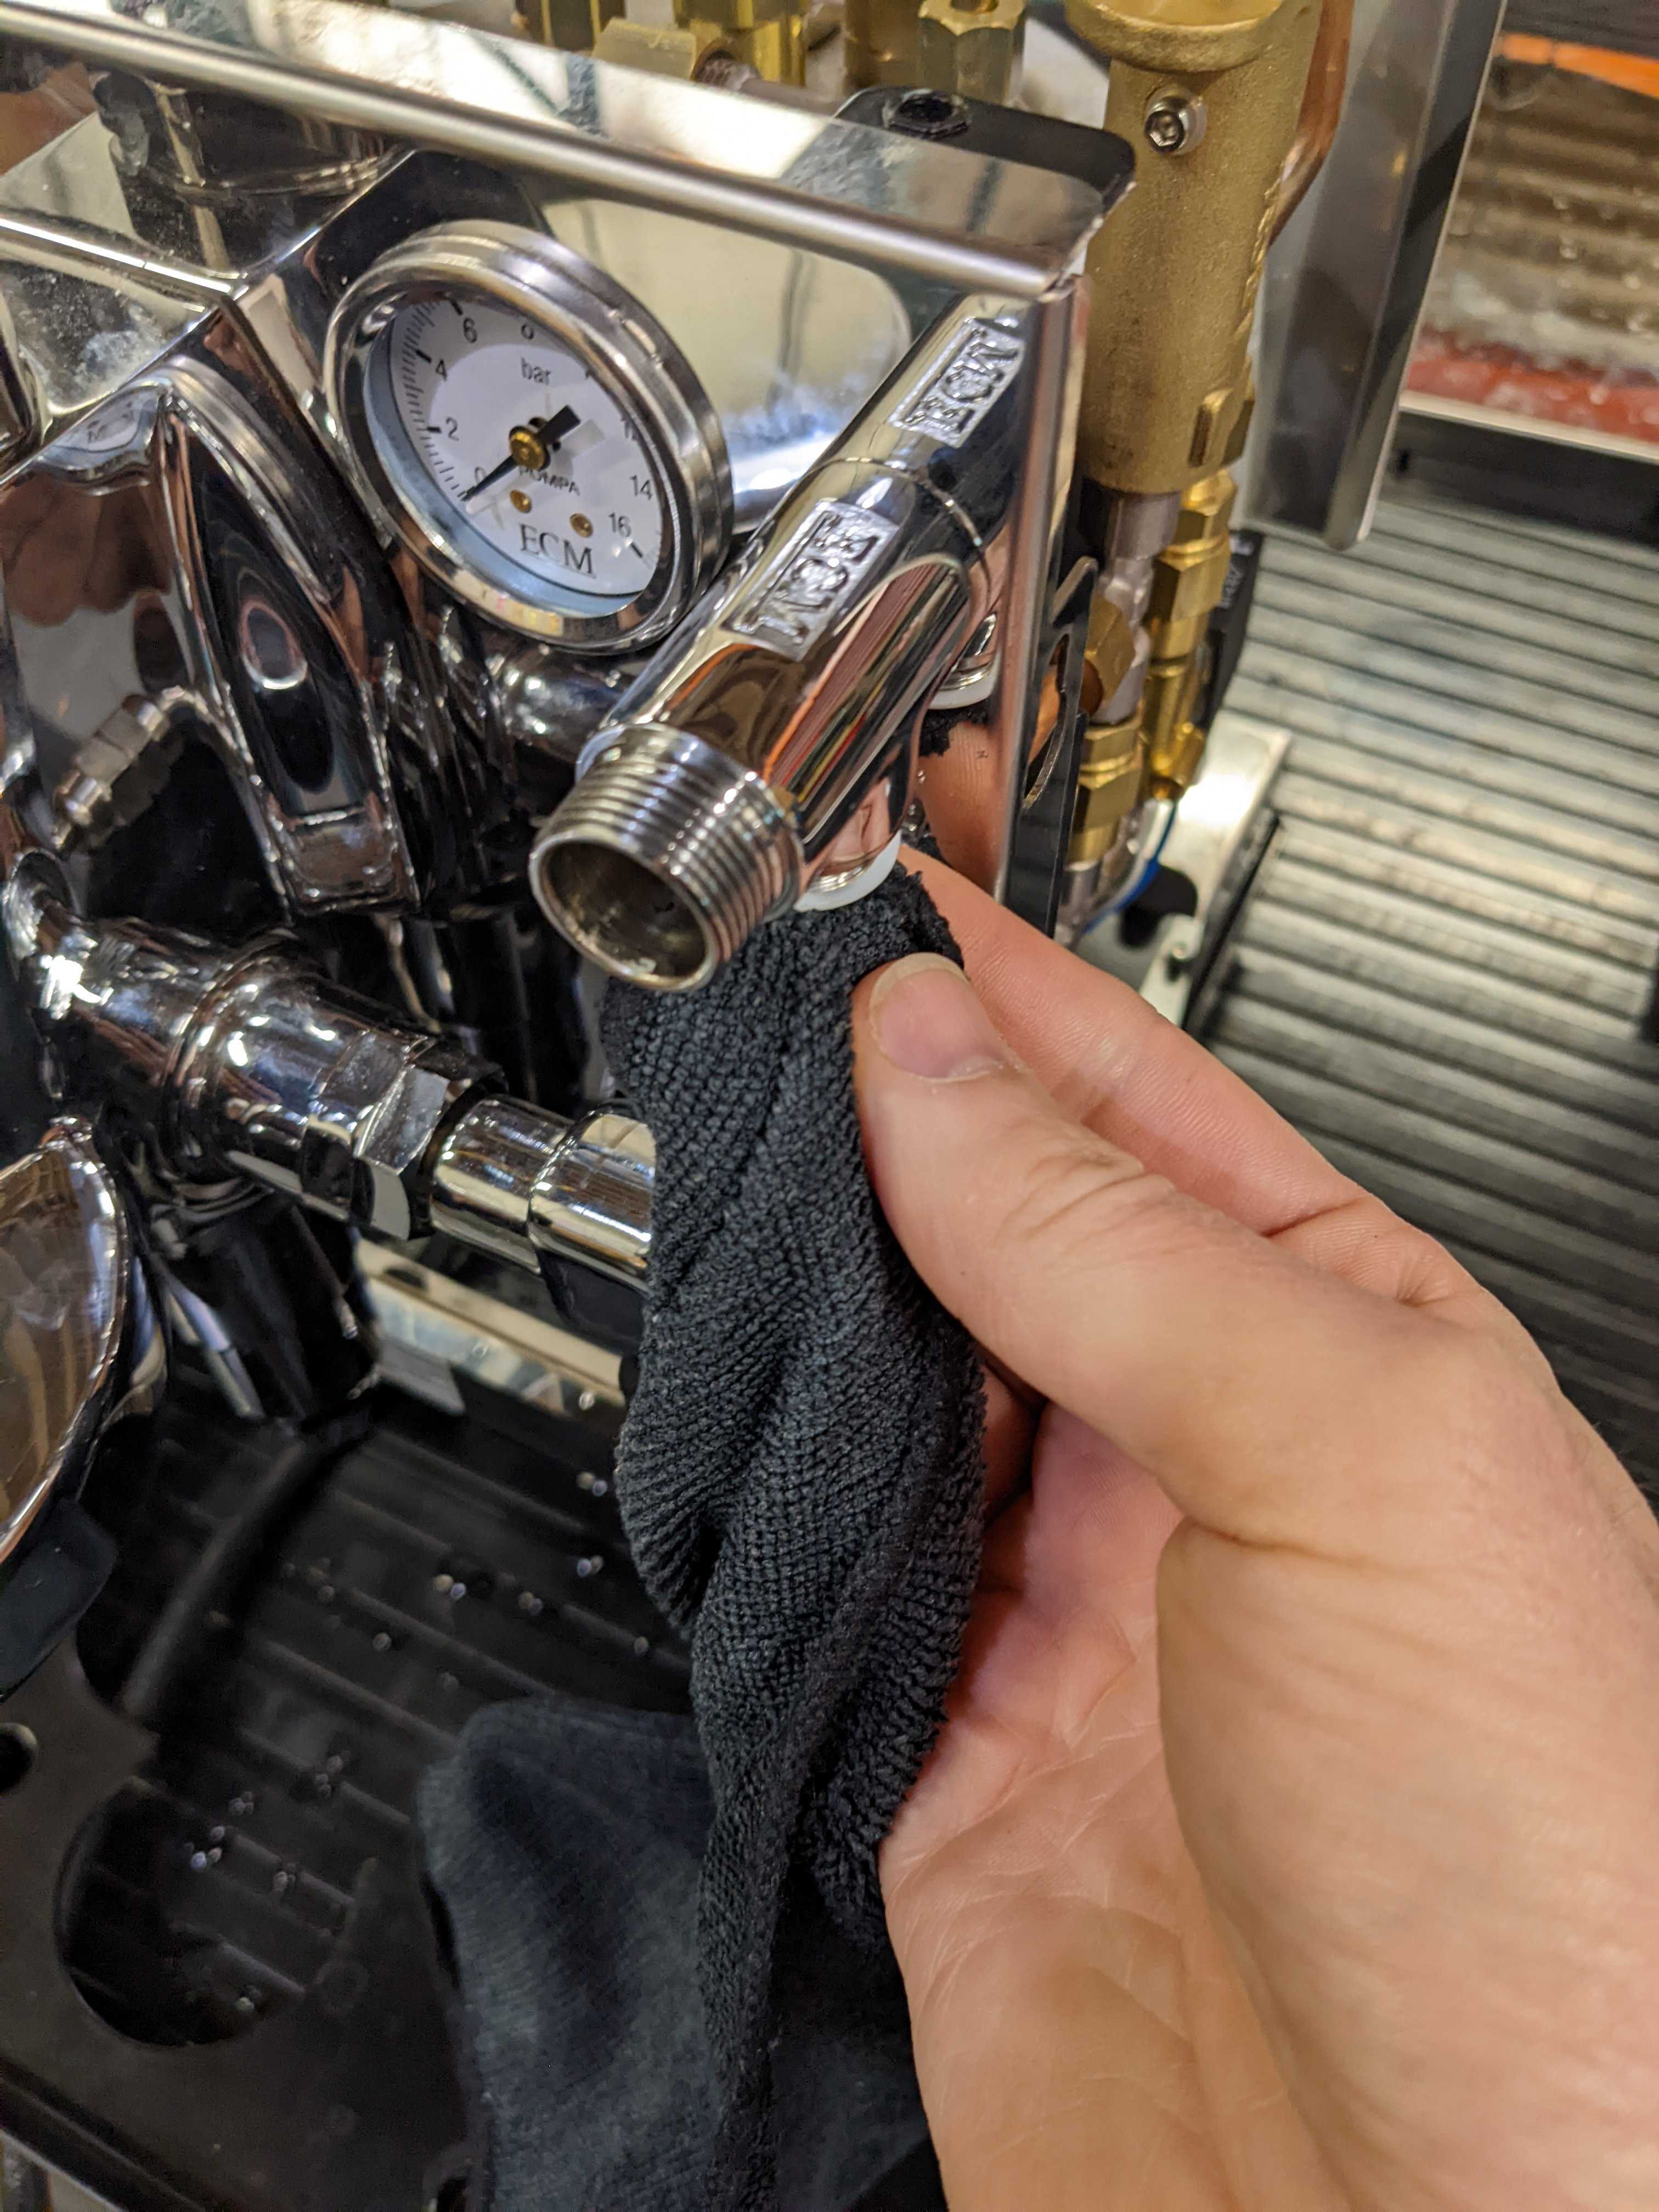
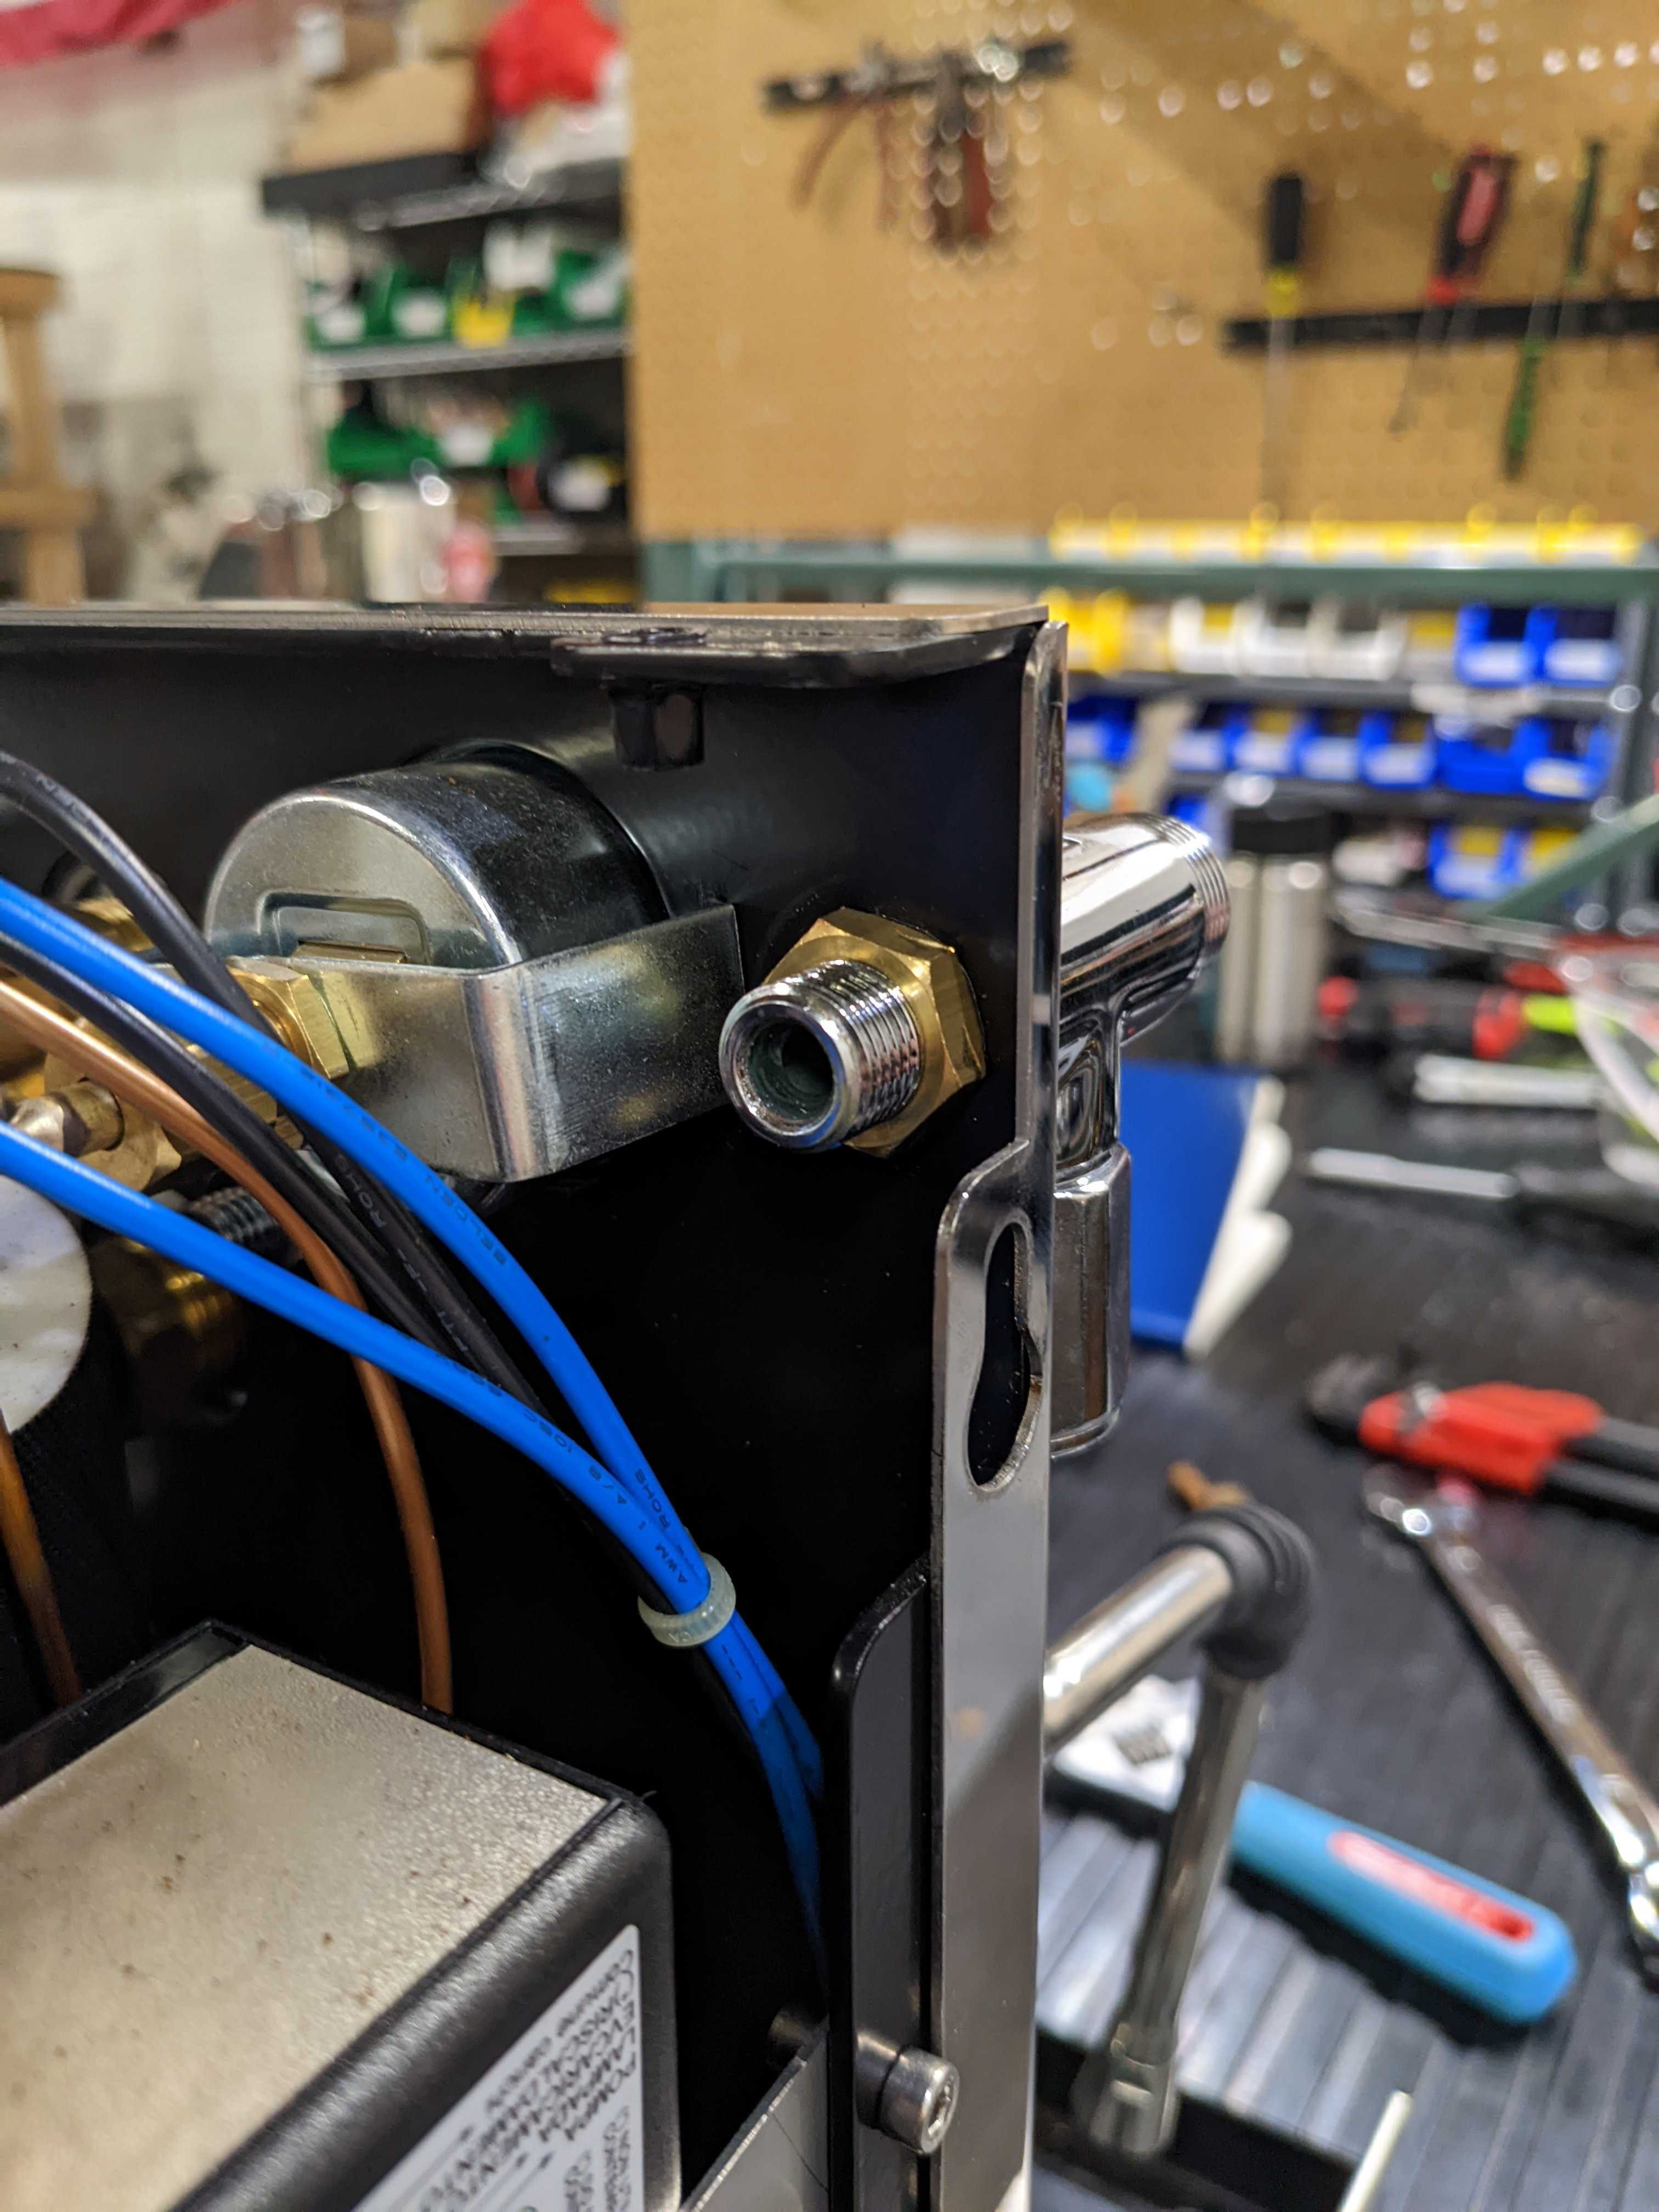
4. Using a 22mm Open-ended or adjustable wrench unscrew the hot water arm nut from the valve body. Use a towel to avoid marring the finish on the fitting if needed.
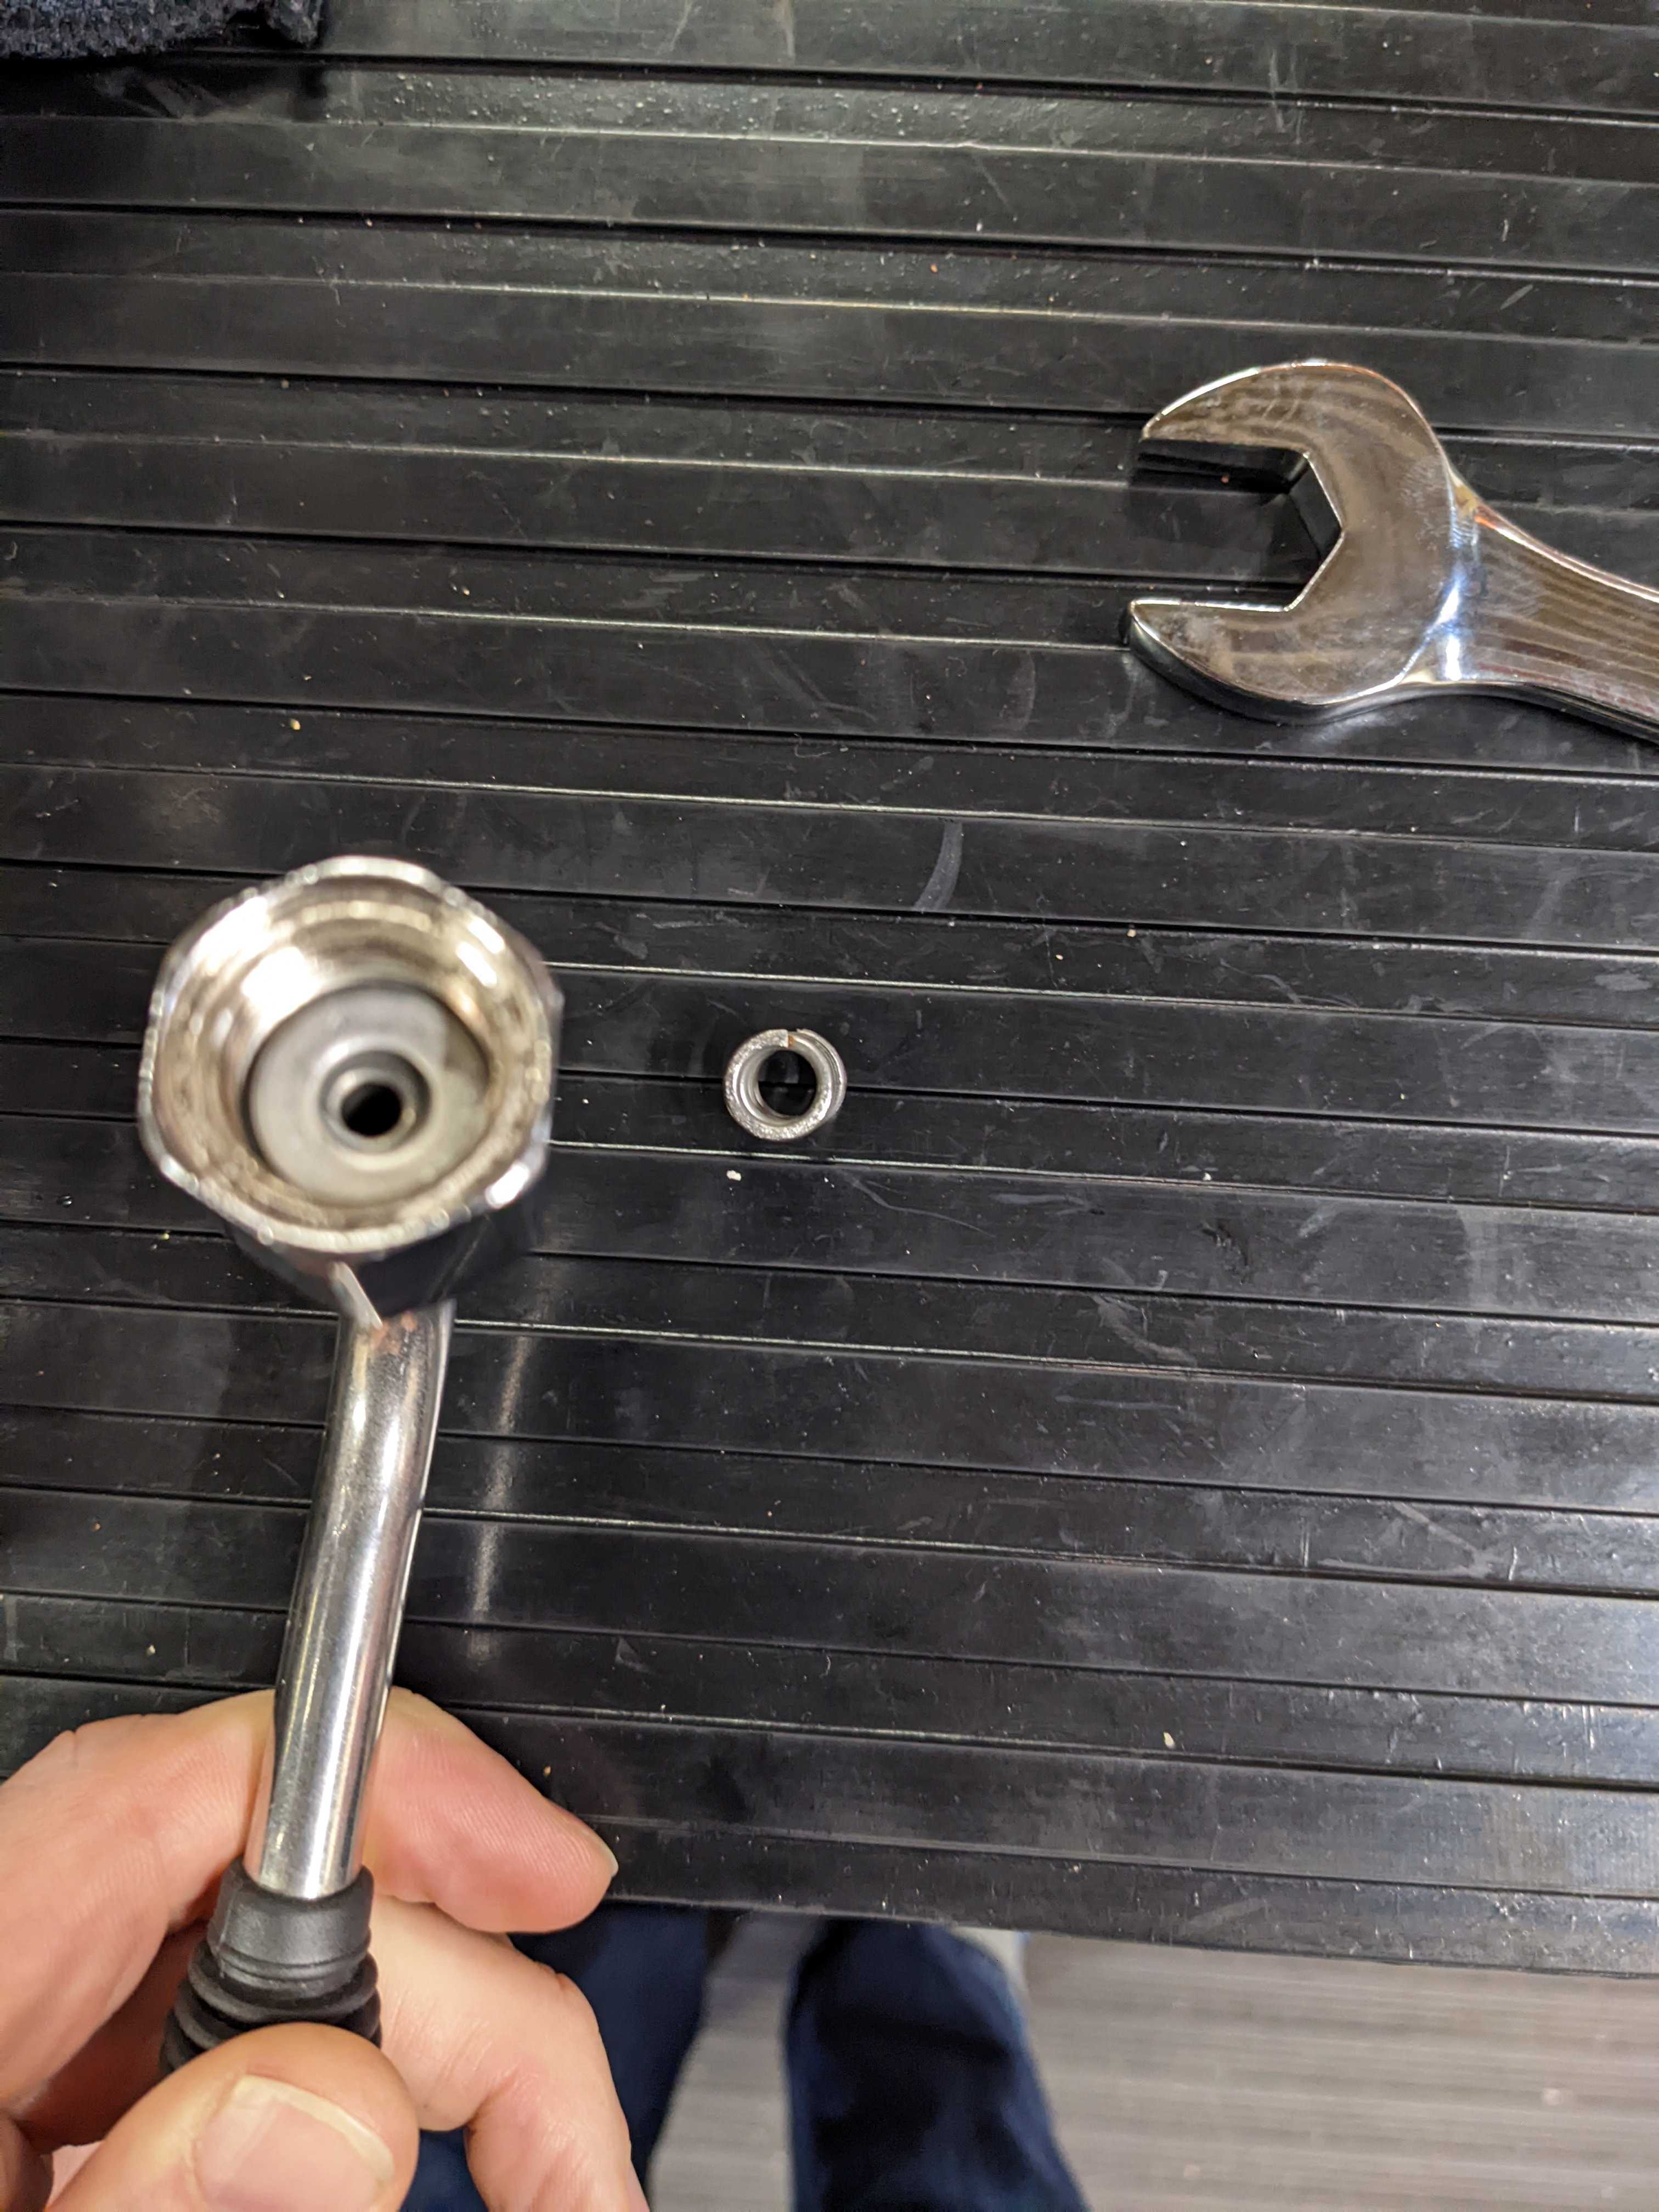
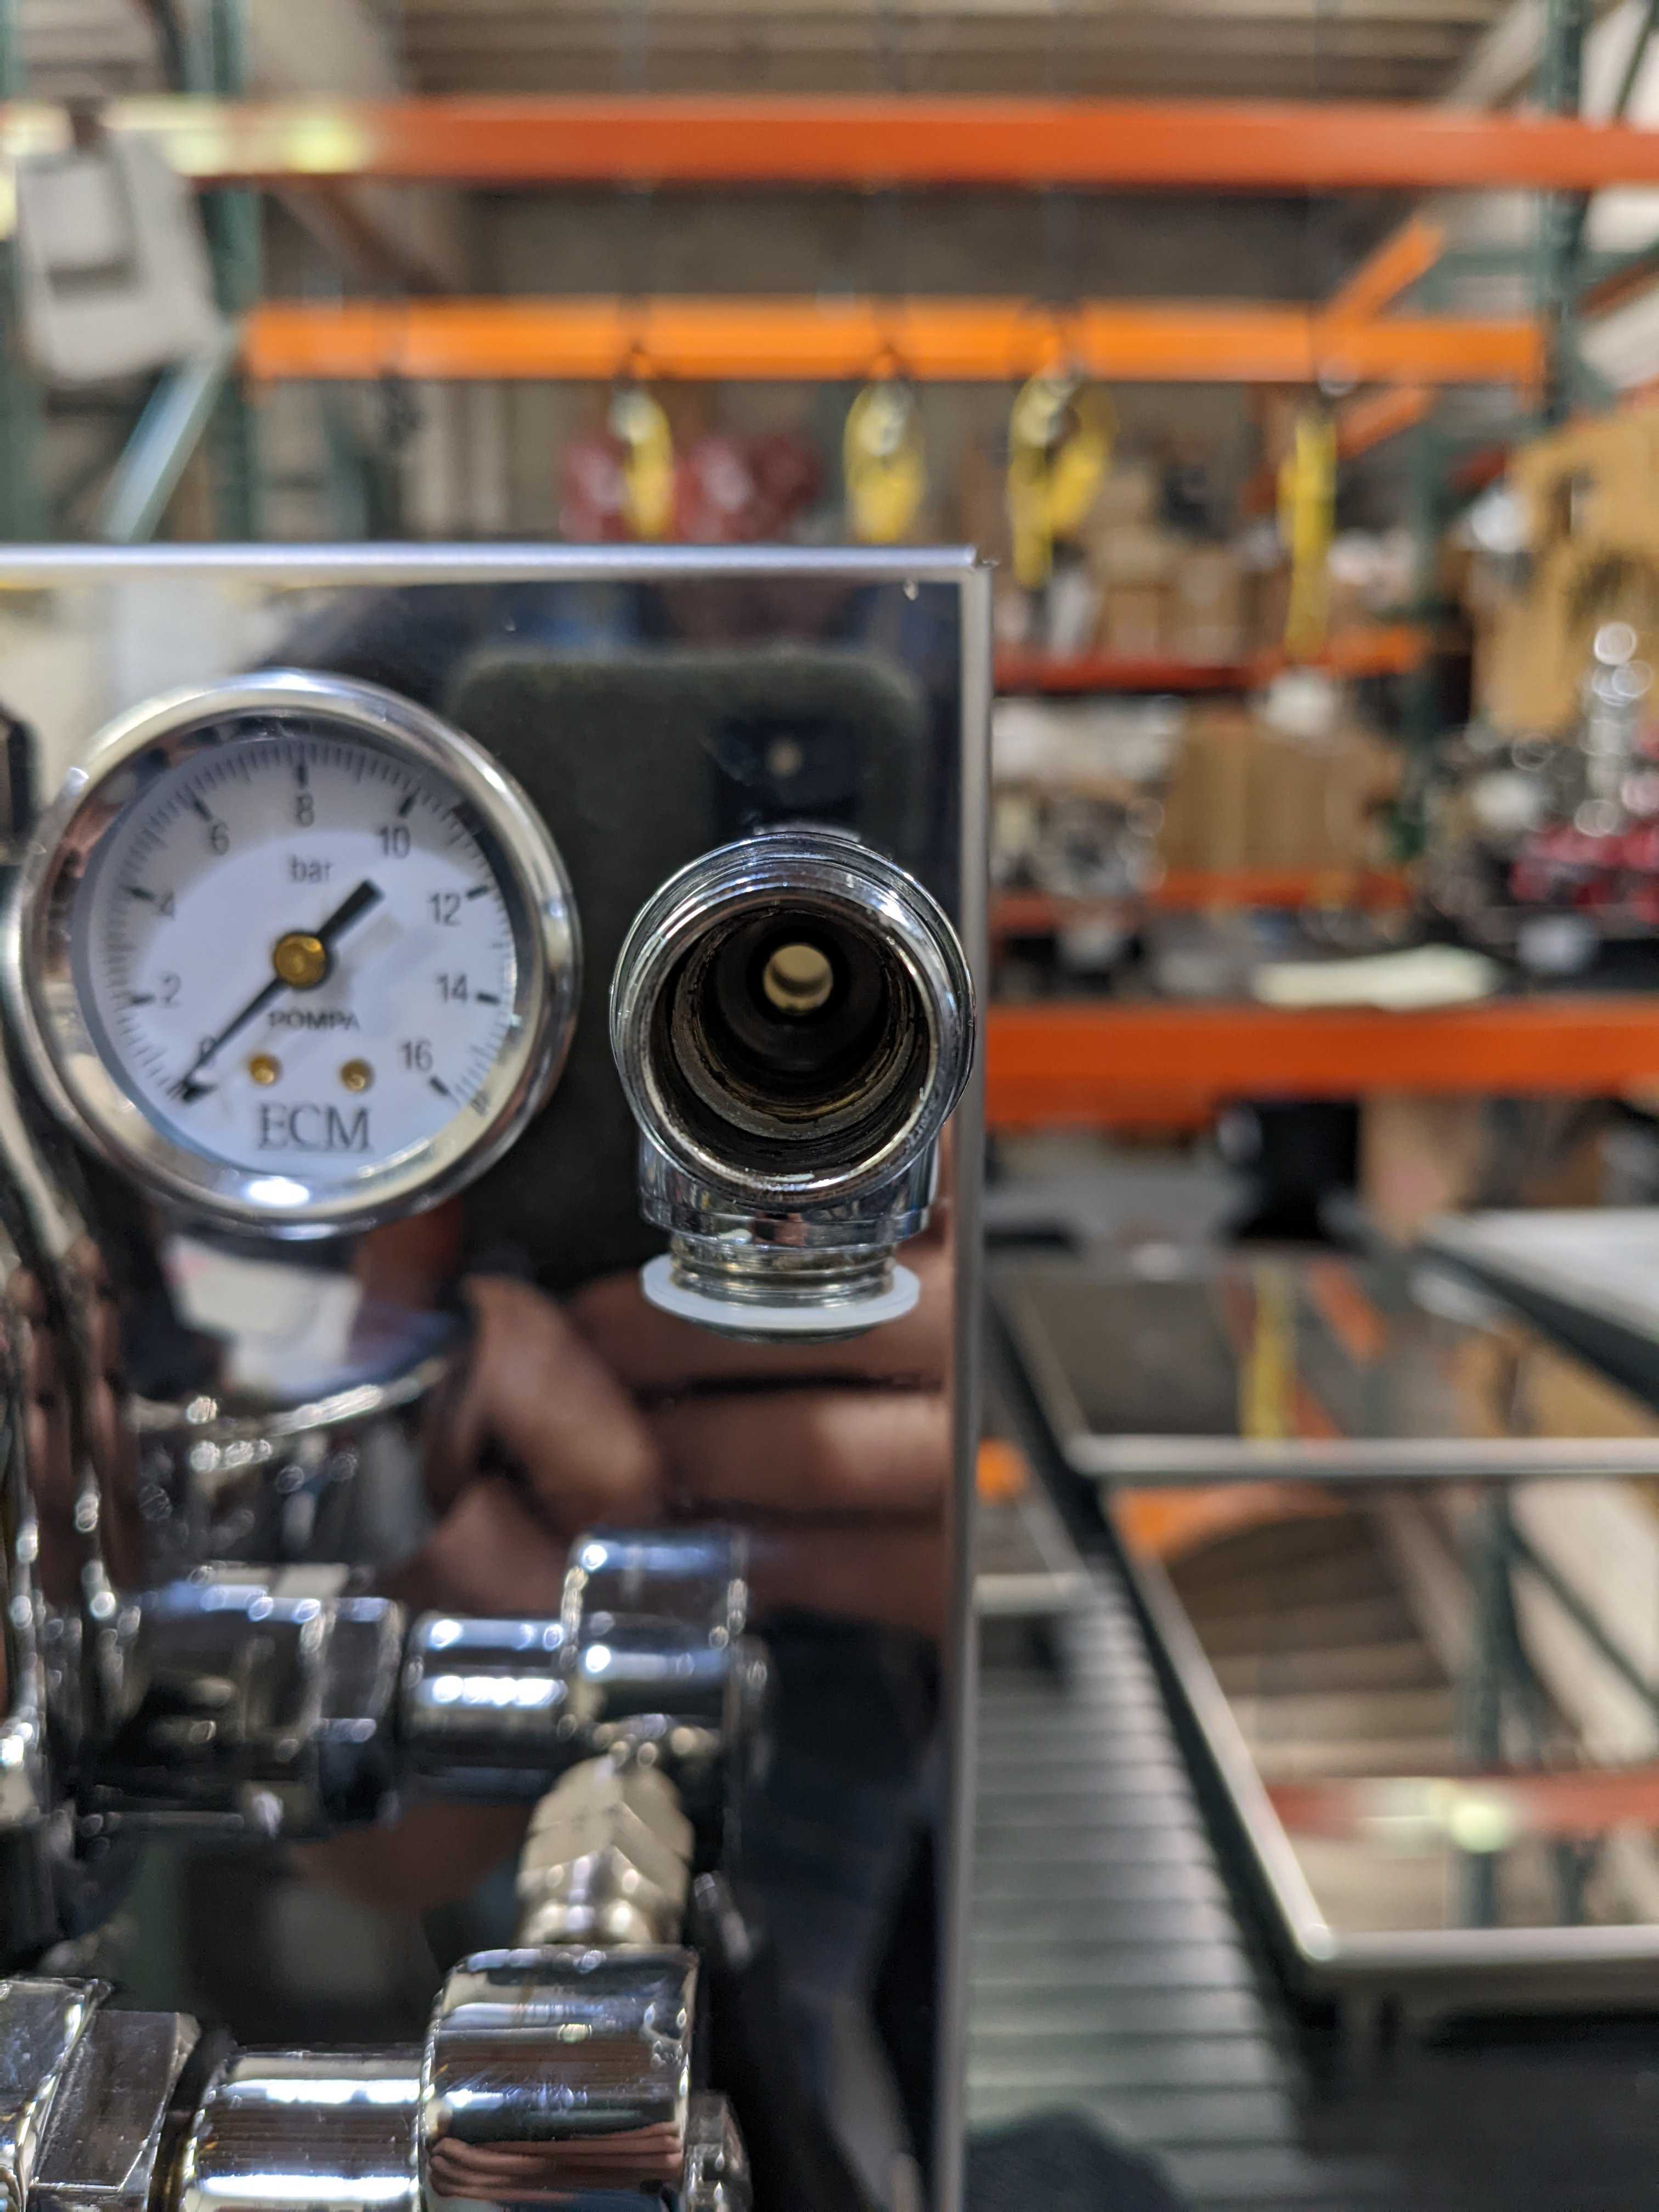
5. Remove and inspect the hot water delivery arm for any debris, clean if necessary, being mindful to not lose the spring.
6. Open the hot water valve completely.
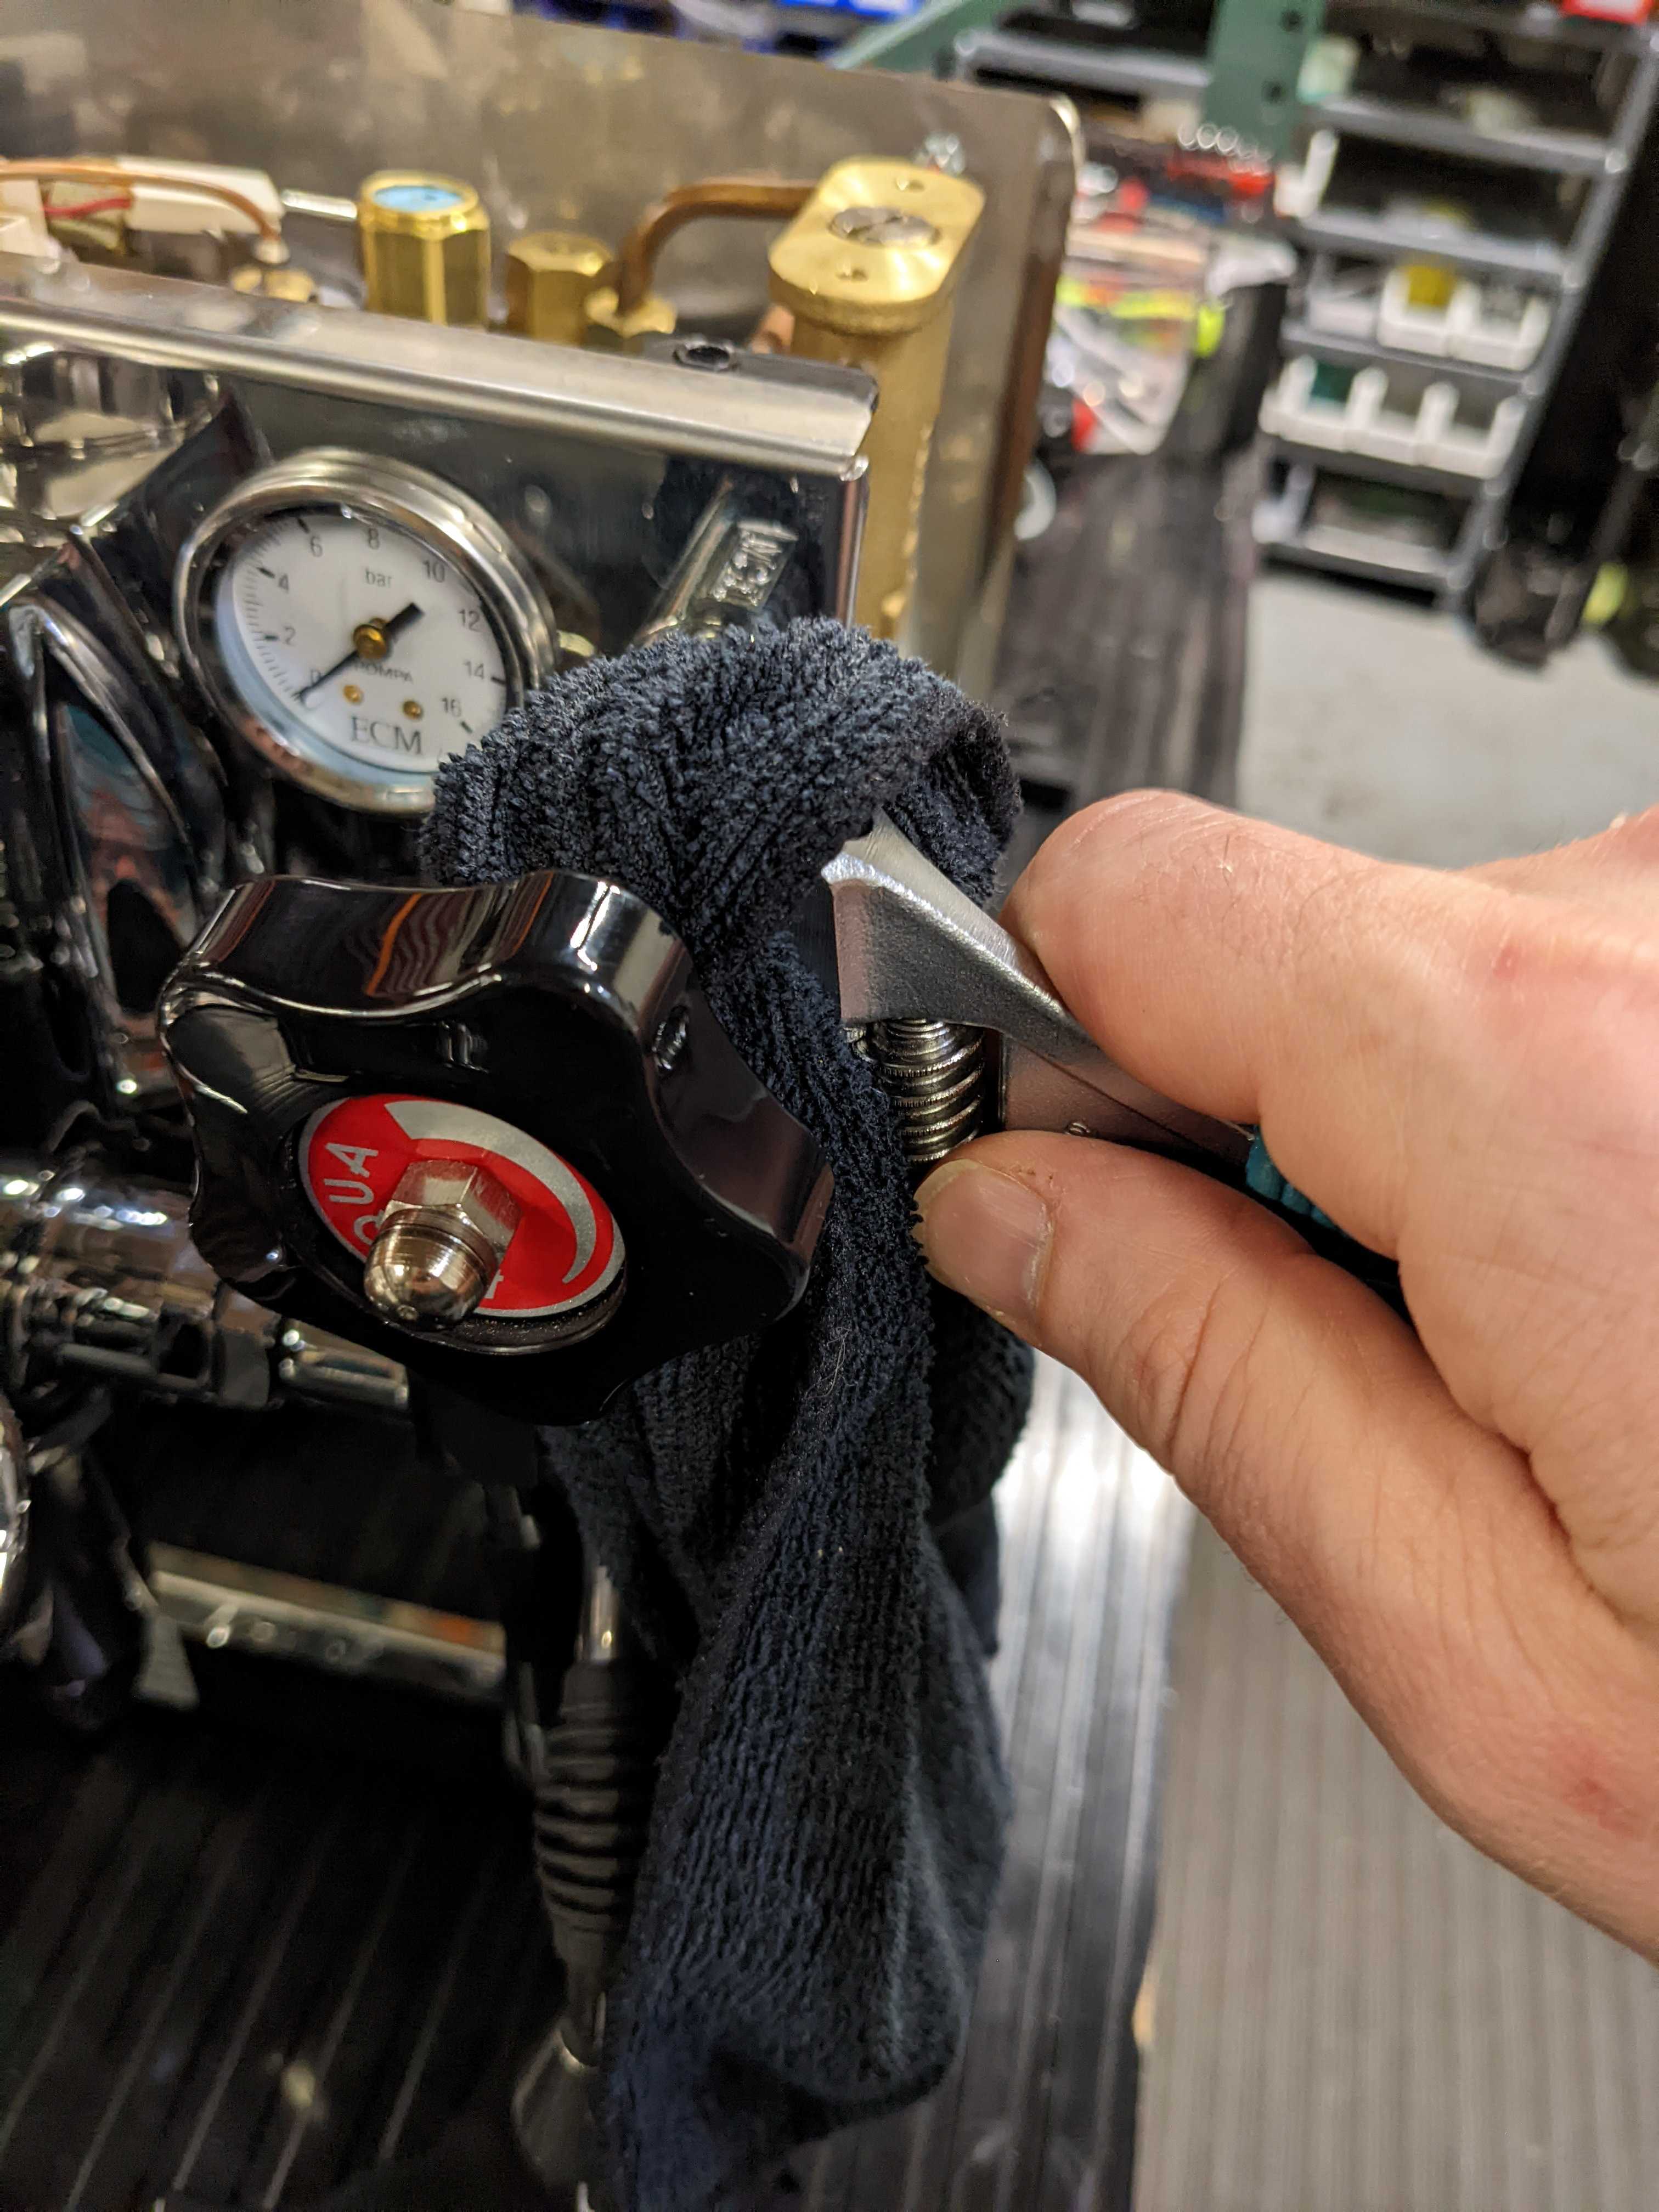
7. Using a 22mm Open-ended or adjustable wrench unscrew the valve assembly nut from the valve body. Use a towel to avoid marring the finish on the fitting.
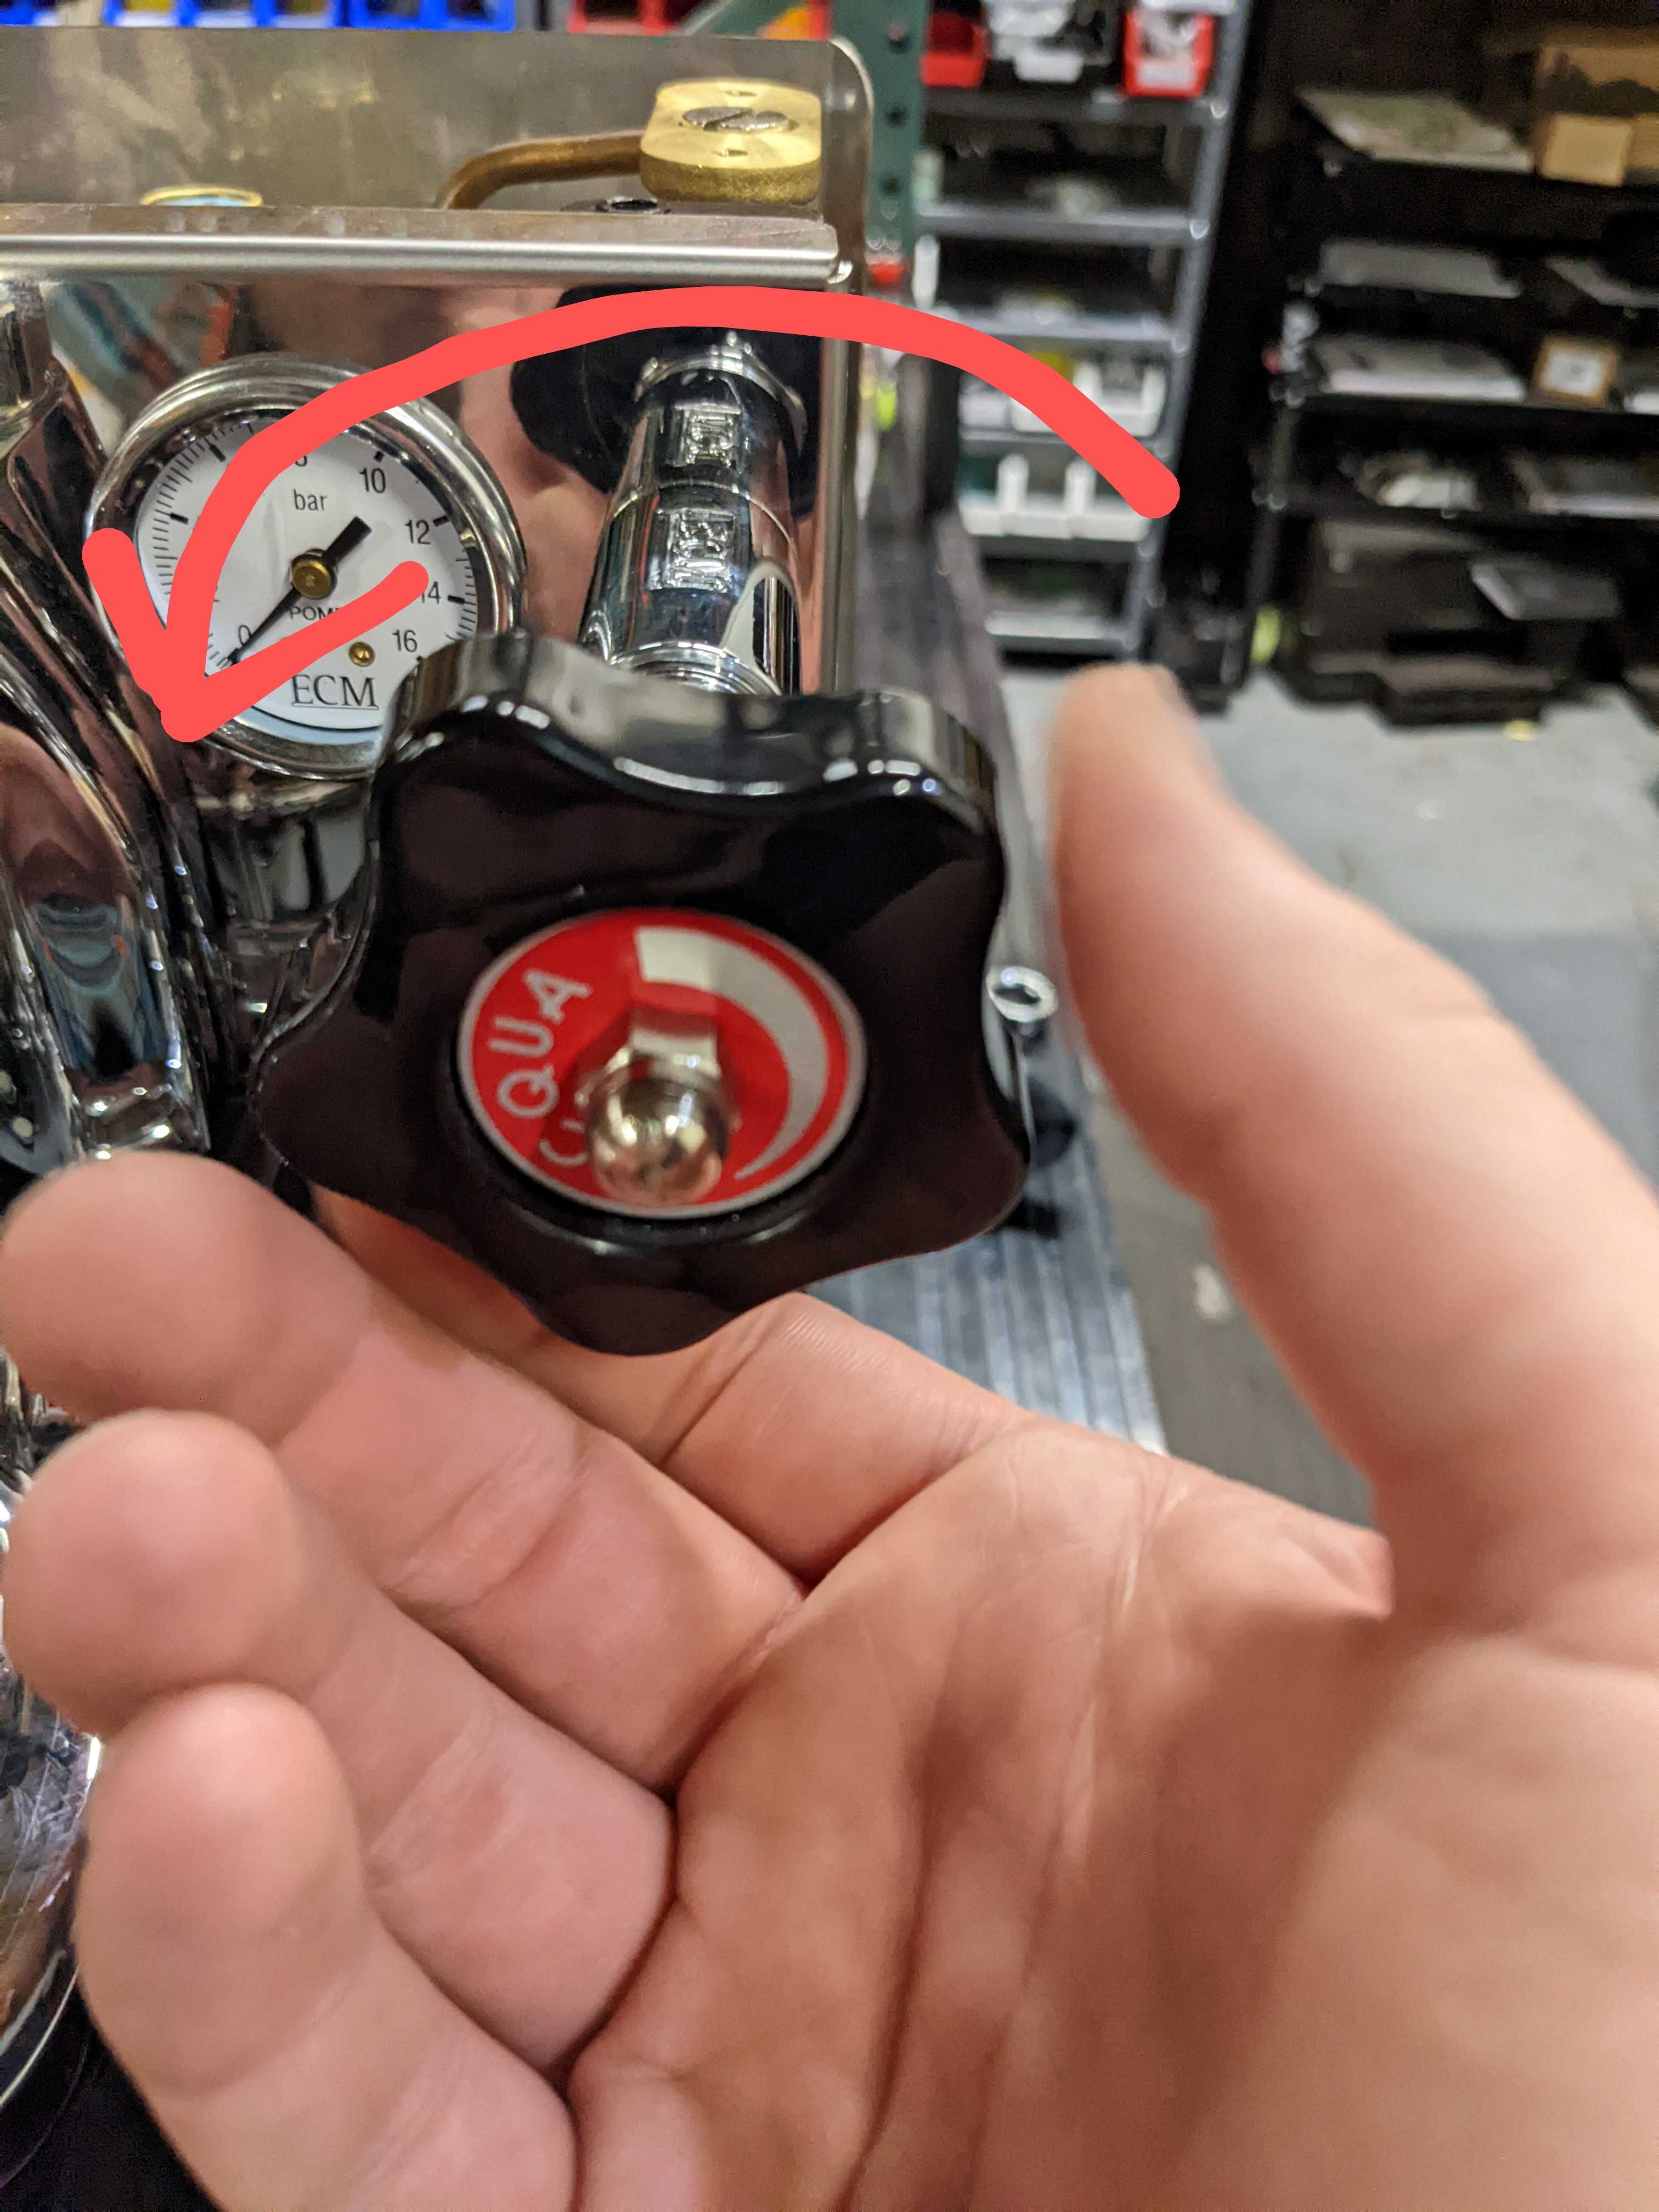
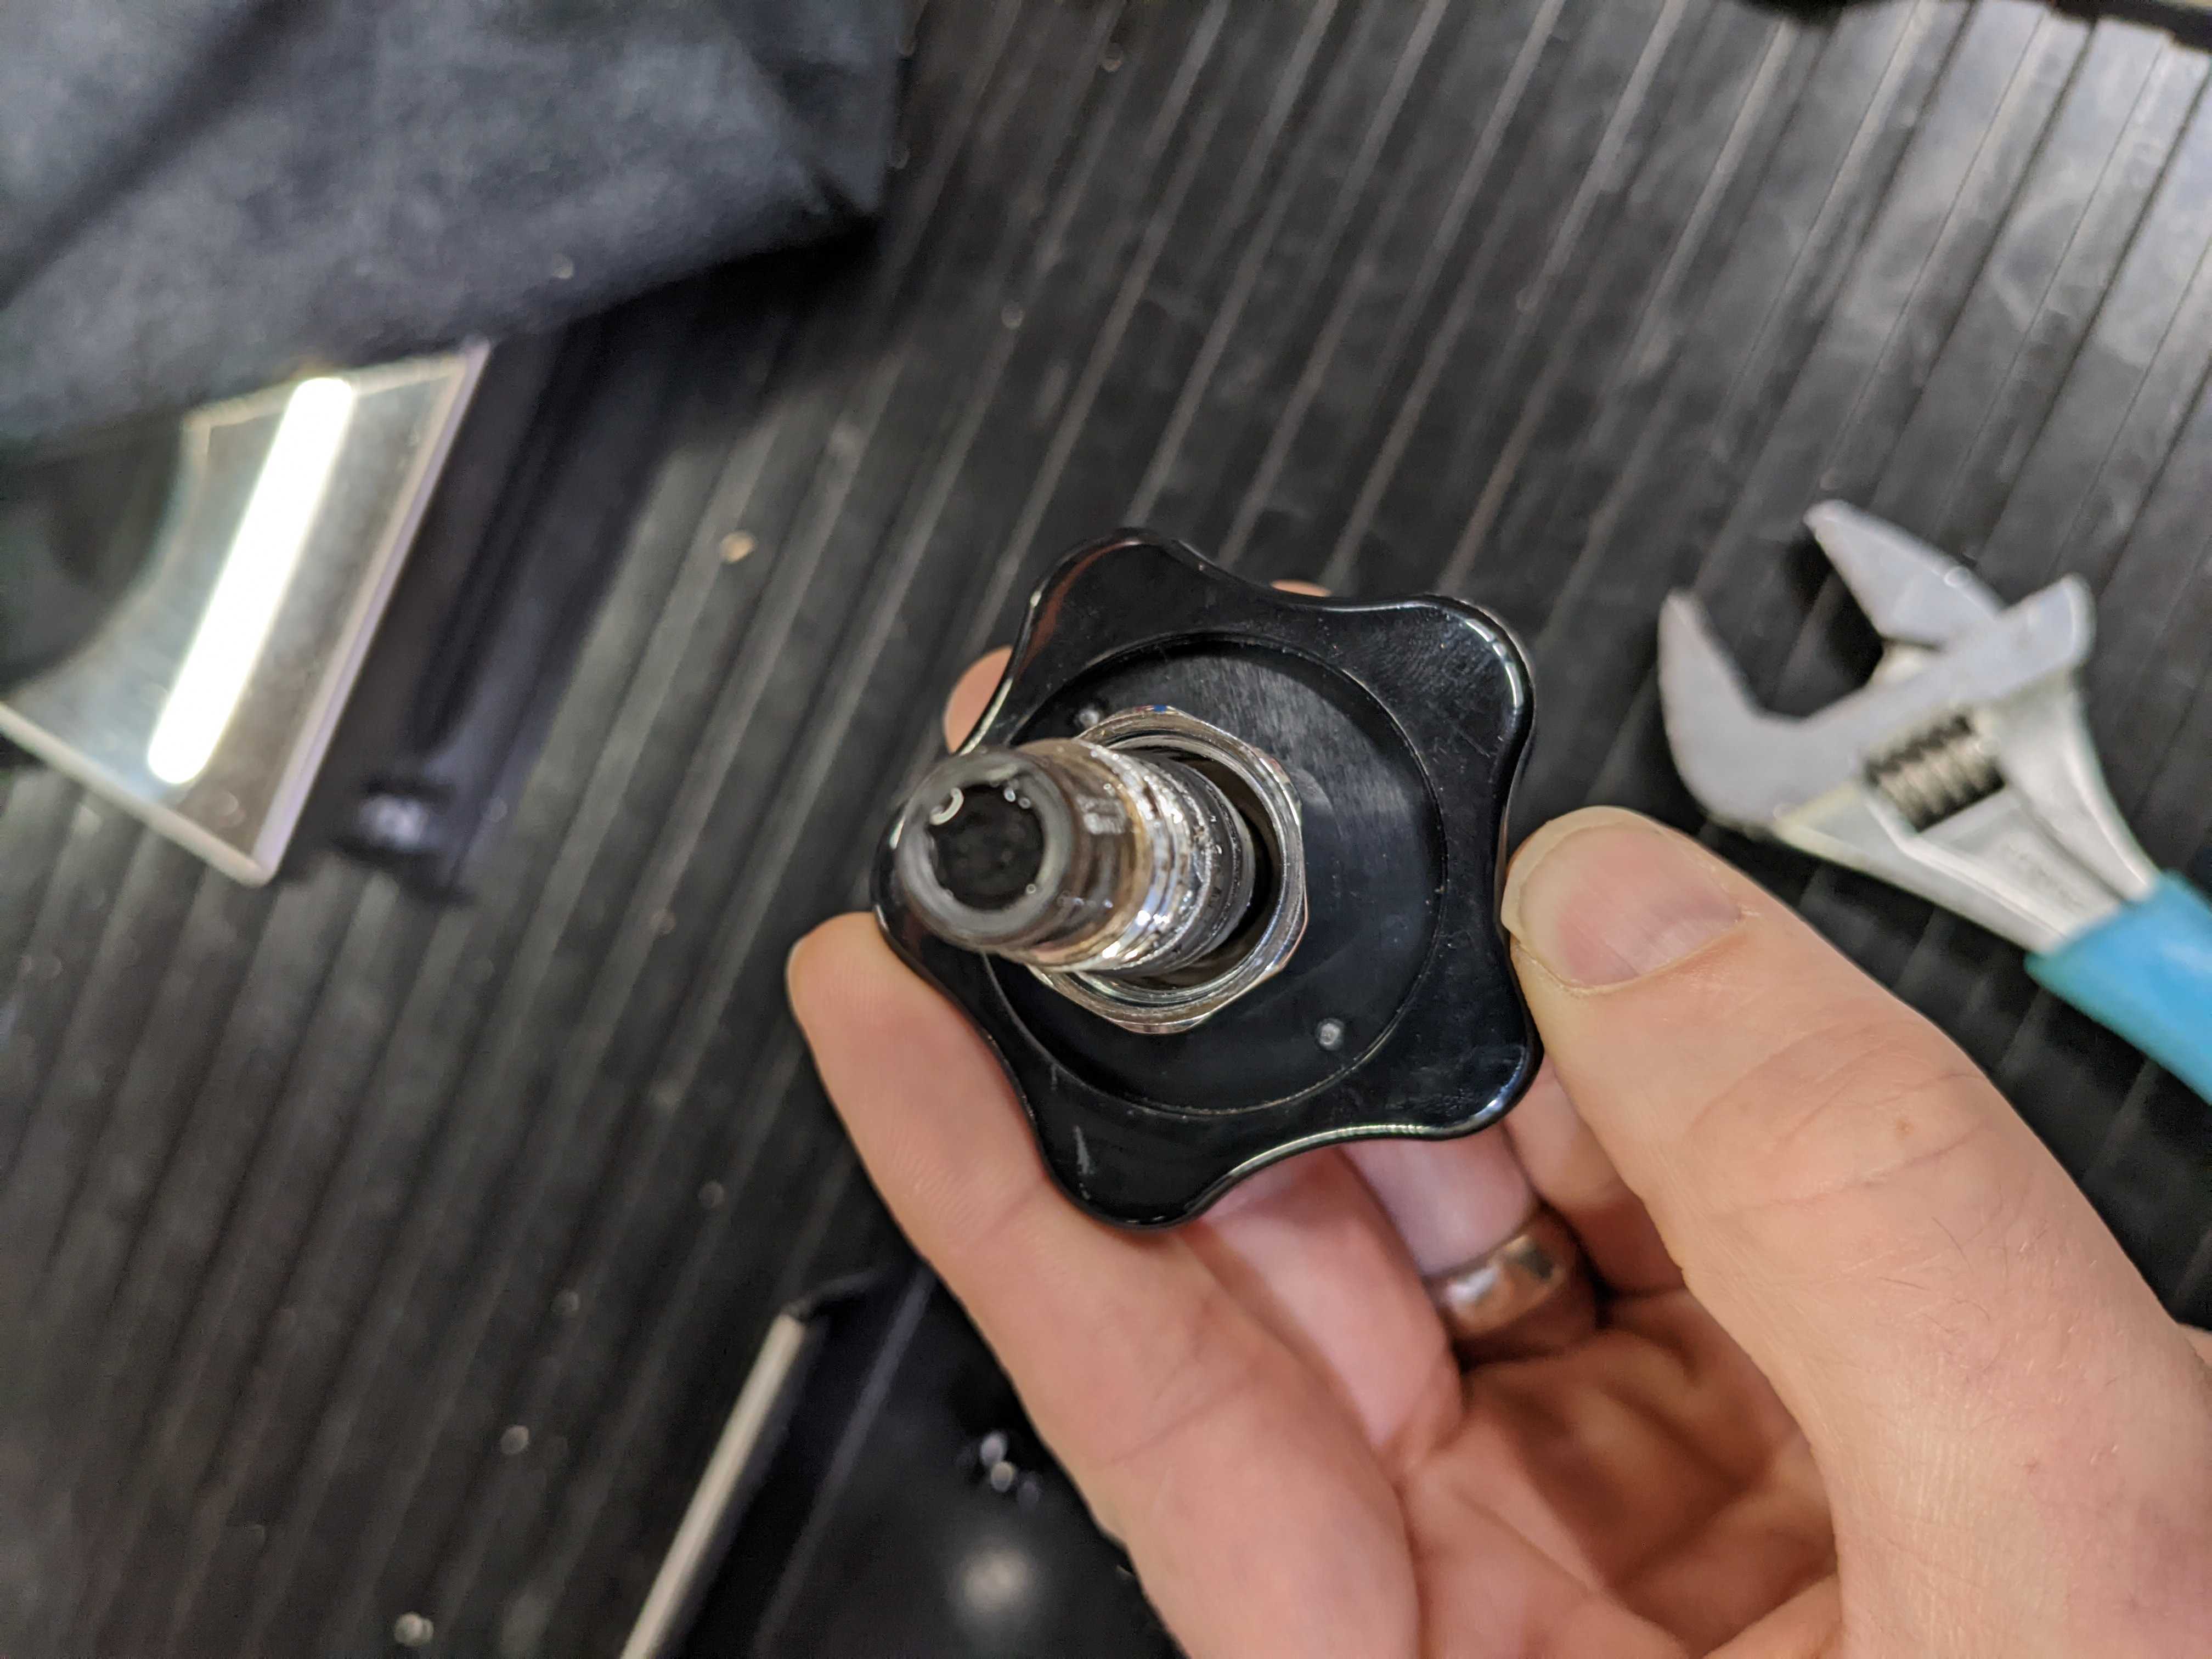
8. Unthread the valve assembly from the body by turning the hot water knob counterclockwise, and remove the assembly.
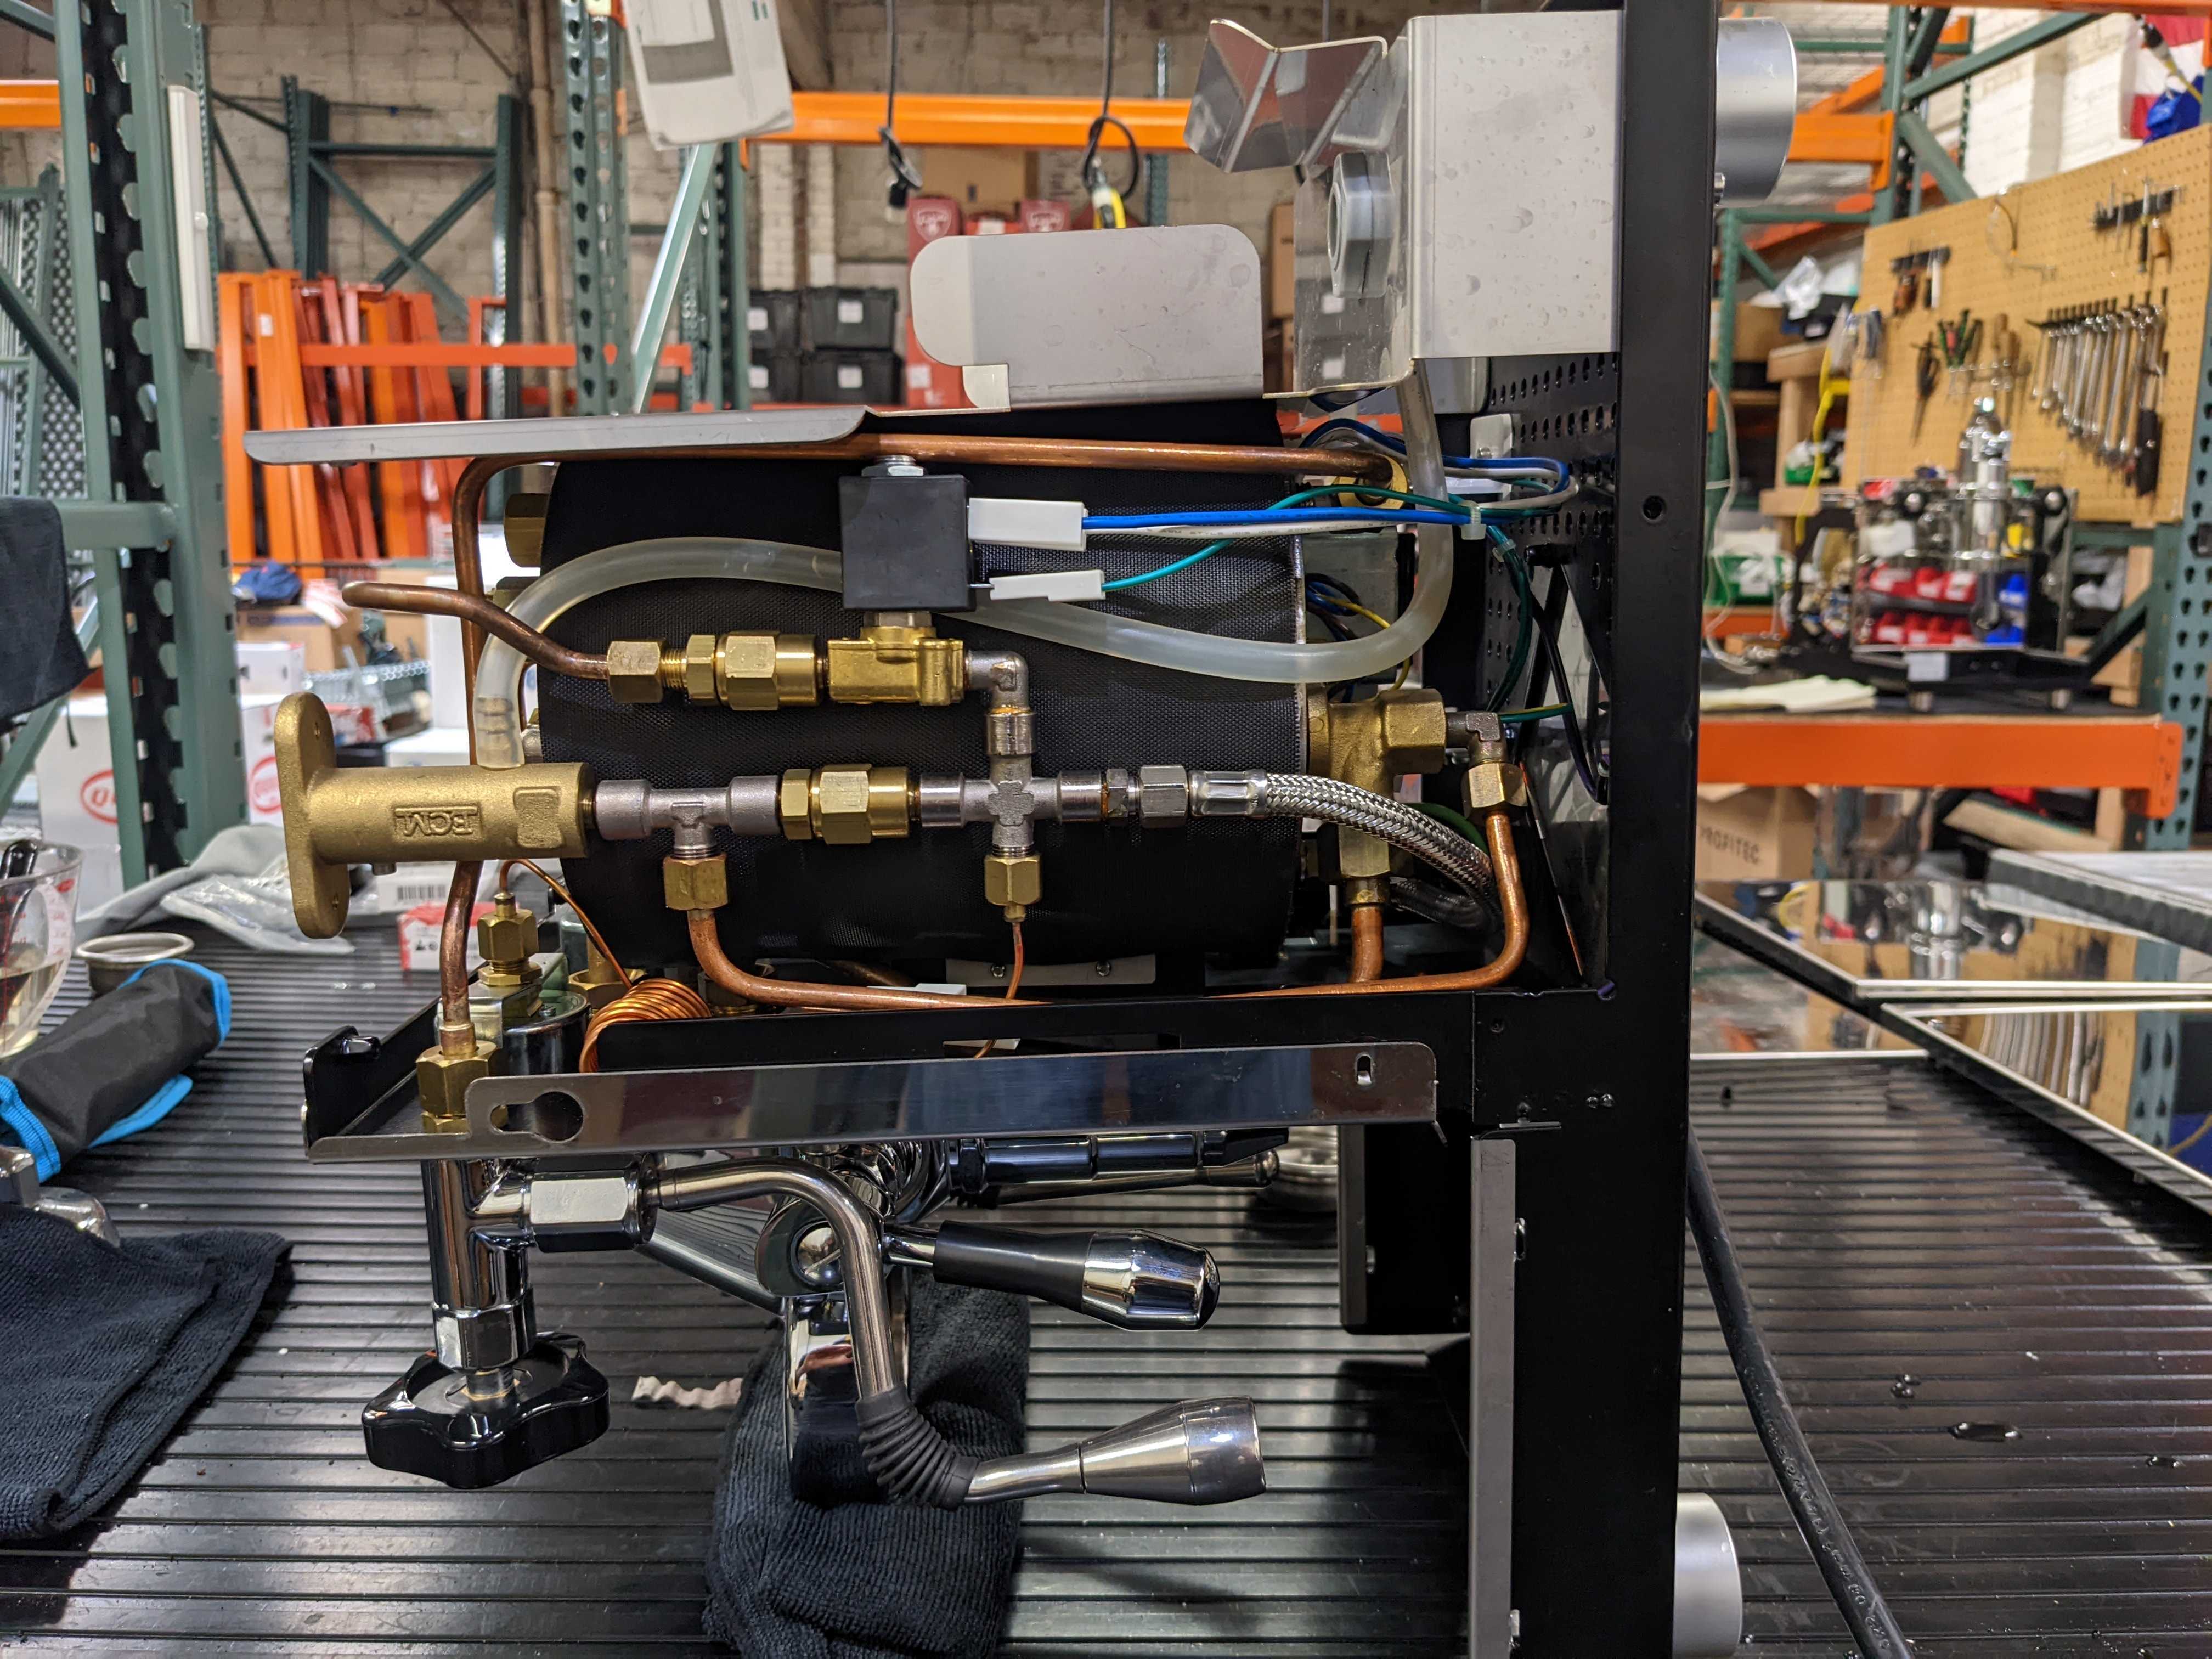
9. With the valve assembly out of the machine, inspect the plumbing seat for debris and clean or replace as necessary. Don't forget to clean inside the arm where the valve closes off the steam/water flow.
10. Reassemble the hot water arm and valve components in the reverse order of disassembly.
11. Repeat this process on the steam side of the Mechanika.
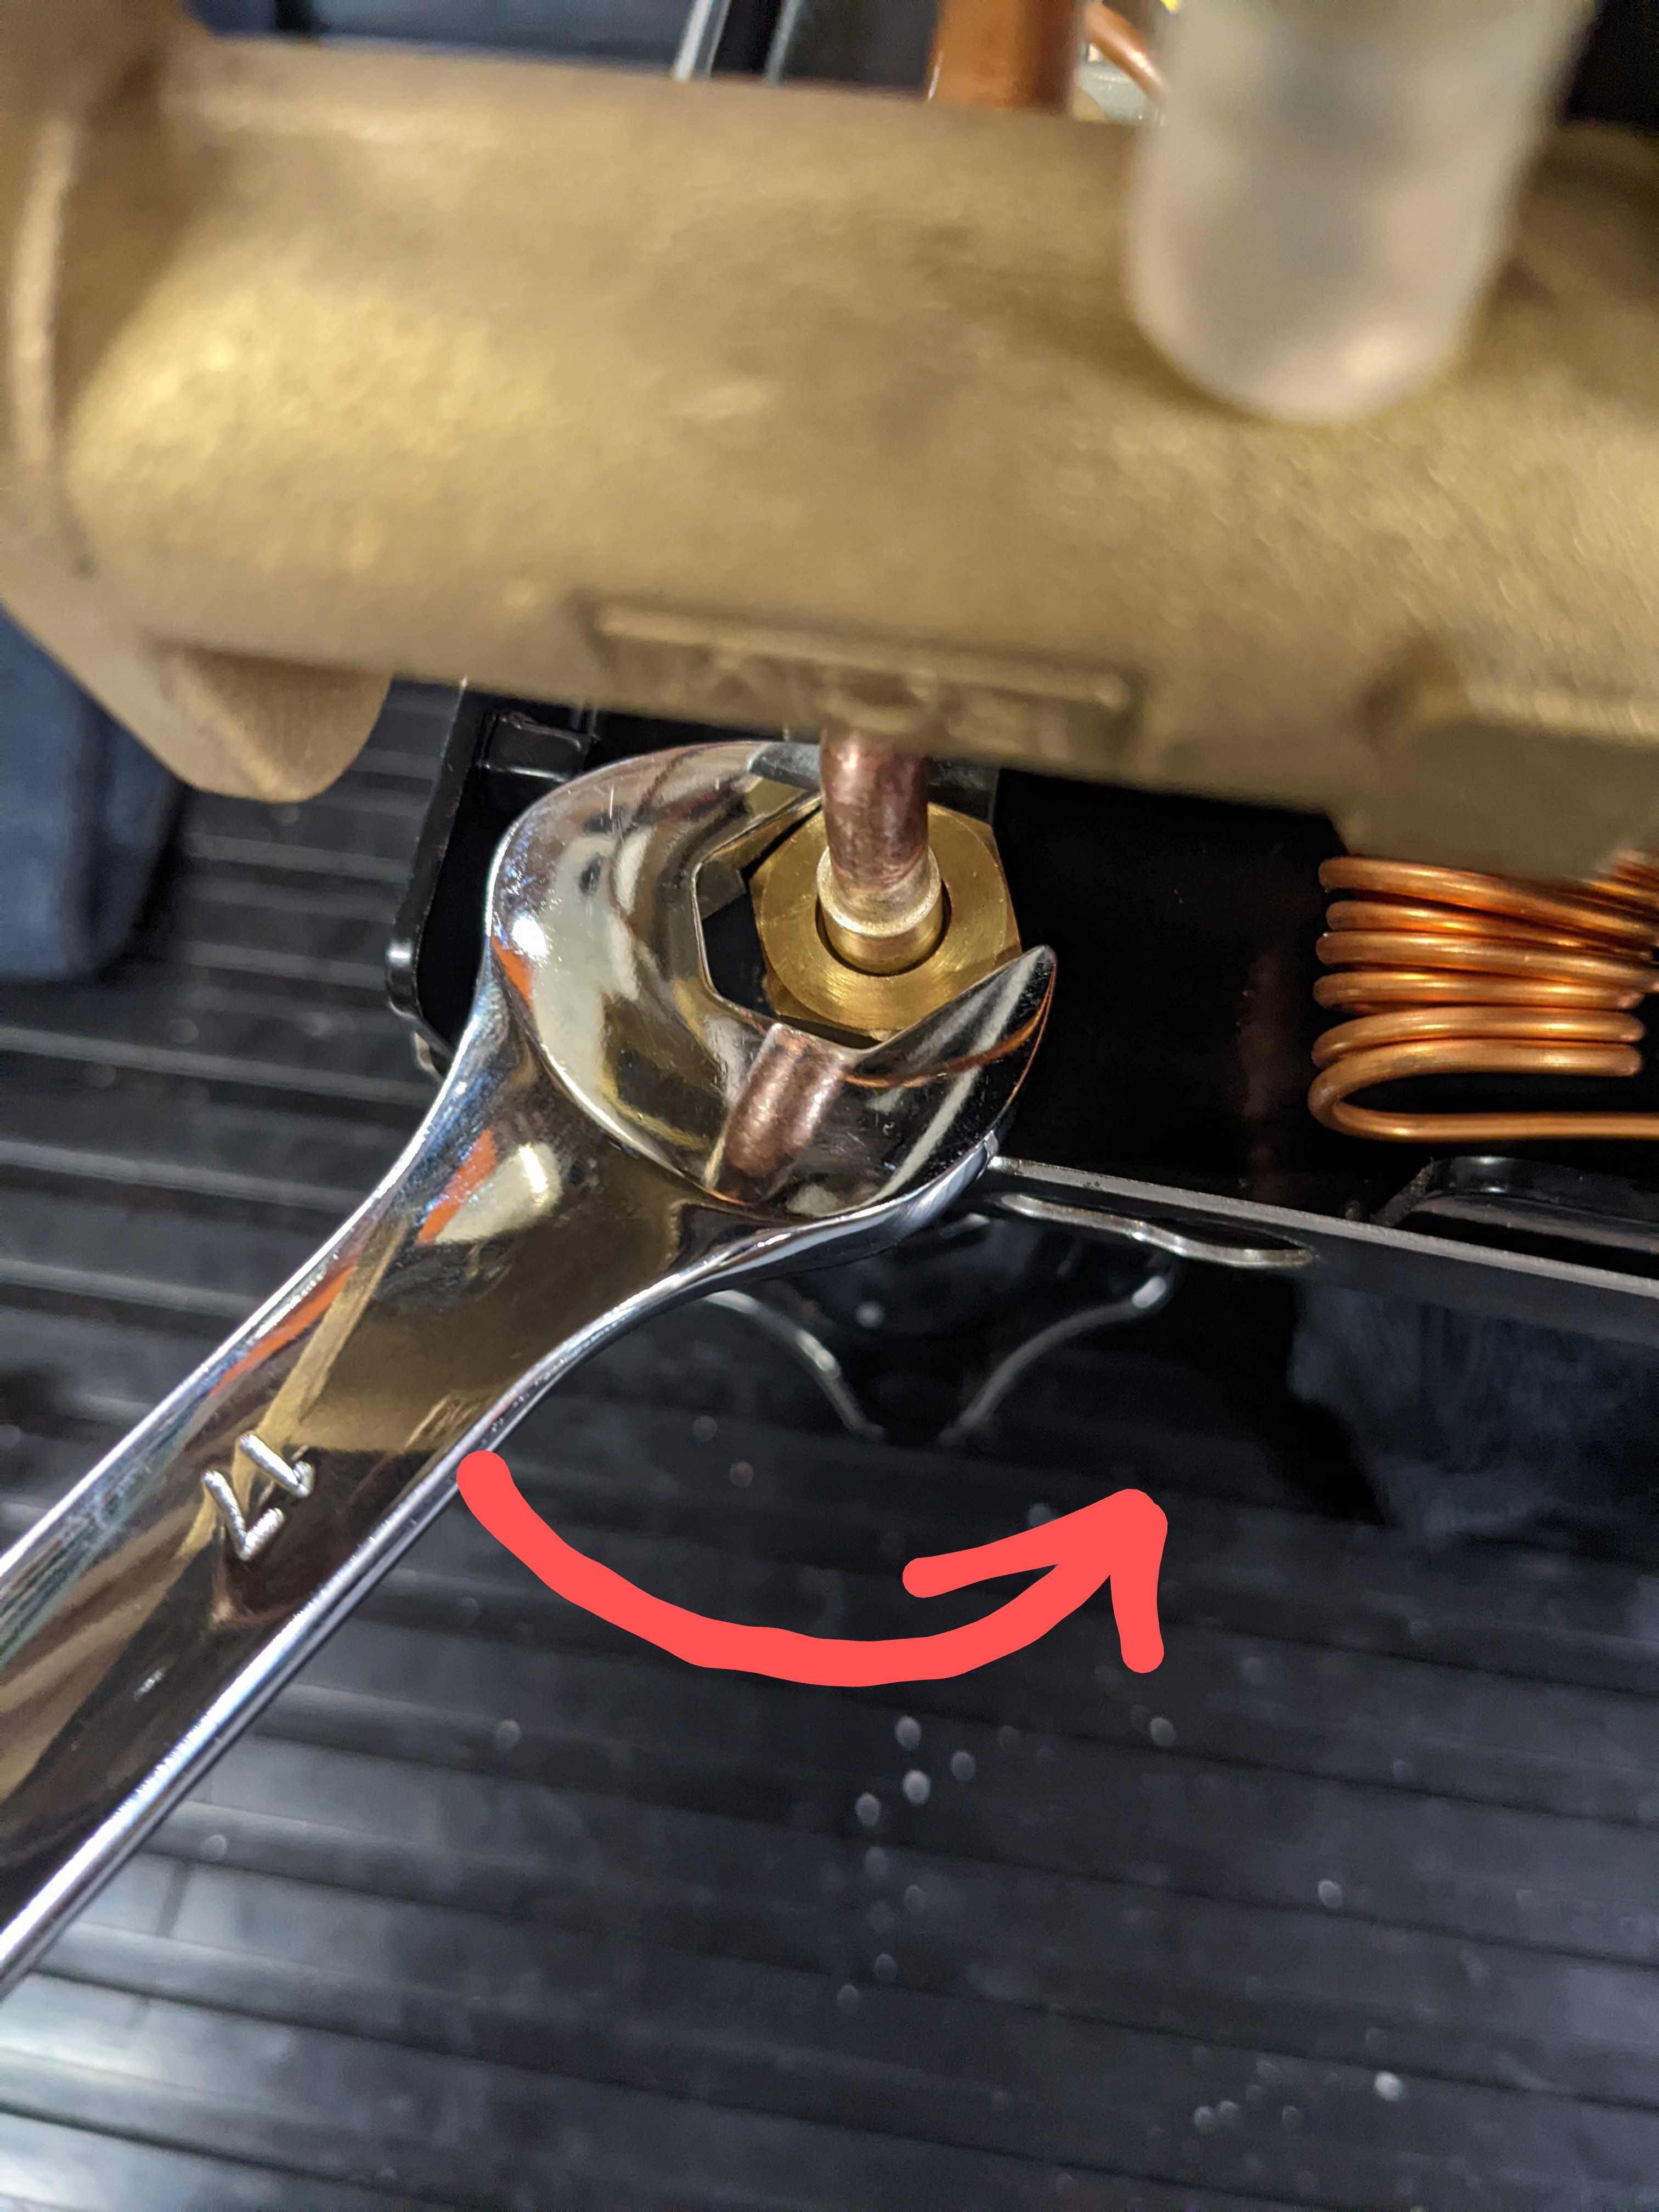
12. Using a 17mm or adjustable wrench, loosen the compression fittings, and remove the steam delivery tube from the steam valve assembly and the boiler.
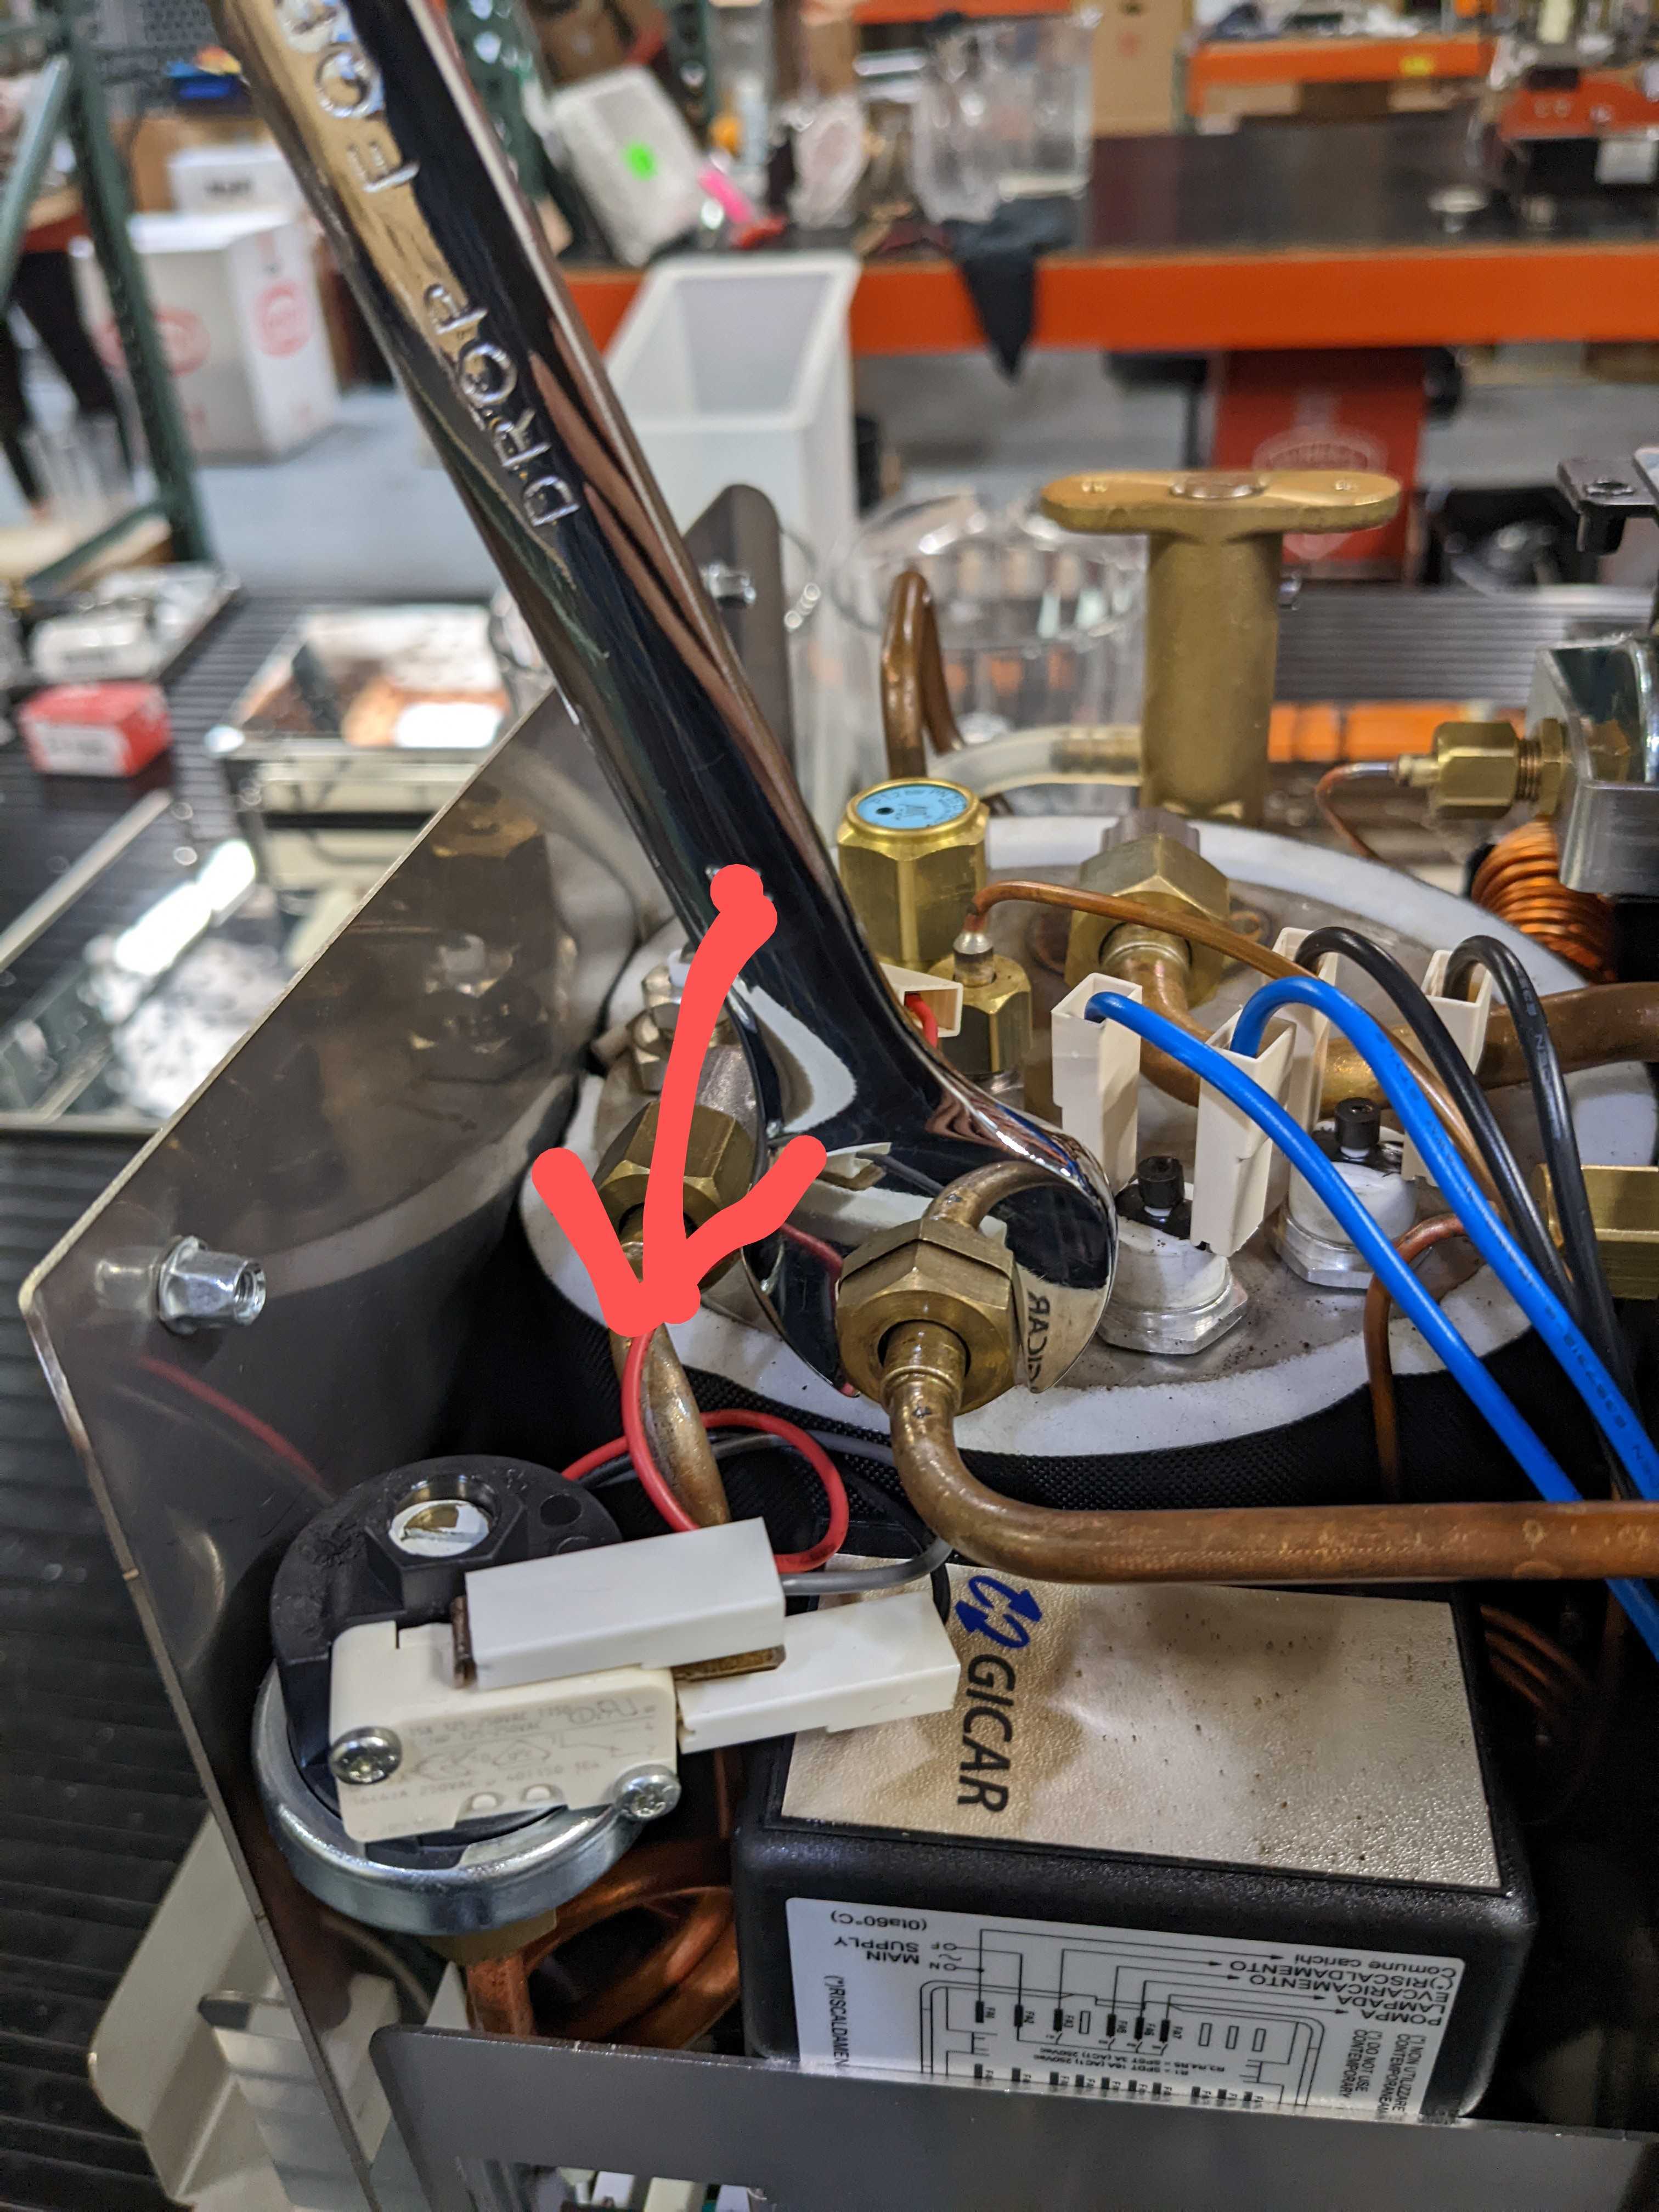
13. Inspect the ends of the delivery tube for any debris or obstruction. Use a pipe cleaning brush or compressed air to clear the tube of any obstruction.
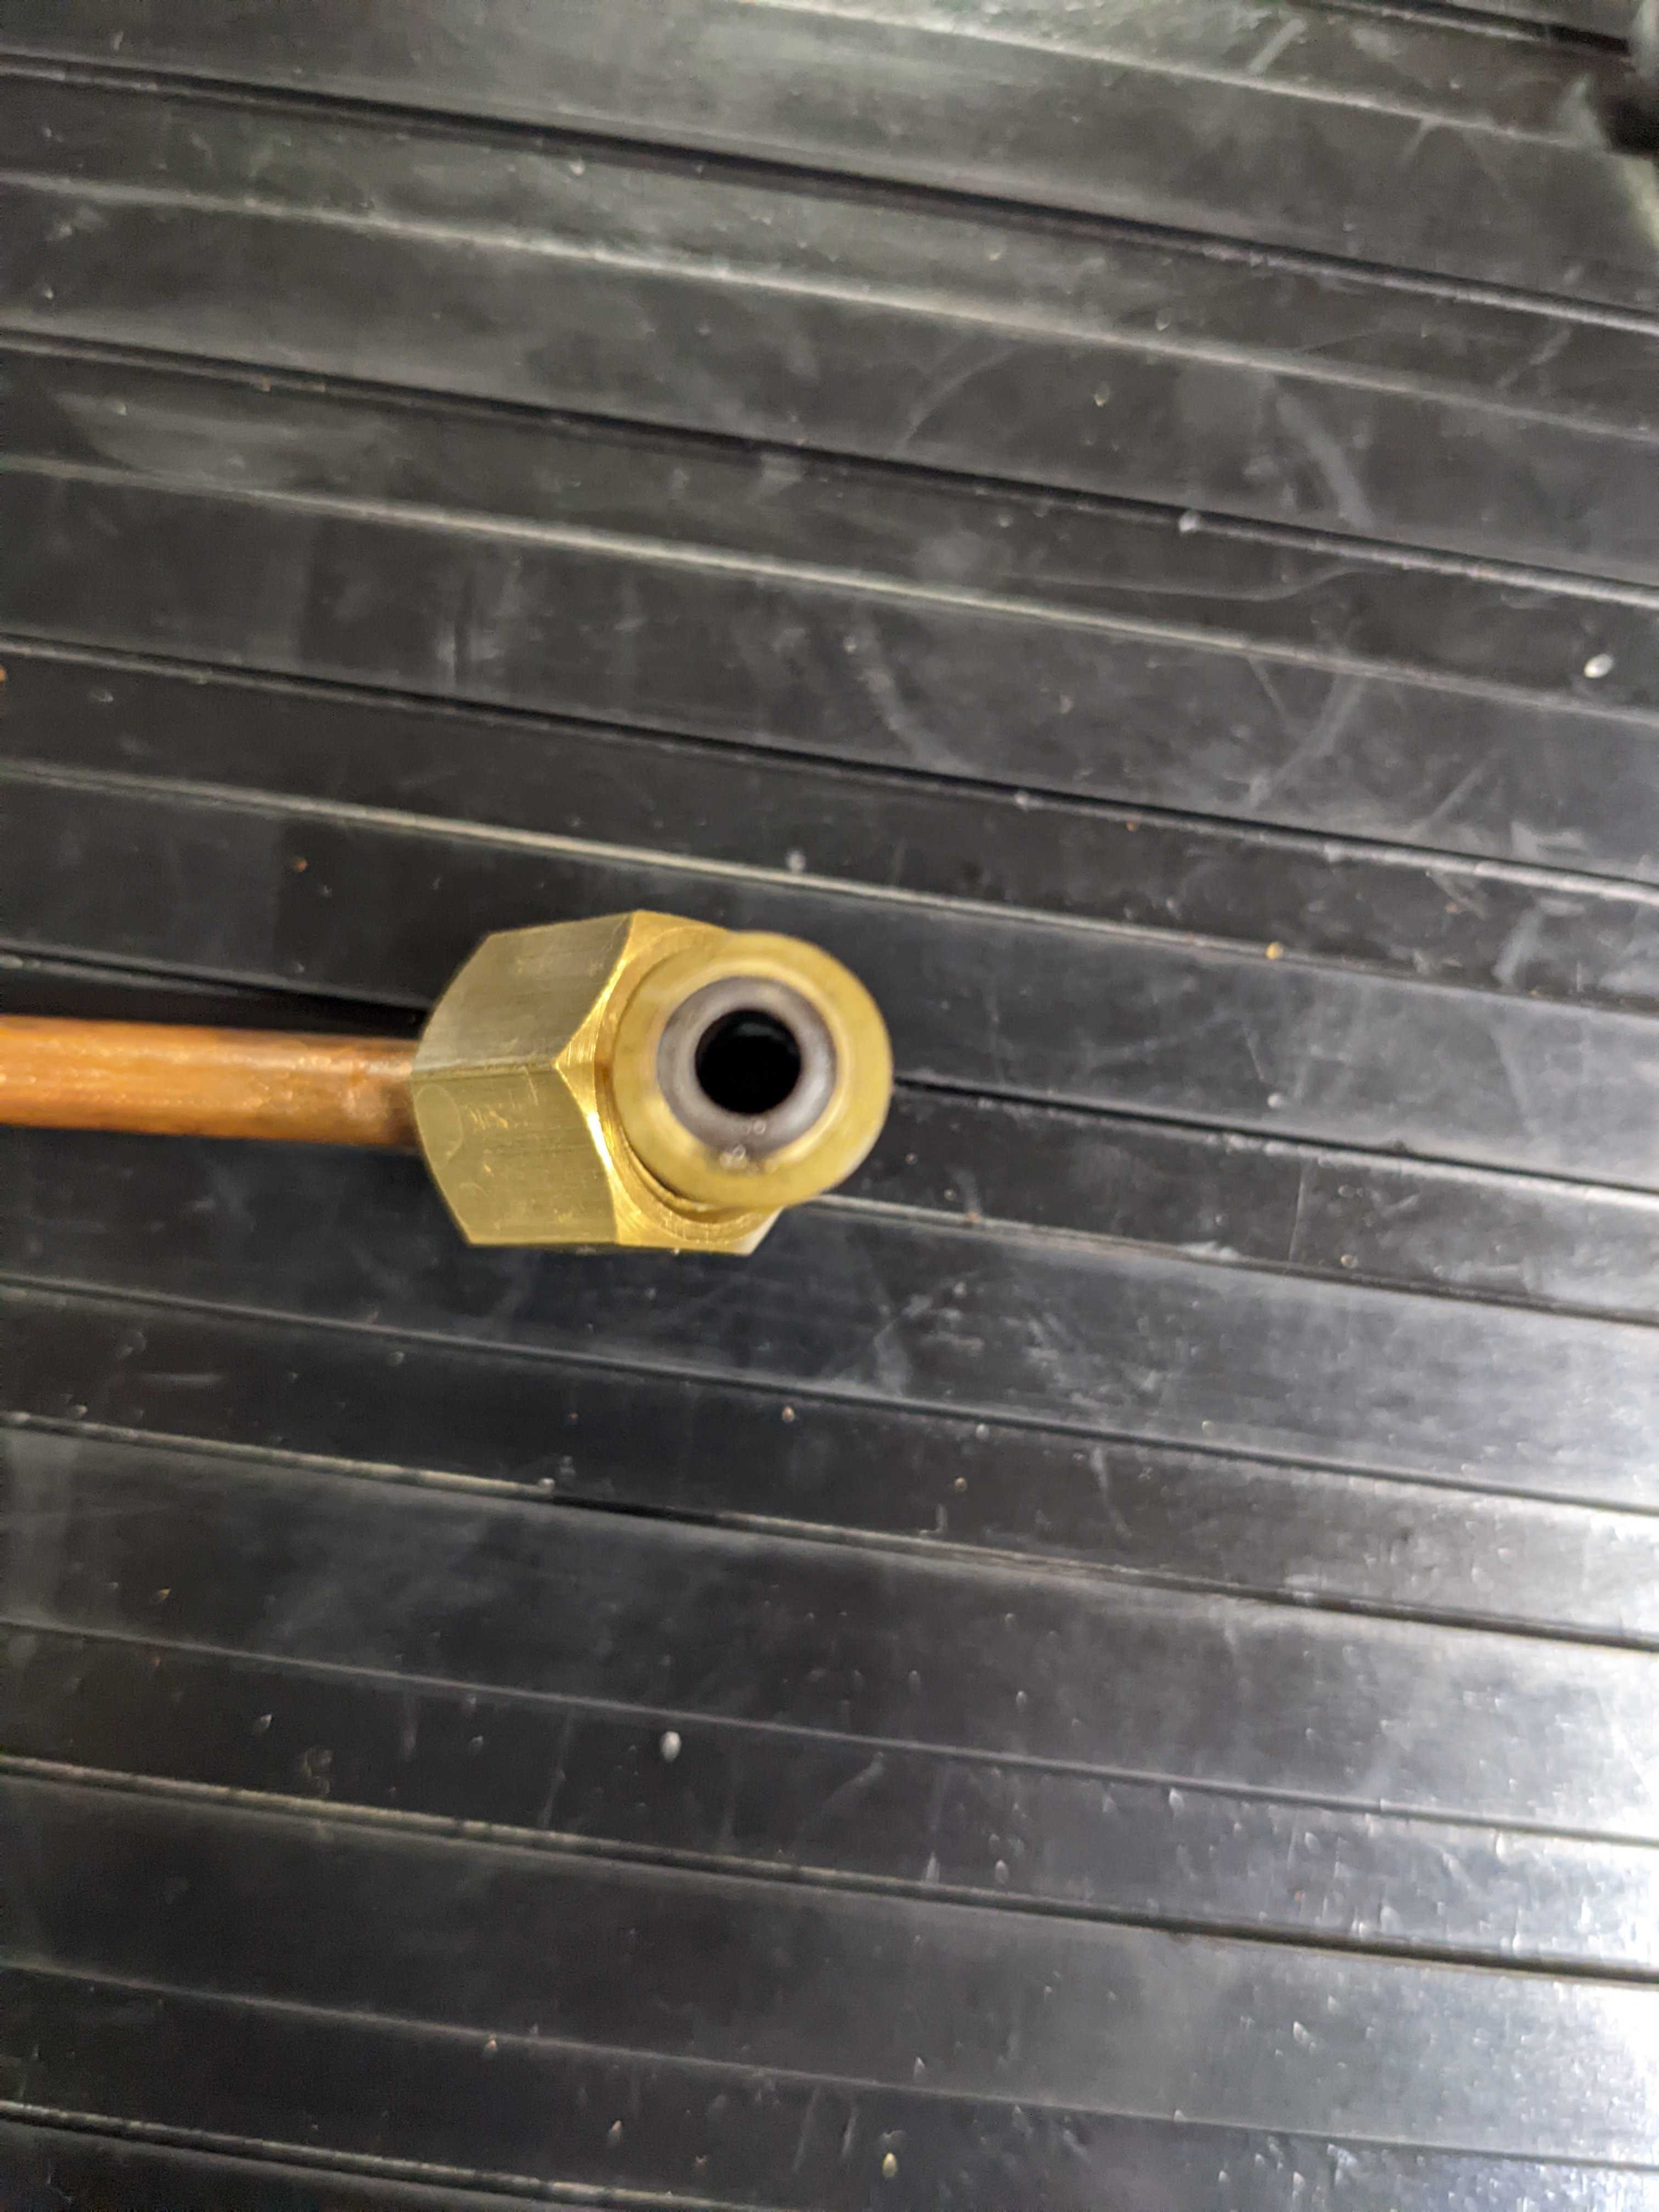
14. Be sure to check that the passages at the steam valve and boiler outlet are clear of any debris or obstruction. Use a pipe cleaning brush if needed to clear any debris.
15. Reassemble steam delivery tube. Make sure the compression fittings are securely seated and be careful not to over-tighten.
16. Tilt the machine forward, resting it on its front feet and the group head. Place a folded towel under the group head to prevent cosmetic damage. Note: it may be helpful to lay a large towel down to catch any spills.
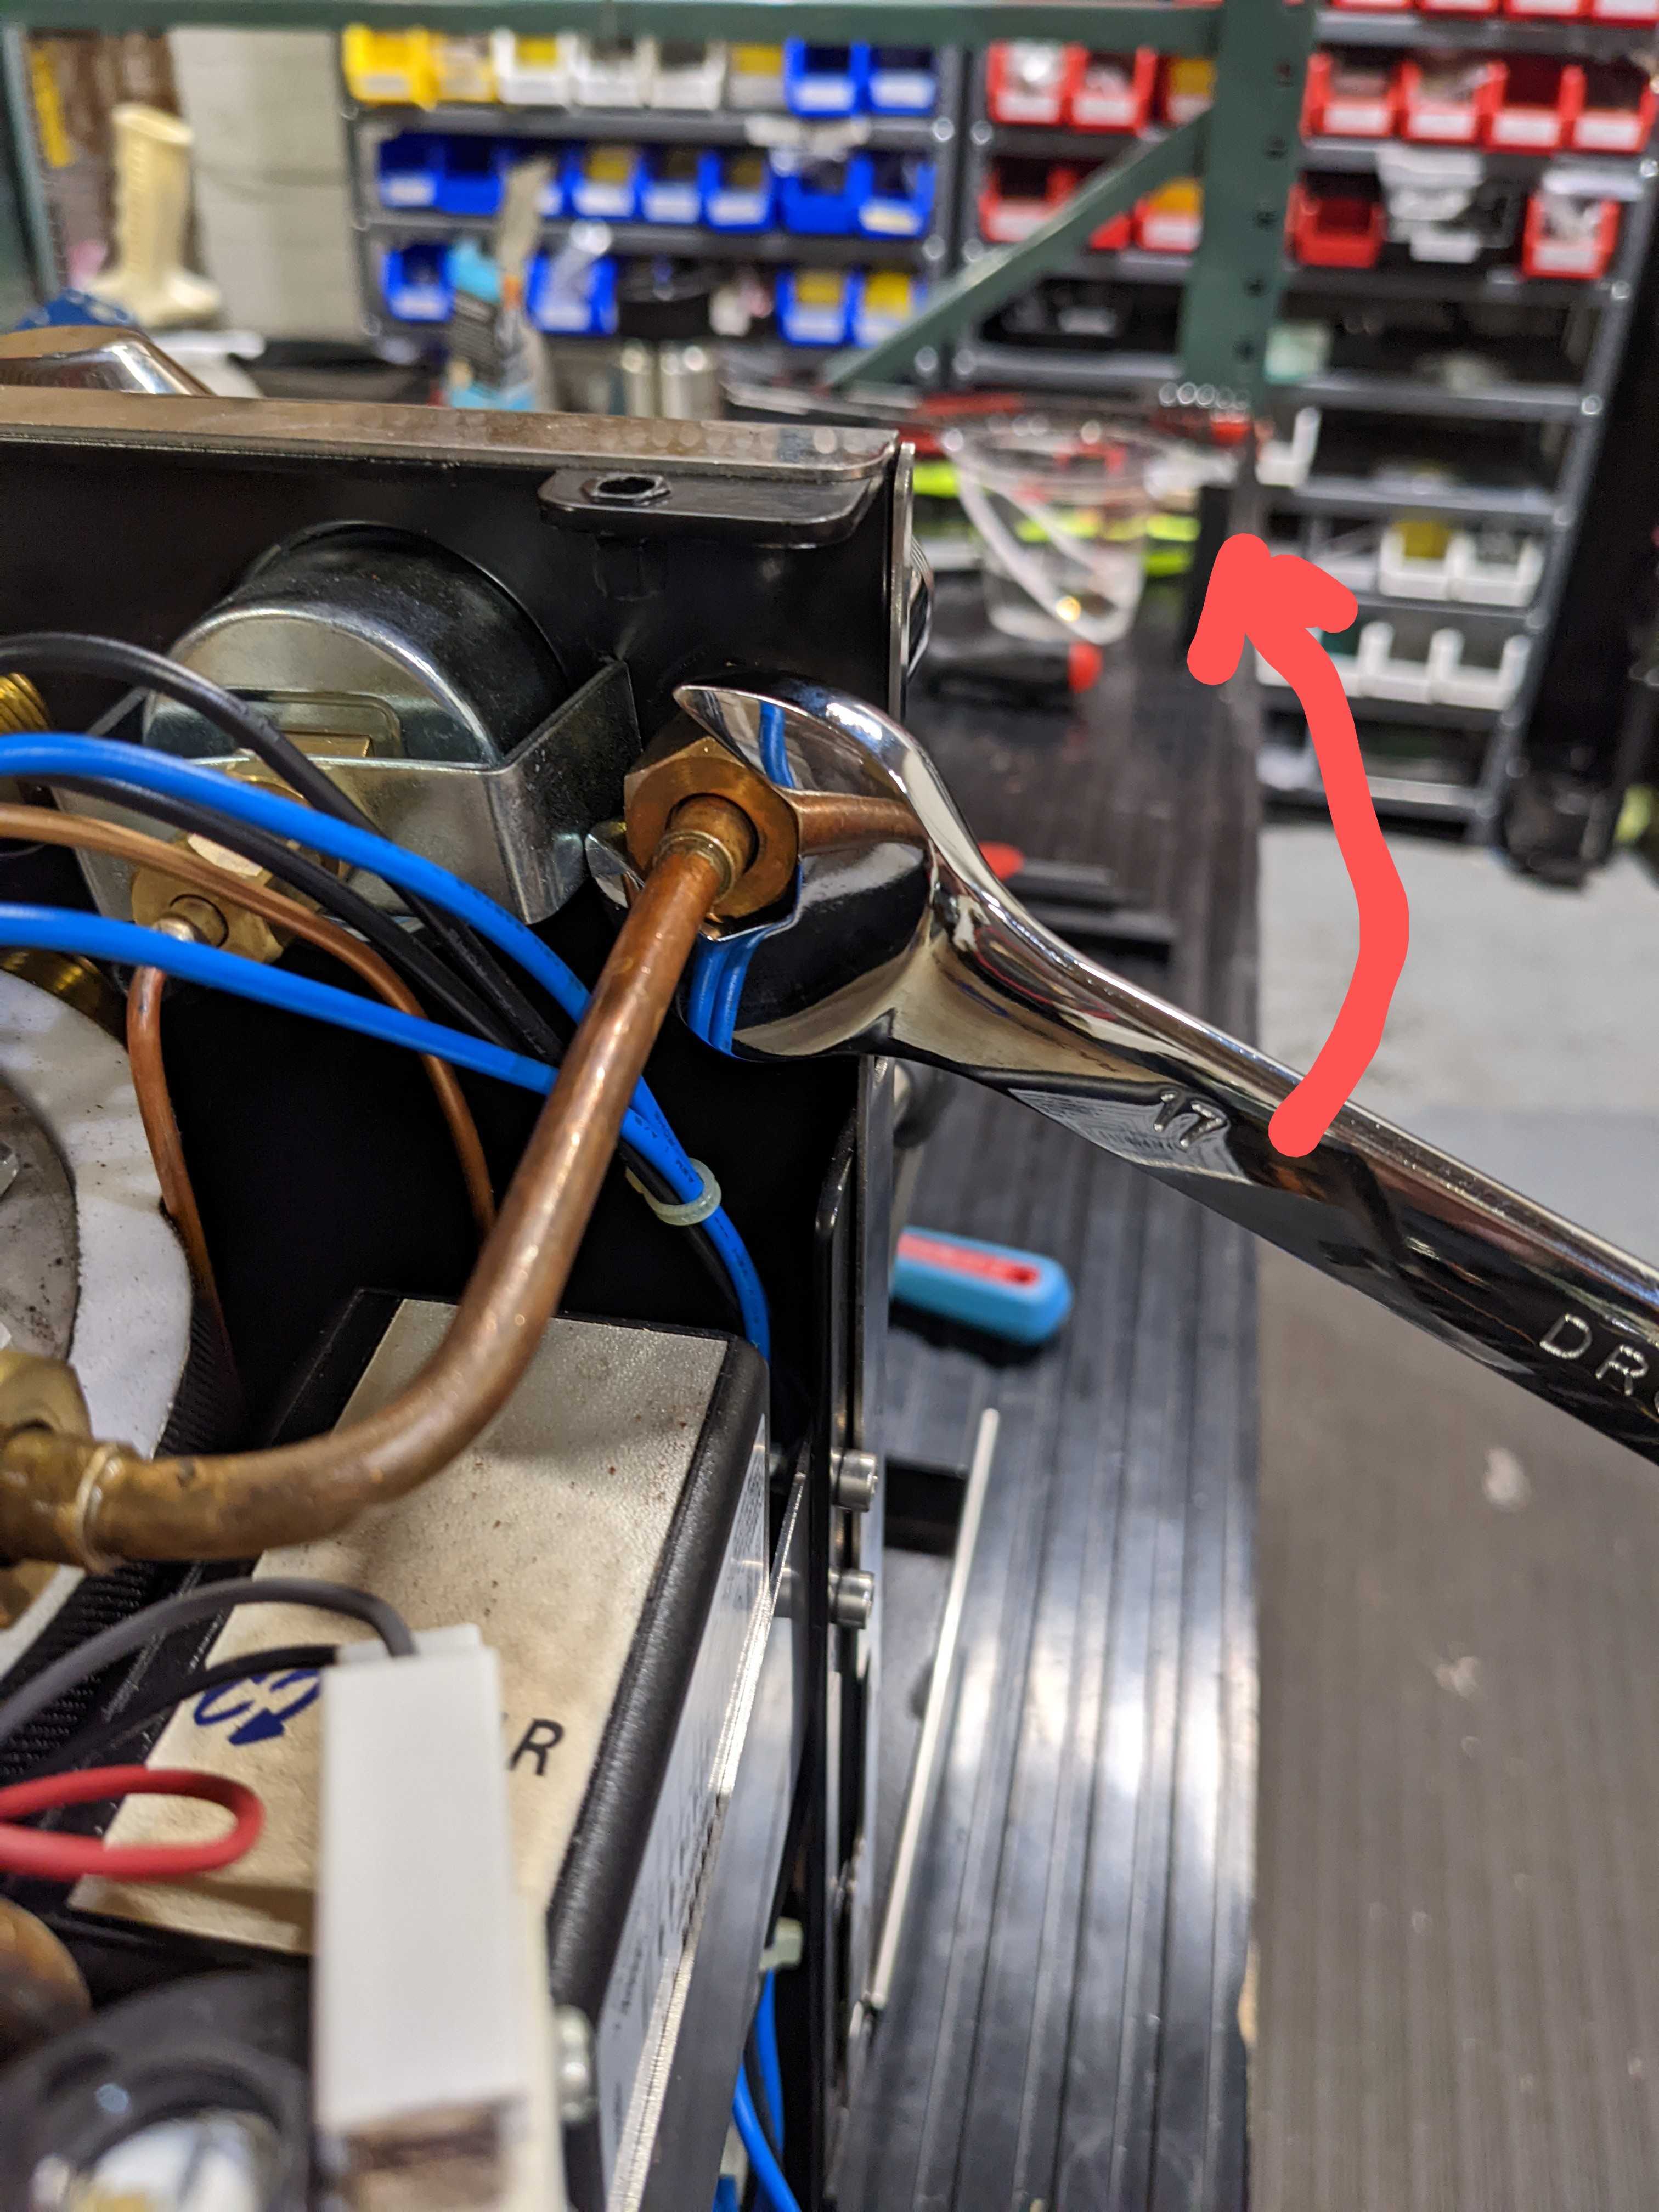
17. Use a 17mm open-ended wrench to remove the compression fitting from the boiler. It may be helpful to place a shop towel below the fitting to catch any remaining water in the boiler.
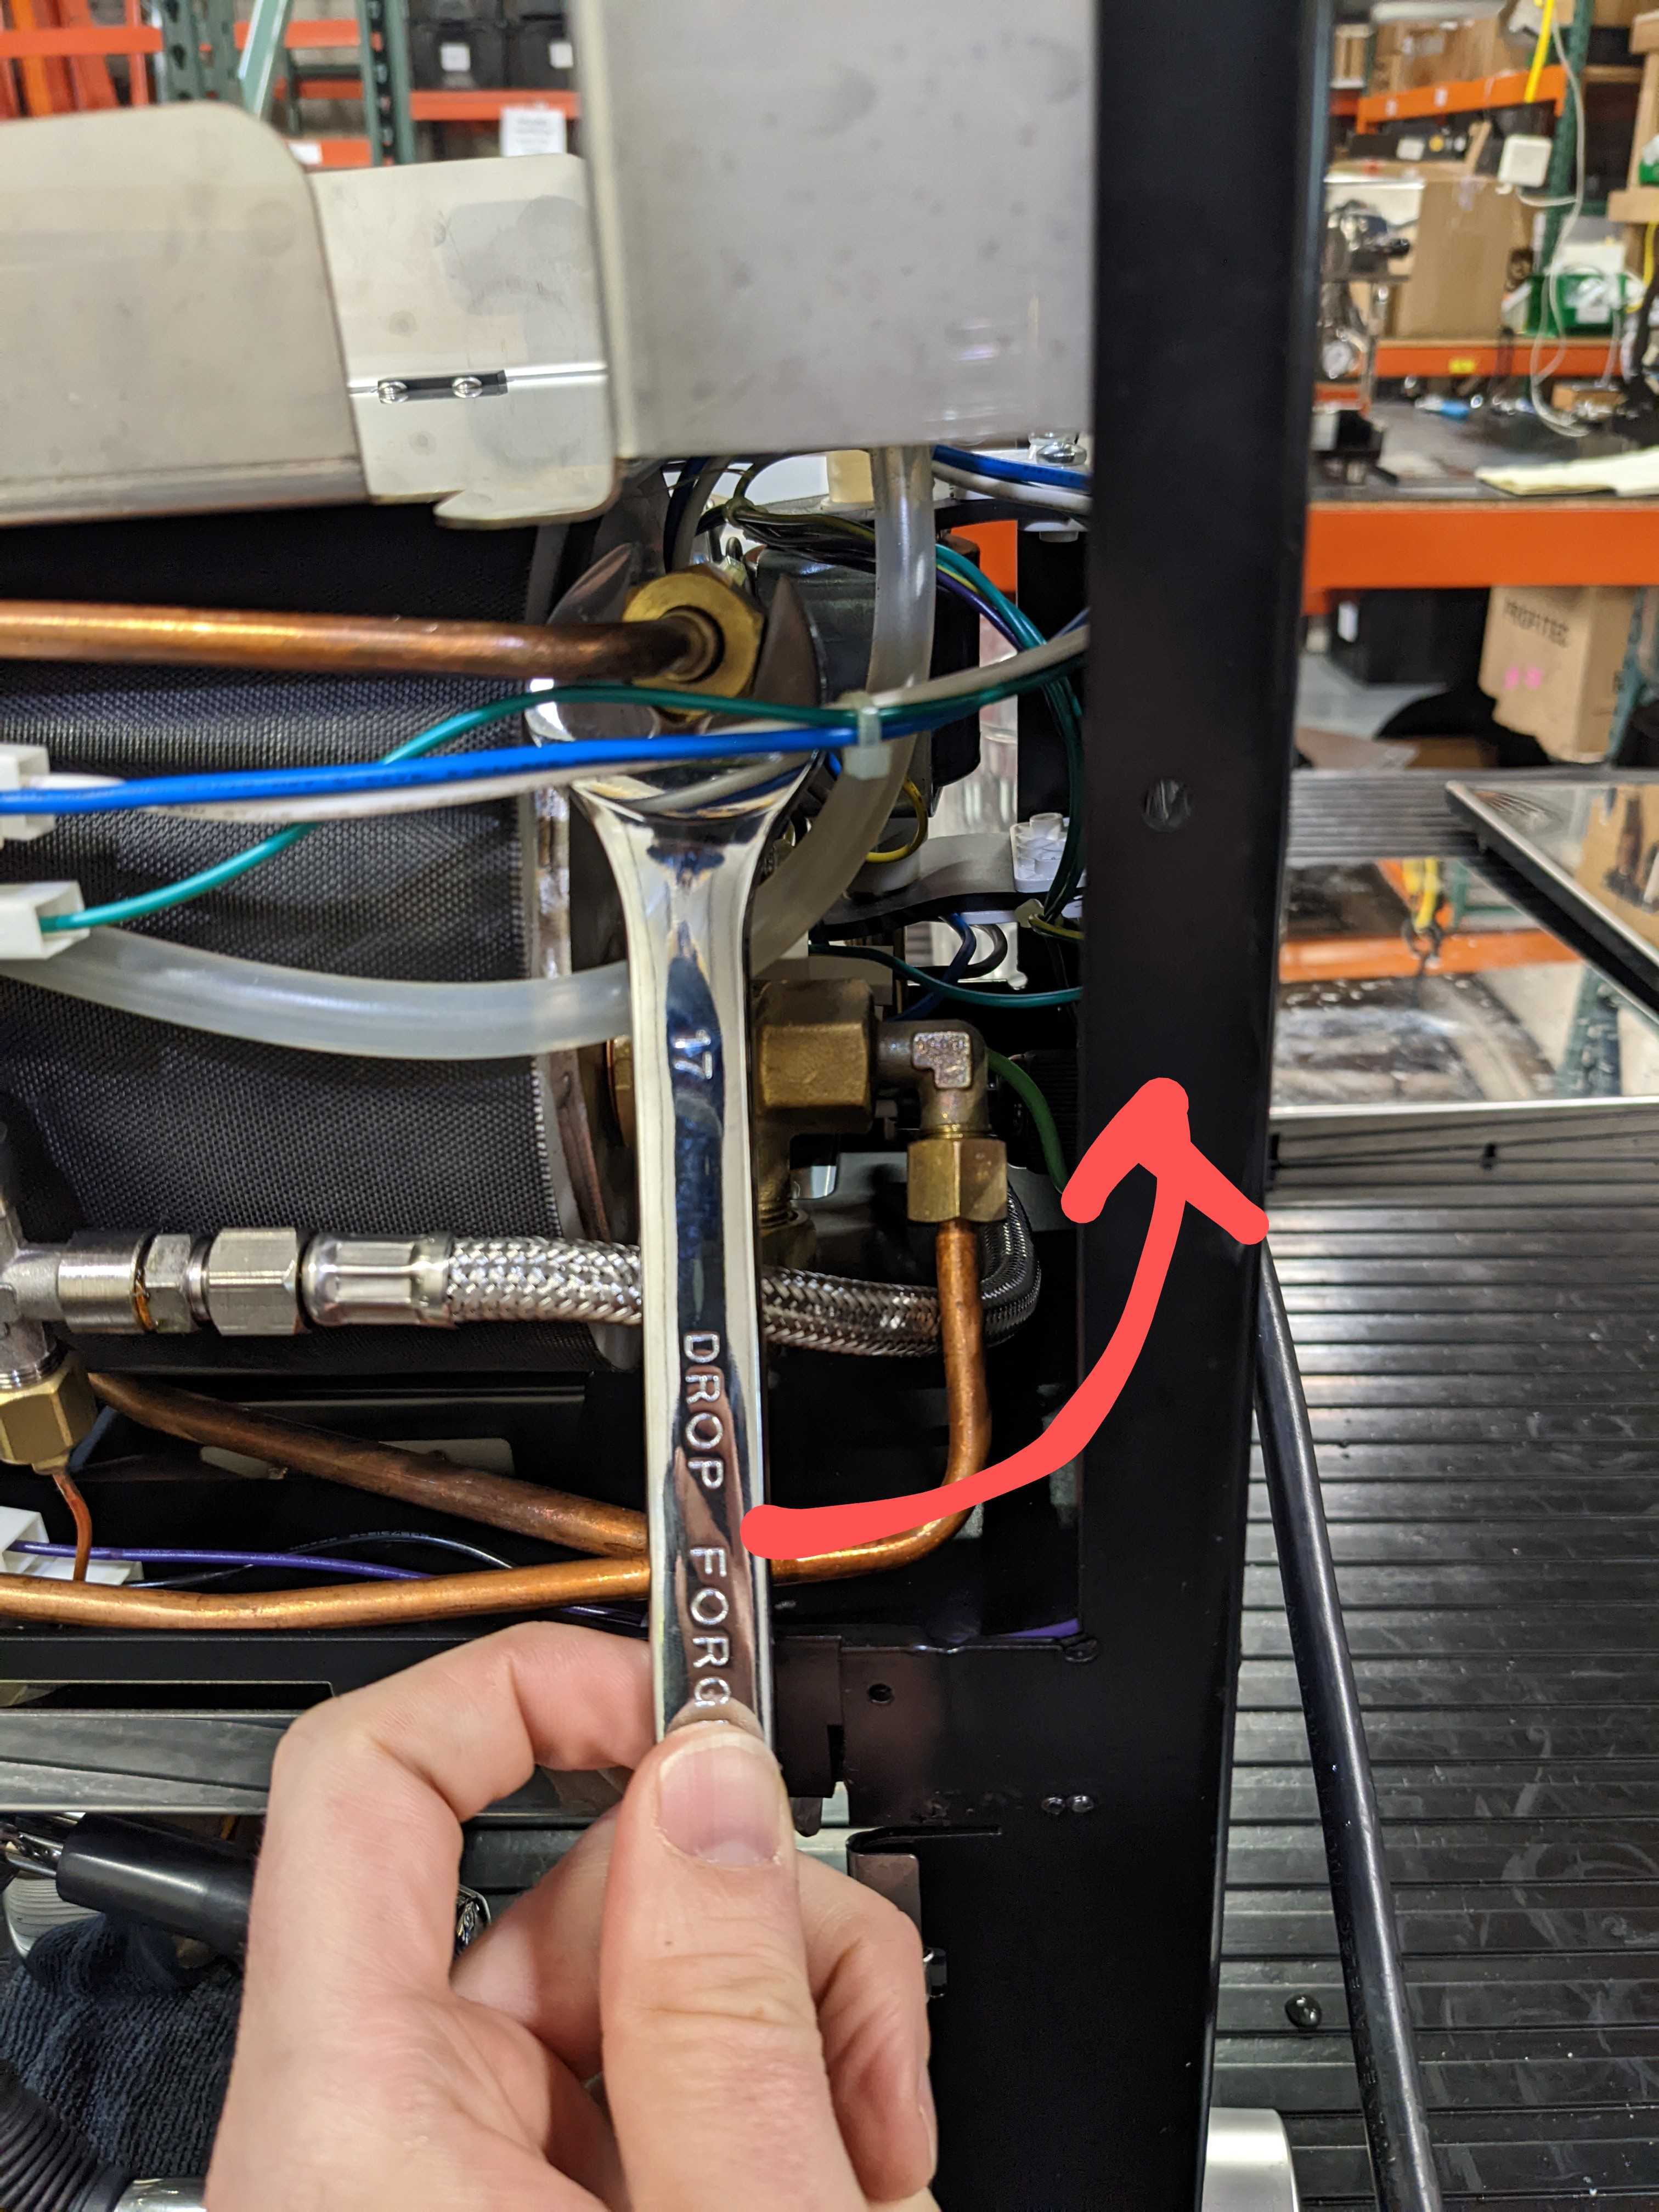
18. Use a 17mm open-ended wrench to remove the compression fitting at the hot water valve assembly.
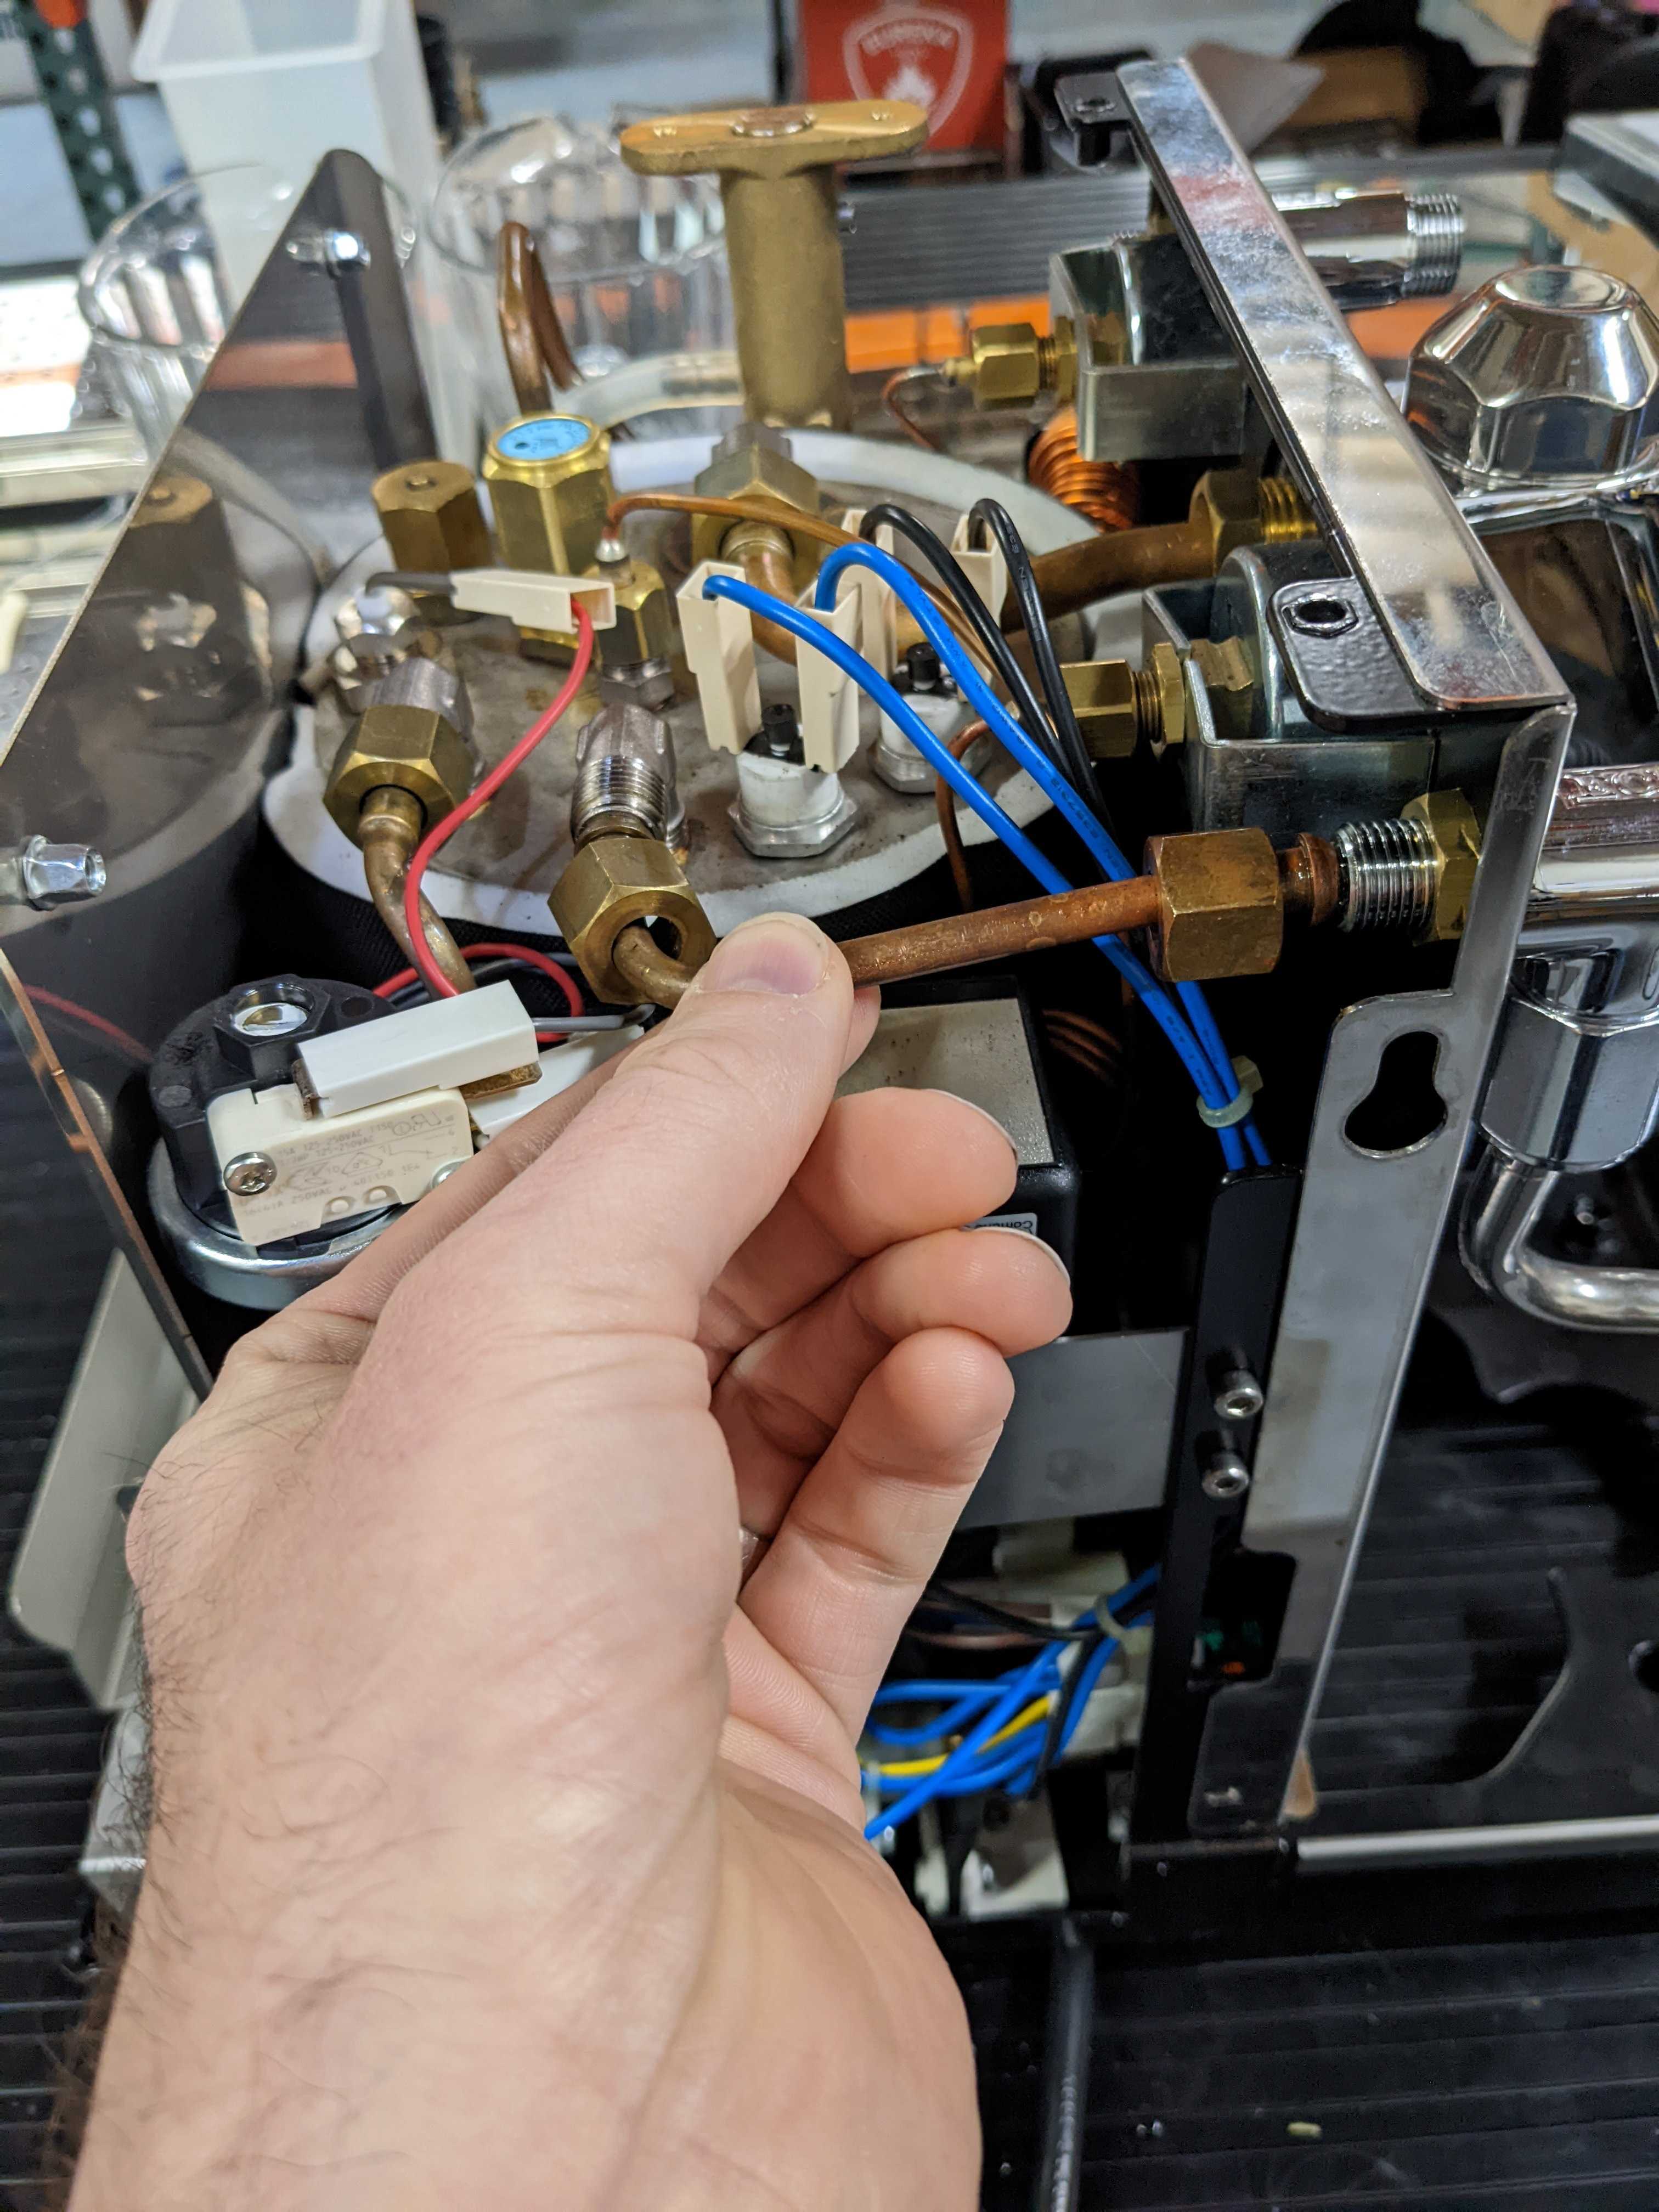
19. Remove the hot water delivery tube.
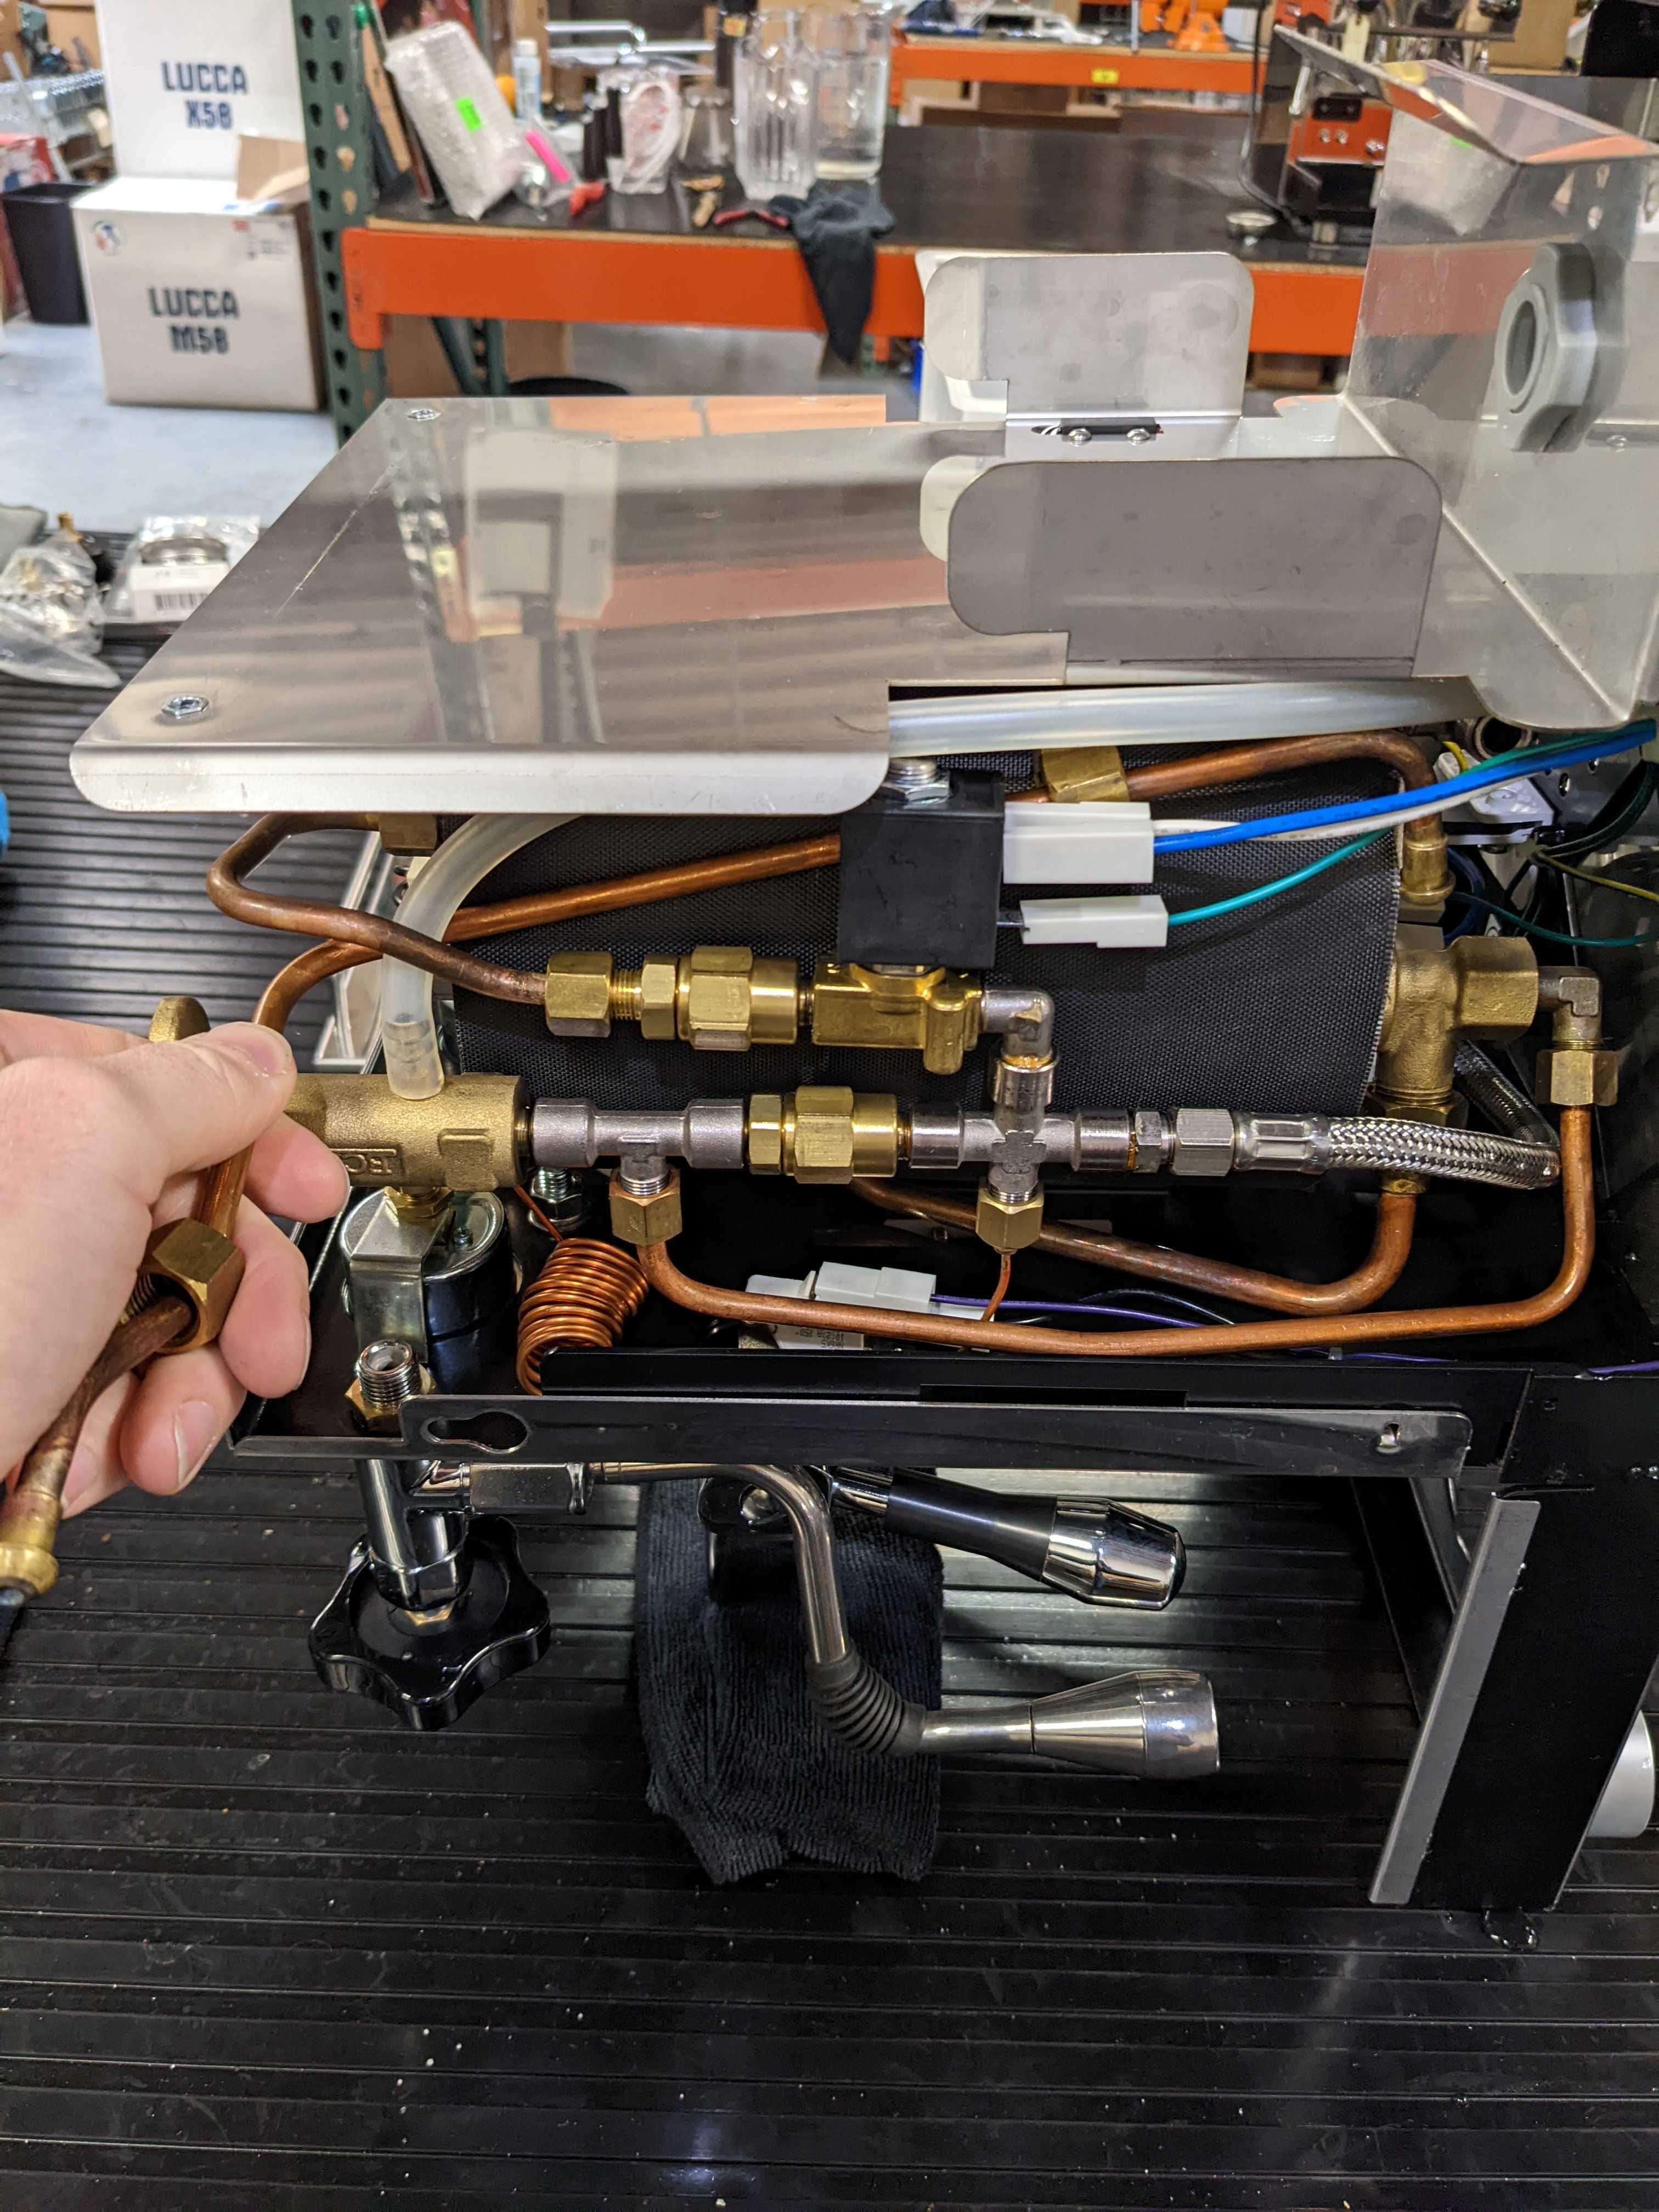
20. Inspect the ends of the delivery tube for any debris or obstruction. Use a pipe cleaning brush or compressed air to clear the tube of any obstruction.
21. Be sure to check that the passages at the hot water valve and boiler outlet are clear of any debris or obstruction. Use a pipe cleaning brush if needed to clear any debris.
22. Reassemble the hot water delivery tube. Make sure the compression fittings are securely seated and be careful not to over-tighten.
23. Tilt the machine back to the upright position.
24. Re-install the panels.
25. Pull some shots.